
Hi there and welcome back for the second creation in my Halloween DIY Skeleton Series! This DIY is fun, simple, and quick, so for those of you who like instant gratification, this is your project!

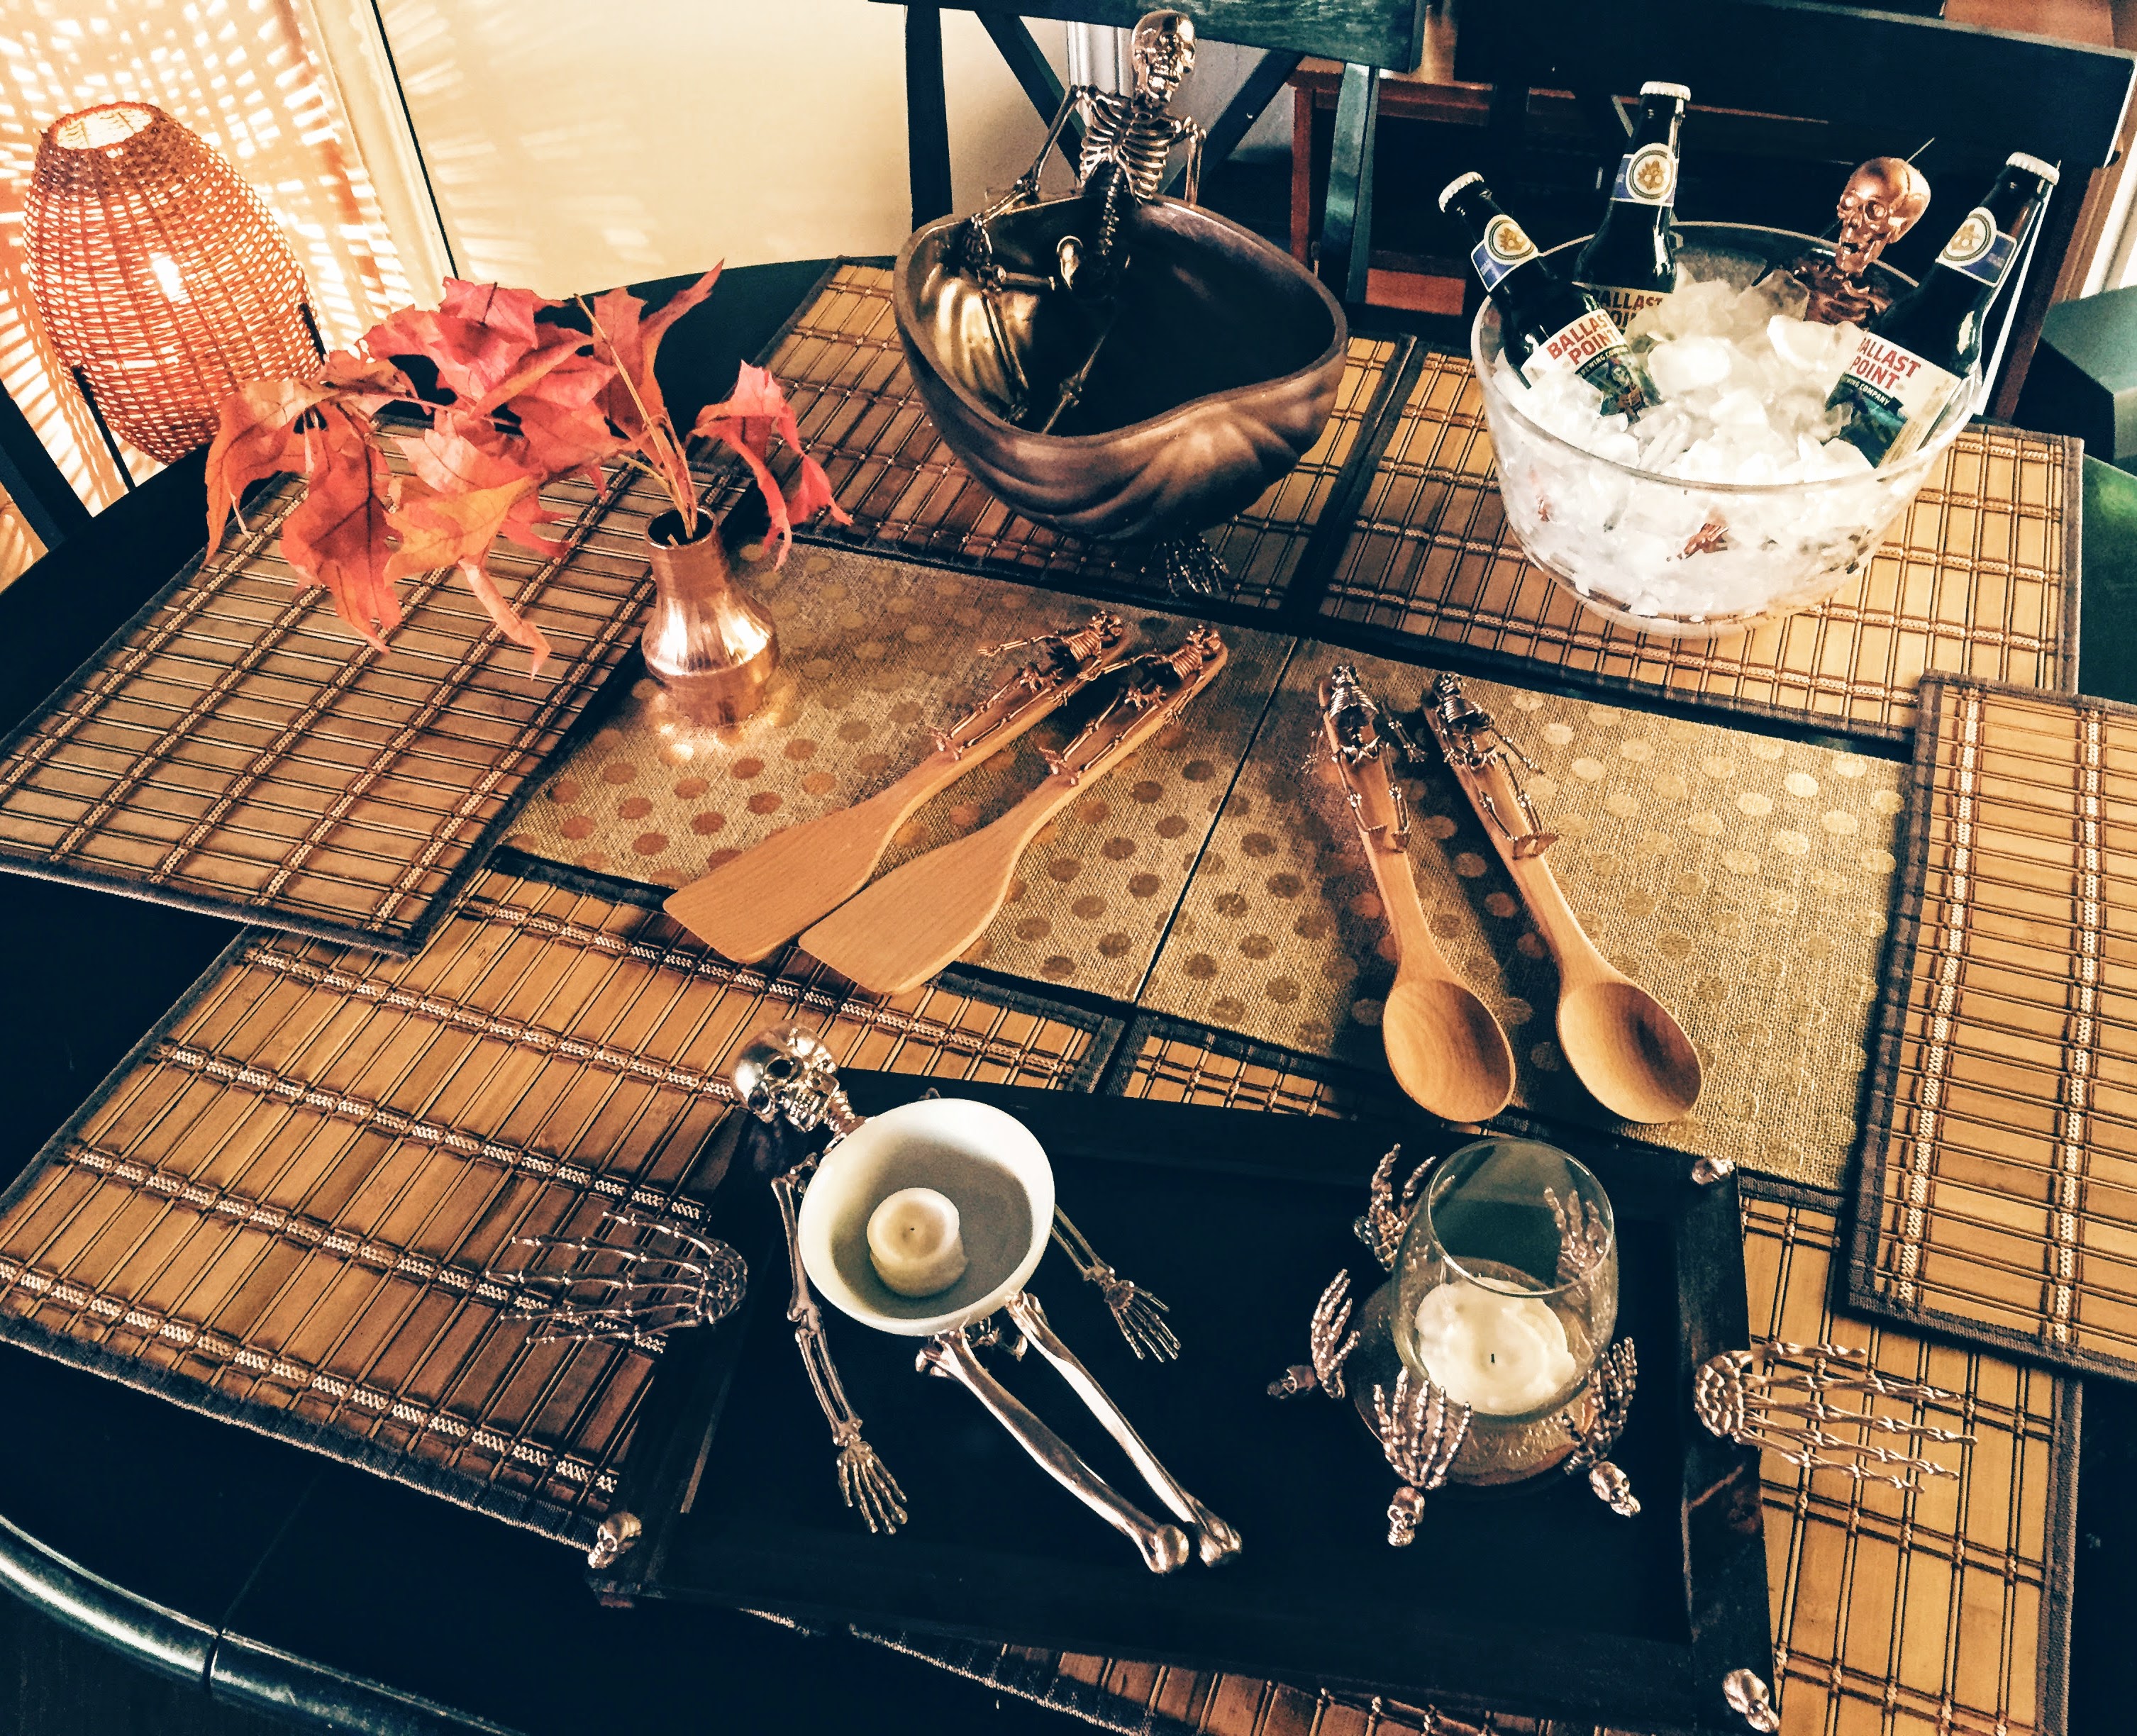
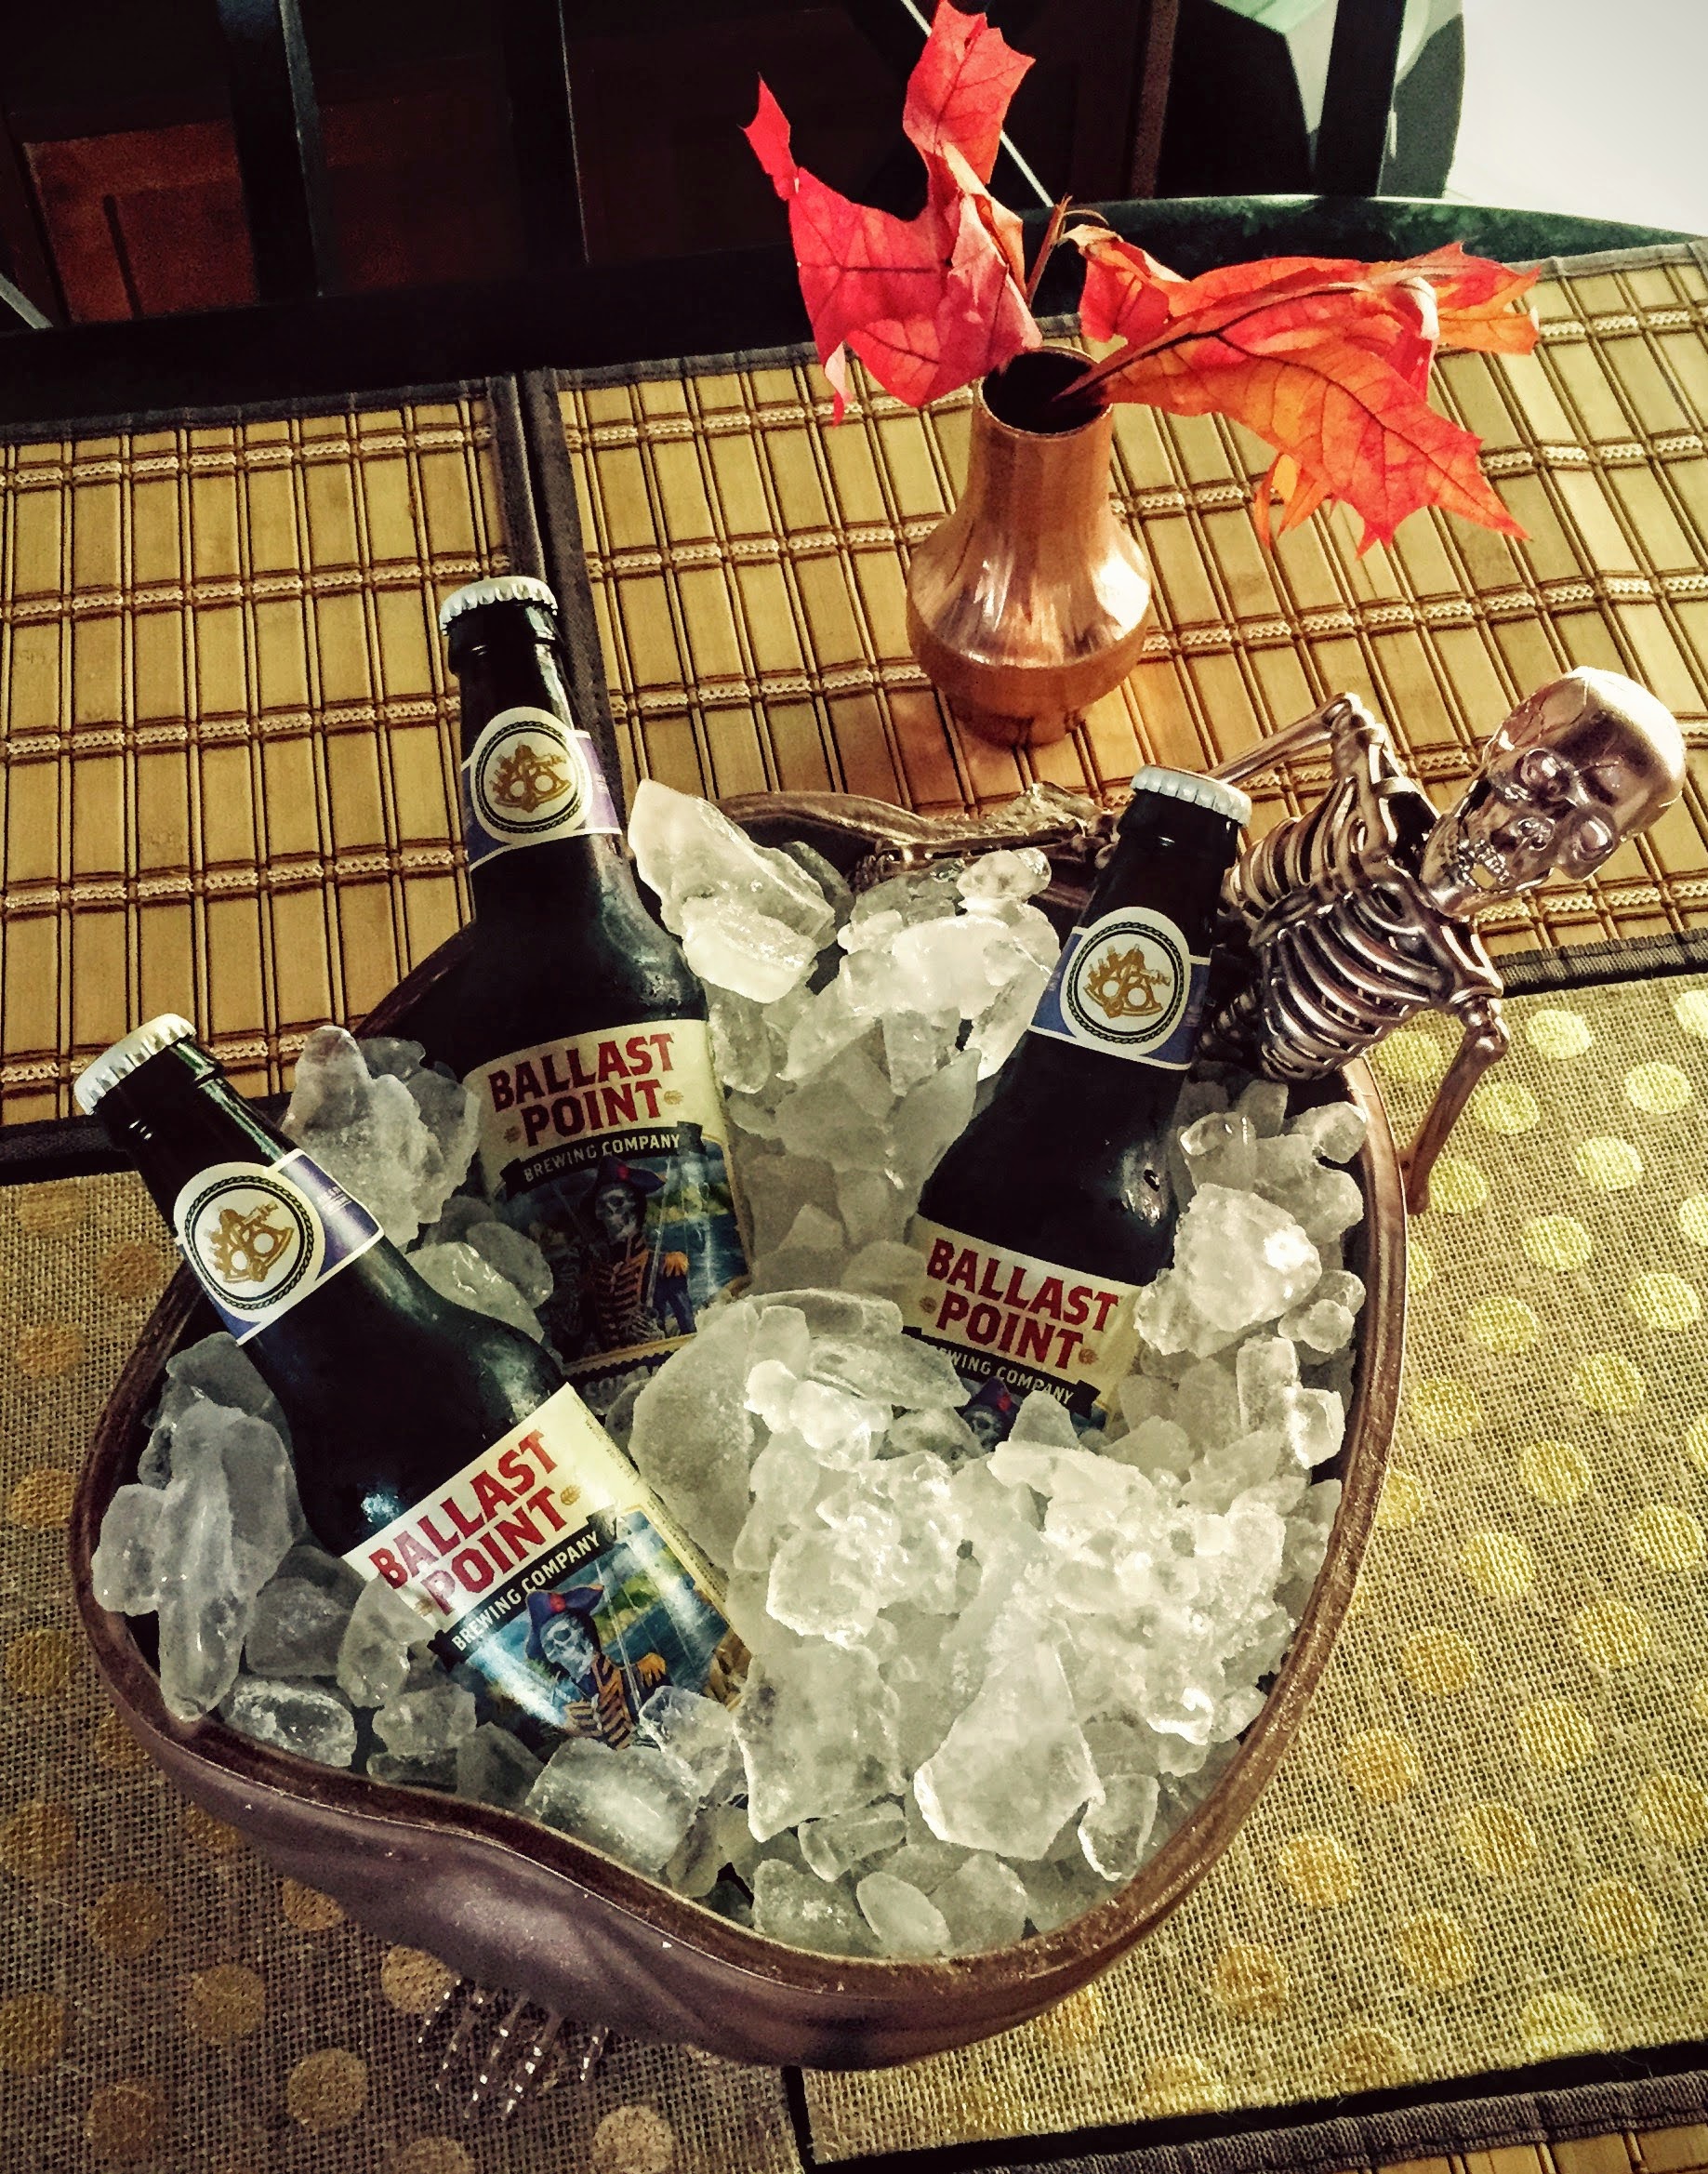
The Ship of Fools Skeleton Party Bucket can be used for ice and drinks, candy, or treat bags… just a few ideas on the menu! It holds about 3/4 of a bag of ice and 3 or 4 beers (if you really squish ’em in). Of course it can be used for soda, water, or treats!

So, without further ado, let’s get going! This will be short and sweet. Here is what you will need:
- This Half Pumpkin from Michael’s. You can find it in the faux pumpkin section. It’s supposed to be hung on the wall. Here is the underside (the bowl side) of it.
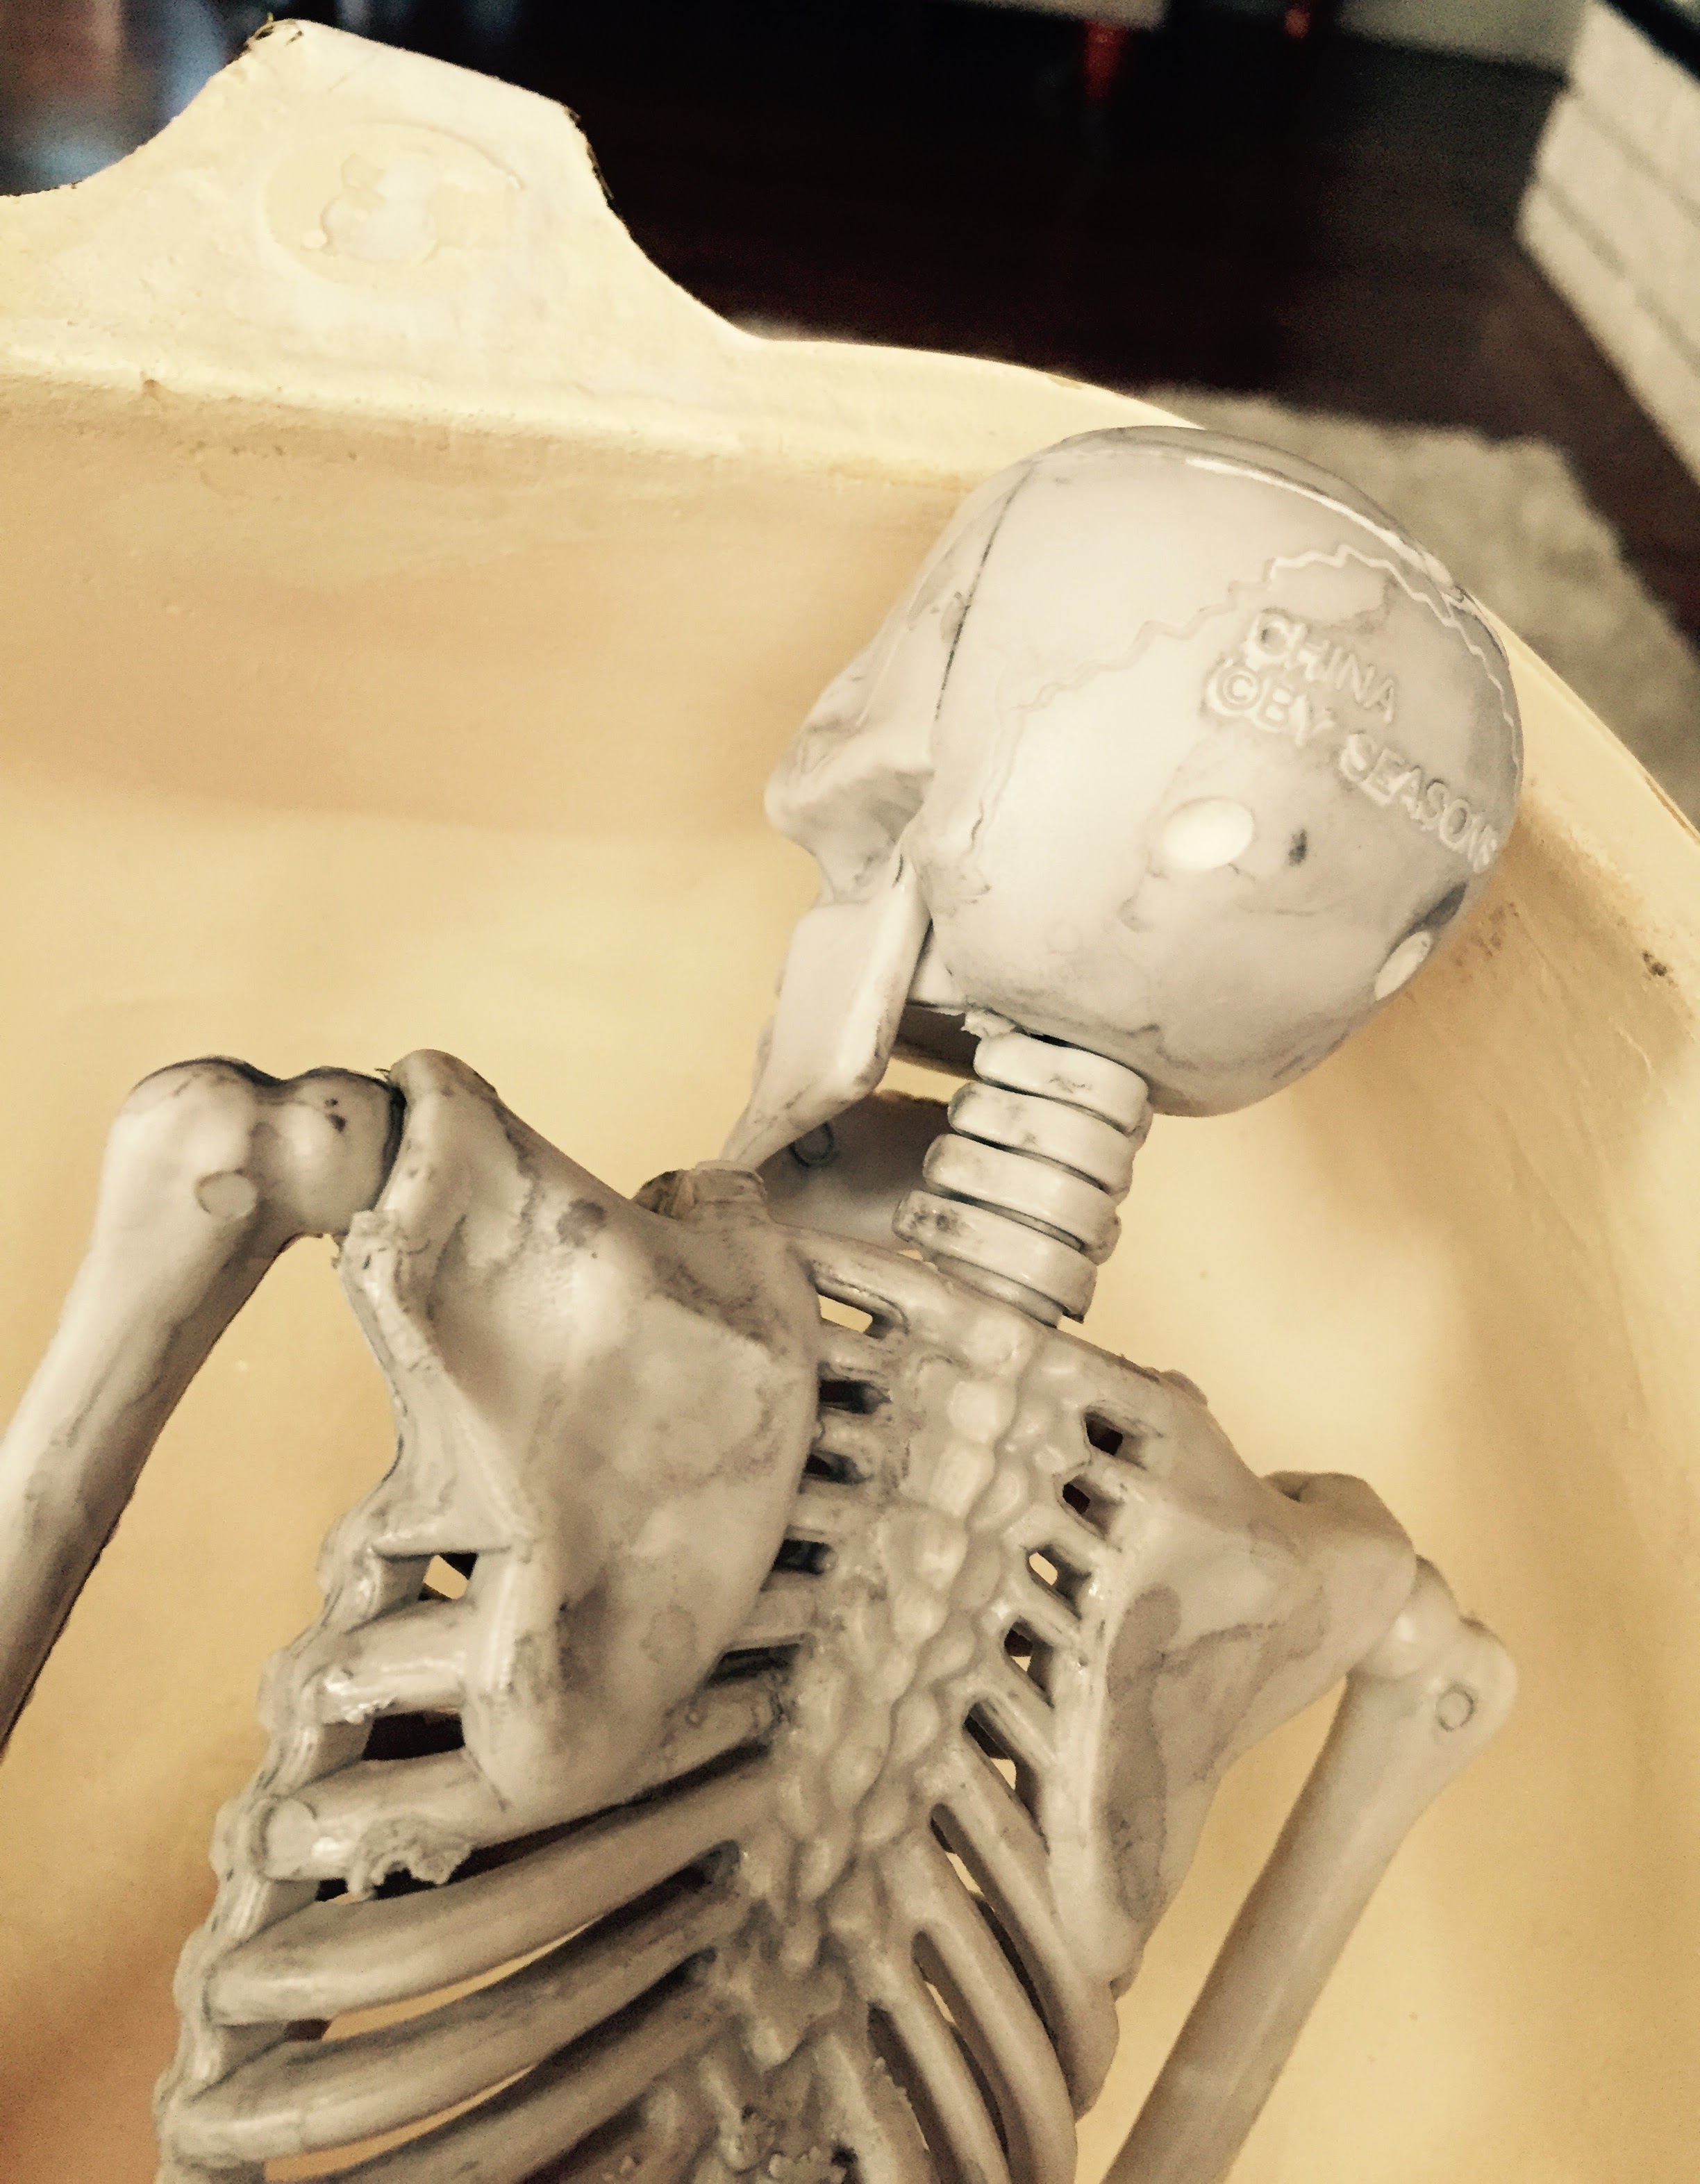
- This skeleton from Target. It ‘s a hanging skeleton, like the ones from Michael’s, but the joints are movable, and the skeletons’ joints from Michael’s, are not. Here is a picture of both, with Target skeleton on the right and Michael’s skeleton on the left.
- These Skeleton Hands from Michael’s.
- Spackling paste for the holes in the skeleton’s head and the nail hole in the stem of the pumpkin.
- I used this Rose Gold Spray Paint from Michael’s, but any metallic paint color of your choice would work.
- Crystal Clear Spray Acrylic– Some colors of spray paint are changed more significantly than others, when using lacquer. The Rose Gold Metallic Spray that I used in this project, changes dramatically with any lacquer, but the Crystal Clear is definitely the best spray I have found for spraying over it. I sprayed the inside of the pumpkin, thoroughly, so it would be protected when housing the ice. You can’t totally avoid the rest of the skeleton, but what I did, was I sprayed a light coat of the Rose Gold on to the rim of the pumpkin and the upper portion of the skeleton, after the lacquer was dry. I tried to avoid, as much as possible, the interior of the pumpkin, but I wanted to regain that Rose Gold sheen, where I could.
- E6000 glue from Michael’s or any hardware or craft store. Super Glue Contact Cement that I bought at Dixieline, but you could probably find most anywhere (ie., Michael’s, Home Depot, etc.). Another option is this Automotive Glue. I think I found it at Dixieline or Home Depot.
That’s it. Go grab whatcha need and come back, so we can start gluing! This is an easy one, so let’s get started!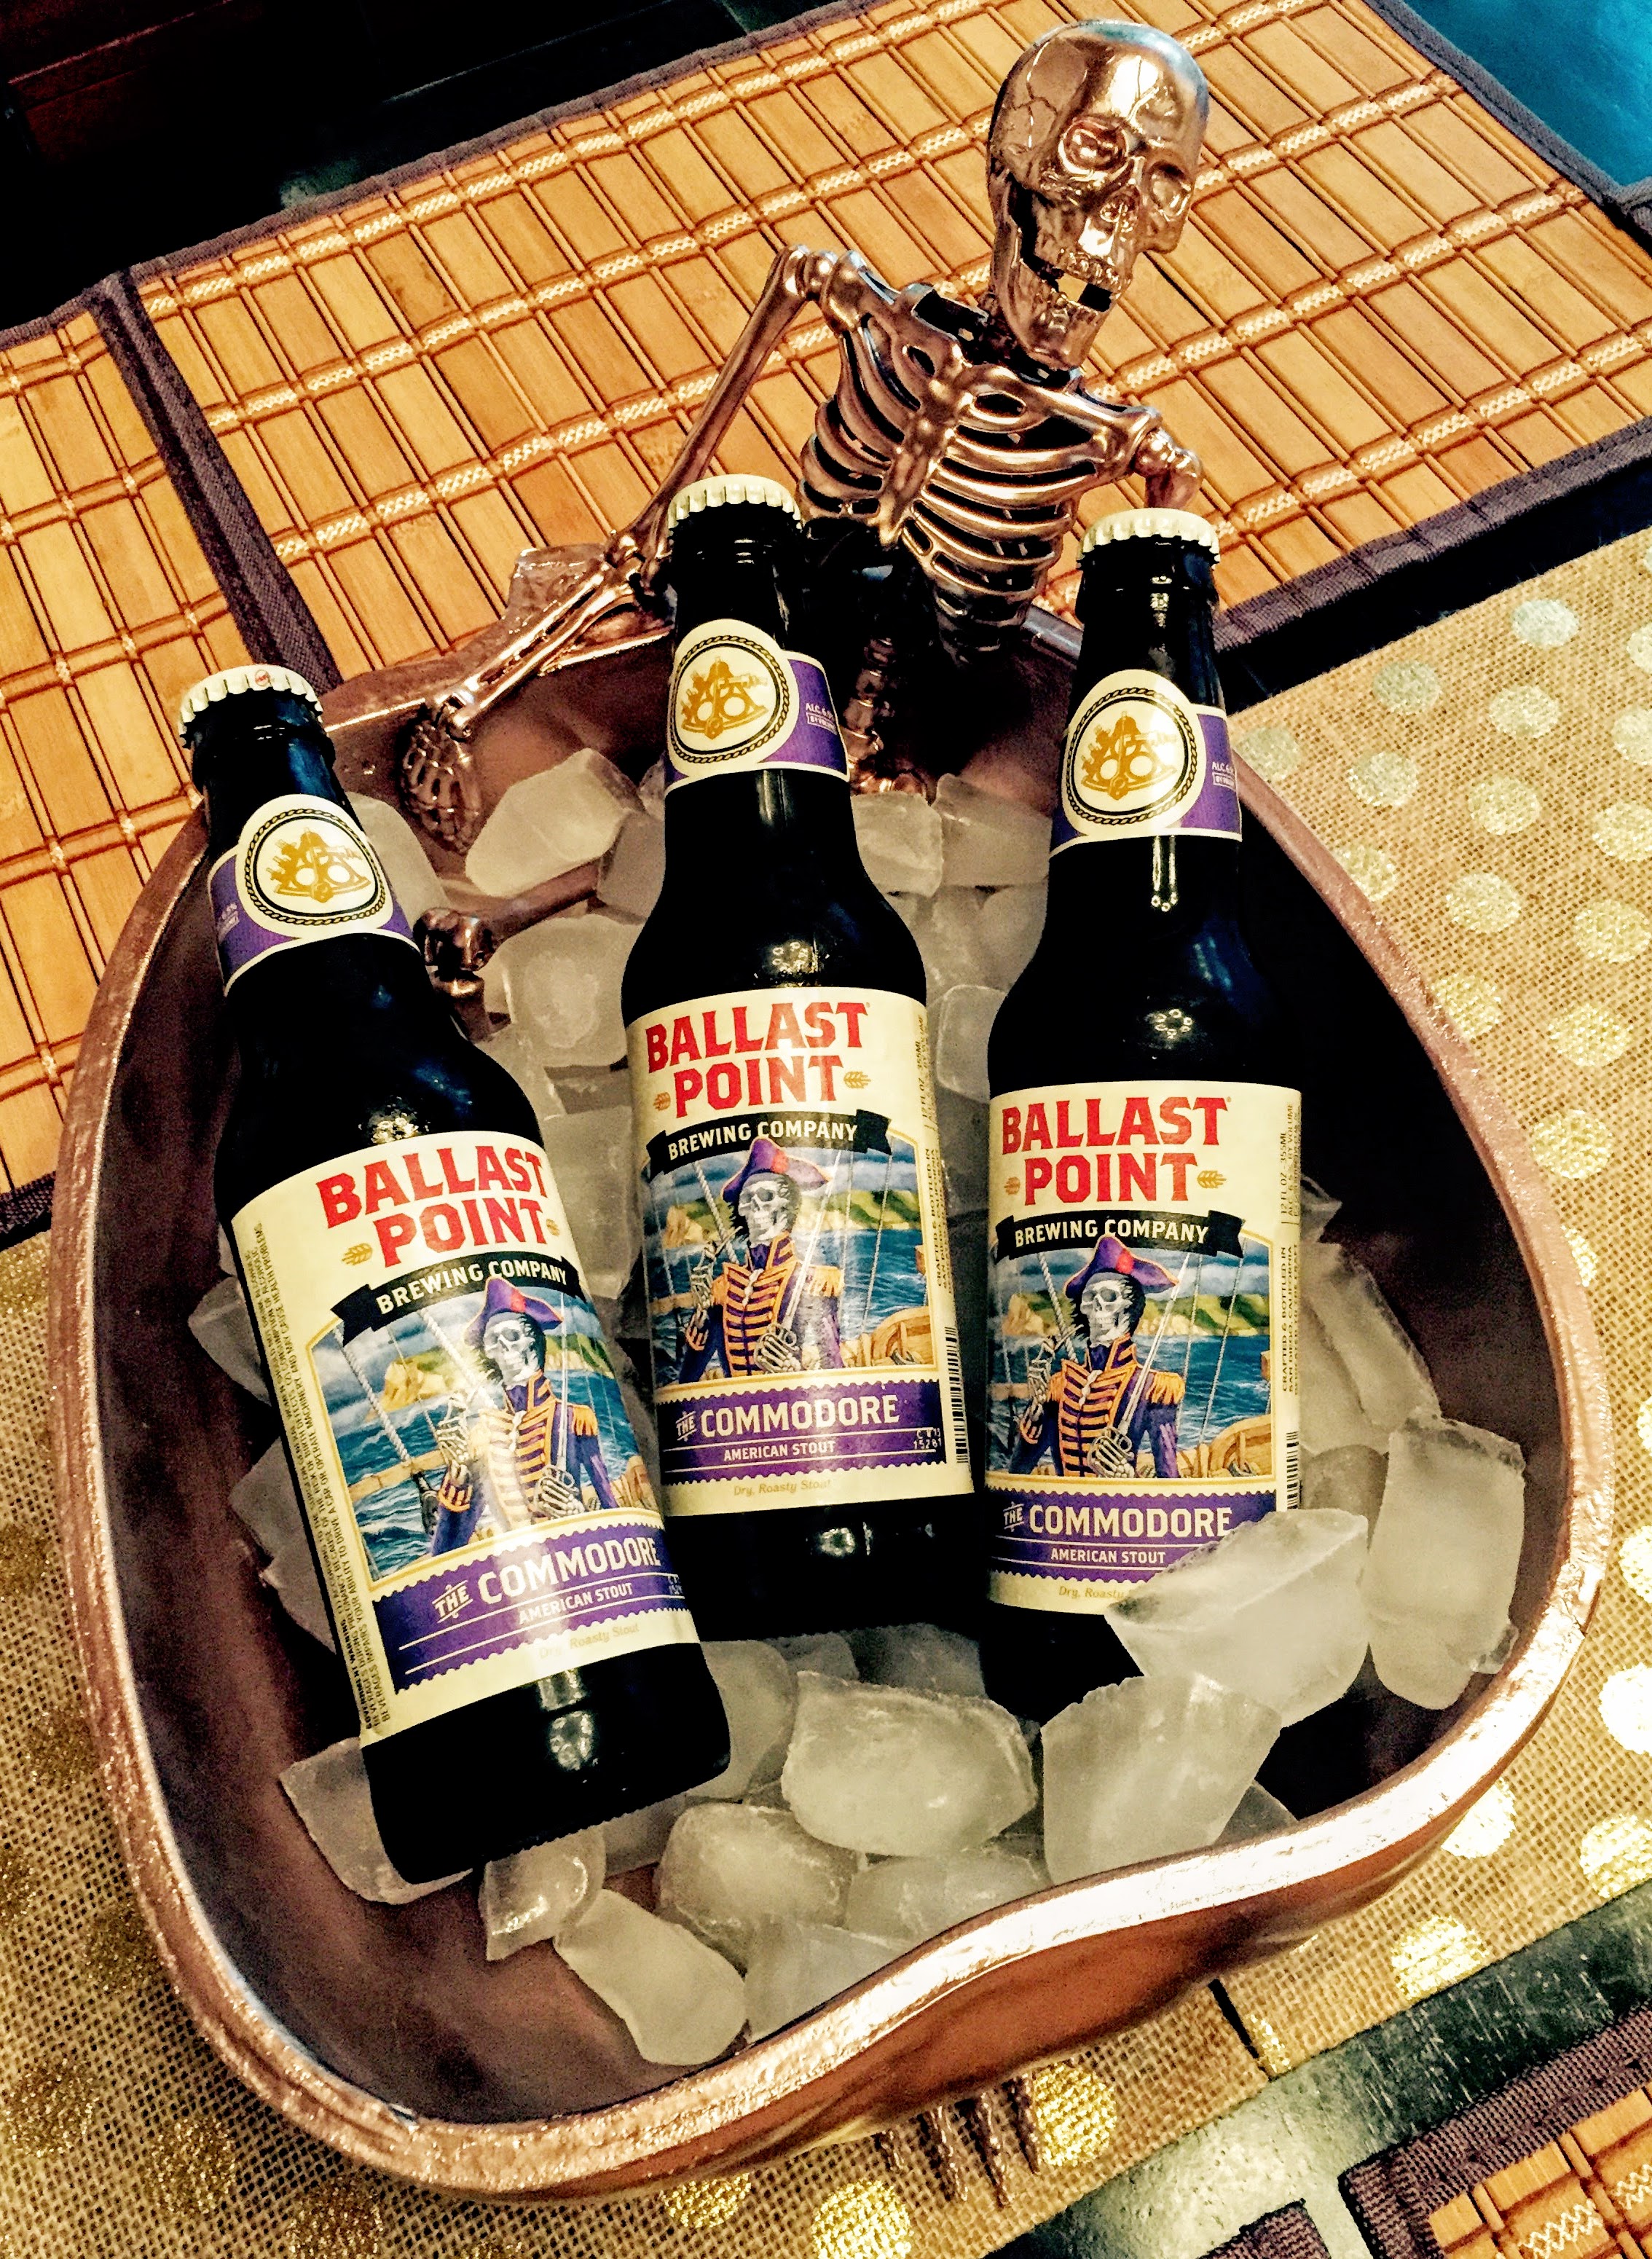
The first thing you will do, is to cut off the hanging string in the head of the skeleton. Then, take your spackle, and fill the hole that the string came out of, and any other holes in the head of the skeleton (mine had 4 in total).
Then, fill in the nail hole in the stem of the pumpkin with the same spackle. Just fill the holes completely, and then wipe away the spackle, so that it’s smooth. It’s hard to sand down the skeleton and the pumpkin, so just make the spackle as smooth as you can, and then you’ll be painting over it.
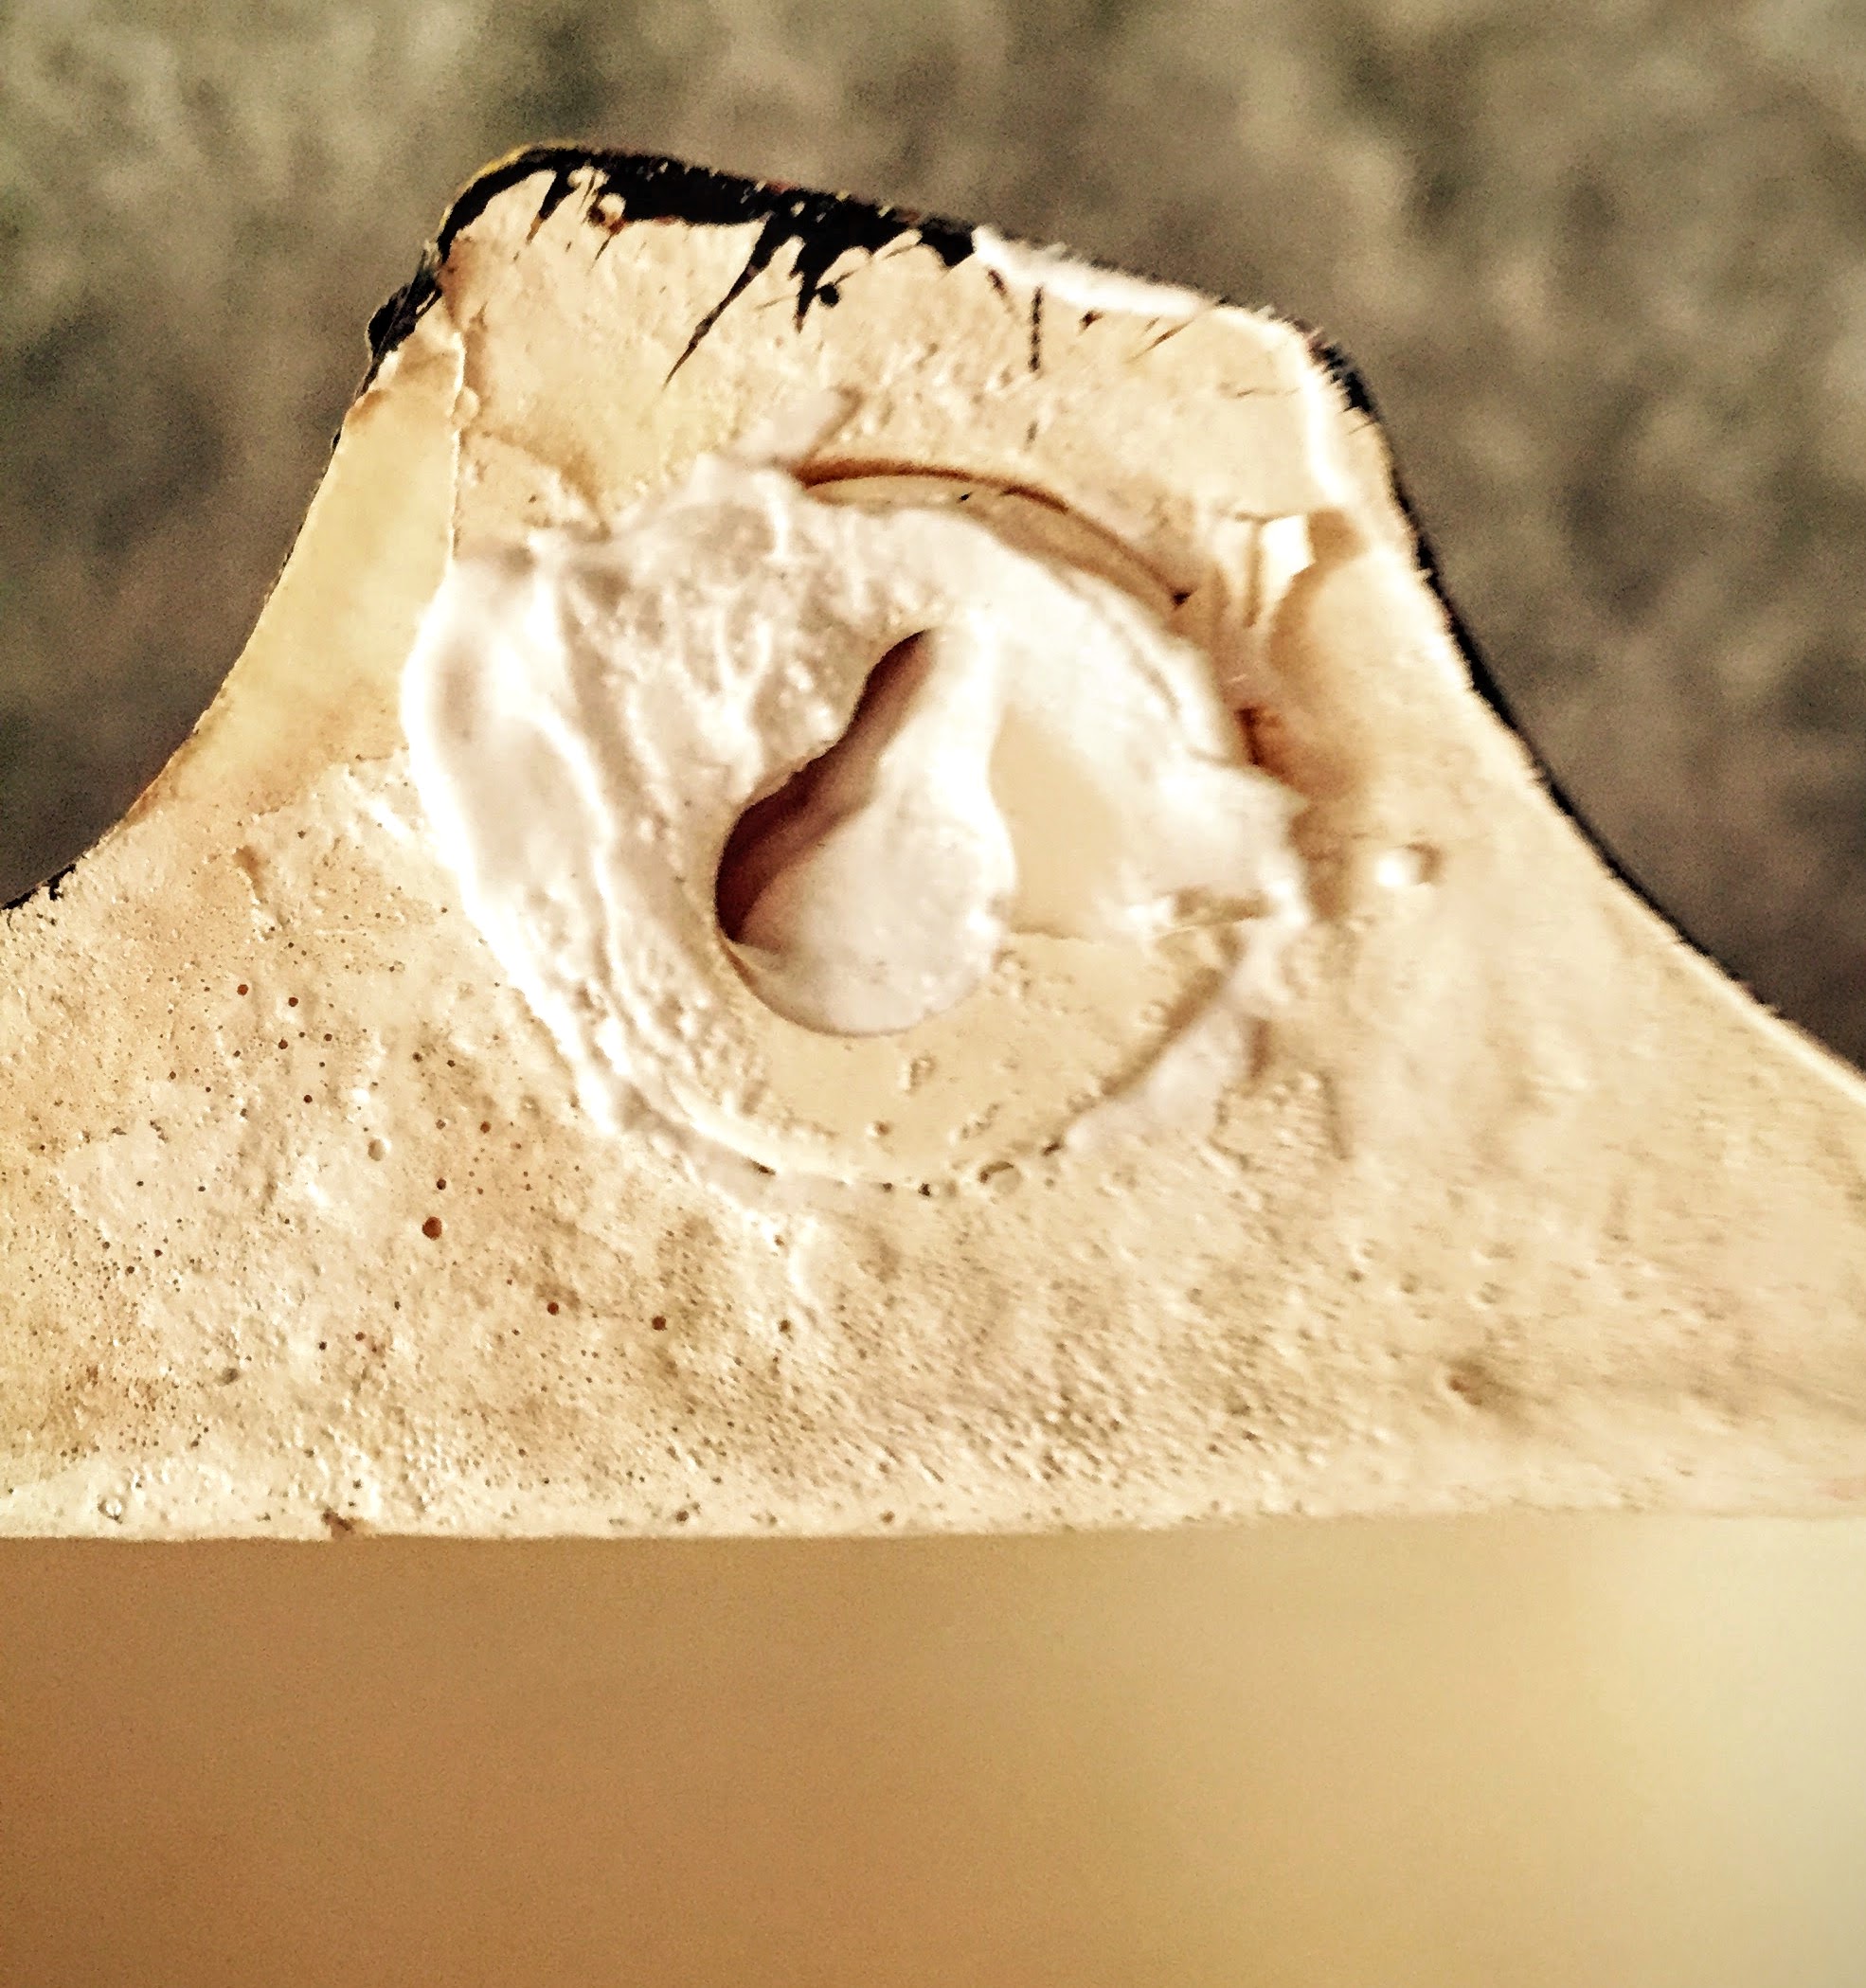
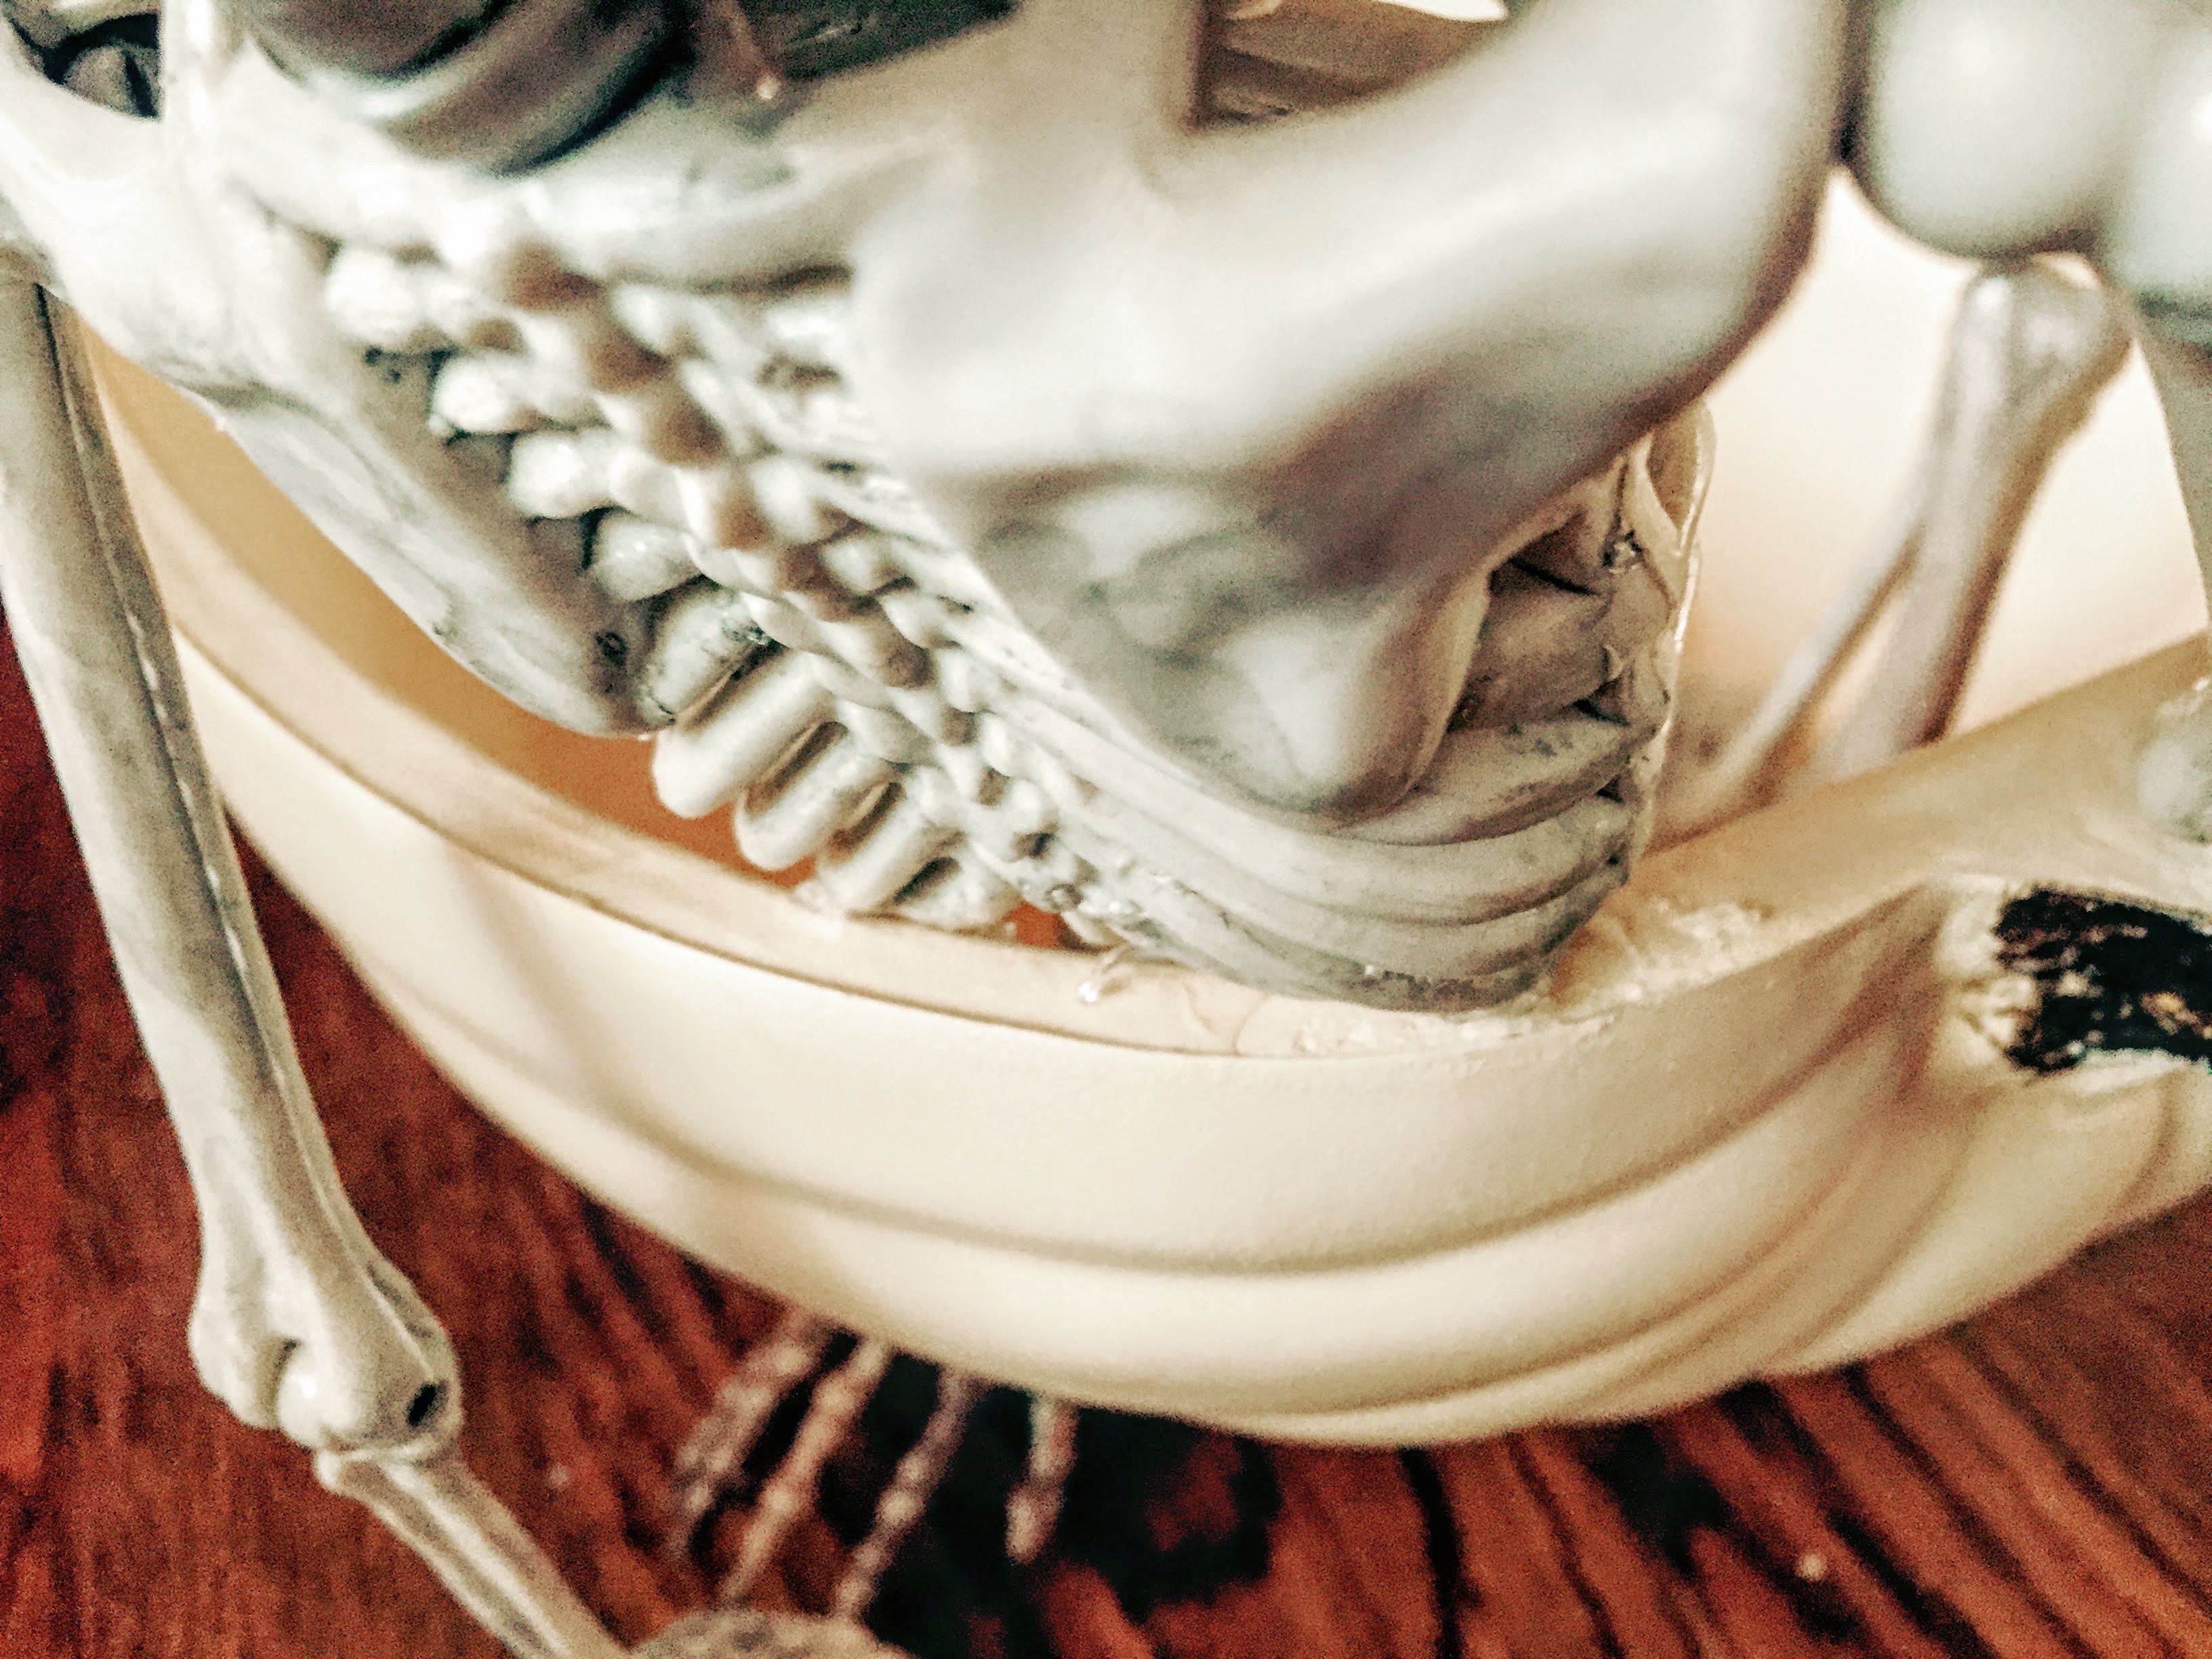
You’ll want to fill in the hole of the pumpkin stem, better than what you see in the photo above. It will be completely filled in, and as flat and as smooth as you can get it (like in this photo). I ended up situating my skeleton with his right elbow over the pumpkin stem hole, because I couldn’t get it very smooth with the spackle.
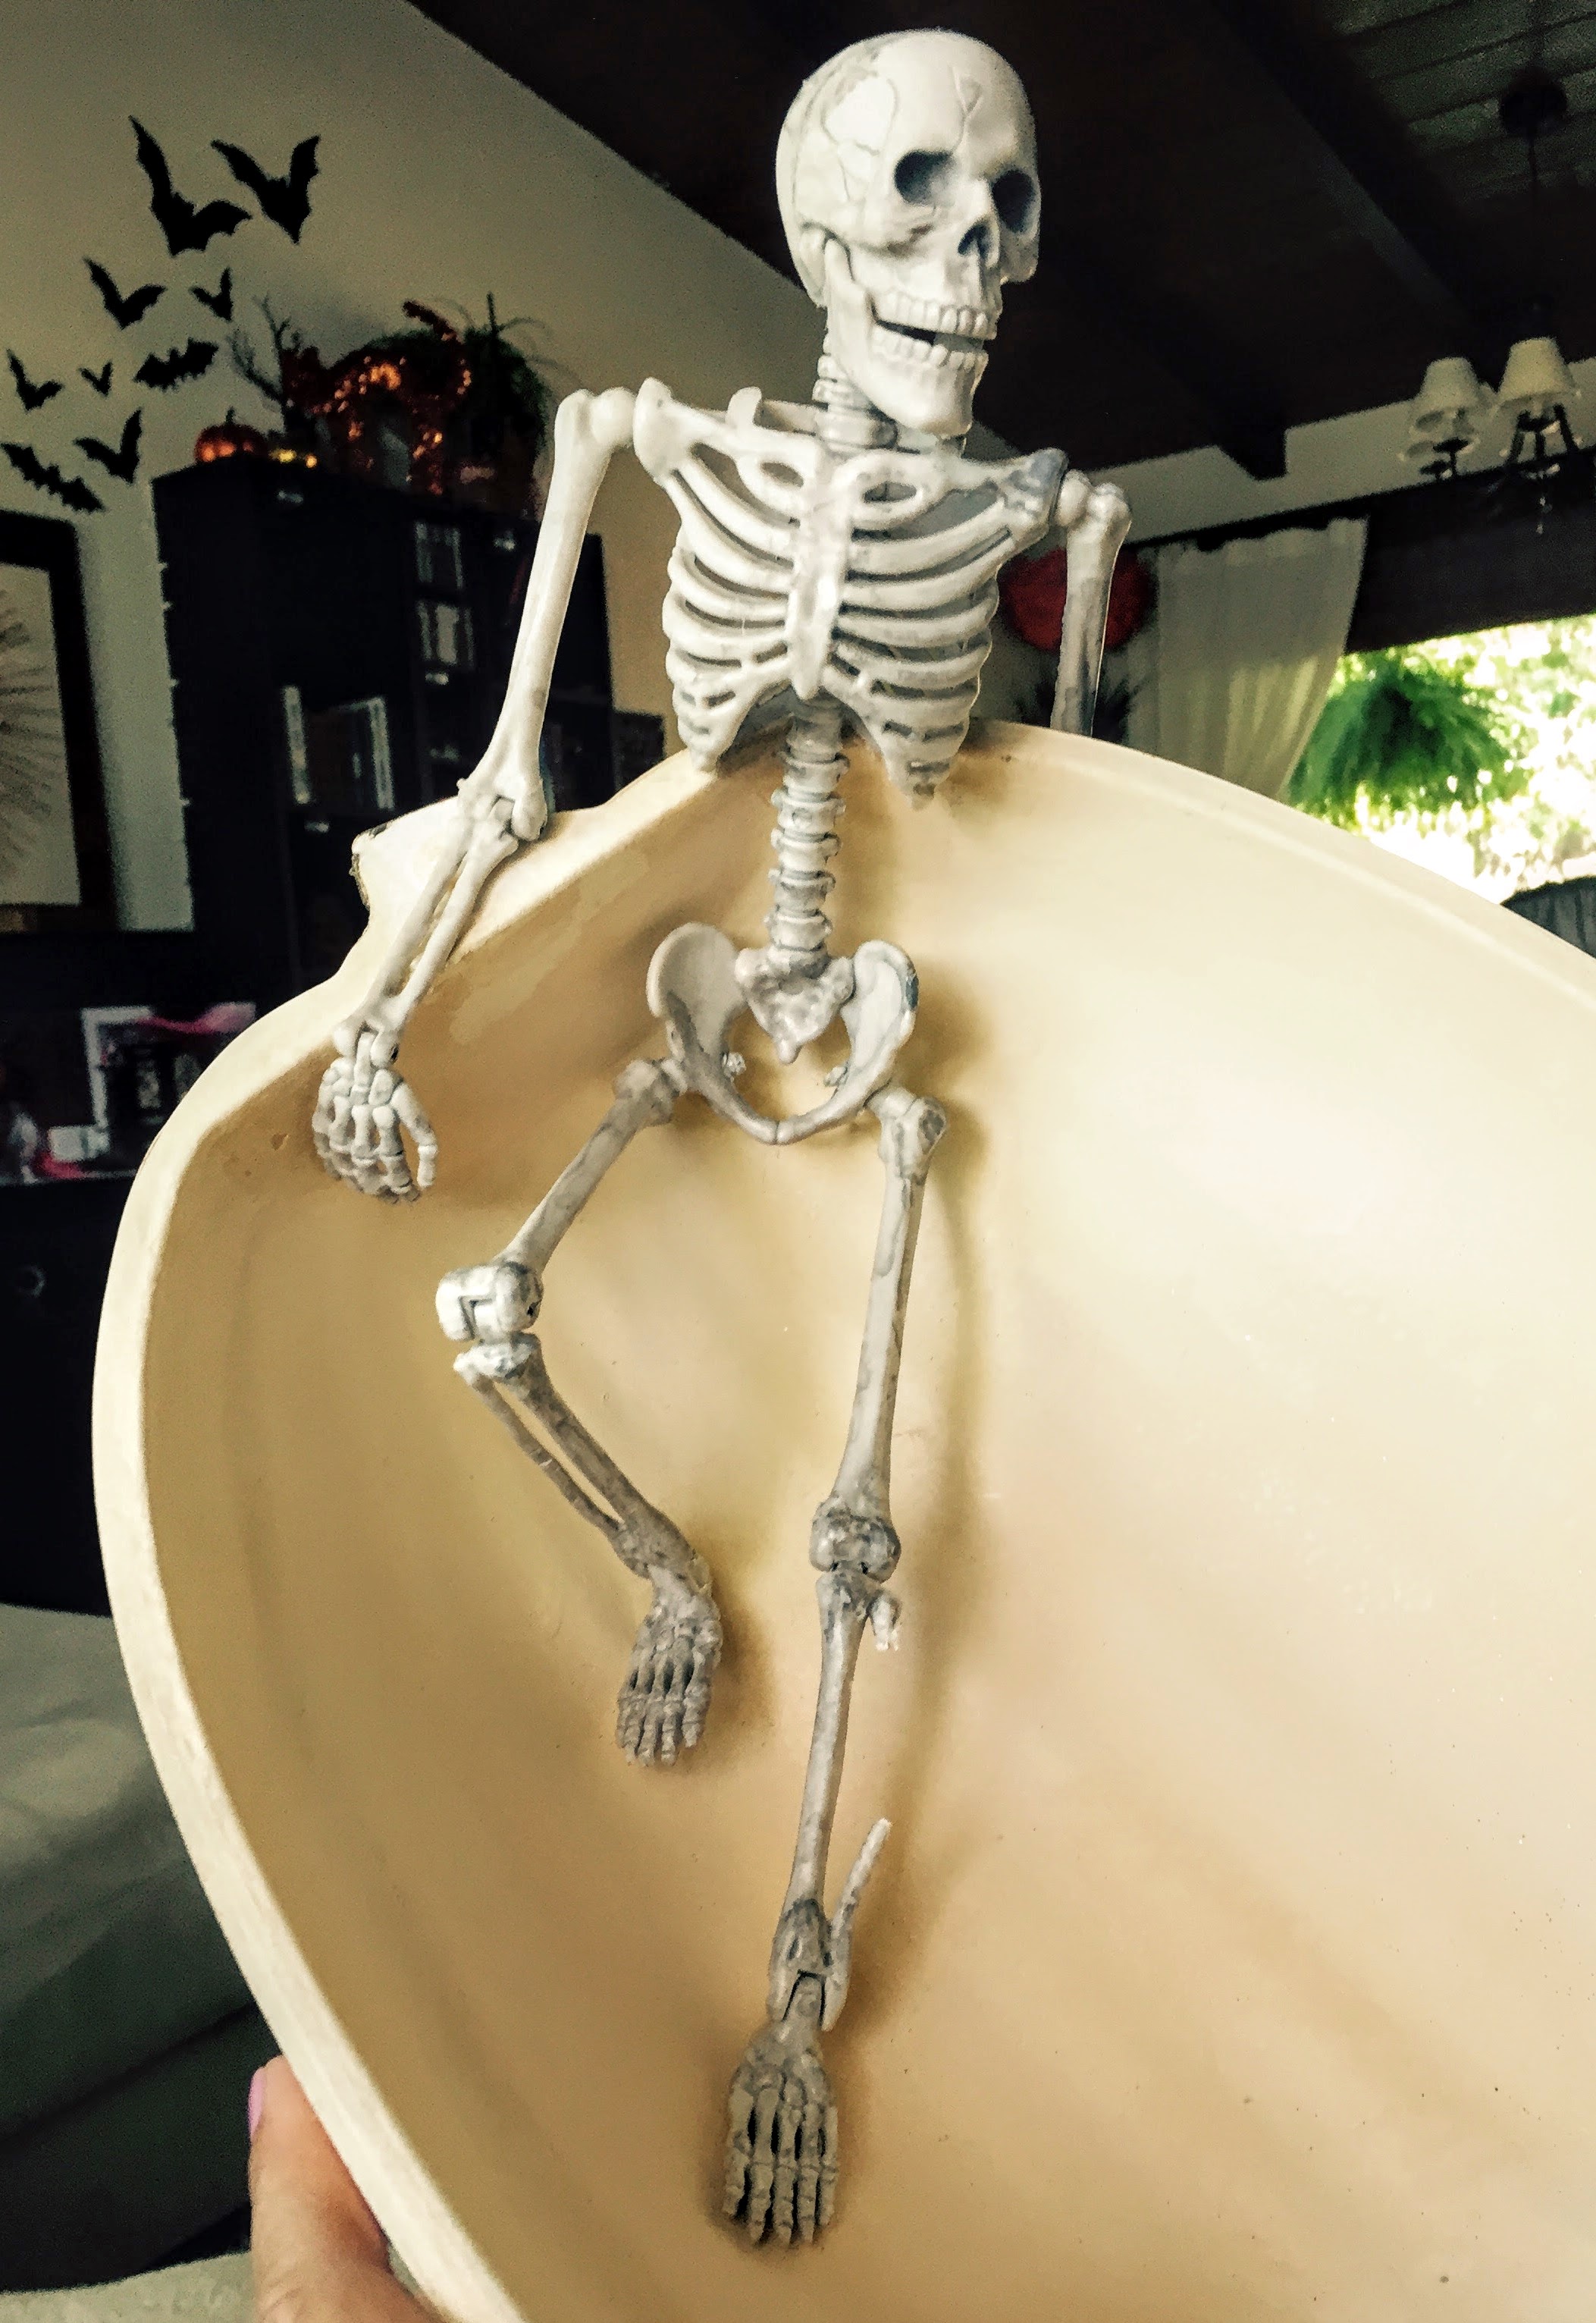
The next step, is to situate your skeleton so that it’s sitting in the bucket as you want it. It needs to fit in comfortably, and have some strong points of contact. Placing the right elbow on the stem is a good, strong contact point. The left arm hangs over the outer edge. I bent the right leg, mostly because that’s the only way it could go, and the left leg is straight… it’s sort of an organic process. Just fit the skeleton into the pumpkin, so that it’s as comfortable as possible. Then, begin gluing the skeleton, bit by bit. First, I glued the right elbow and forearm onto the pumpkin stem (over the hole):
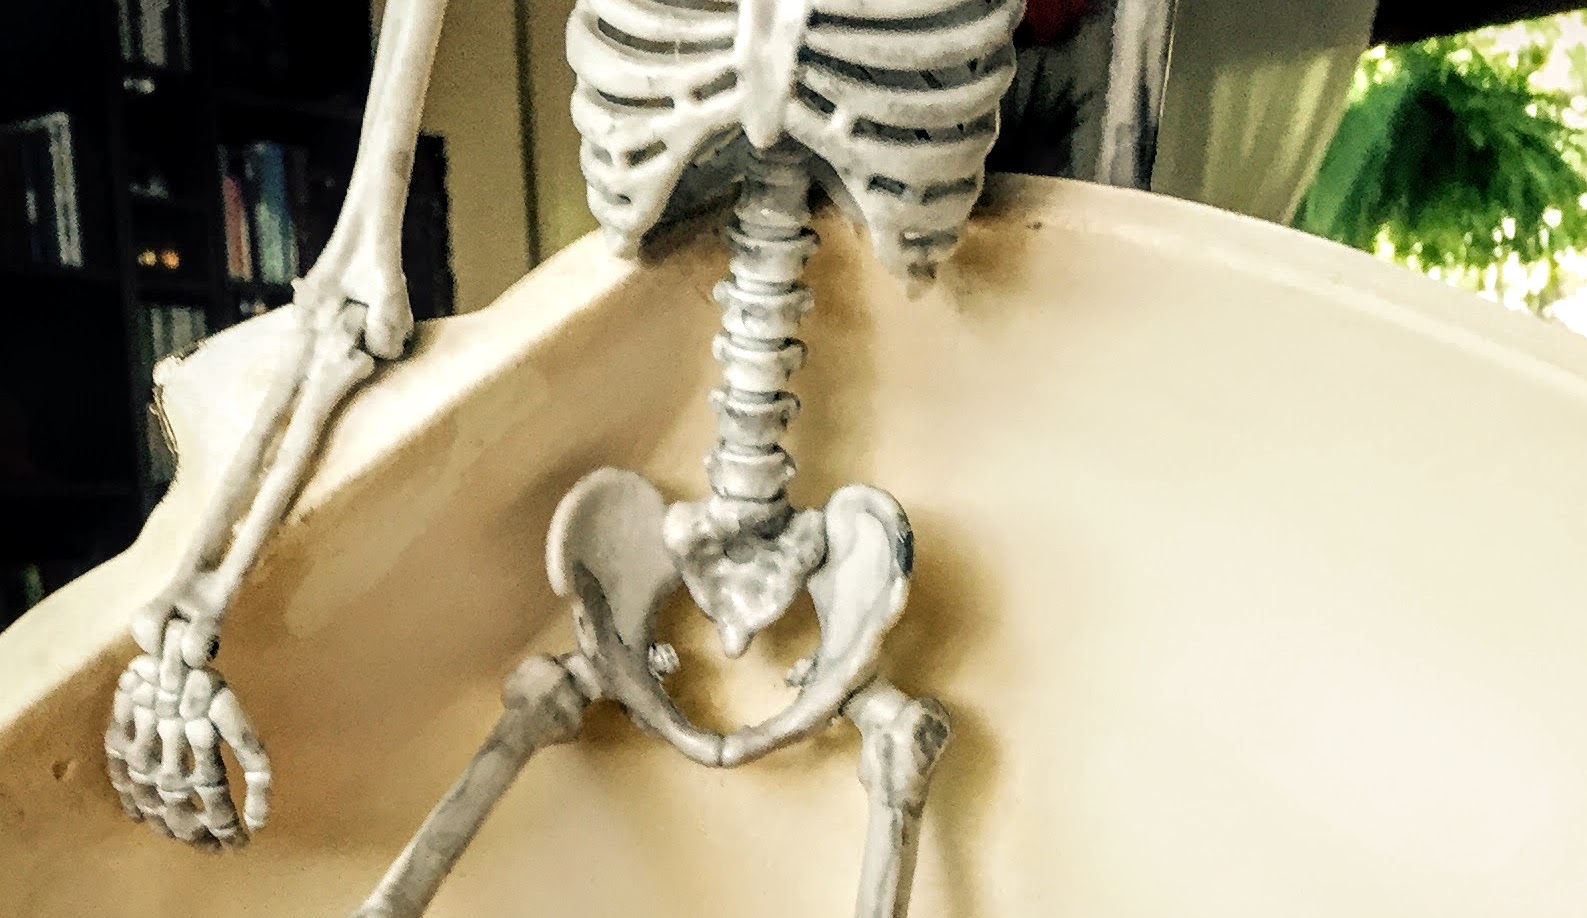
You will want to apply some Contact Cement and some E6000 and then hold the elbow and arm in place, until it stays on it’s own. At the same time as you apply the glue to the elbow and forearm, you will probably want to put some under the hip bones as you can see above, and then again, under the backside of the rib cage (on the right hand side), like so:
Next, I would wait a bit, holding the points that you have glued to the pumpkin, in place, until they’ve set. Once they feel fairly sturdy and stable, you can go ahead and start gluing the feet:
First, bend the right leg, and glue the foot down, where it feels comfortable. Next, keeping the left leg straight, glue the left foot:

Leave the left arm loosey goosey for the meantime. We will glue it down later. Also, remember the glue will be pretty gushy- there is no way to really avoid that, but the spray paint will cover most of it, so don’t worry about it too much. It’s more important that the skeleton is REALLY secure in there.
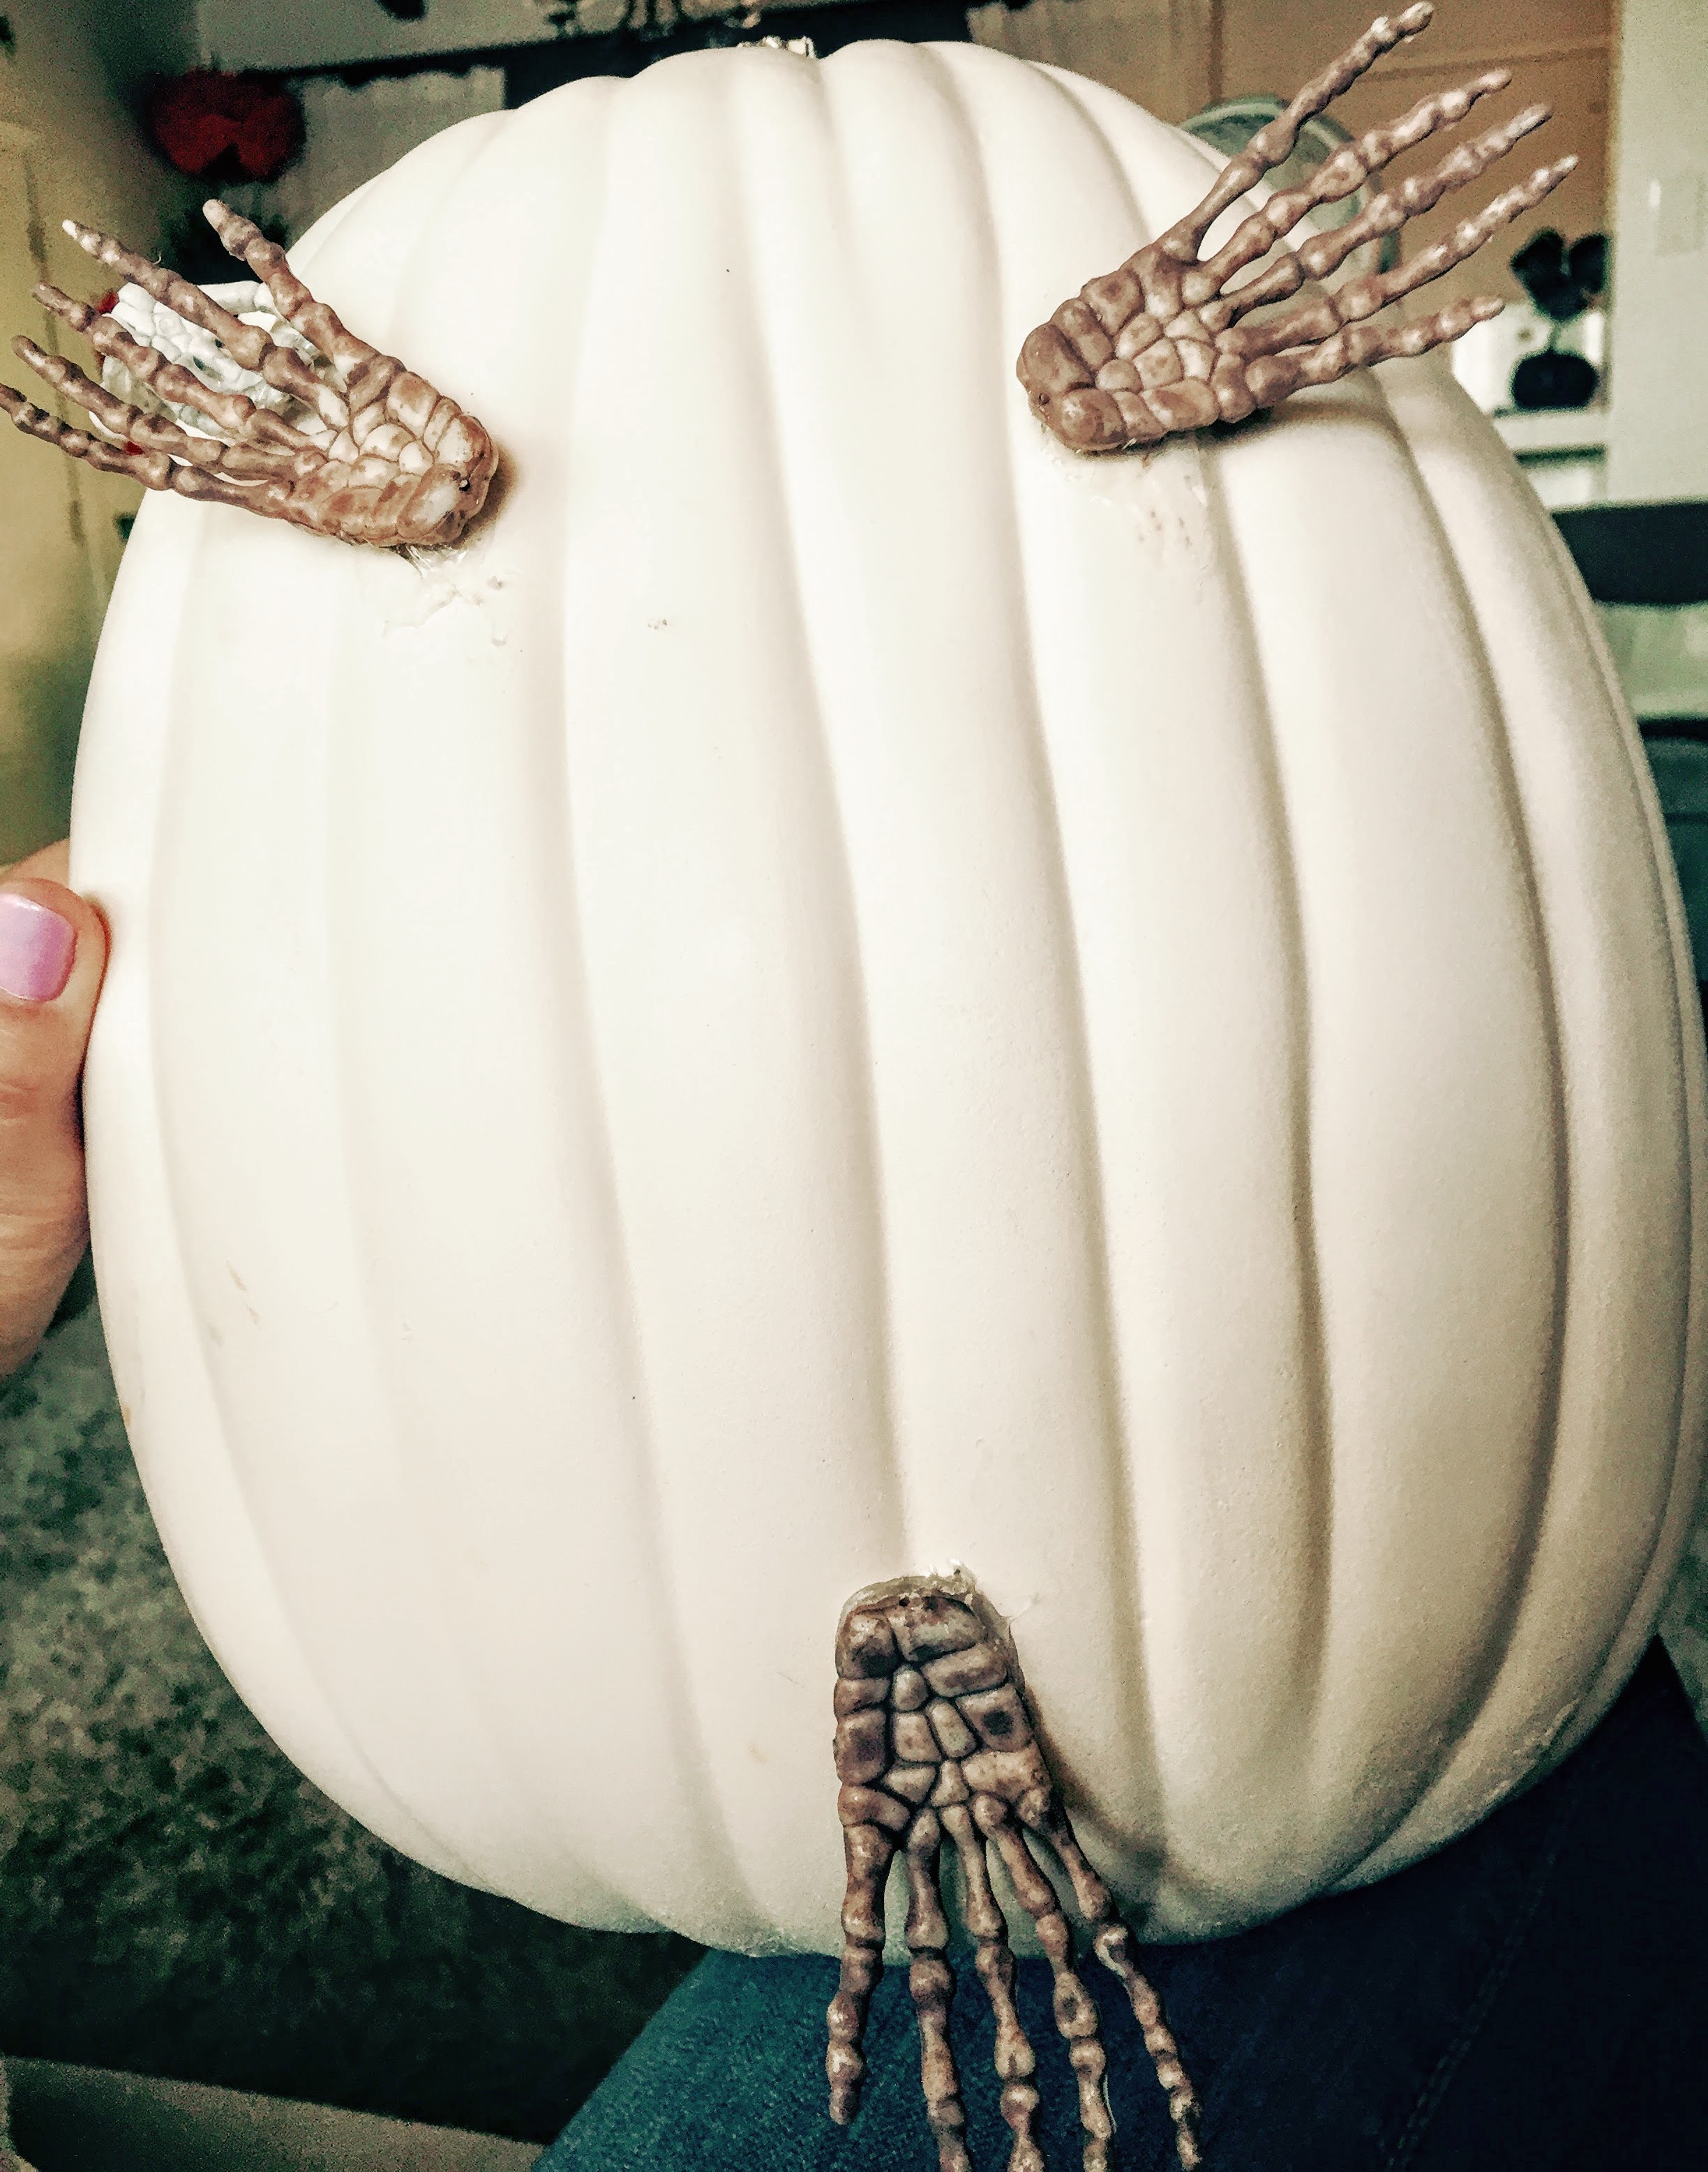
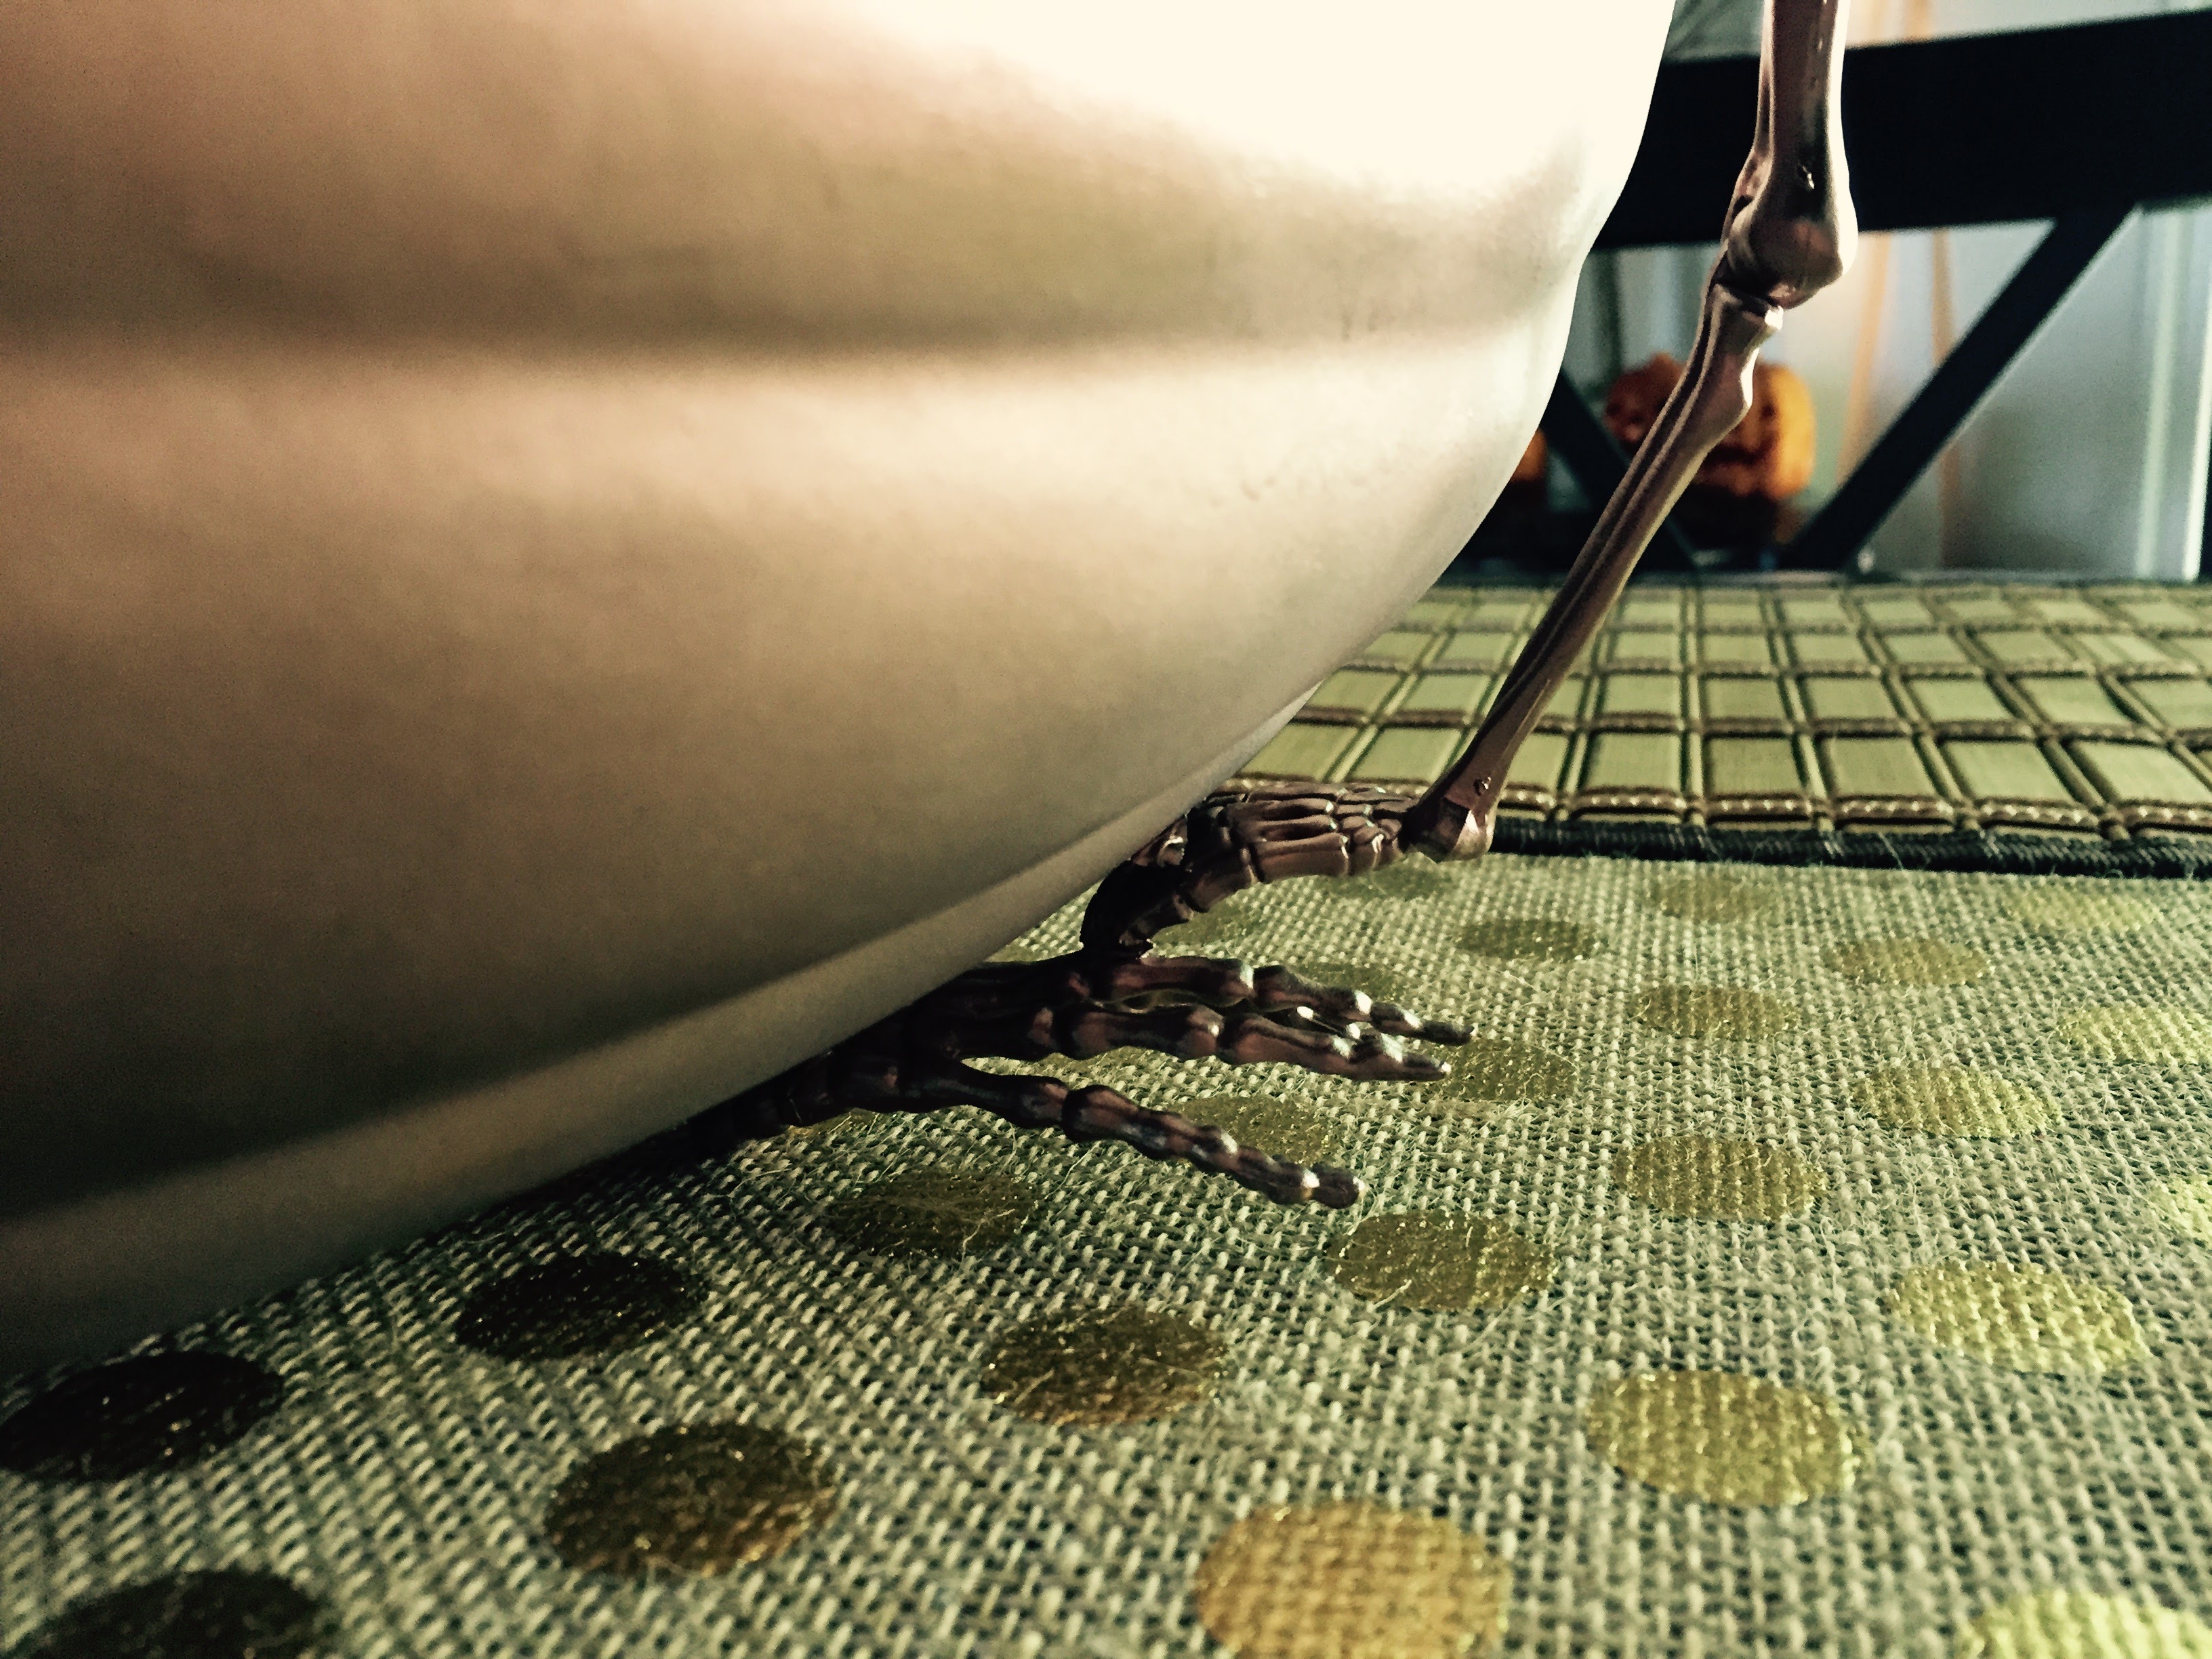
Once you have allowed for some dry time and your skeleton is feeling nice and tight, you are going to want to add the “feet” to the bottom of the pumpkin. For this, you will actually use the skeleton hands from Michael’s. You will need 3 of them. What I did, was I let the pumpkin sit with the skeleton already in it, and just looked and felt where the pumpkin was tipping. I then, placed the hands where they stopped the tipping and once I had a couple in place (this is somewhat of a balancing/guessing act), I held one in place, turned the pumpkin over, and glued it on with a big blob of glue.
Then I flipped it back over to make sure it was in the right place and moved it a bit if it needed that. At this point, I held it in place until it felt set, and also wiped away any excess glue that it was possible to get rid of (you can see in the image above, where I needed to slide the hand down- later, I wiped a lot of that glue off, although I didn’t get all of it). Once again, the spray paint will take care of most of the mess. Use the same process for the other 2 hands. When you have all of the hands glued, it will look something like this:
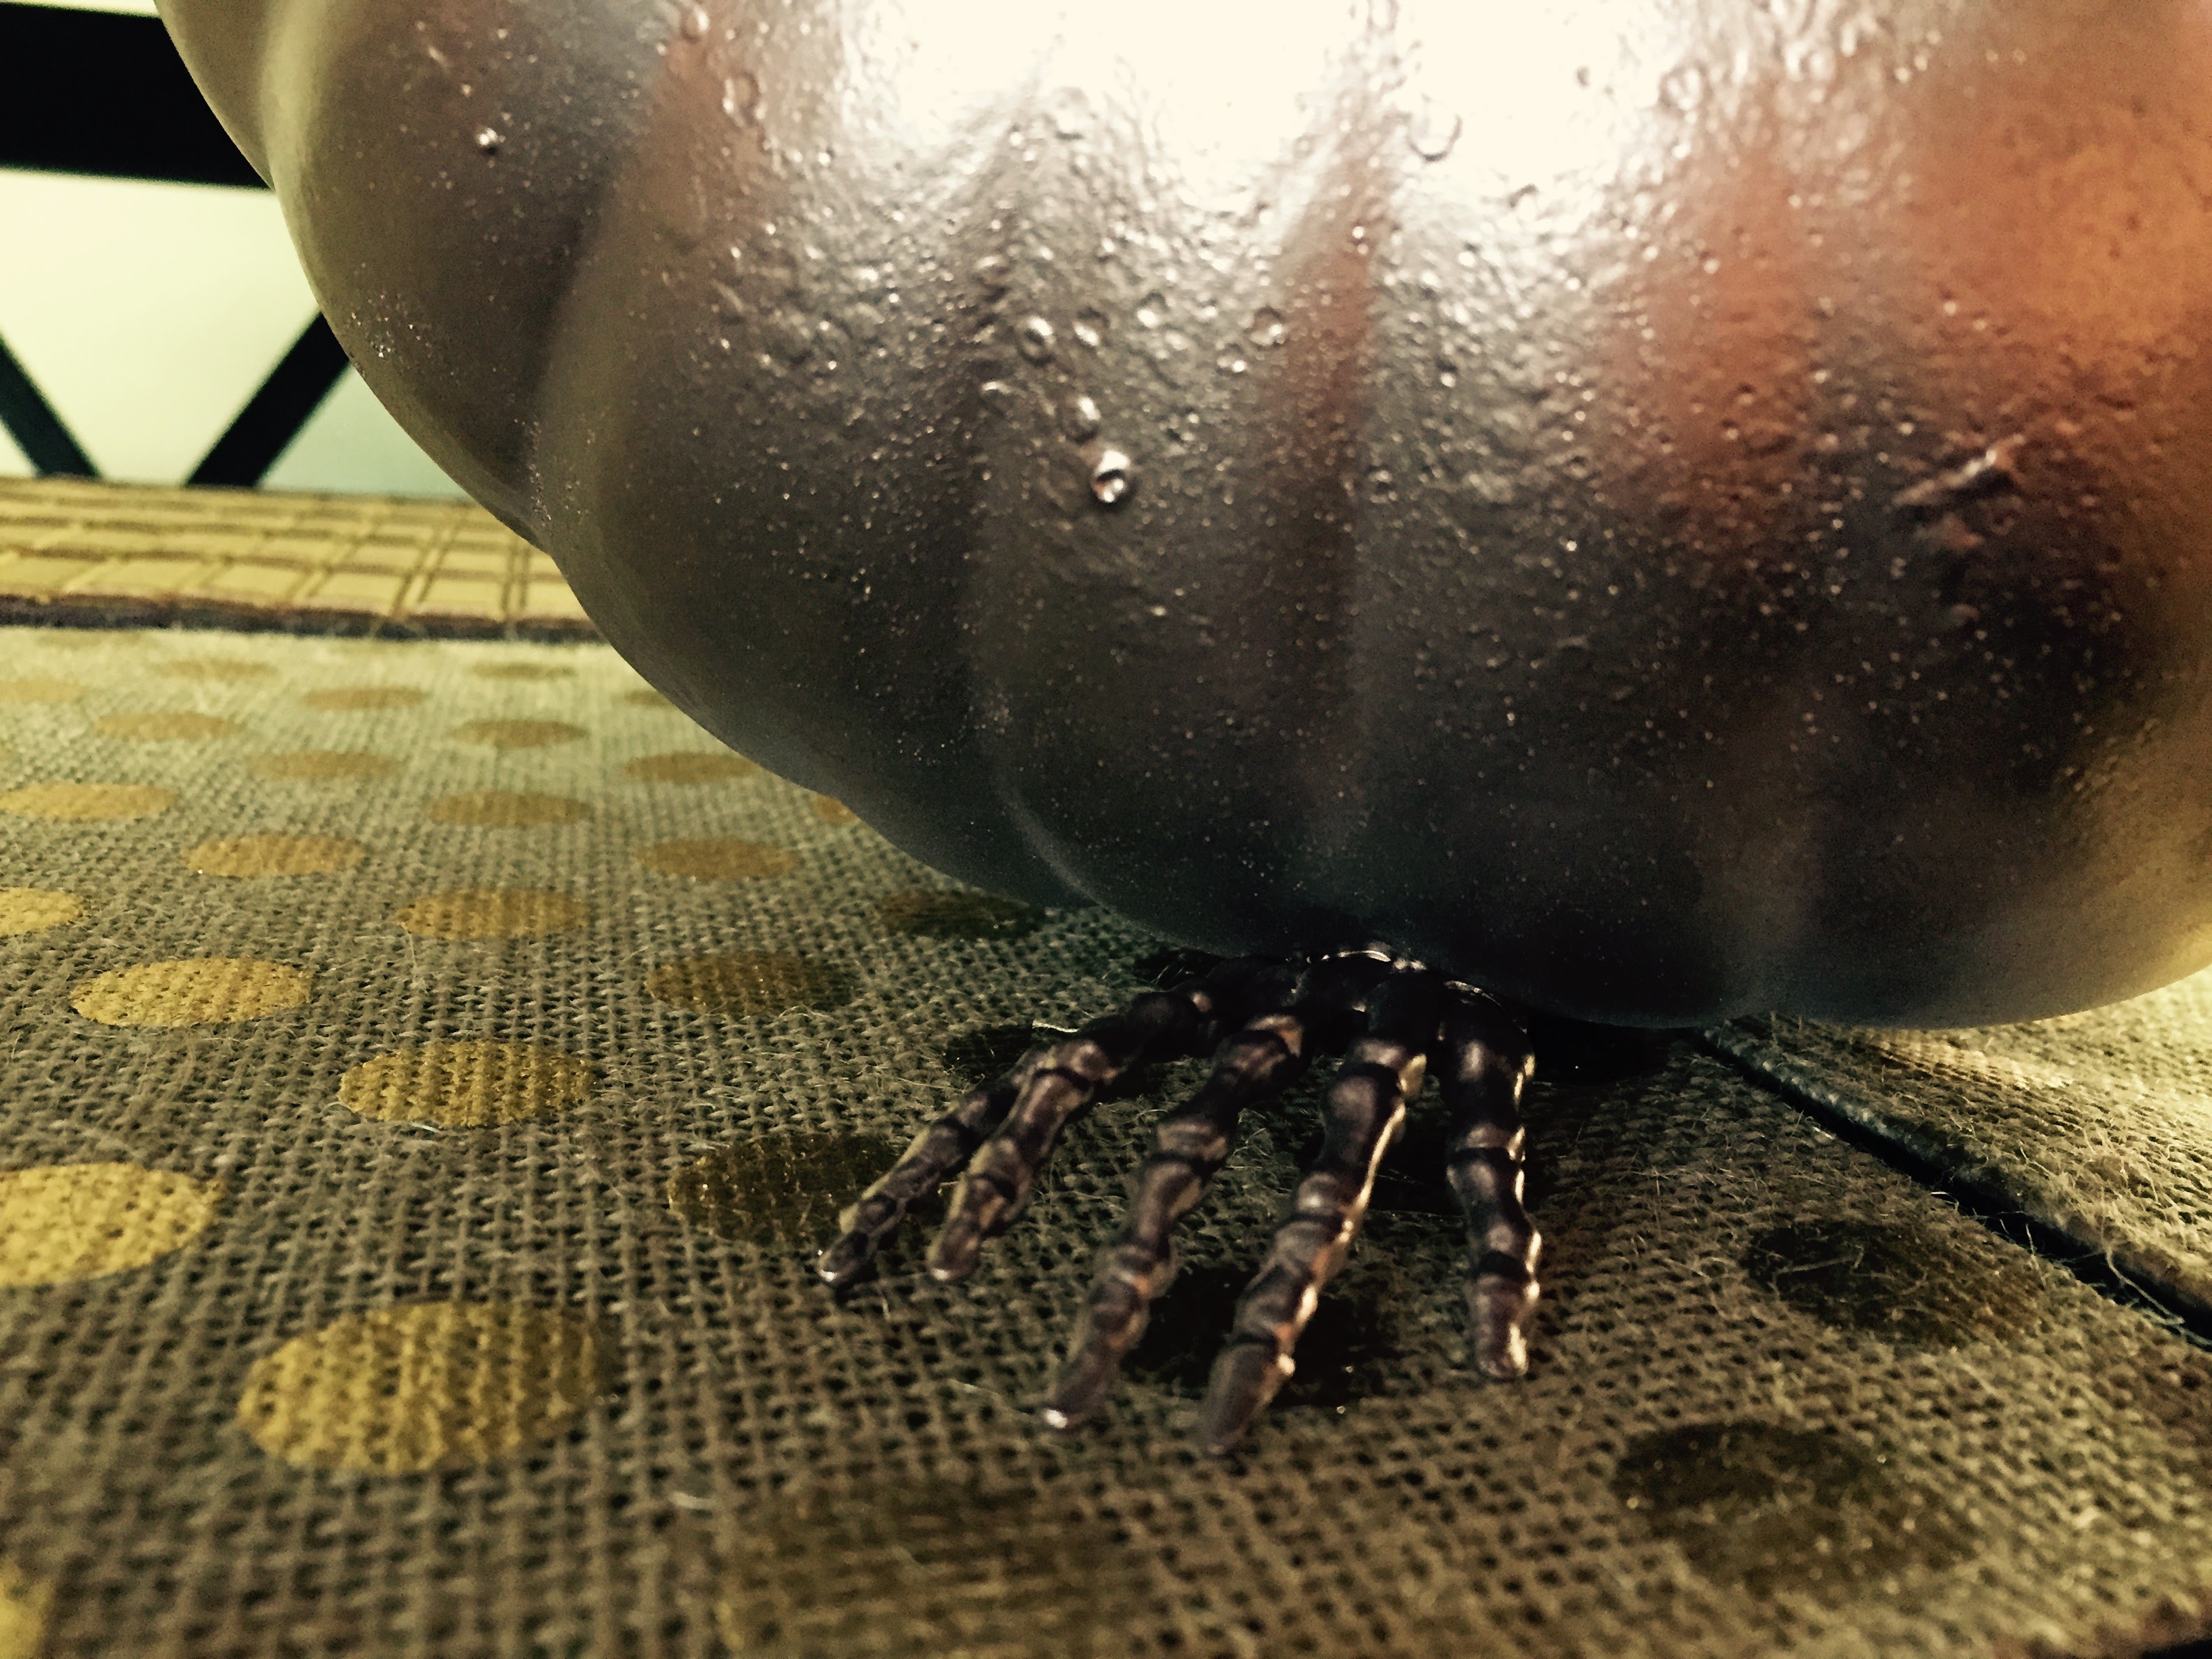
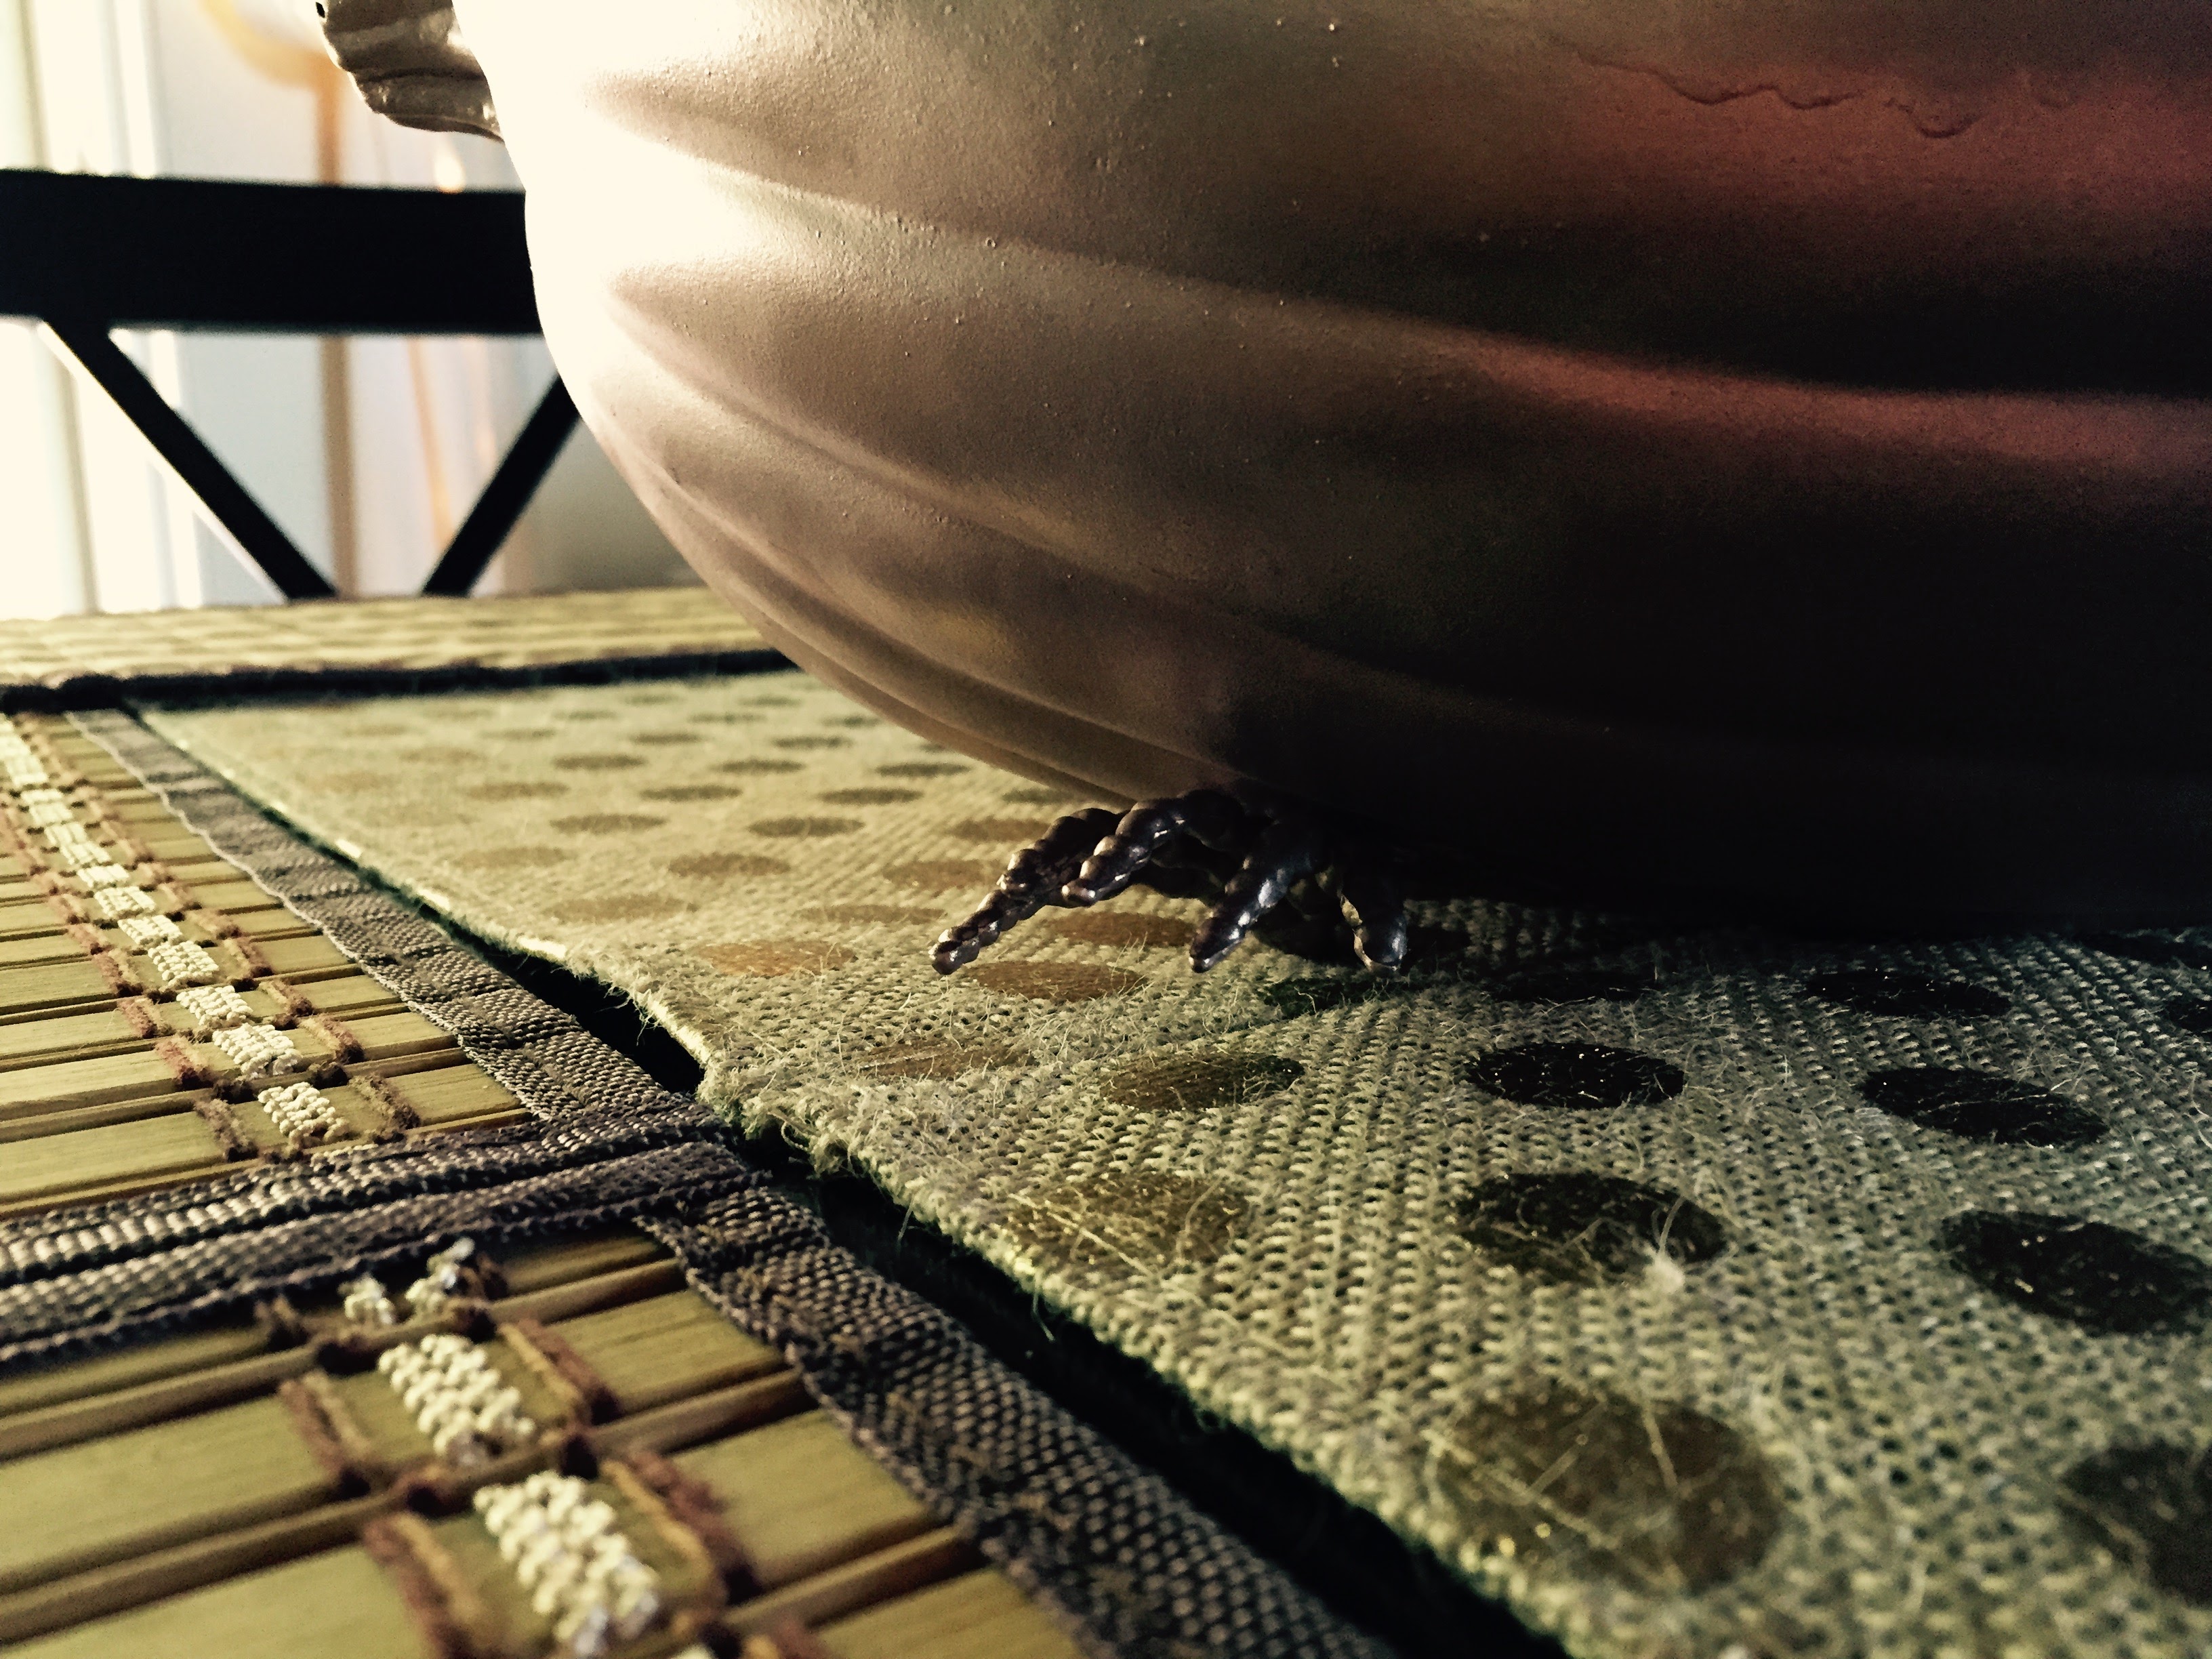
Here is a shot from underneath, after the feet have dried and are sturdy (post spray paint). A couple of the hands are kind of coming up and look a little tipsy, but the pumpkin itself, is very sturdy- at this point, it can hold almost a whole bag of ice, with beers, and stand steady and stable.
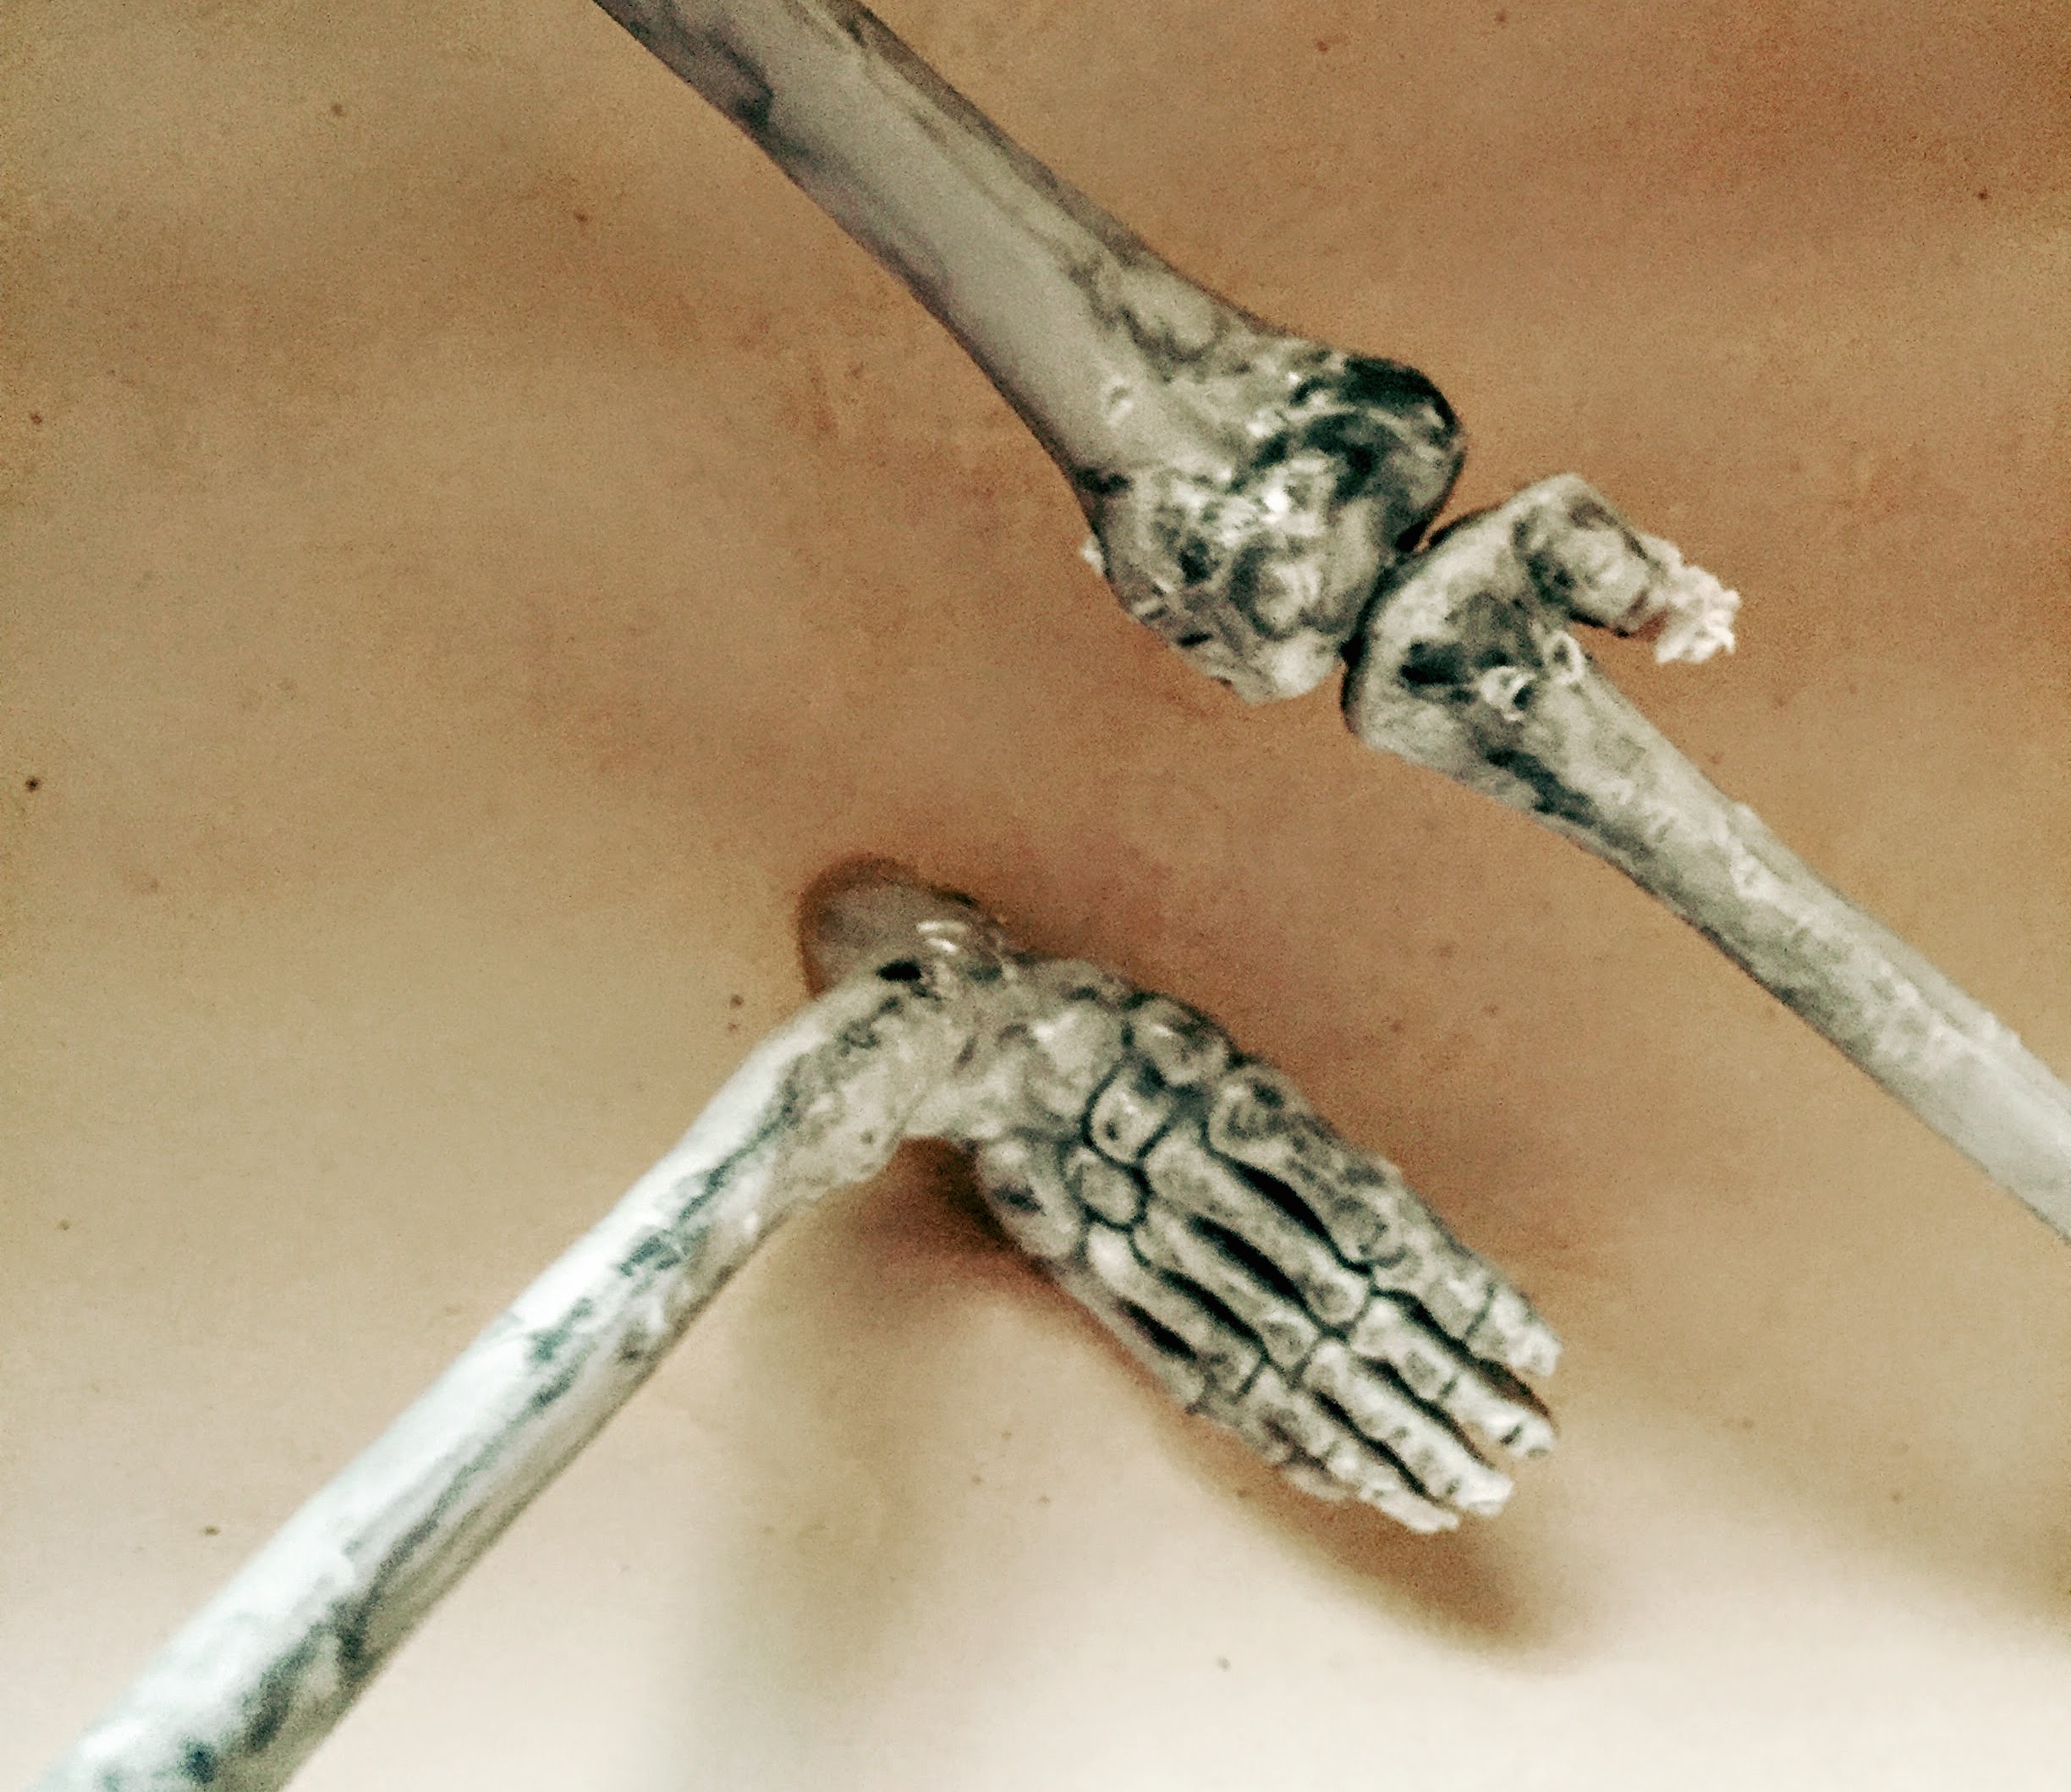
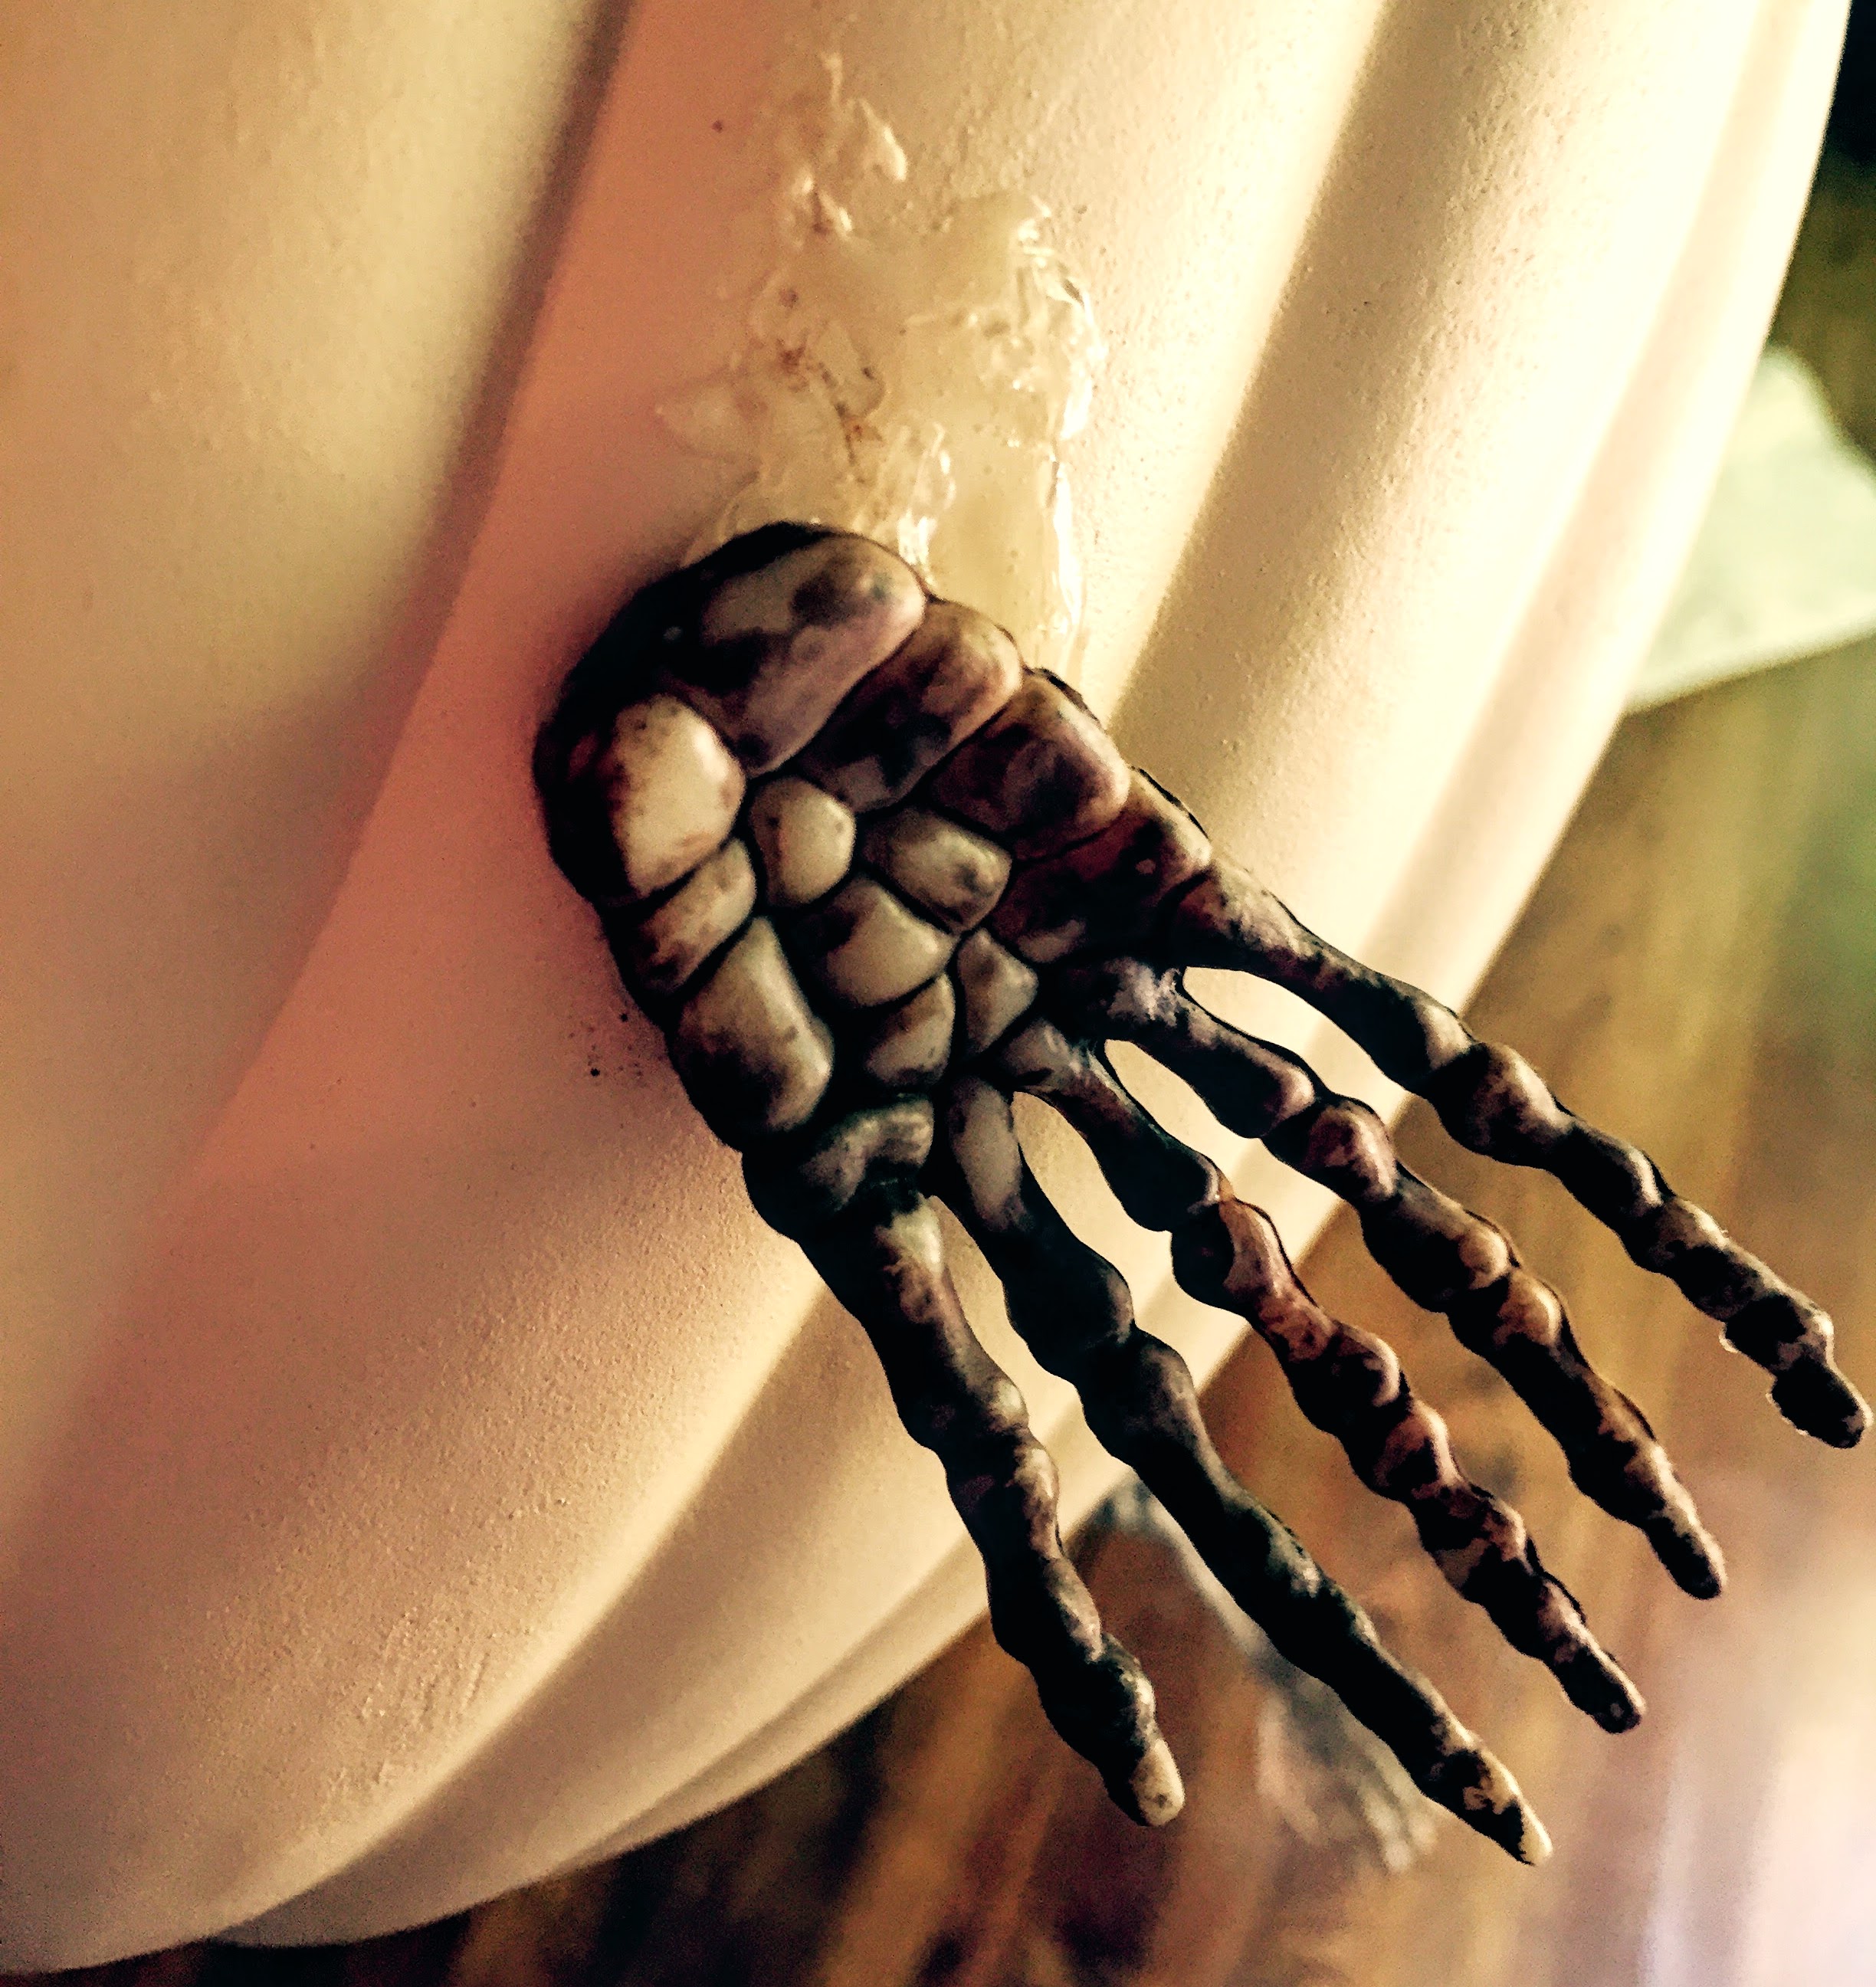
Last, but not least (gluing-wise), you will want to glue the left hand of the skeleton to the hand beneath it. I glued the tops of the fingers to the pumpkin and the bottom of the finger tips to the hand beneath it. I like the effect. It looks like the skeleton and the pumpkin are holding hands!
Once, you’ve glued everything using a combo of the Contact Cement and E6000 (or you could use this Automotive Glue), it’s time to break out the spray paint! At this point, you need to make sure that your glue is very dry and the skeleton is not moving. You may need to wait hours or do all the gluing one day, and then paint the next.
So, head to an outdoor space with a face mask and some gloves! Lay your skeleton pumpkin face down (so that the bottom of the pumpkin is facing the sky) on a sheet, towel, or piece of cardboard. Paint the bottom of the pumpkin thoroughly with light coats of spray, allowing dry time between each coat. Make sure you get in all the deep grooves of the hands (or “feet”) of your pumpkin, and spray everything within reach while your pumpkin is upside-down. Once the bottom of your pumpkin is thoroughly coated and thoroughly dry (you may want to wait a few hours- if you are using cardboard to spray on, you do not have to wait as long), turn it over, and do the interior of the pumpkin and the skeleton. Once again, thin, light coats of spray allowing for dry time in between. Make sure to get in all the nooks and crannies of your skeleton and make sure to thoroughly coat the rim of your pumpkin, because it really catches the light when it’s on the table.
Once you’ve painted everything and it’s dry, grab your Clear Coat Acrylic spray. I sprayed mine with a Mod Podge lacquer and it changed the color of my paint. I ended up respraying the top of the skeleton, the rim of the pumpkin, and the underside to reestablish the beautiful sheen I had had before the lacquer, with the rose gold spray. I left the interior lacquered so that I could put ice and drinks inside. I think the Clear Coat Acrylic is the answer to this problem. I used it on a skeleton I painted the other day, and it didn’t seem to change the color at all. In fact, it gave it a brilliant shine, so I think it will be perfect. You can lacquer everything, and if it changes the color significantly, you can respray the top and underside with the metallic.

Now, you just need to allow your creation to dry for a day (or a few hours, if you’re in a rush!) and then load it up with ice and drinks, and get the party started! Cheers and Happy Halloween!
Happy Nesting.
Kirstie xo
PS: If you would like to make more Spooky Skeleton Creations for your Halloween bash, go to these links: Skeletons in the Closet Serving Tray, Ice Bath Skeleton Party Bucket, and Spooky Skeleton Serving Spoons.