

Hi again and welcome to my second post! I’m so happy you’re back!
This is a follow up, to walk you through the making of the Ombre Wood Backdrop, for the Mid Century Sunburst. The Sunburst looks beautiful on it’s own, but on our tall, white, rental walls, it just sort of gets lost! As renters, we’re not supposed to paint our walls, so I have to find innovative ways to make our space more exciting. Don’t get me wrong… for all of its flaws and many a year of renters’ grime, it’s a great house. It’s a 1959 A-frame with a wood beamed ceiling, and a giant white brick fireplace in the living room. The kitchen is semi-open to the living room which is AWEsome, because I can cook AND watch my crazy (and adorable) 2 year-old daughter run all over the place! I also have a very energetic and wonderful 9 year-old son, who just started 4th grade.
Our living space is small, but feels much bigger than it actually is. When they built this house in 1959, the idea of the “great room” or the “multipurpose room”, as it was once called, was just catching on. The theme is not fully integrated here, but it’s a well-thought-out, small-version-attempt at the Mid Century idea, made popular by Joseph Eichler in the 50’s and 60’s.
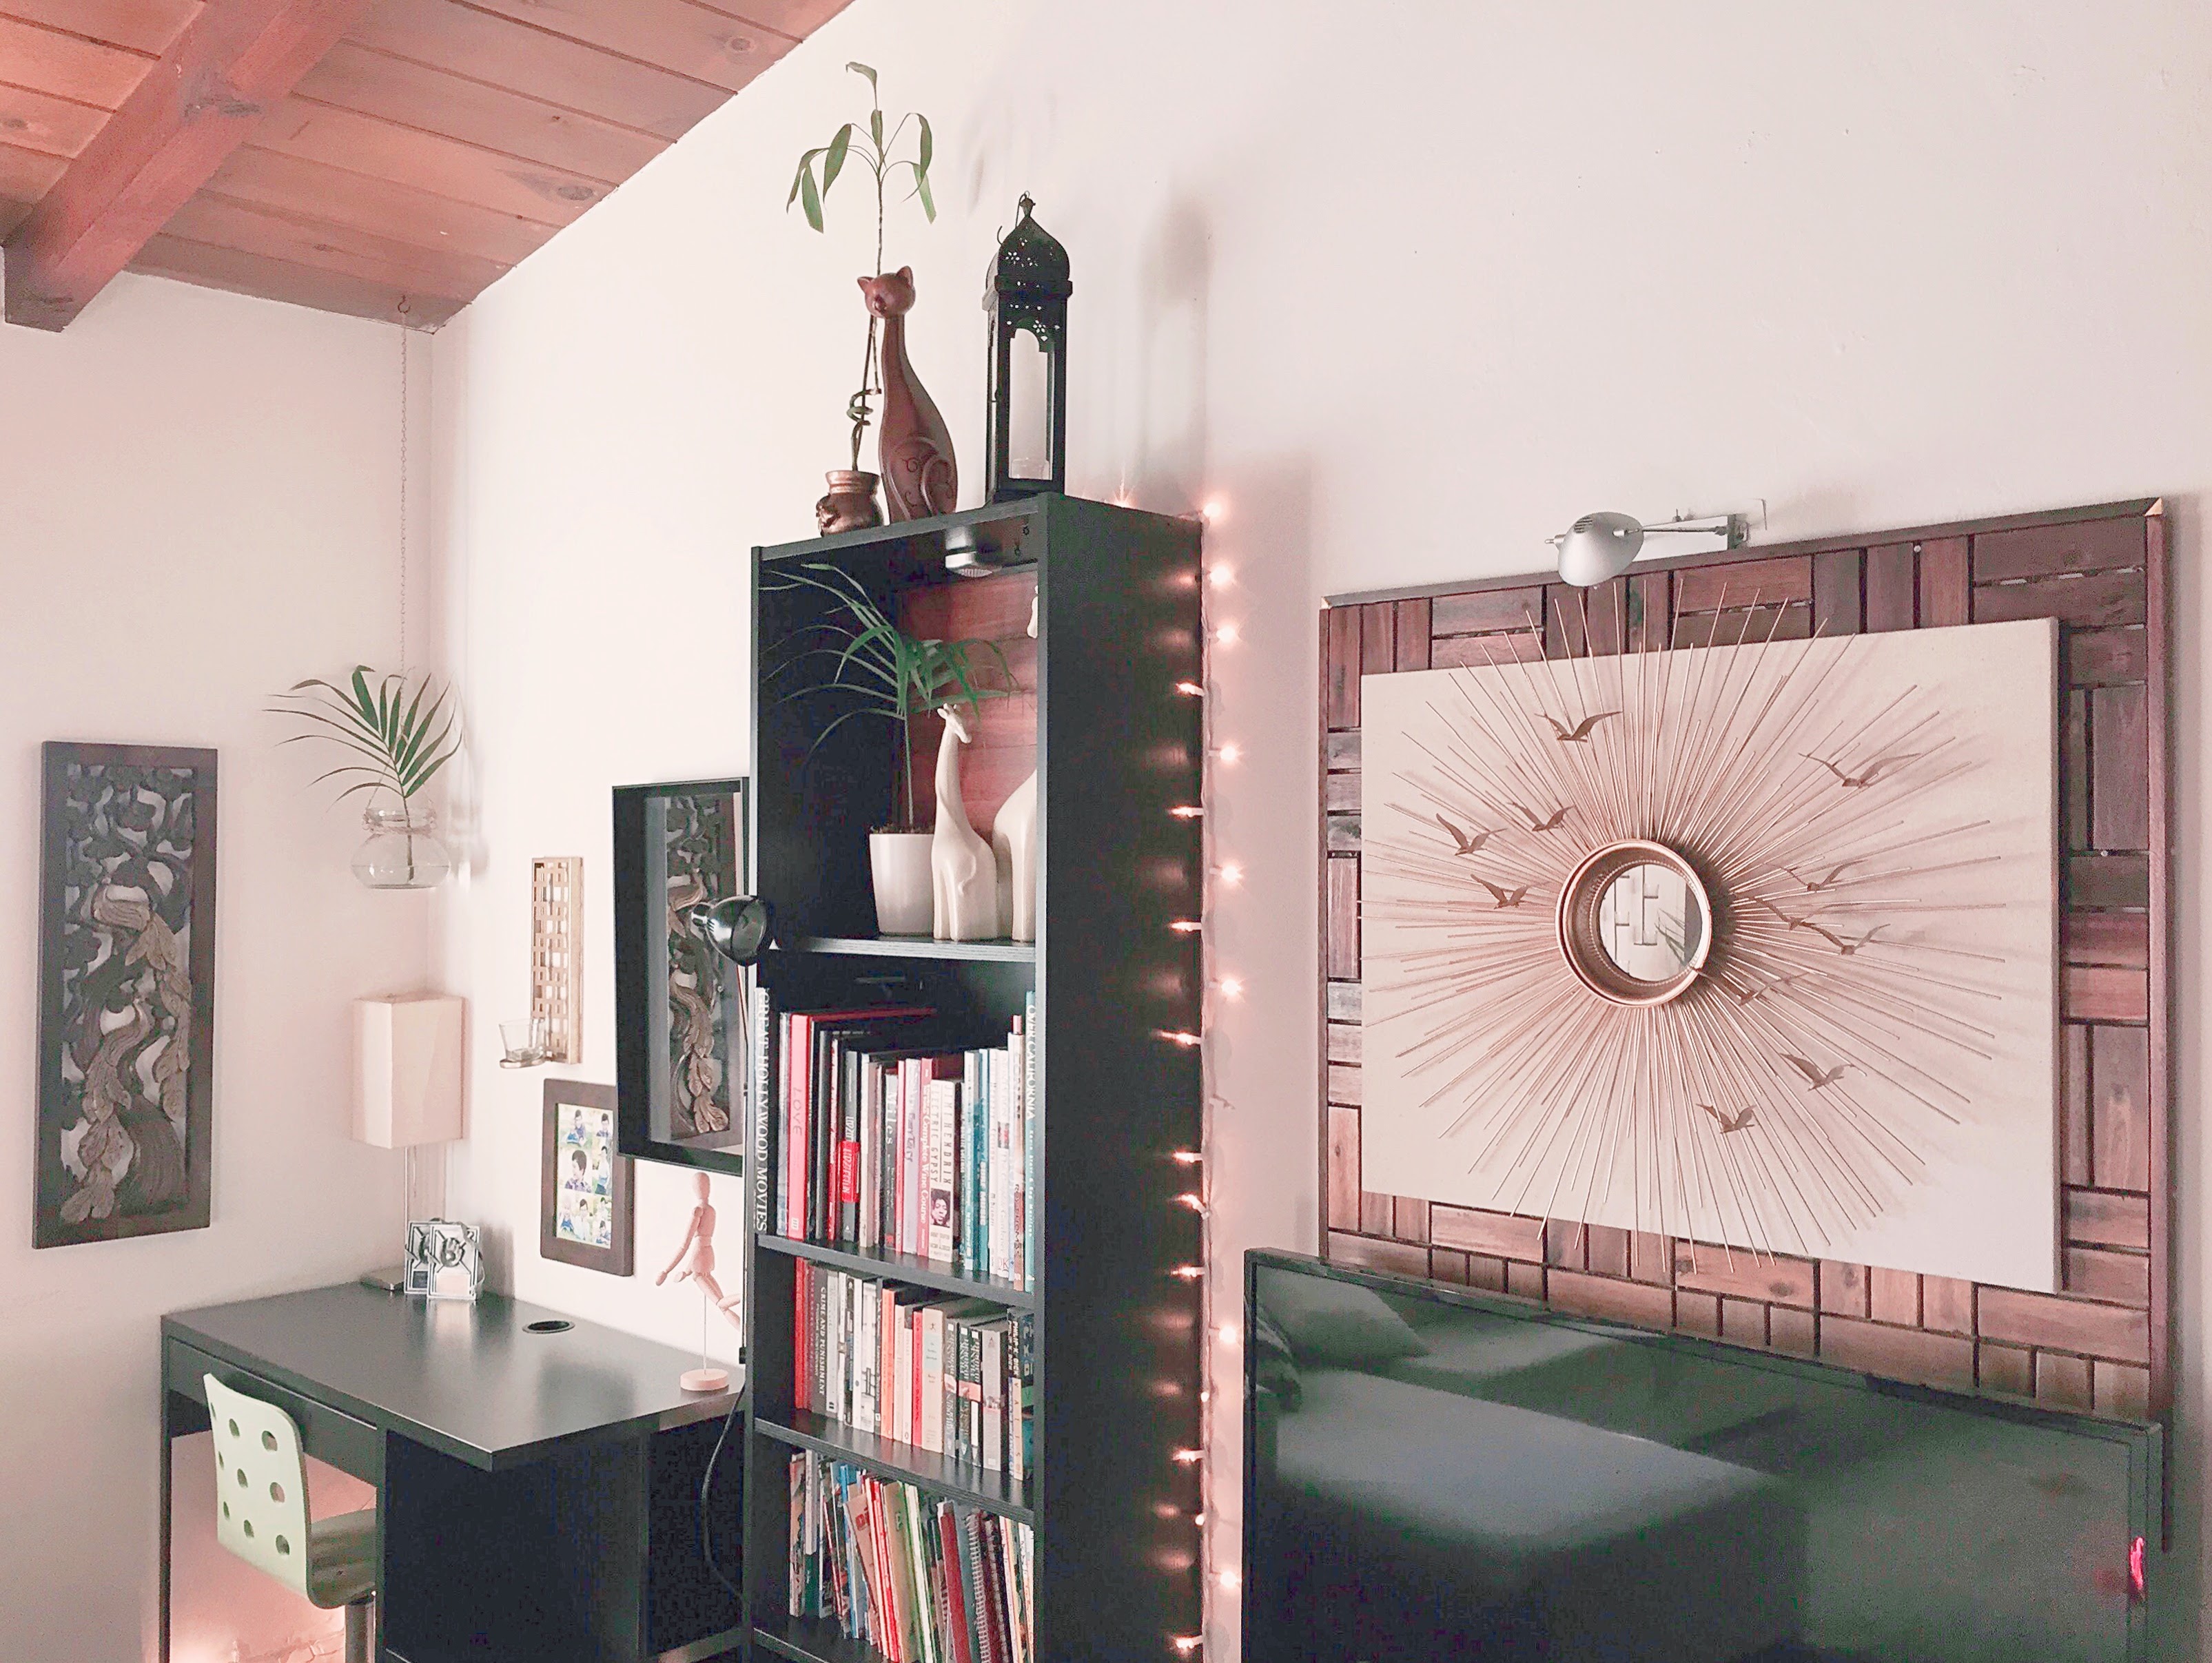
The main wall in our living room, rises up to meet the A-frame, which is where your eye goes, right when you enter the house. I needed a fairly large piece of art to go between my bookshelves and above the TV. It’s basically the media center of the room, so my goal was to take the focus off of the television and electronics. We live in about 1300 sq ft of space, in total, which includes 3 tiny bedrooms and 2 bathrooms. Our living room houses all that we do. We don’t have any extra playrooms or media rooms. I try to fit everything in, while still keeping the look uncluttered and pretty. My goal was to place the spotlight on one beautiful piece, that would pull your attention away from the chaos, while still providing a useful station.
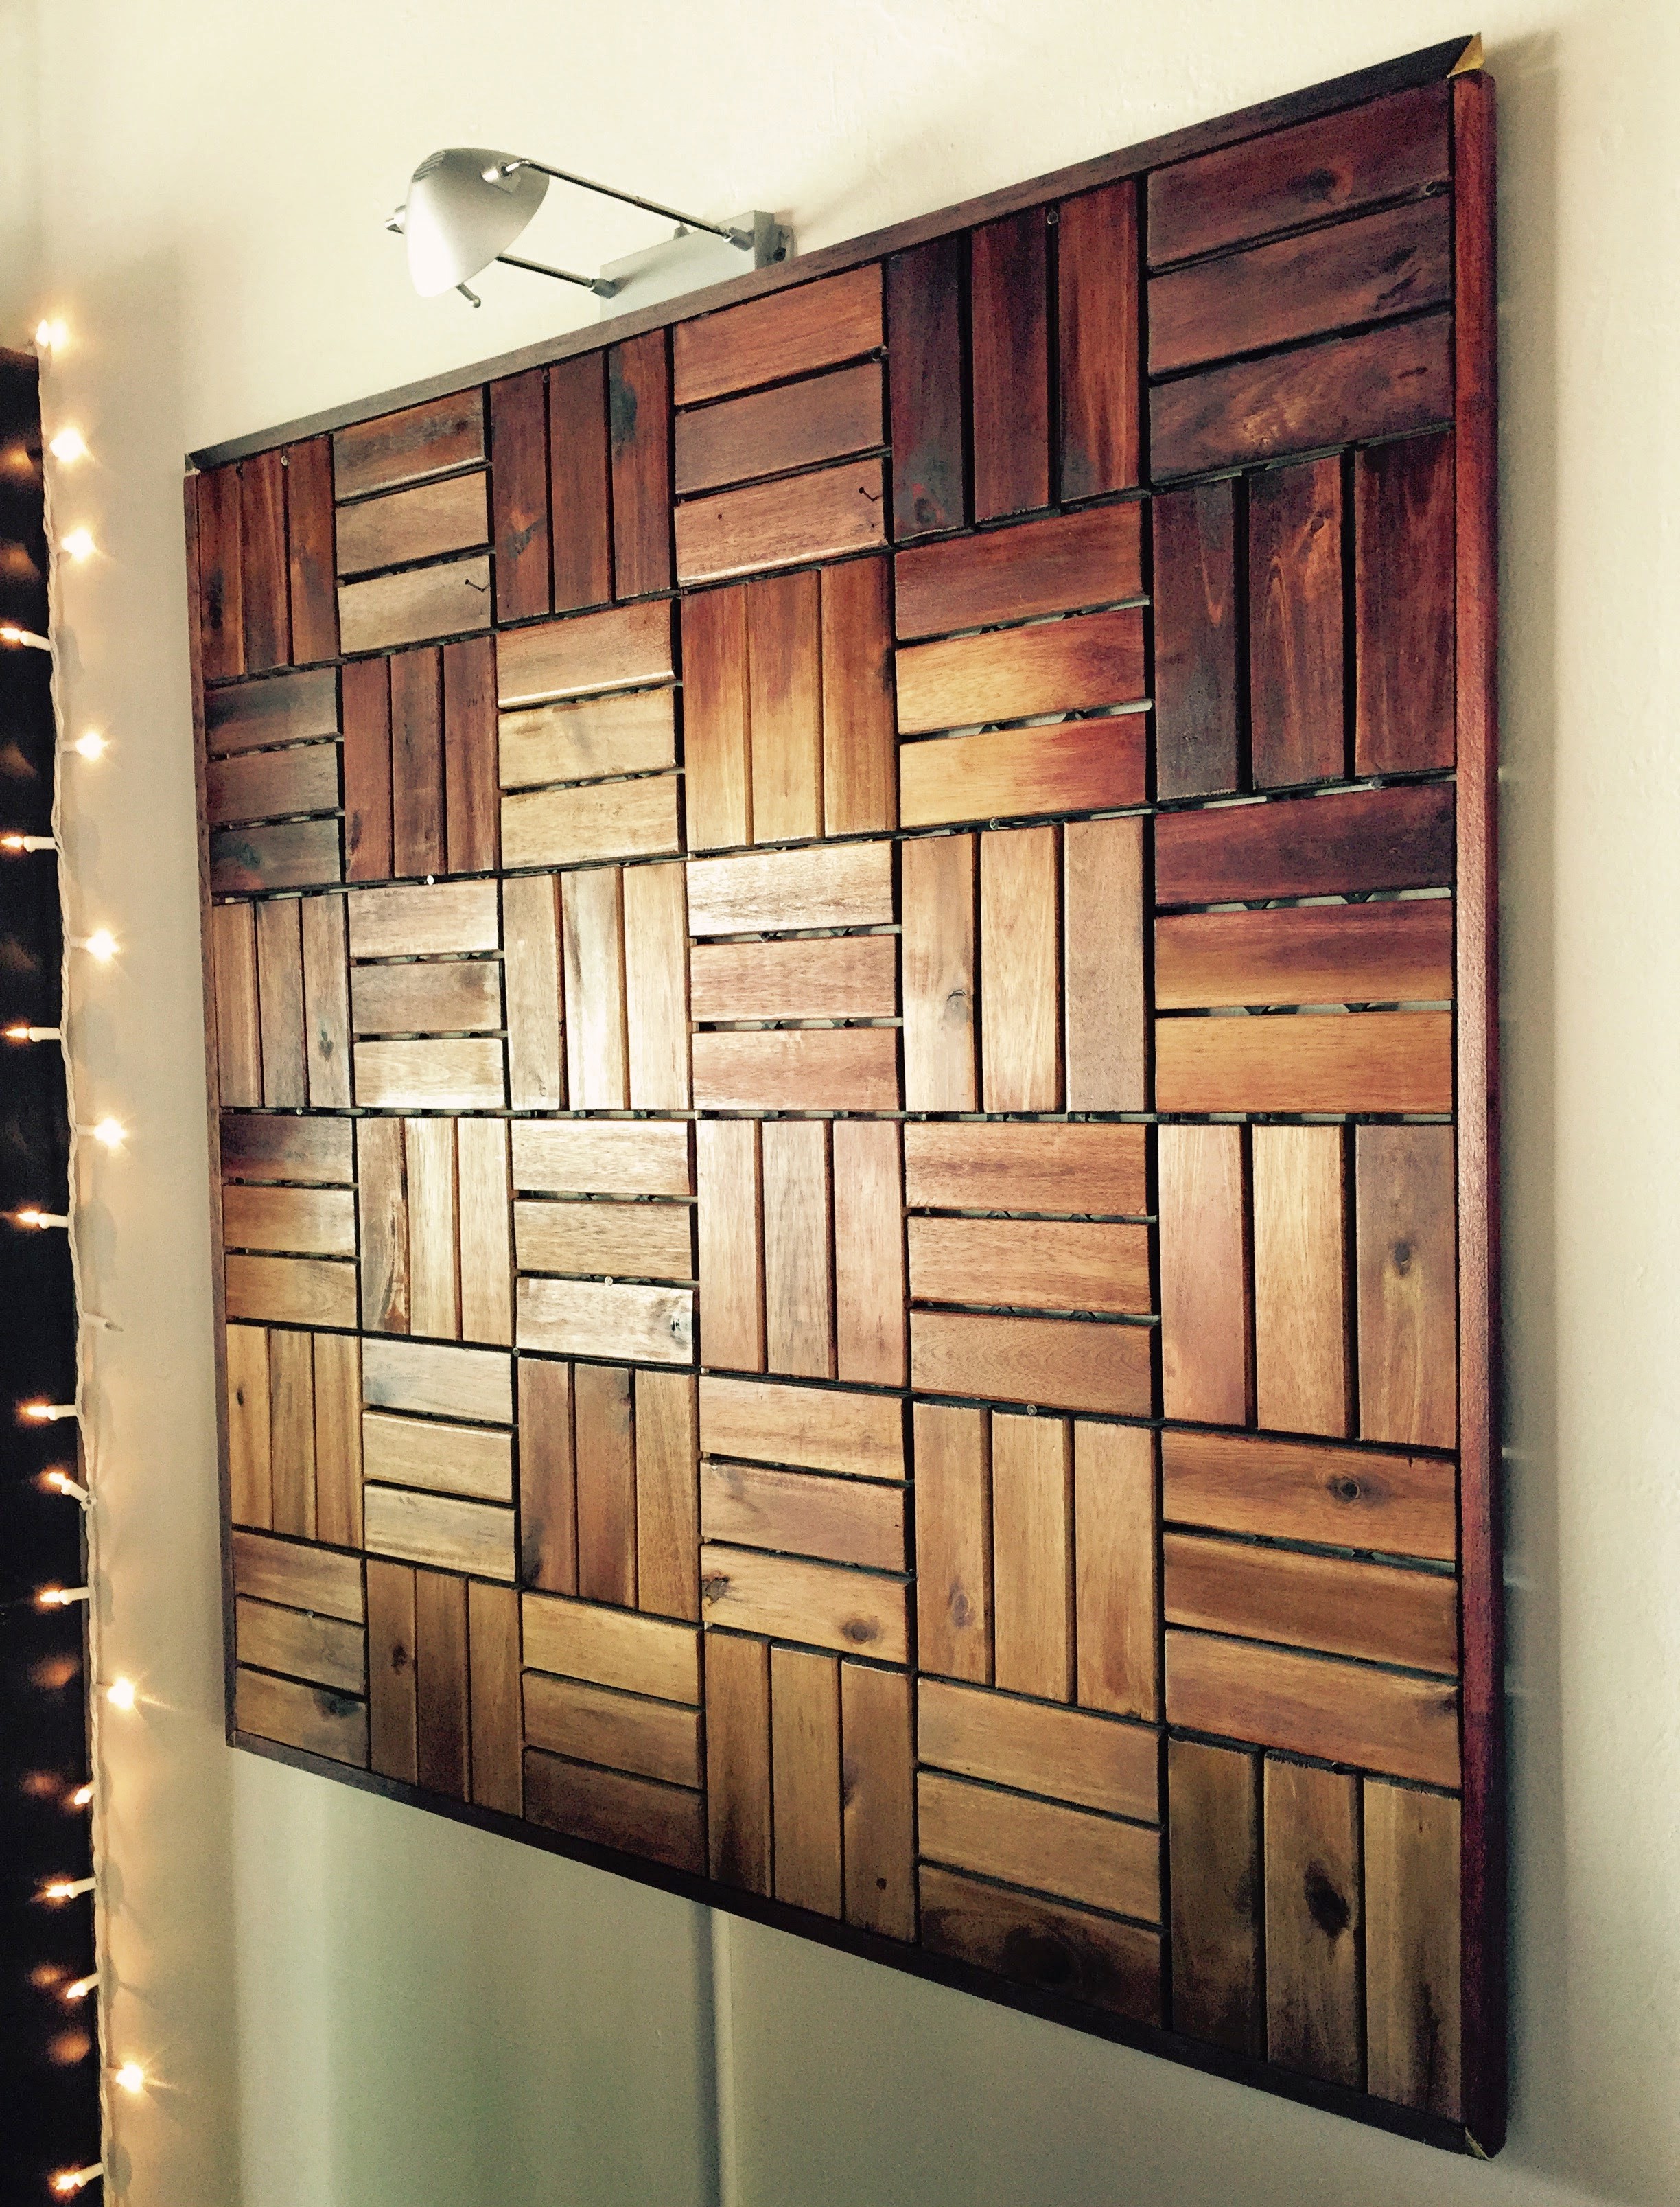
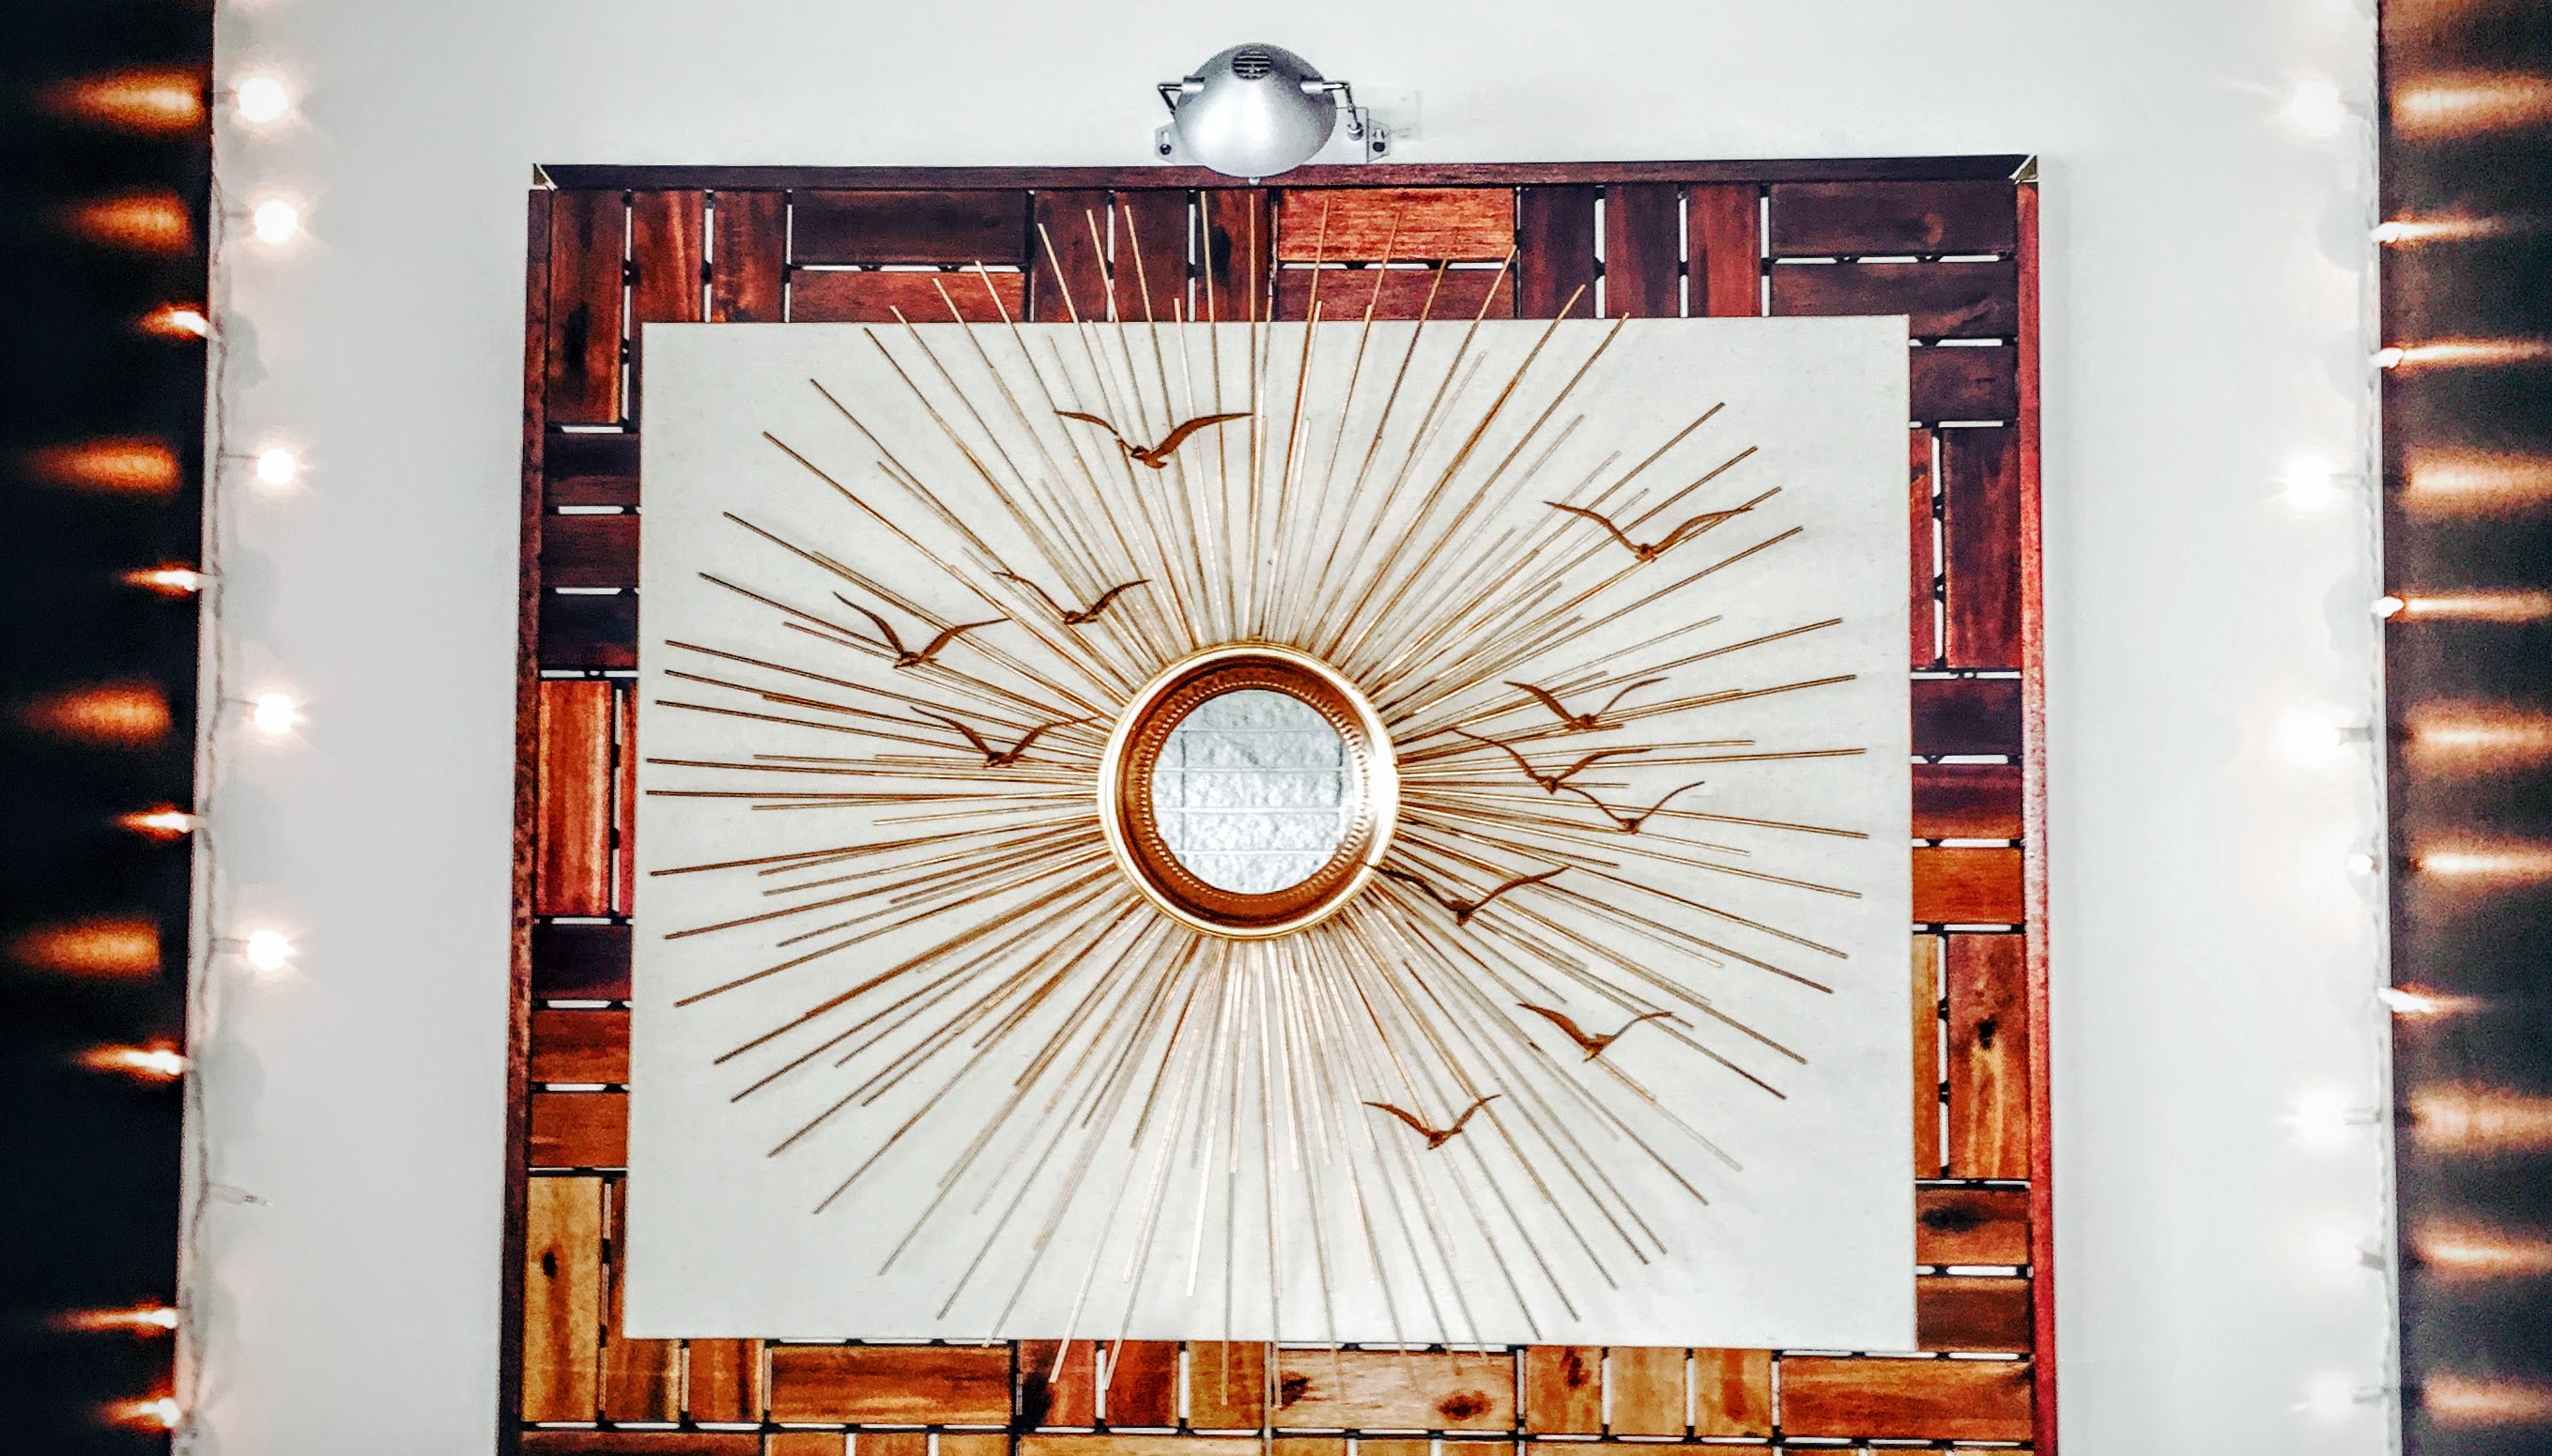
And this is what I came up with!
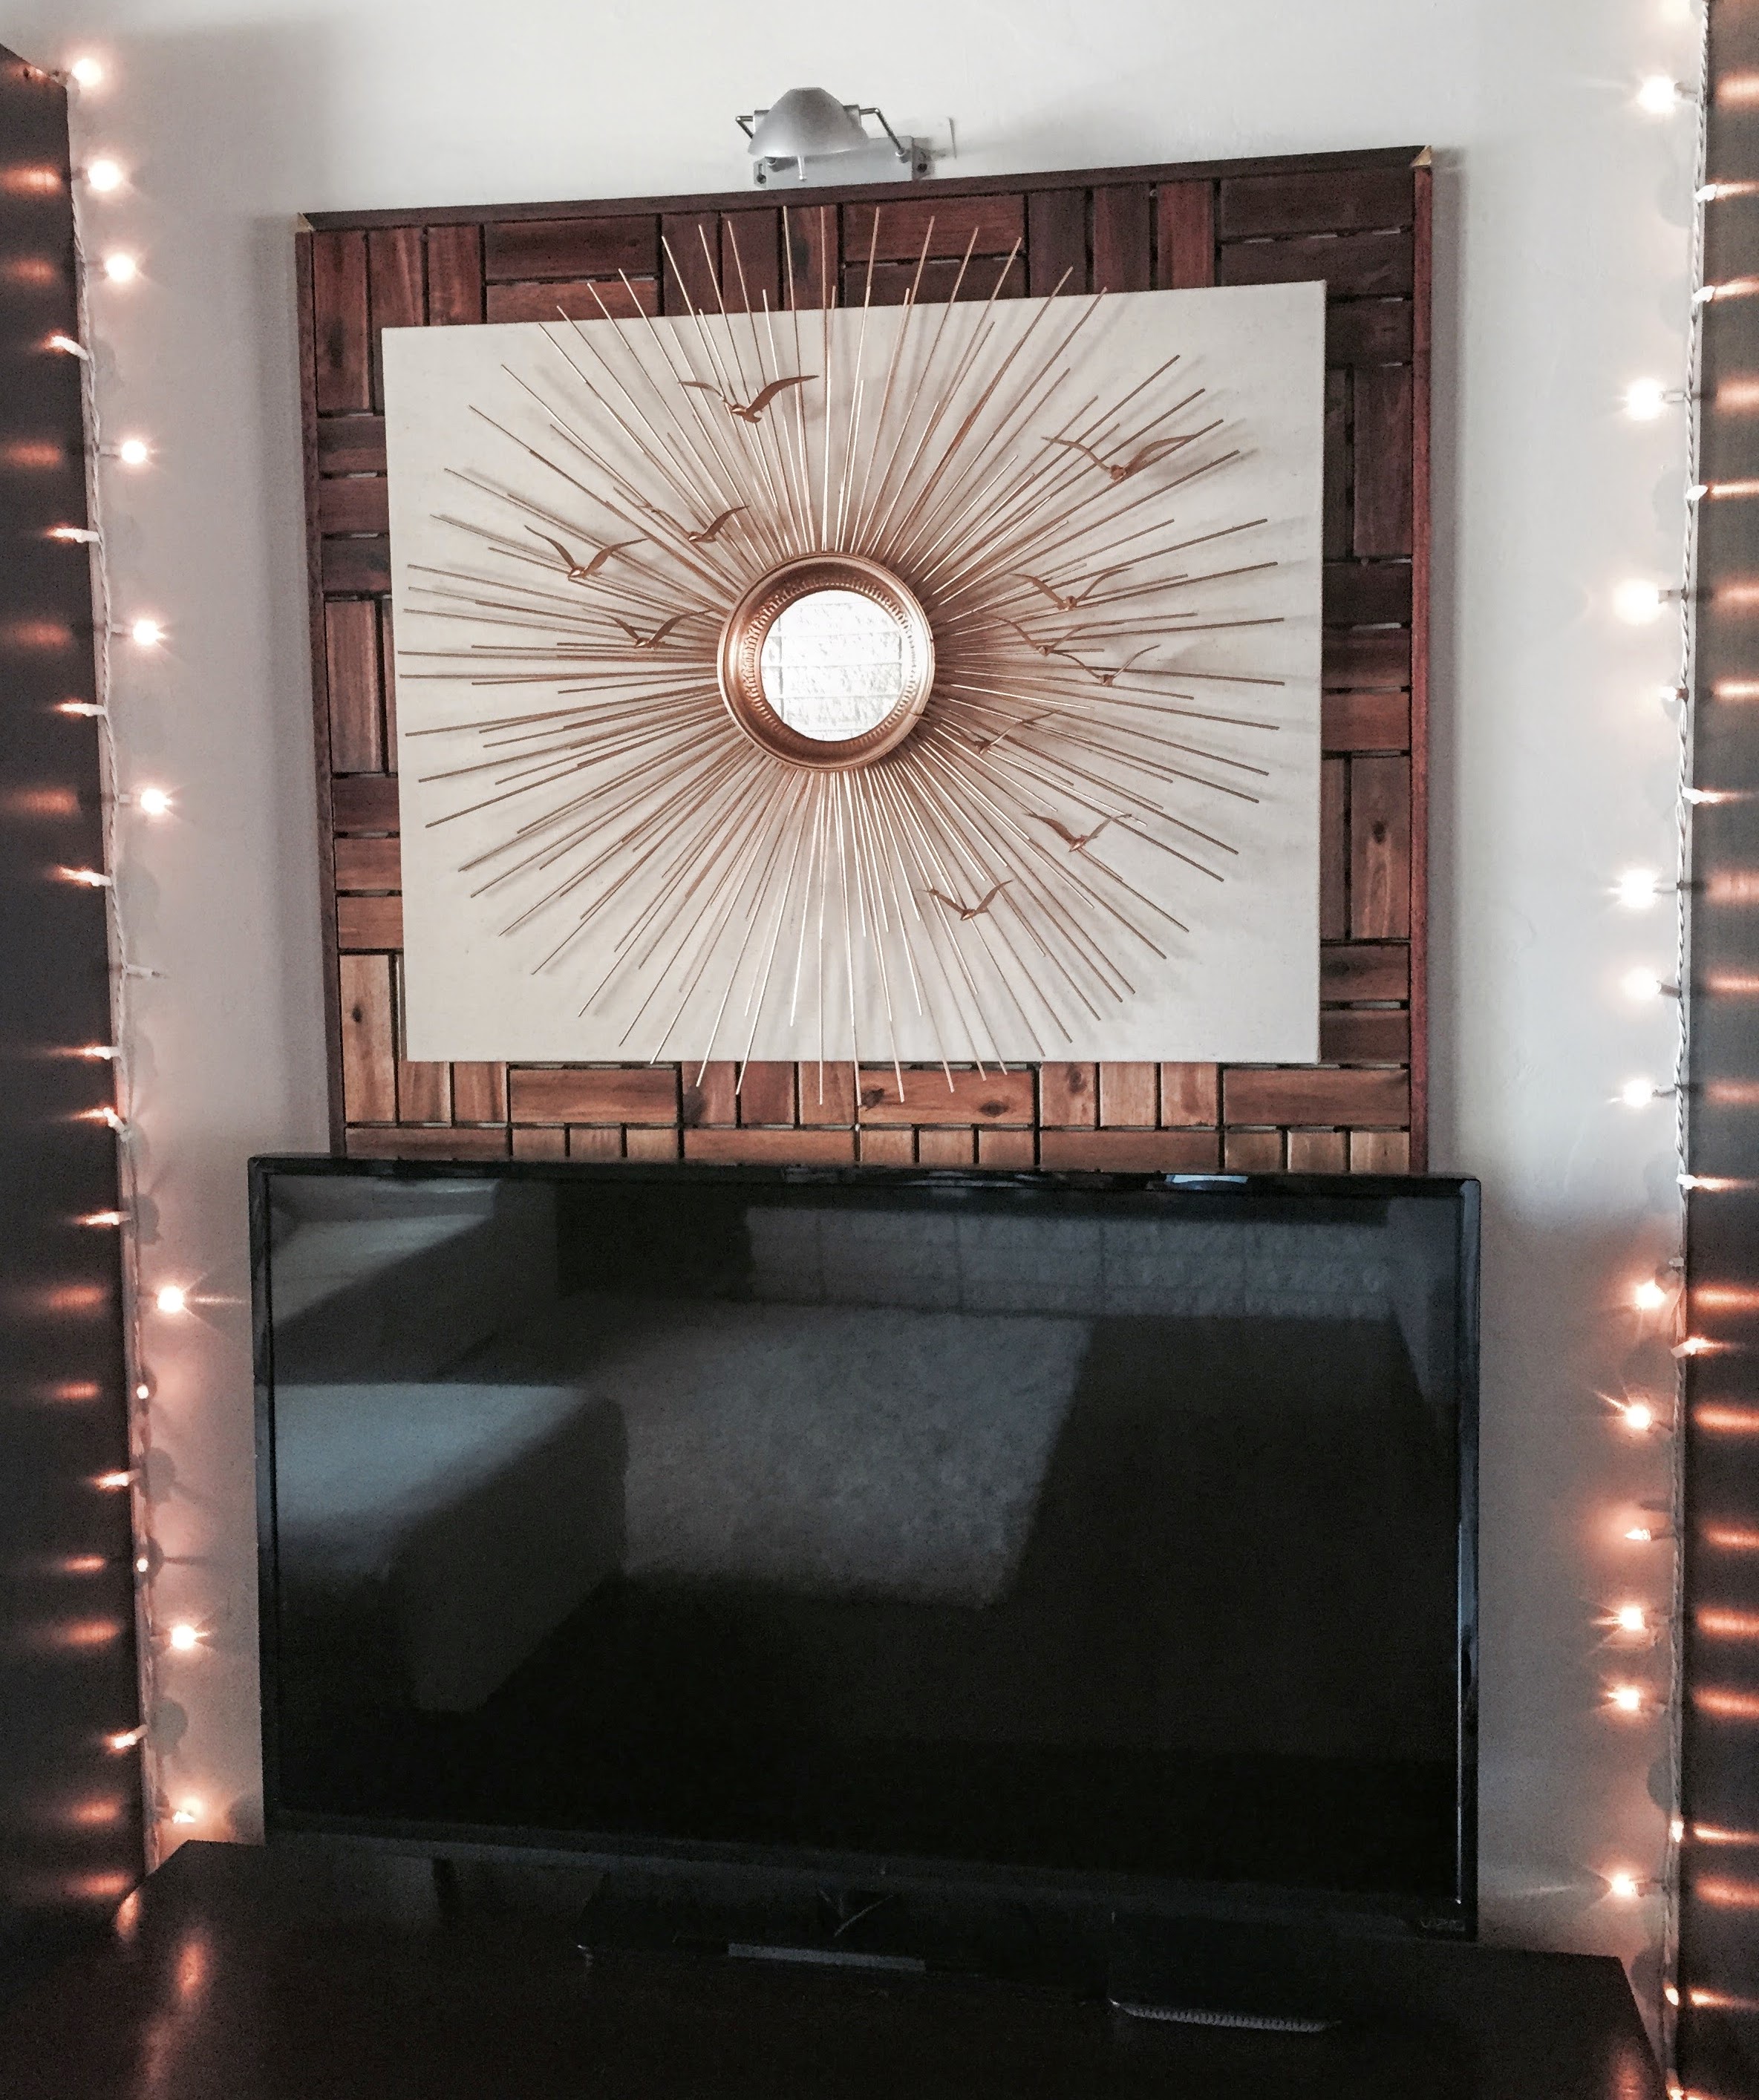
If you are not putting your sunburst right behind a television, you may want to buy a bigger canvas, that comes down further than the one in the above image (or perhaps, 2 smaller canvases placed very closely together). You can see in this image, that the canvas is a bit small for the wood backdrop and it’s not perfectly centered, because I have left space below it, for the TV.
You could obviously use this wood backdrop for any piece of art or any other installation that you’d like. Here is what I hung on it before the Sunburst went up:
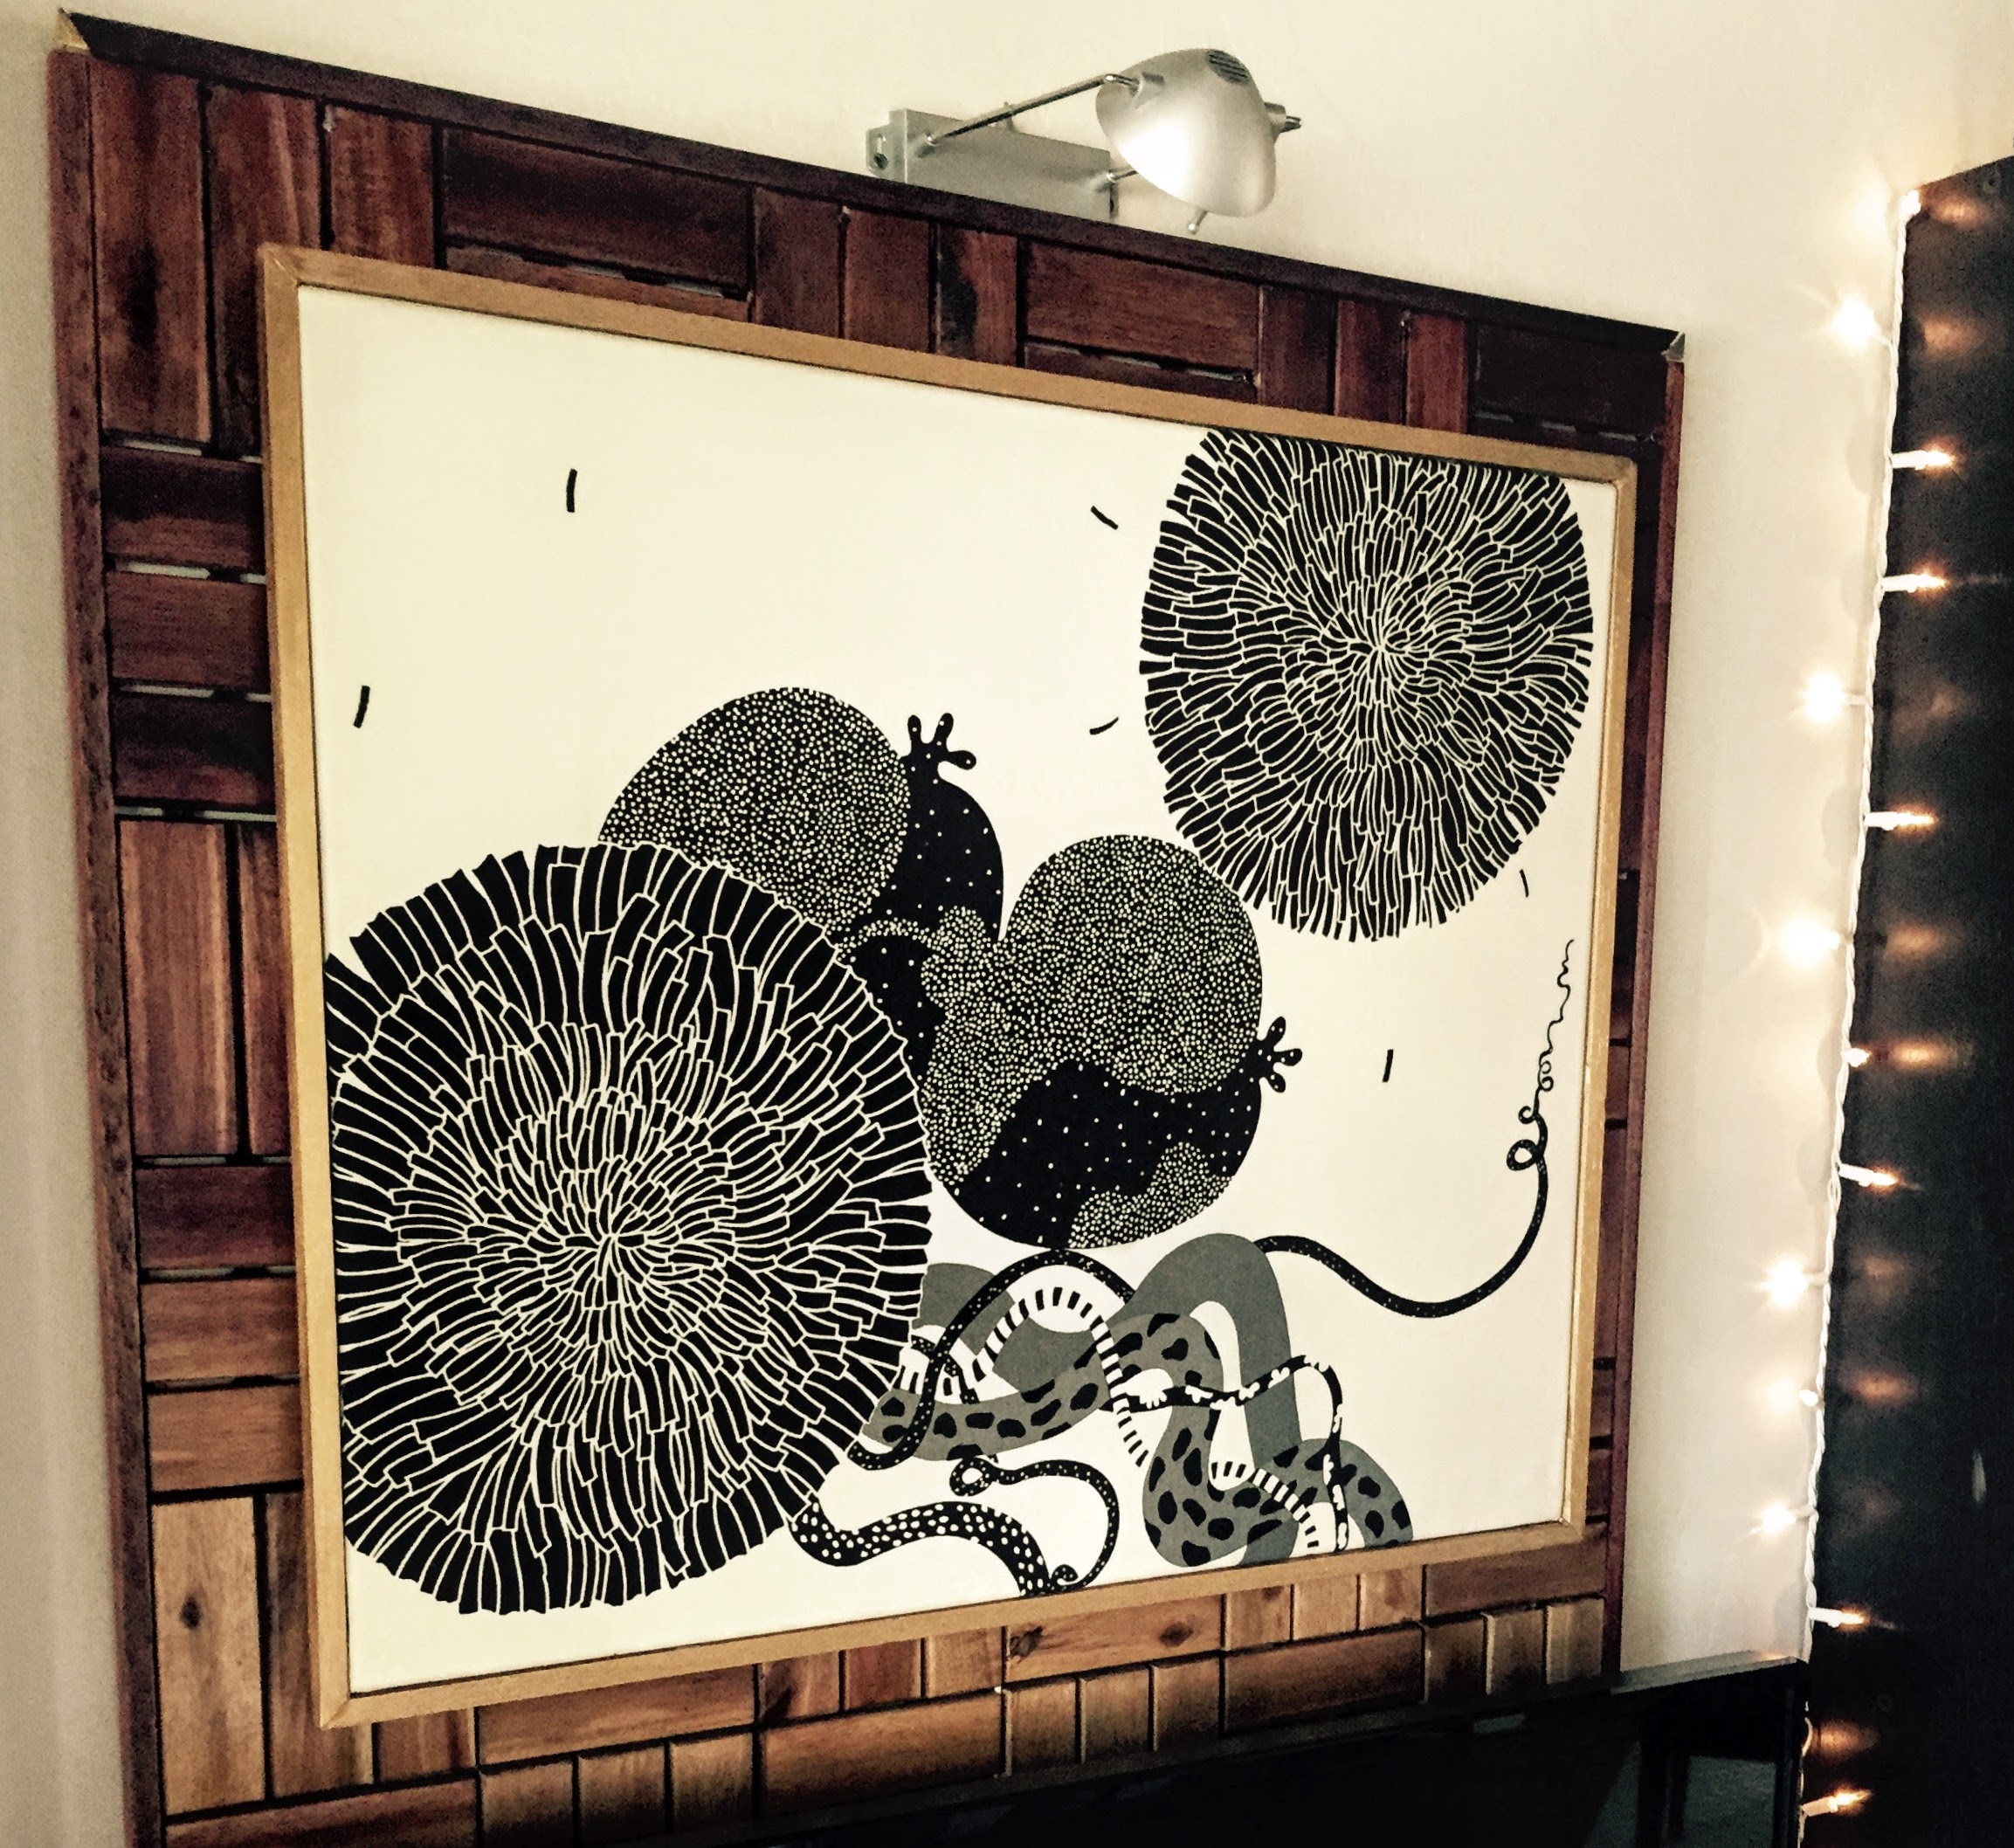
I really liked it- it was graphic and bold, and made a nice statement, without being overwhelming. I simply wrapped a thin canvas that I bought at Michael’s, with some IKEA fabric. Then, I made the balsa wood frame that you see around the edge. I painted the frame with the same 24K paint that I used on the sunburst. The look was very modern, while still maintaining a Mid Century vibe.
Anyway… let’s get building! Here is most of what you will need:
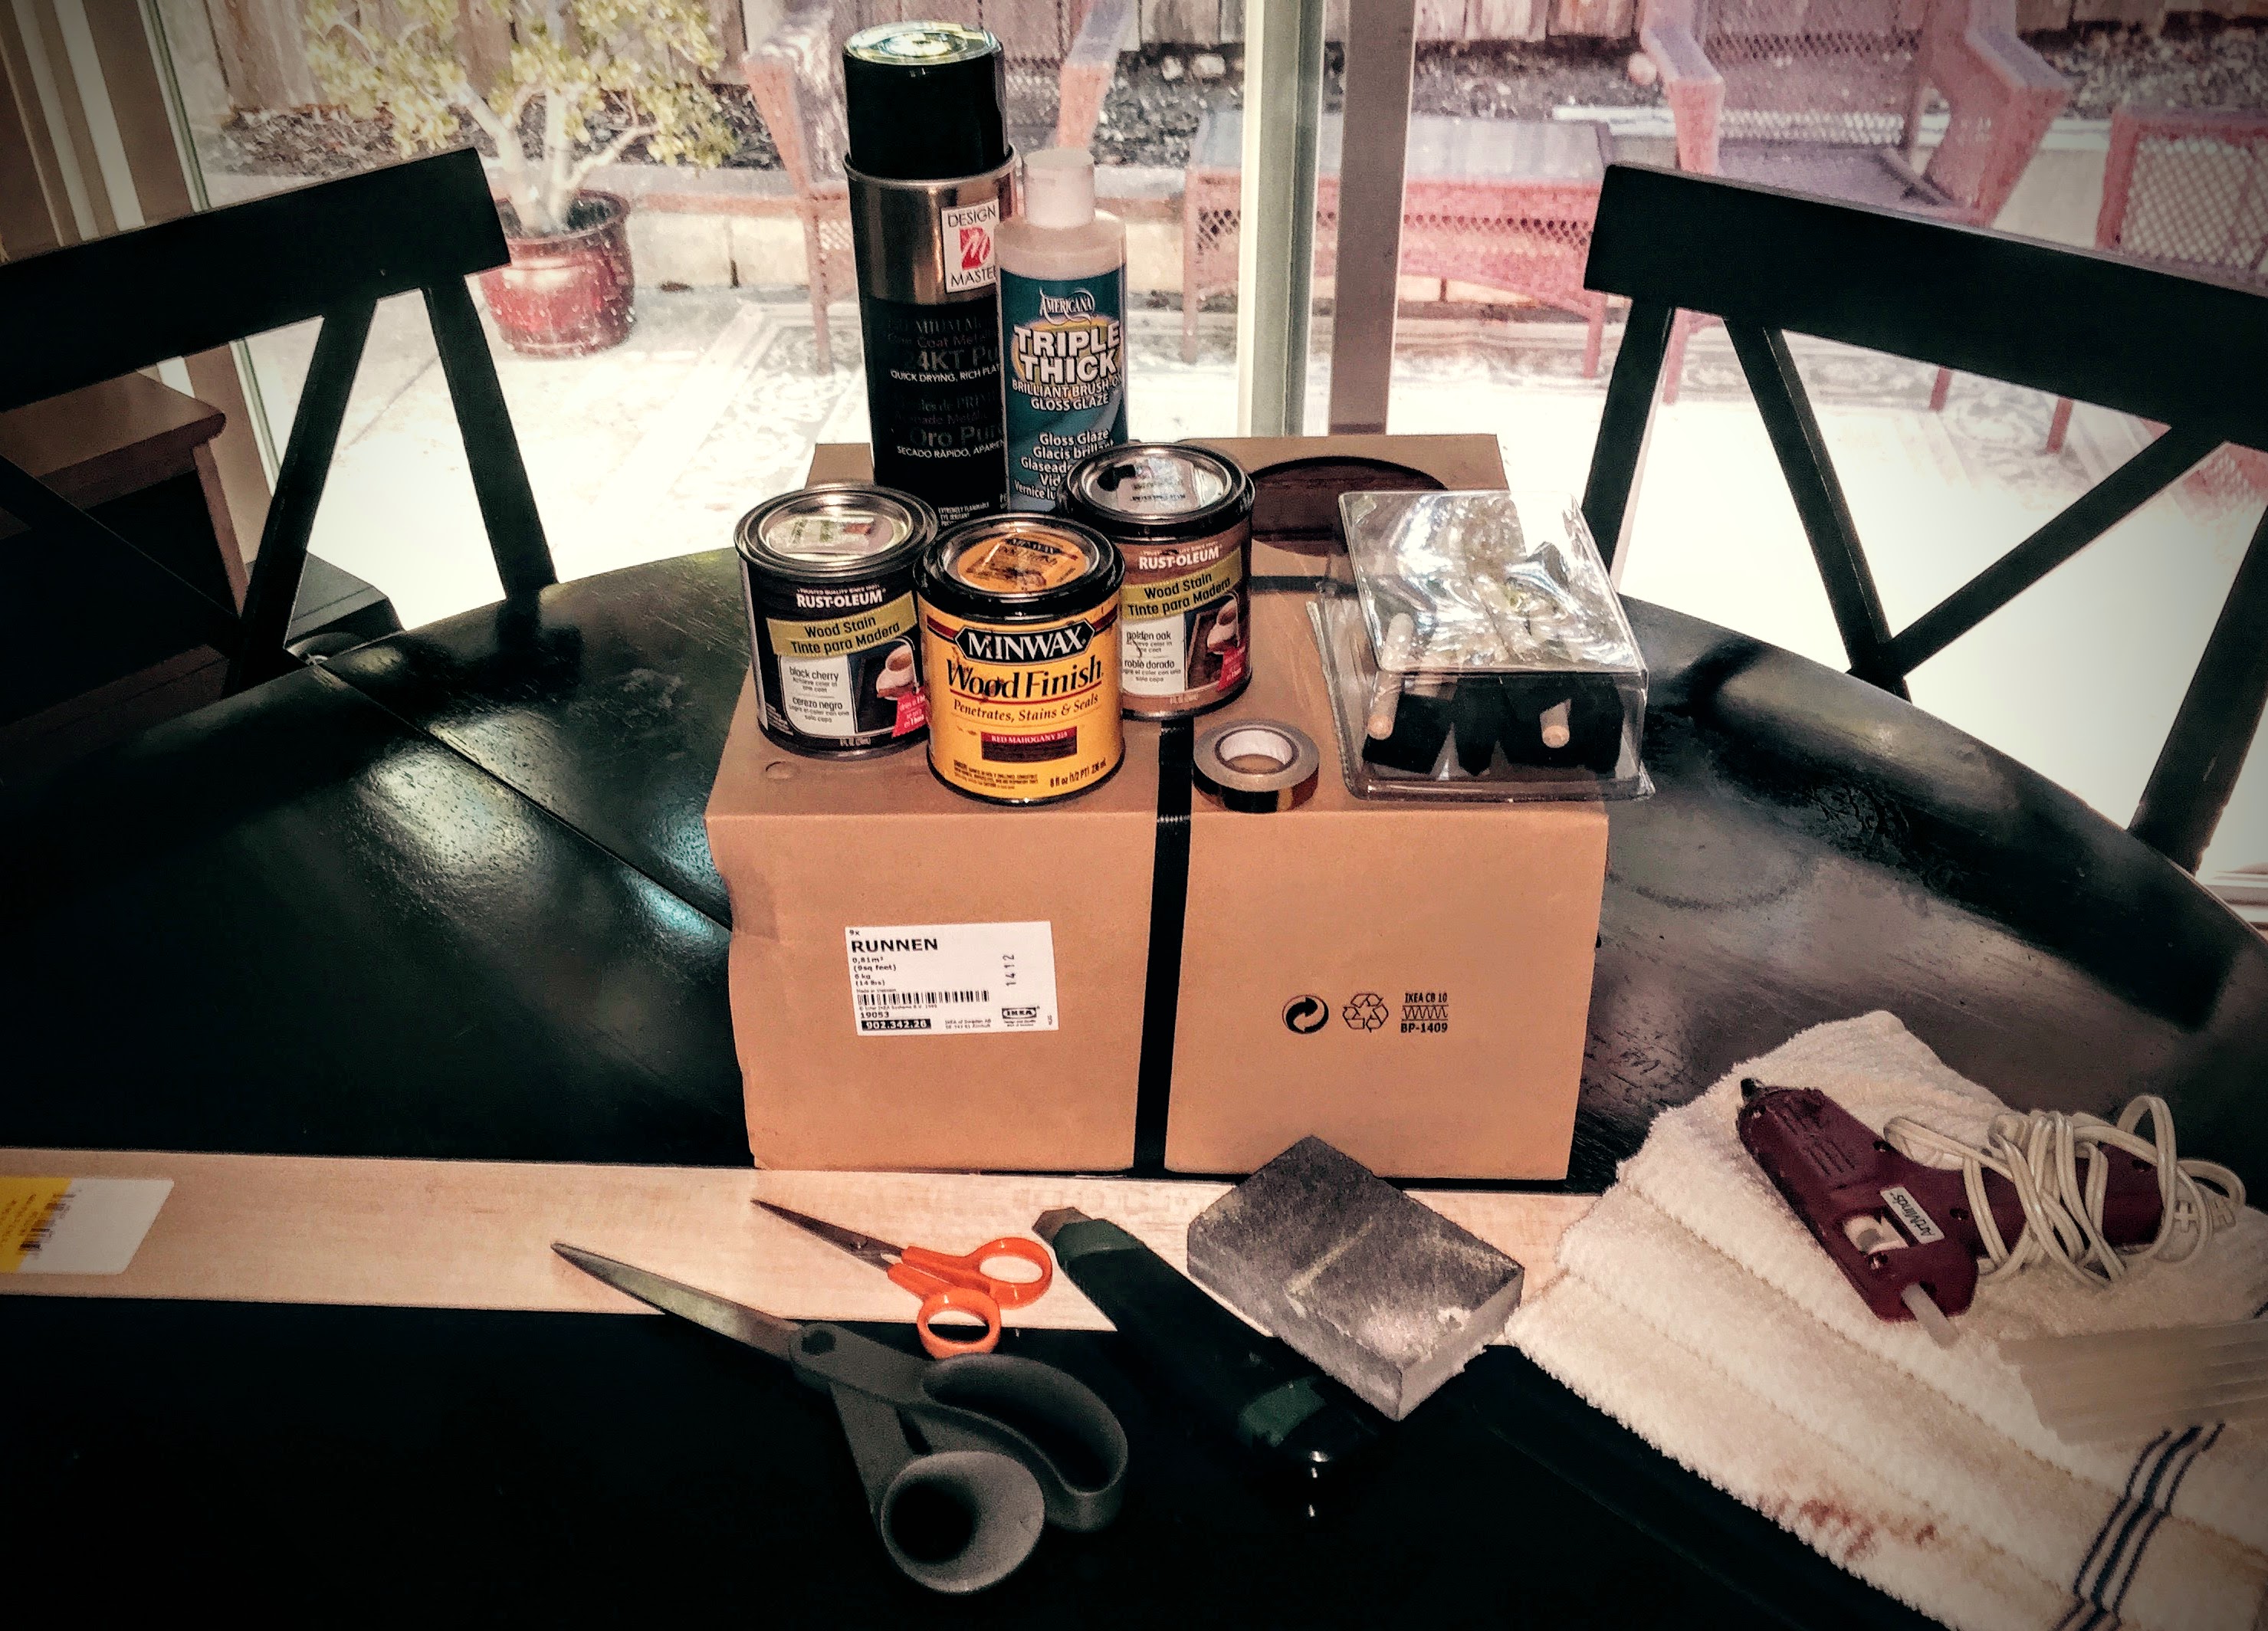
- 1 Set of IKEA snap-together wood deck flooring– $35.00/ 35.5″W x 35.5″H x 1″D wood square
- 4 pieces of thick balsa wood (it is 1/2″W x 1/2″H x 1/2″D and 36″ L– make sure you don’t get the shorter length on accident). This will be for the frame you see around the wood and you can find it at Michael’s.
- 1 piece of thin 1/16″D x 3″W x 36″L balsa wood (from Michael’s) for the gold corners of the frame
- 24K Gold Paint (same as we used for the Sunburst- also for the gold corners)
- Gold Washi Tape (also for the gold corners– it’s by Recollections in the embellishments section at Michael’s- it’s called Foil Tape and it comes 3 to a pack with 1 gold, 1 copper, and 1 silver)
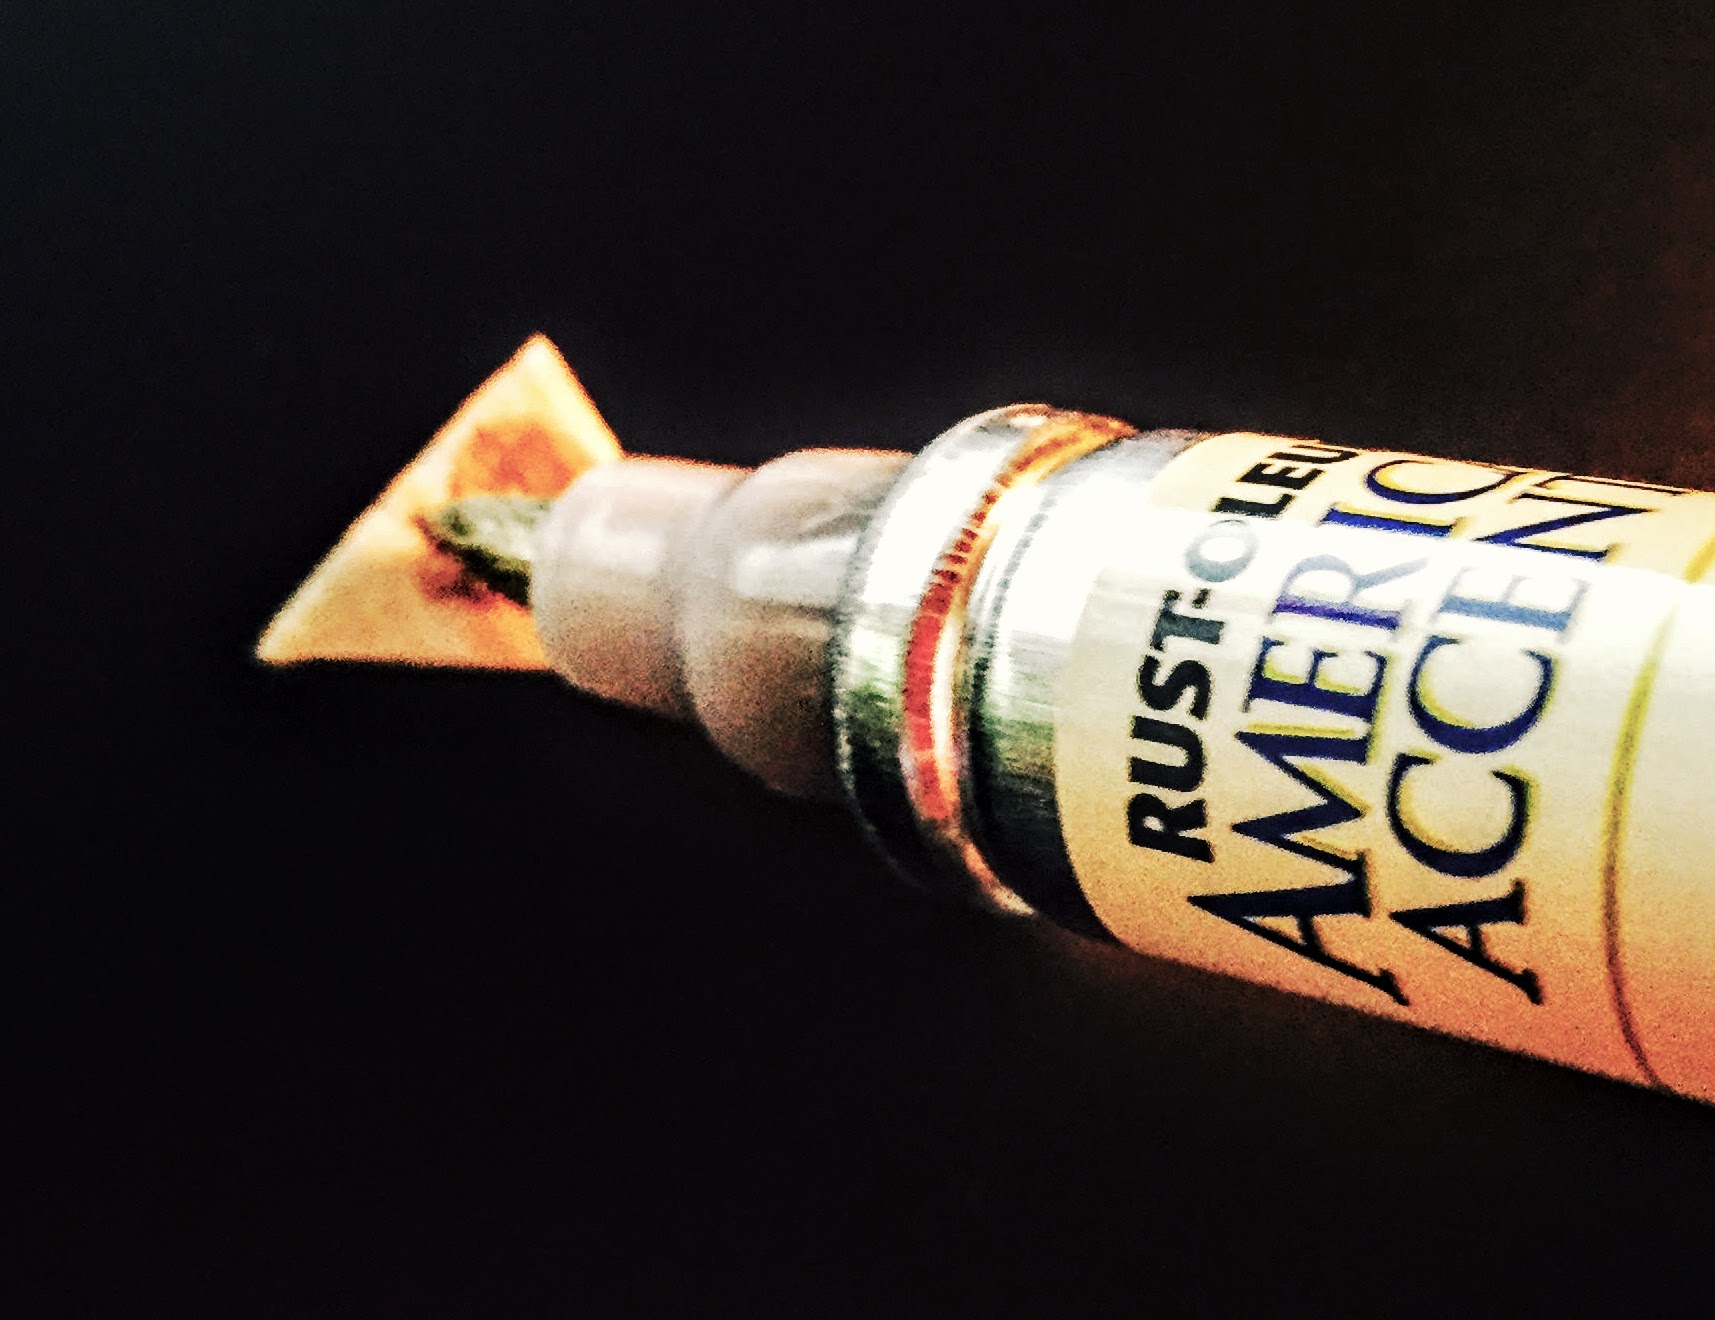
- Rustoleum American Accents Gold Leafing Pen– for the gold corners
- Rustoleum or Minwax wood finish- Here is where you can choose your own color theme- I actually layered colors. I used some Minwax Red Mahogany (this one is quite dark, so if you are not sure about how dark you want it, or how red you want it, you might want to start with something lighter), I also used Rustoleum Traditional Cherry, which is a much lighter red tone. I then layered in Rustoleum Golden Oak which balanced some of that red tone.
- Rustoleum High Gloss Lacquer- I don’t have any of this on hand at the moment, so I wasn’t able to show it, but it will be right by the wood finish at Michael’s. Just be aware of whether you want the satin, semi-gloss, or gloss finish. I prefer the high gloss, because it catches the light nicely, and truthfully, it is not THAT glossy- I actually wish it was a little glossier! In the picture above, I show Triple Thick, which is also a high gloss lacquer that works nicely.
- Sharp scissors -Fiskars Razor Edged Large Scissors bought at JoAnne’s work great especially for cutting the thick balsa wood; Fiskars Fine-Tip little orange scissors also work really well, especially for the finer details like the gold corners (both can be seen in image above)
- Xacto Knife
- Small Black Sponge Paintbrushes (from Michael’s- they come about 10 to a pack for something like $4.99)
- Sandpaper block or sandpaper
- Hot glue gun and glue sticks
- Soft cloths- 3 or 4 will be necessary because you need to wipe the stain off as you go
- 1 1/4″L nail with a 1/4″ head
* Just a quick note to say you should read the whole post before you go buy supplies. There are a few things to consider about color, sanding, etc., further on in the post- thanks!
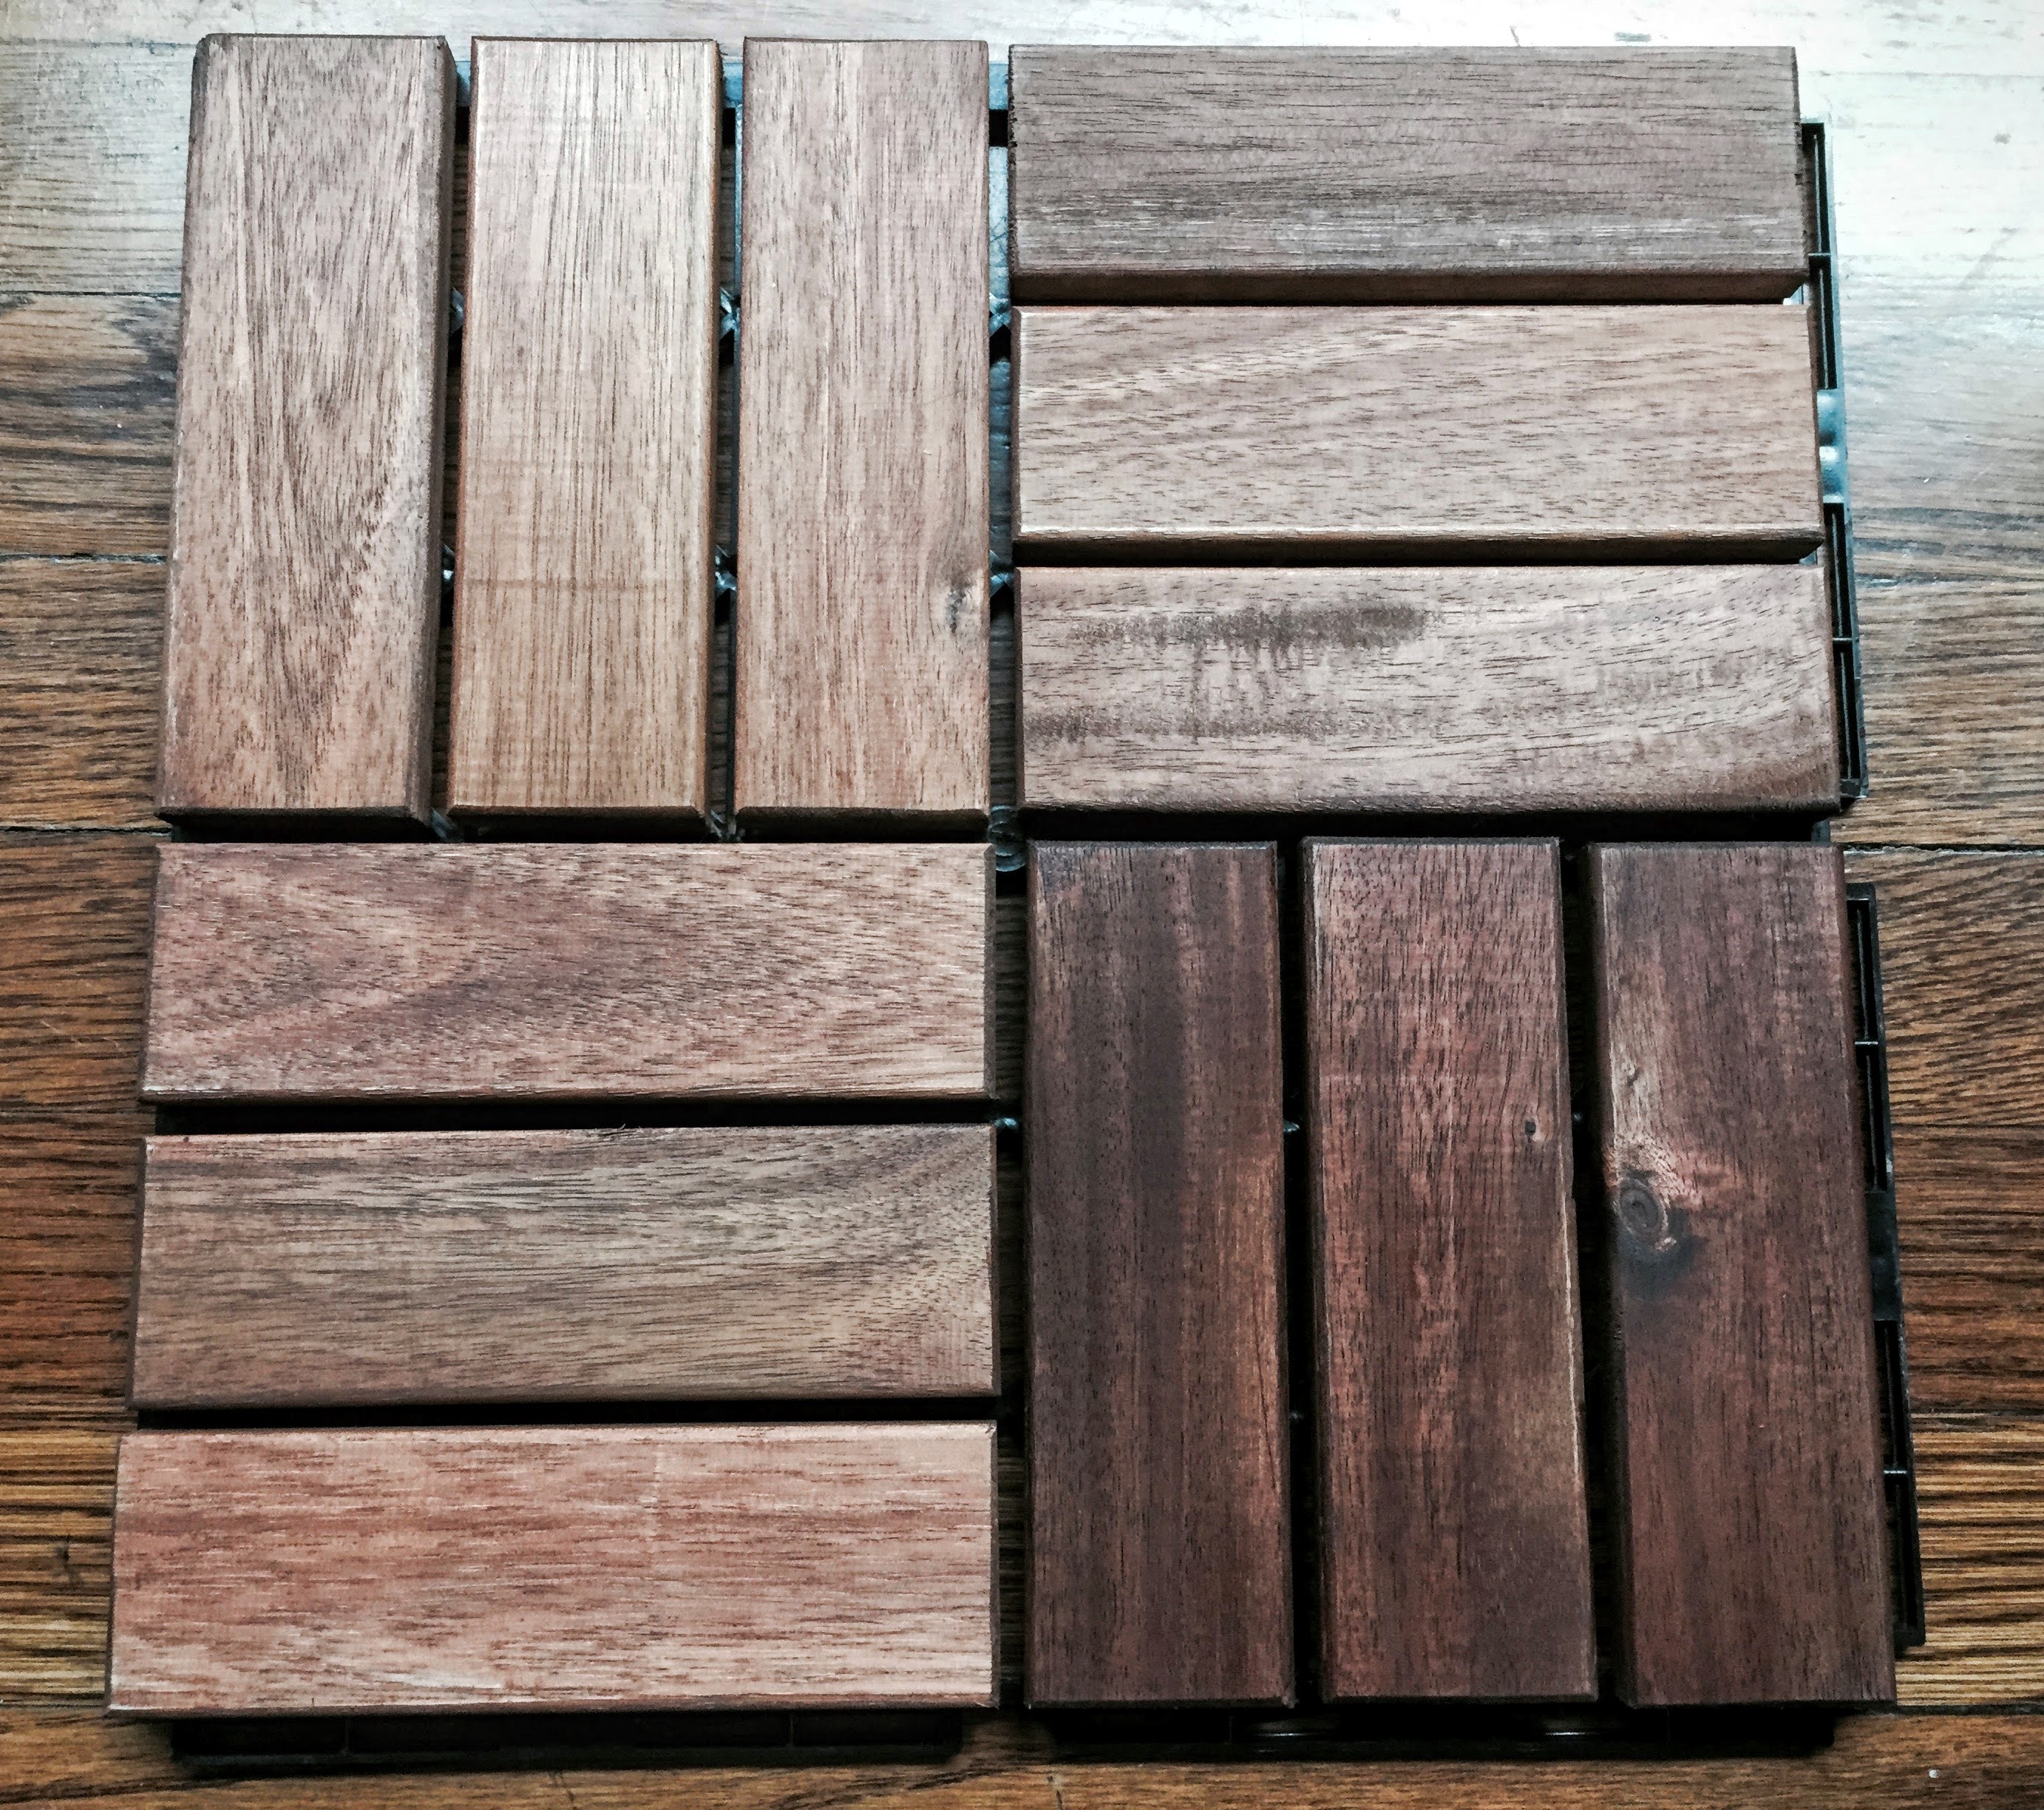
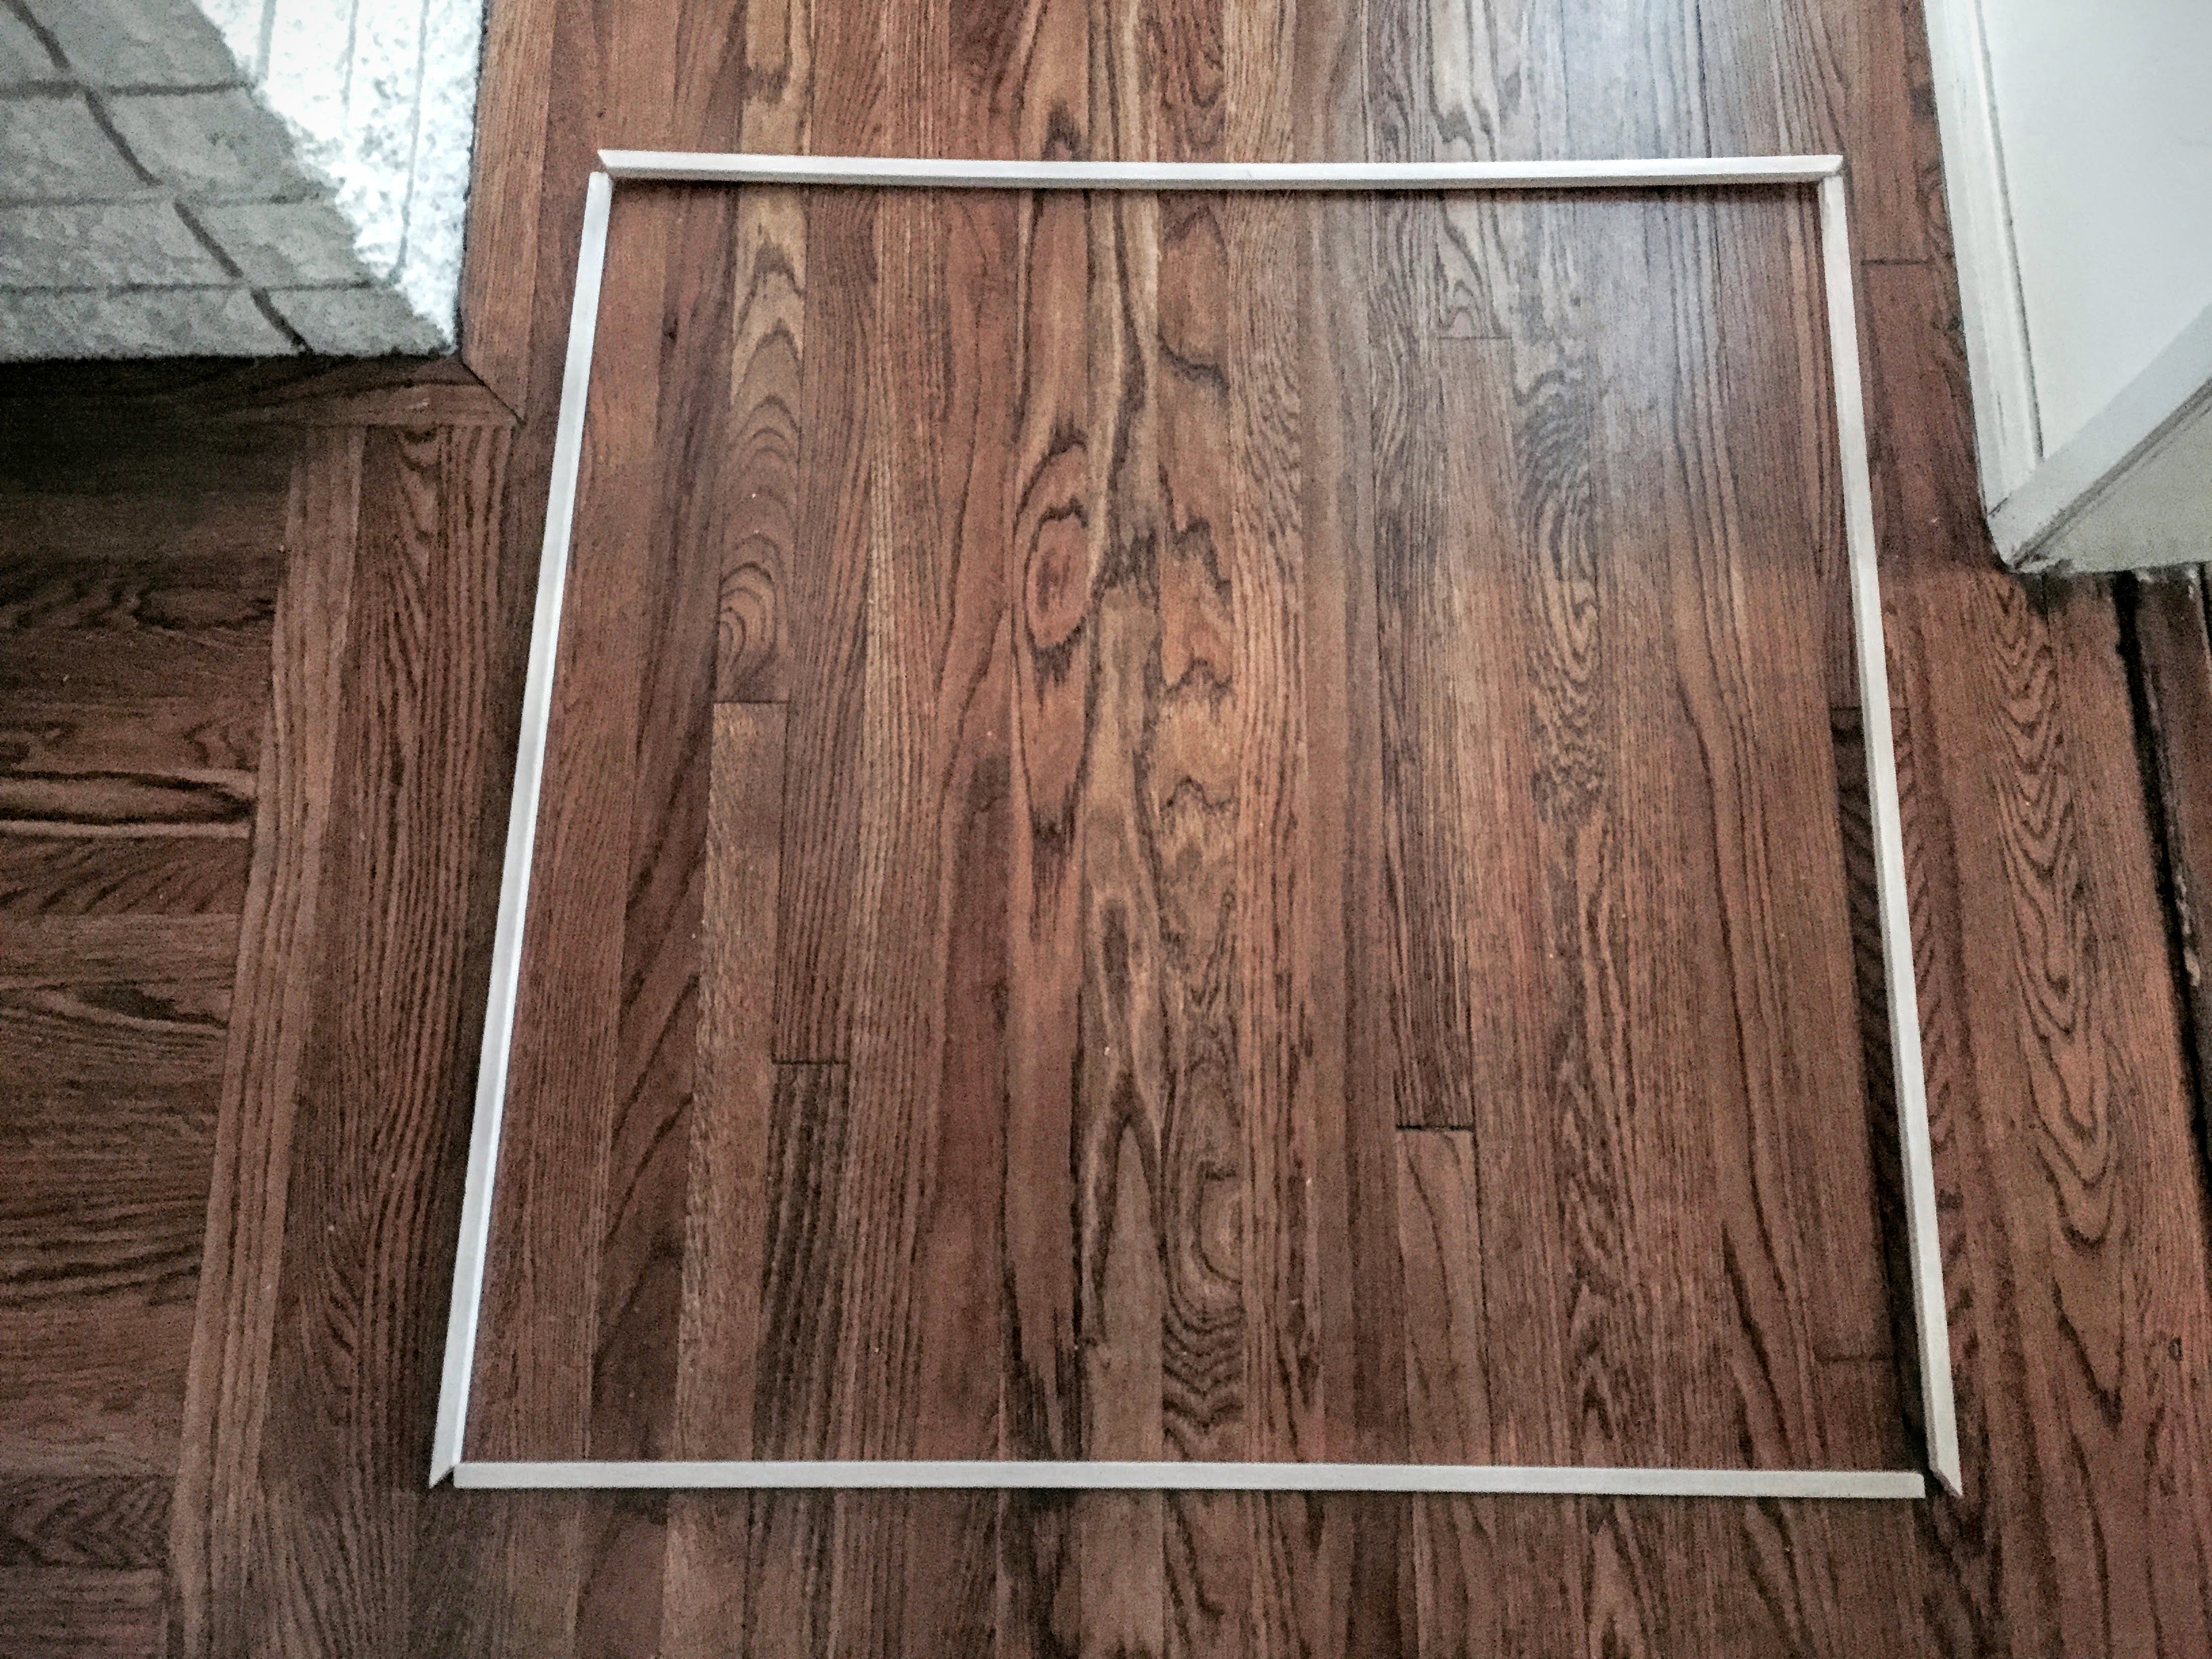
The first step, will be to get the wood deck flooring out of its packaging, and start snapping the pieces together in the configuration you want:
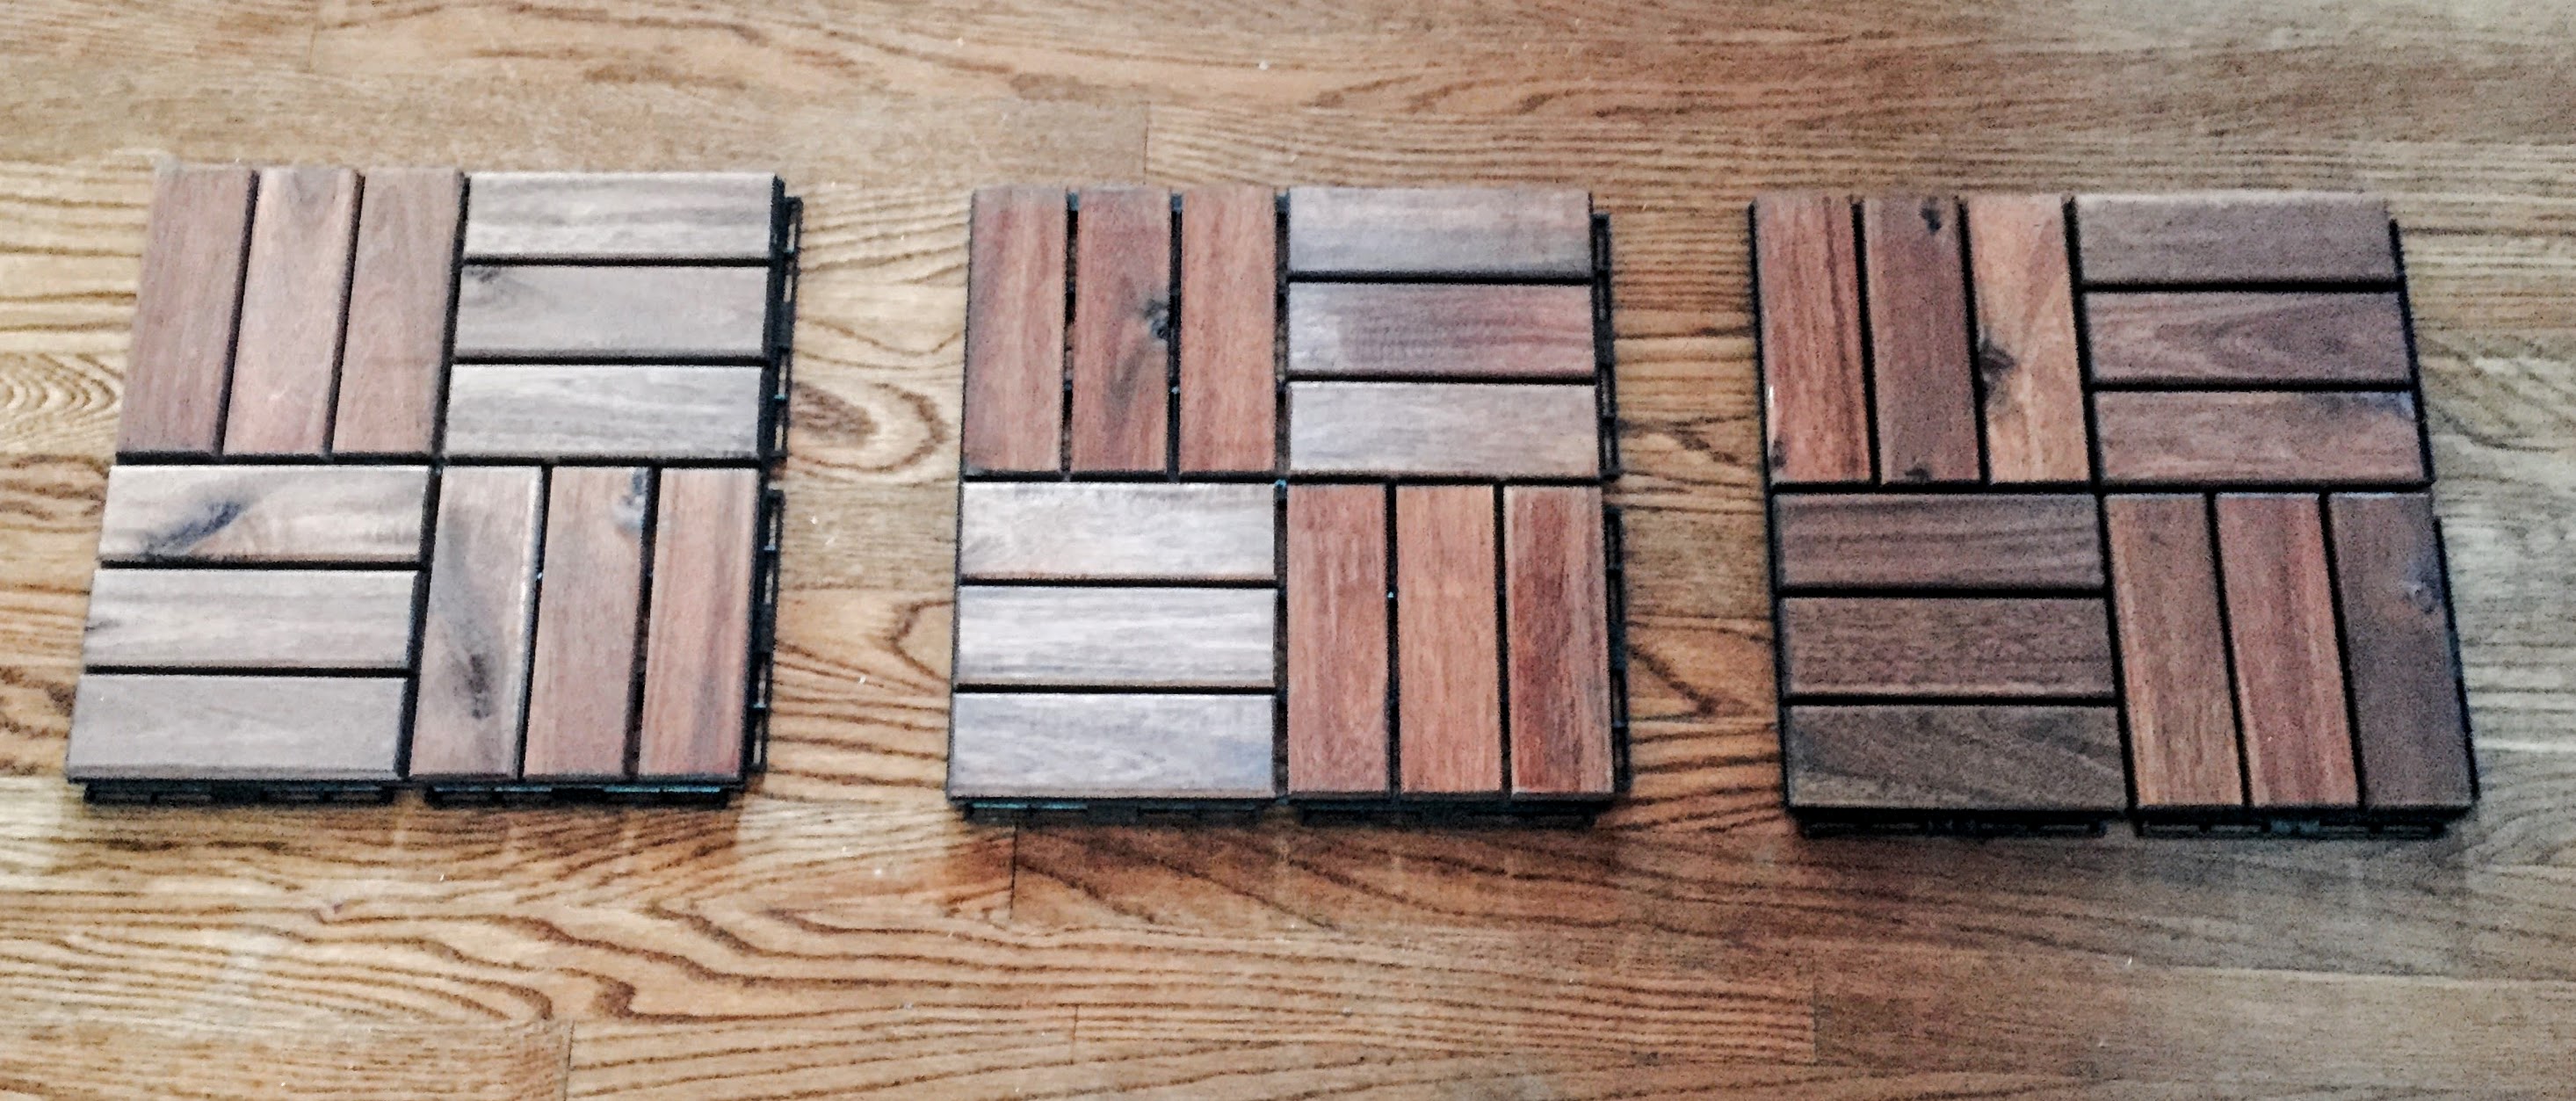
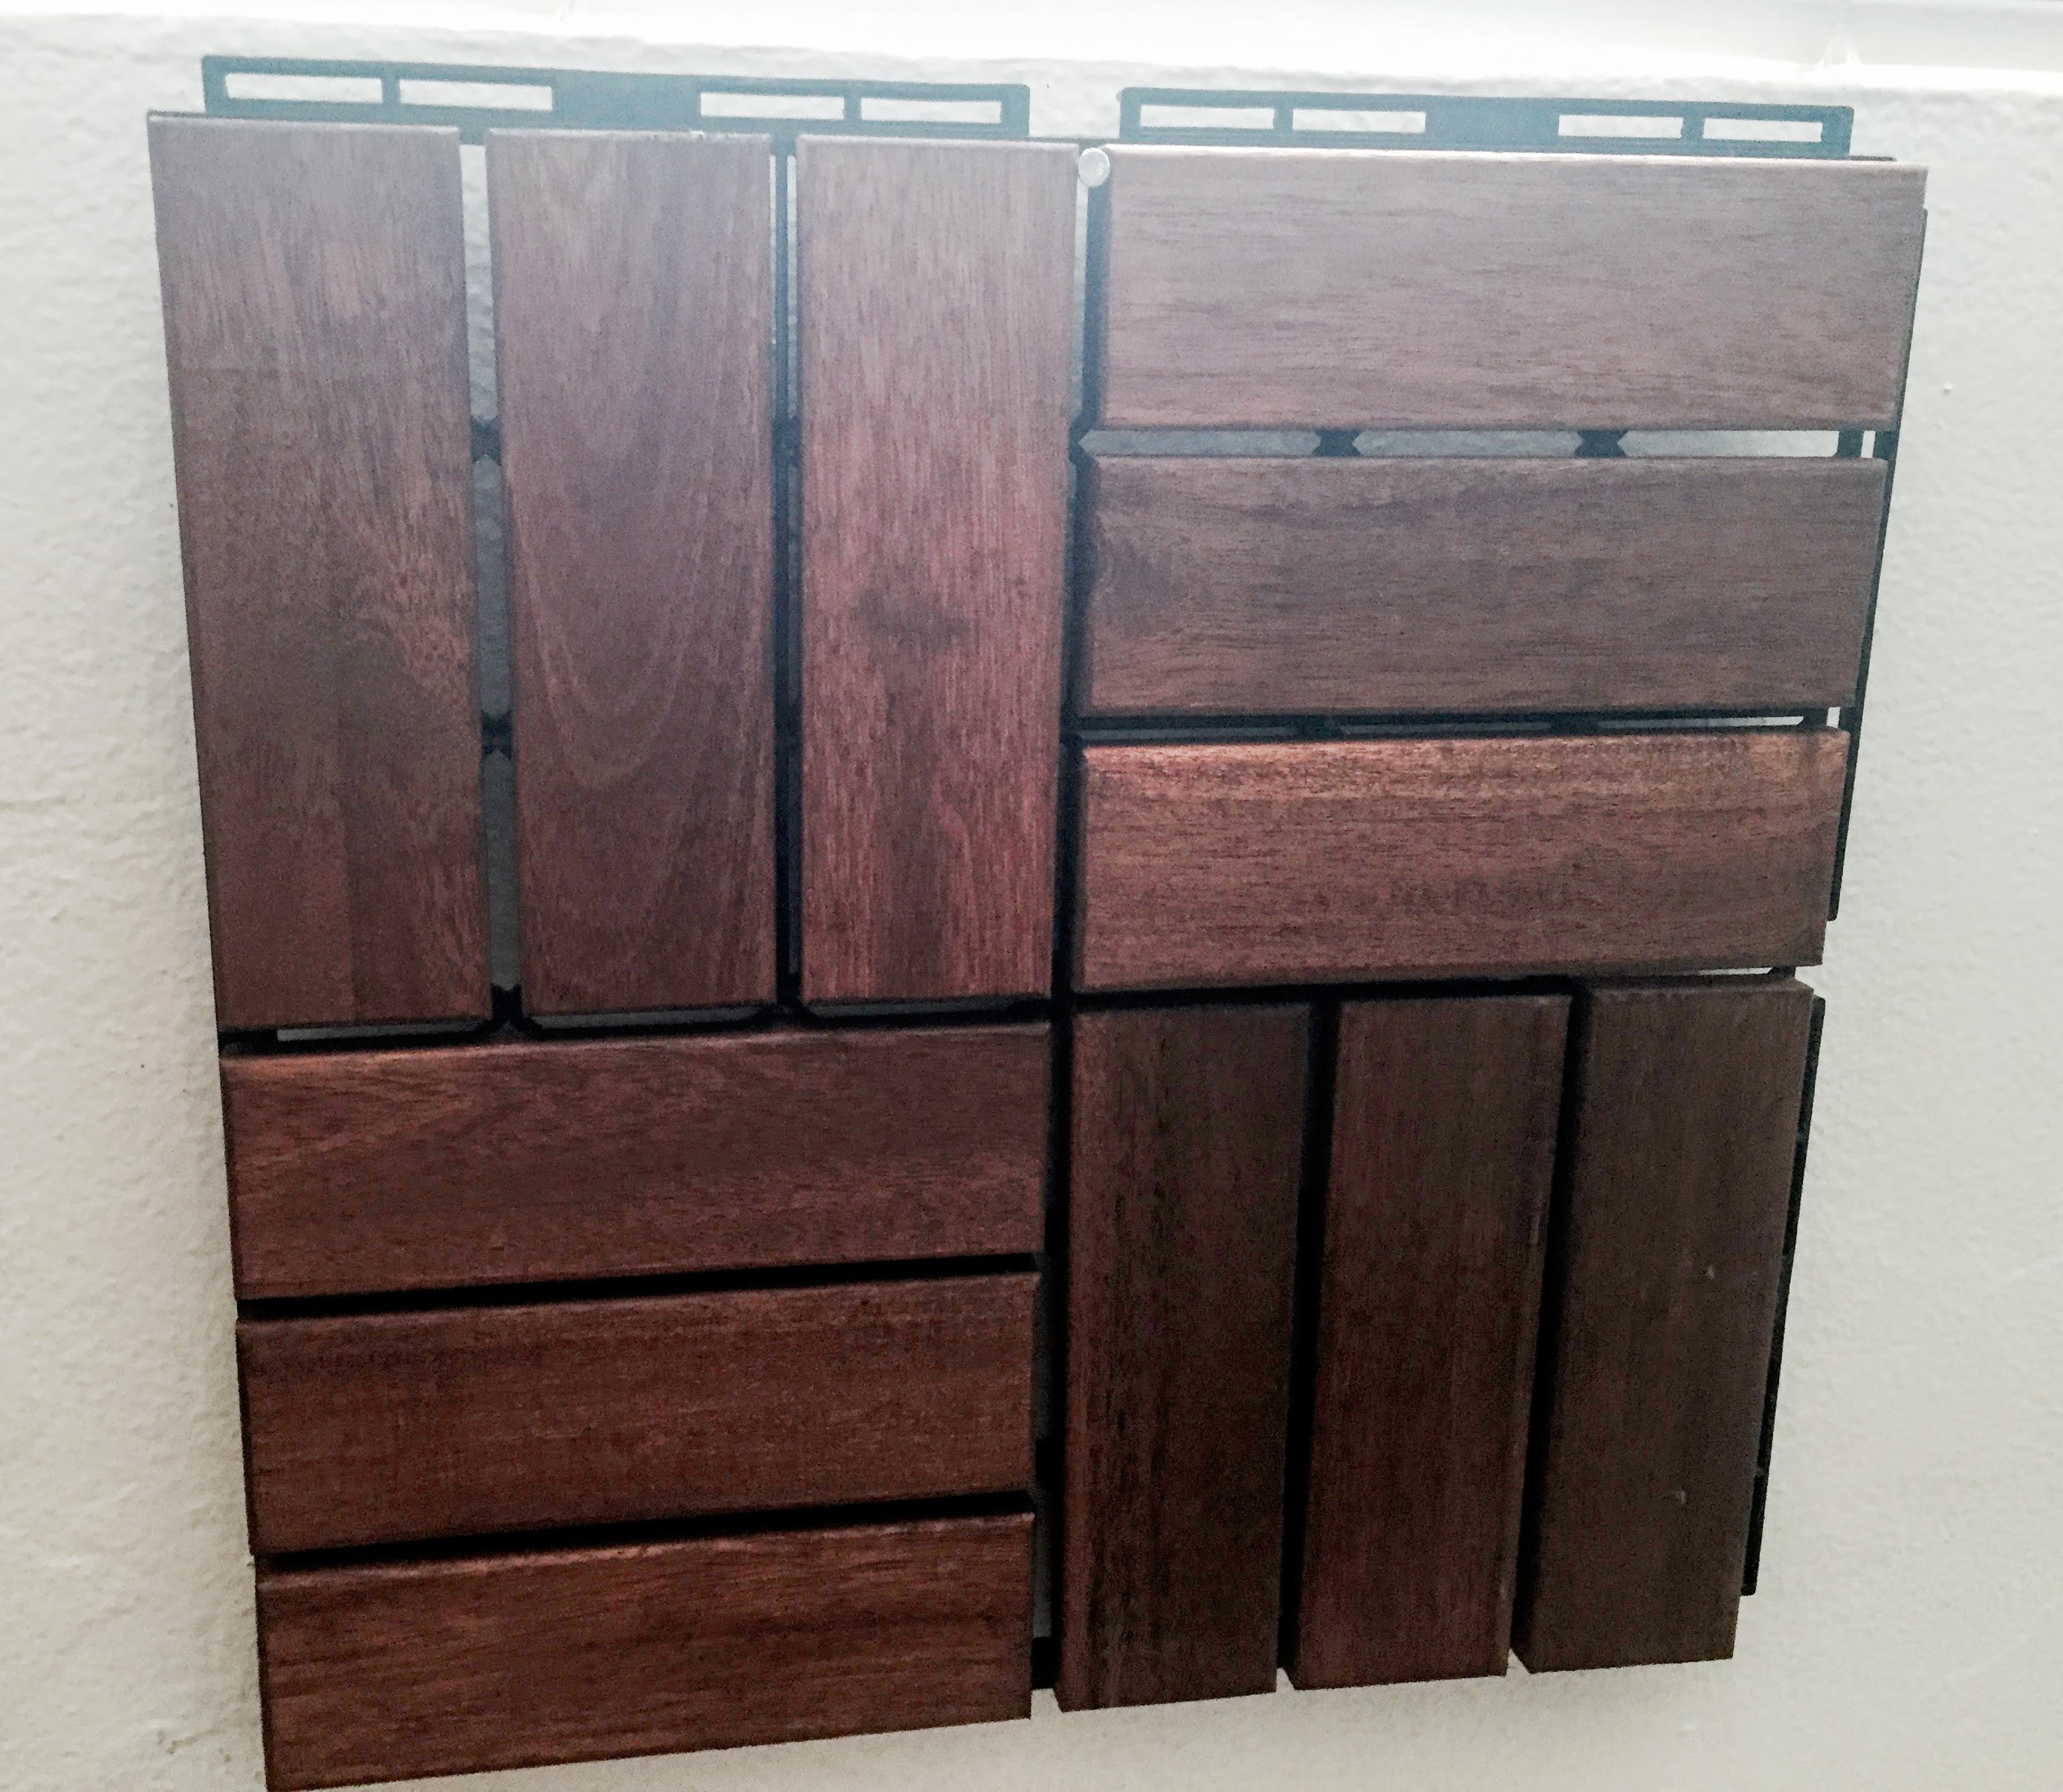
If you are doing the configuration that I did, you can start by snapping 3 units together. I always lay it out on the floor first, so that I don’t get disoriented when I go to hammer it into the wall. It’s pretty self explanatory and if you run into any confusion, you can follow the IKEA instructions. At this point, once they are all connected together, you will have black snaps sticking out of 2 sides of what will look like a long rectangle:
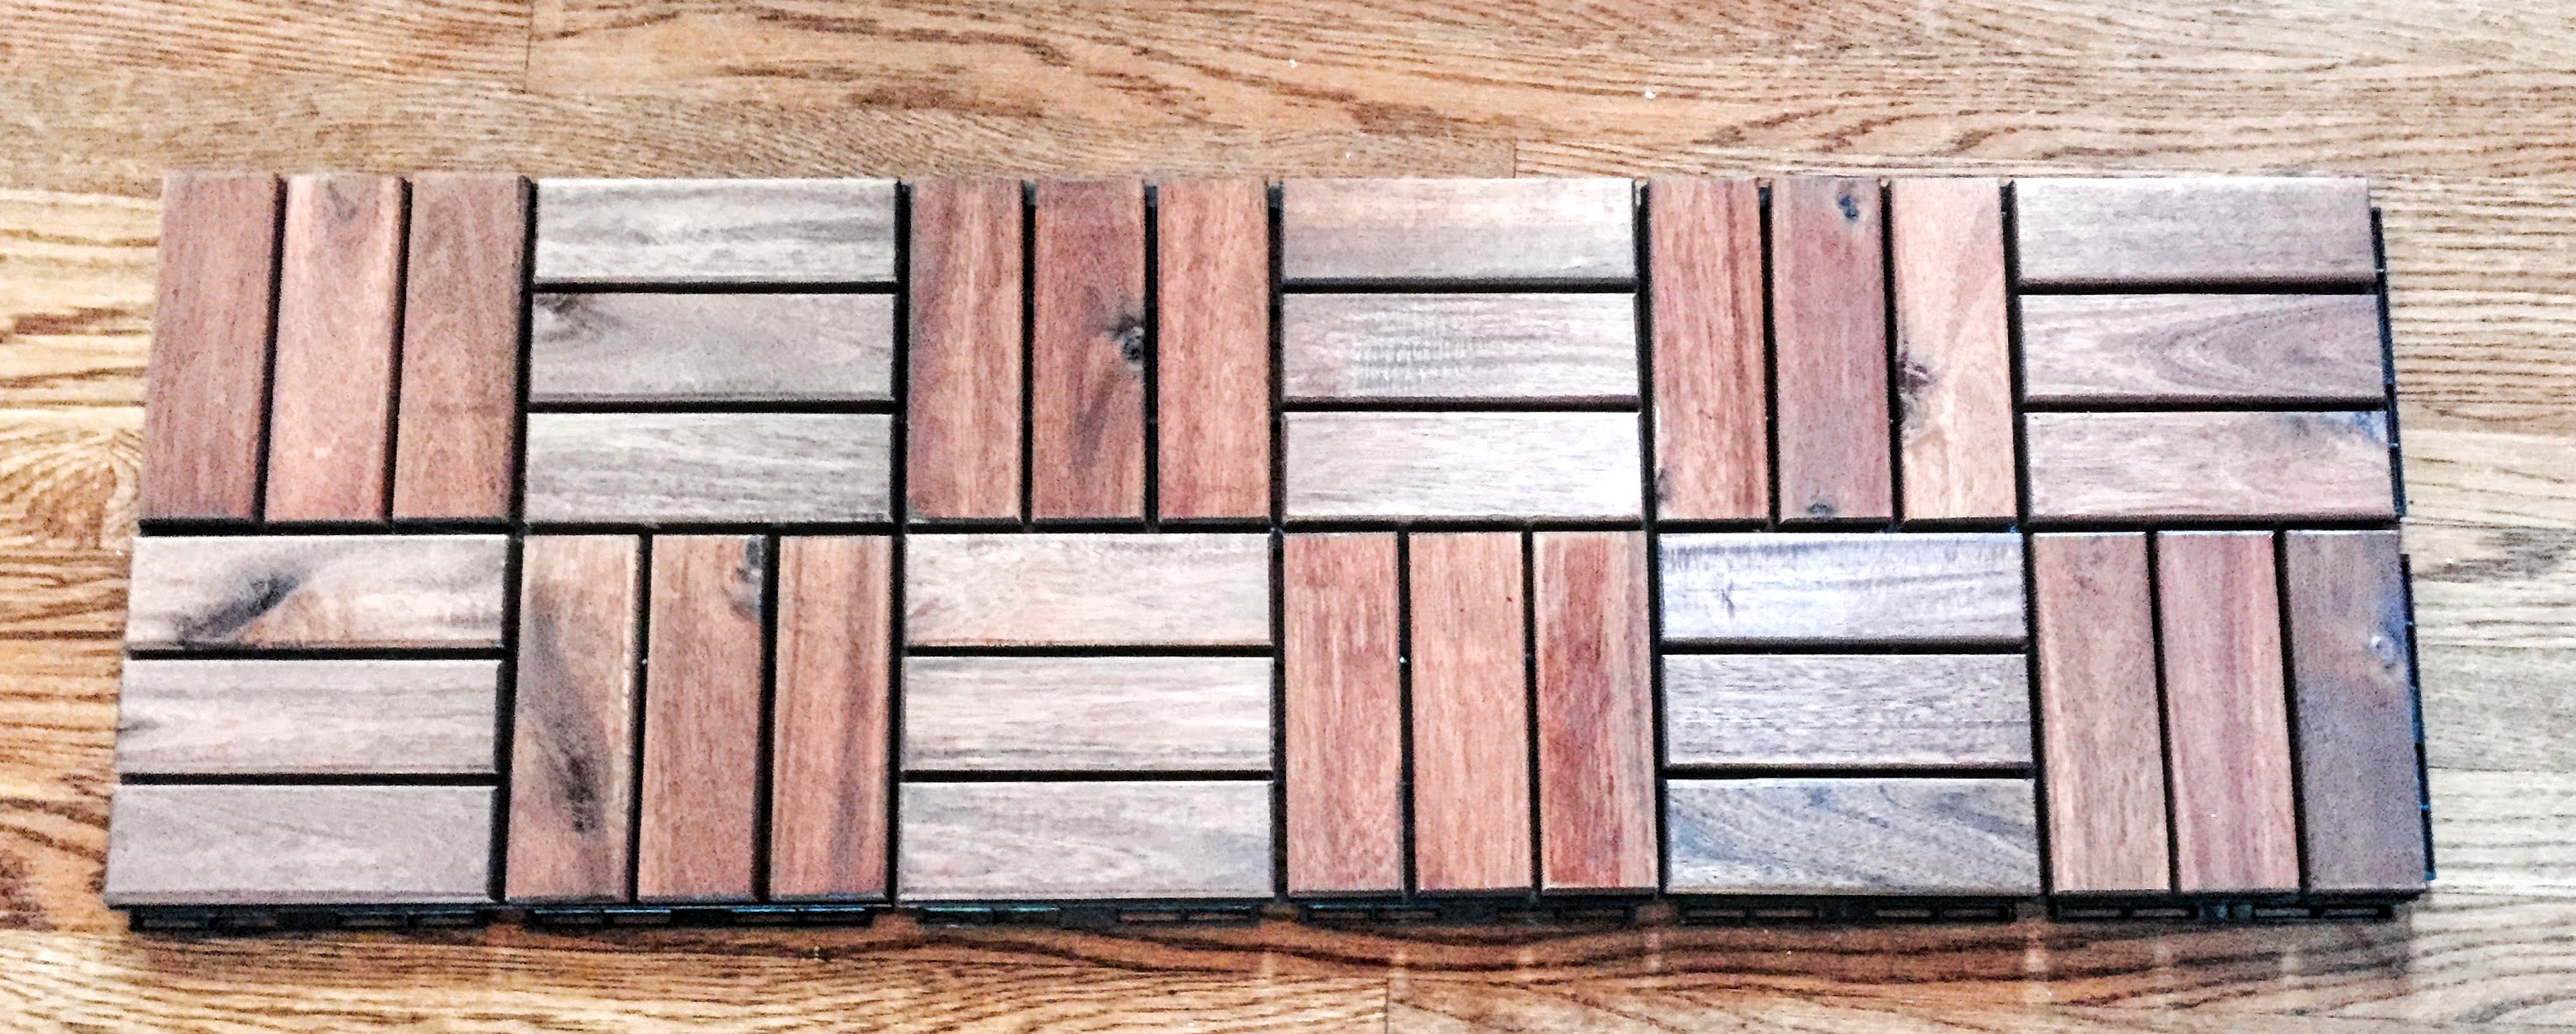
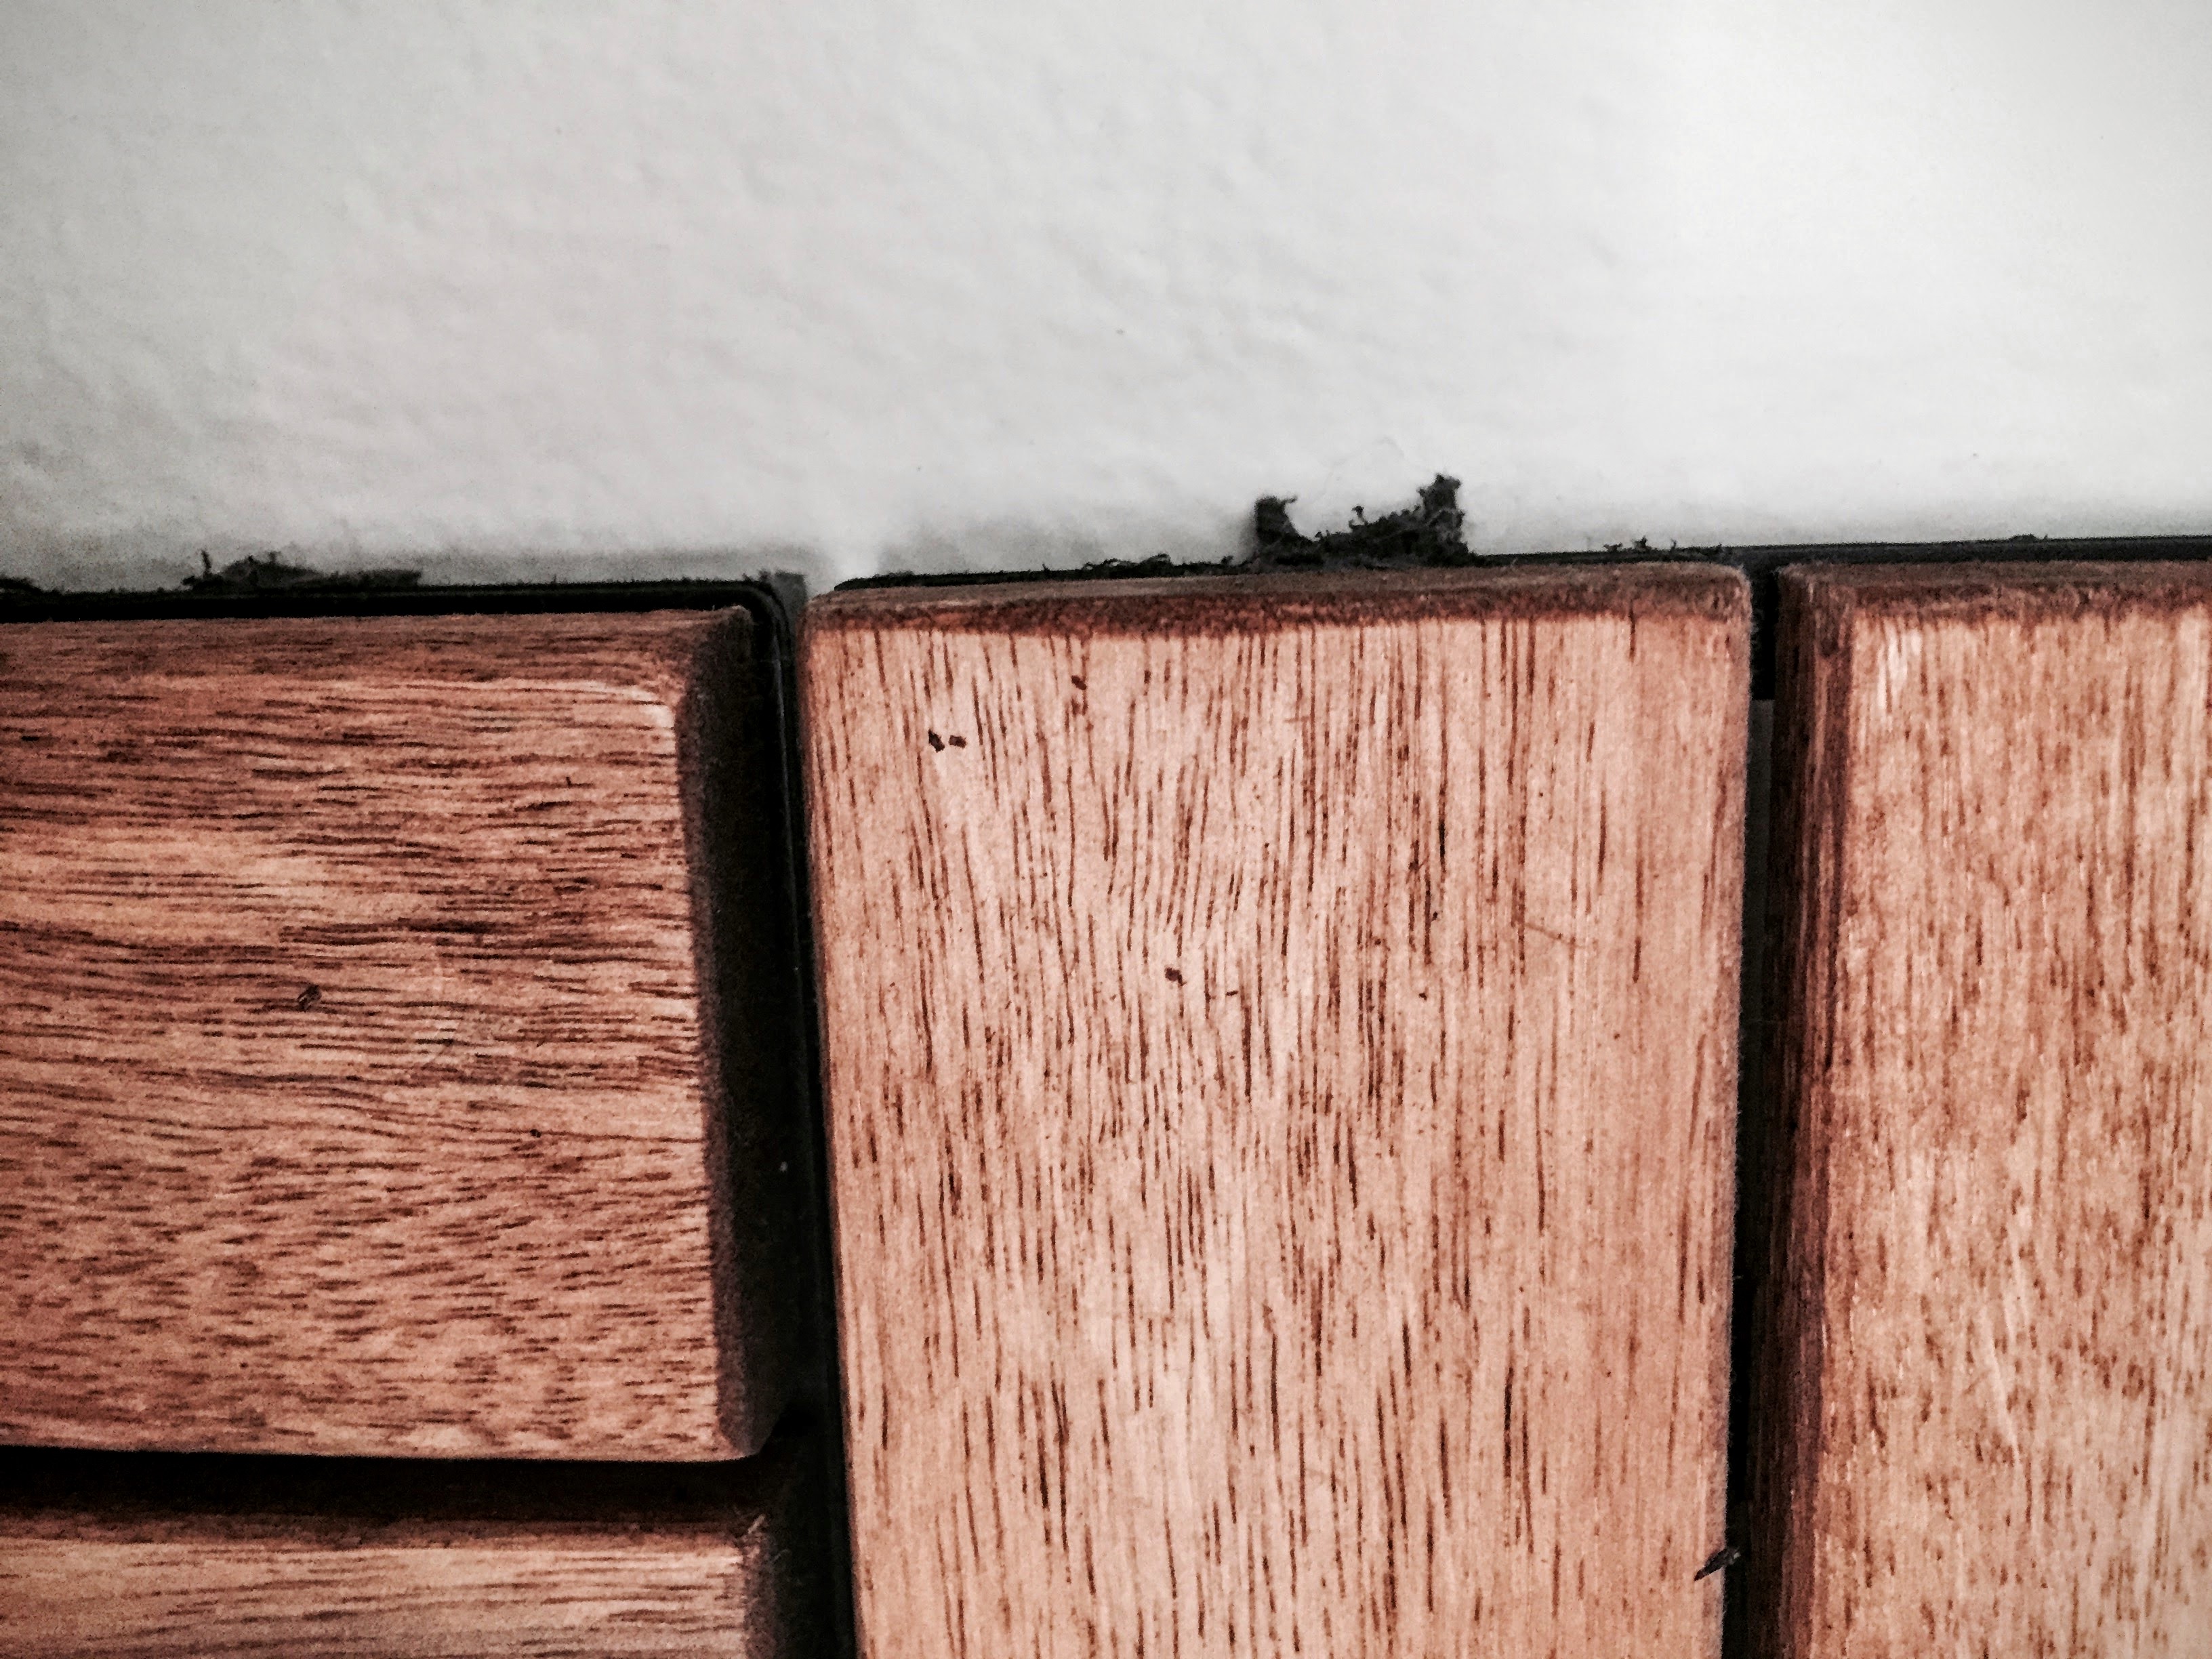
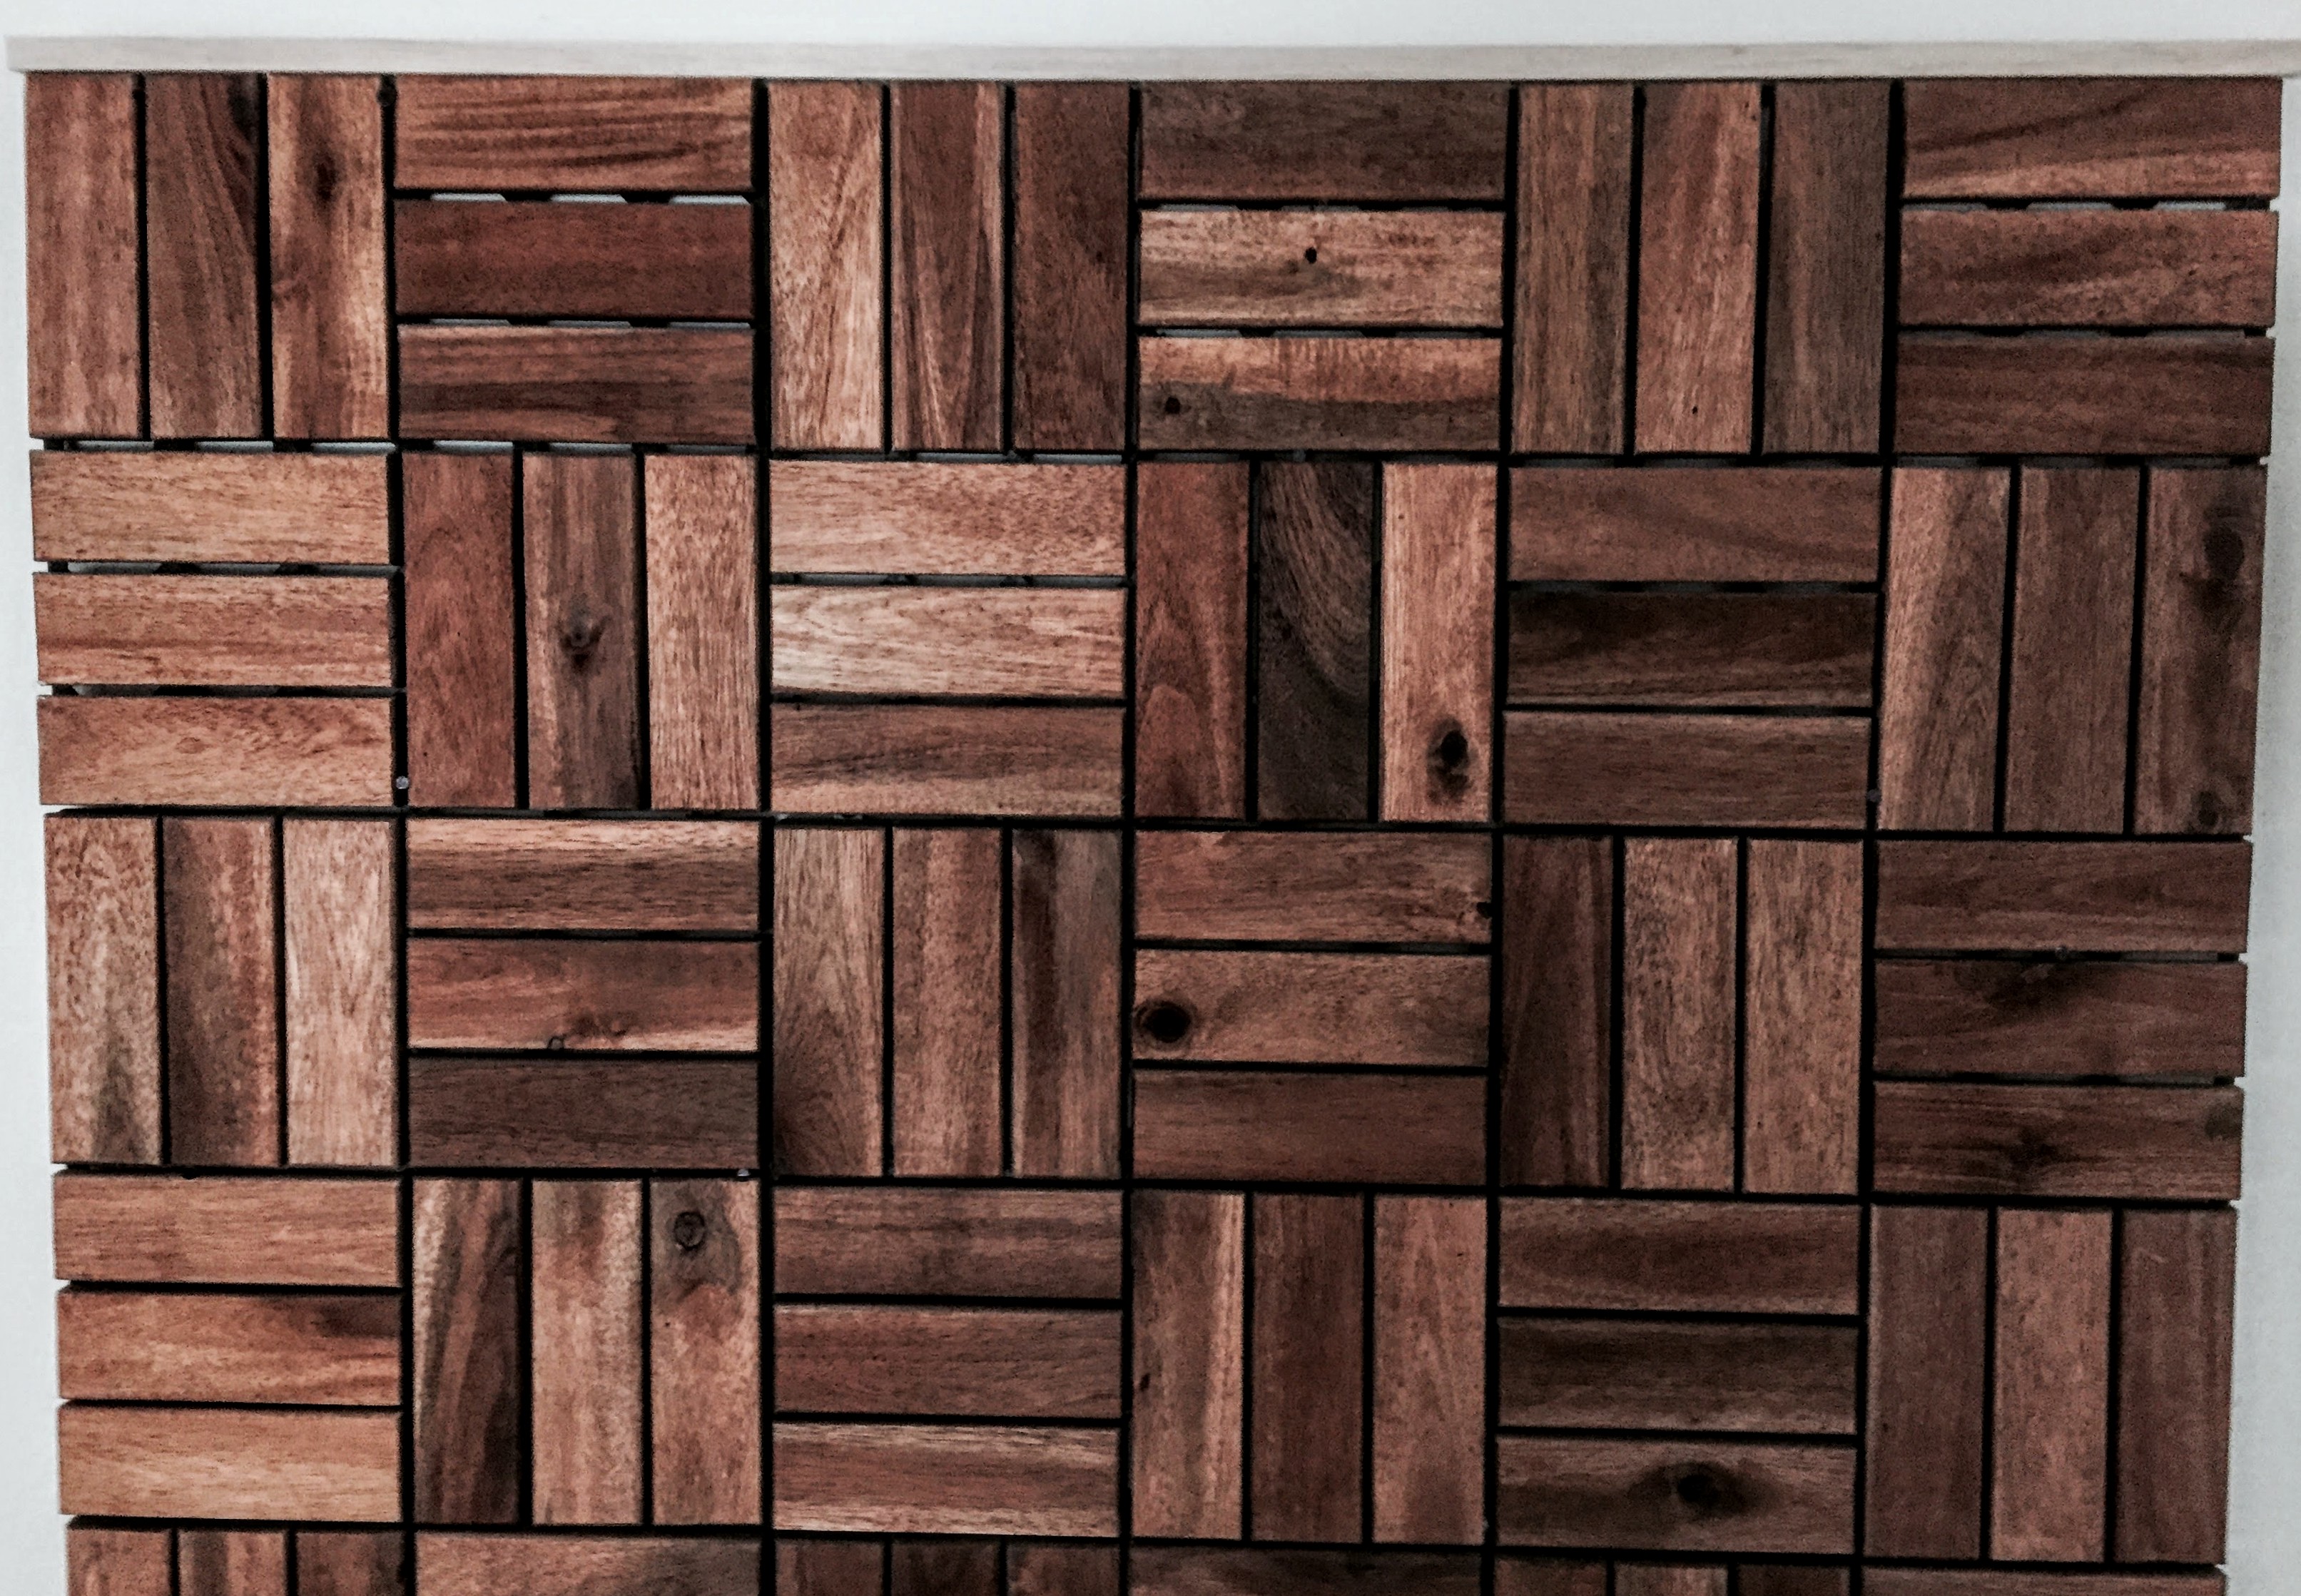
Do you see the black line along the right side and along the bottom (in the image above)? Those are the snaps. So continue to snap them together until it is a 35.5″ x 35.5″ square:
If you look very closely at this image or zoom in, you will see the black line that goes all the way up the right-hand side, and also, along the bottom edge. These are the snaps. The reason they’re still there, is that you’re meant to be able to add more and more on, for a patio. They didn’t know we’d be using it as a frame!
So… just a quick aside here, to say that I have not bought this flooring in a long time (probably about a year). The new version that I assembled in the above images, is a little different than the original version. In some ways it’s better, in some ways, it’s not as good. Here’s the breakdown:
Not-so-good news first:
The color of the wood in the new version is quite a bit darker than its original counterpart. It may be difficult to achieve the ombre effect that I made in the original. The upside to this, is that if you LOVE darker wood, you’re in great shape!
To achieve the ombre look with the darker wood, you could probably use a very dark stain at the top, like Rustoleum’s Black Cherry and then gradiate (is that a word?) down, maybe just leaving it the original tone in the middle and then, sand off some of the color at the bottom, to lighten it up. It would still be beautiful, just a bit darker, overall. OR you could just leave it as is, and lacquer it. You will have to decide how much effort you want to put in! Here is the backdrop after I finished the ombre staining on the original:
So, now the good news! In the original version, the snaps were much larger and came up along the sides of the wood much higher. You had to cut them off with scissors or a saw before putting the balsa wood frame onto the wood square. It was a pain and it looked bad, which is why I added the frame to begin with. Sooo, now you don’t have to cut them off! The balsa wood fits perfectly, right on top of them, and no one will ever know they’re there. SO much easier! This is a stroke of luck! I think I almost ended up in the ER a couple of times trying to get those little suckers off.
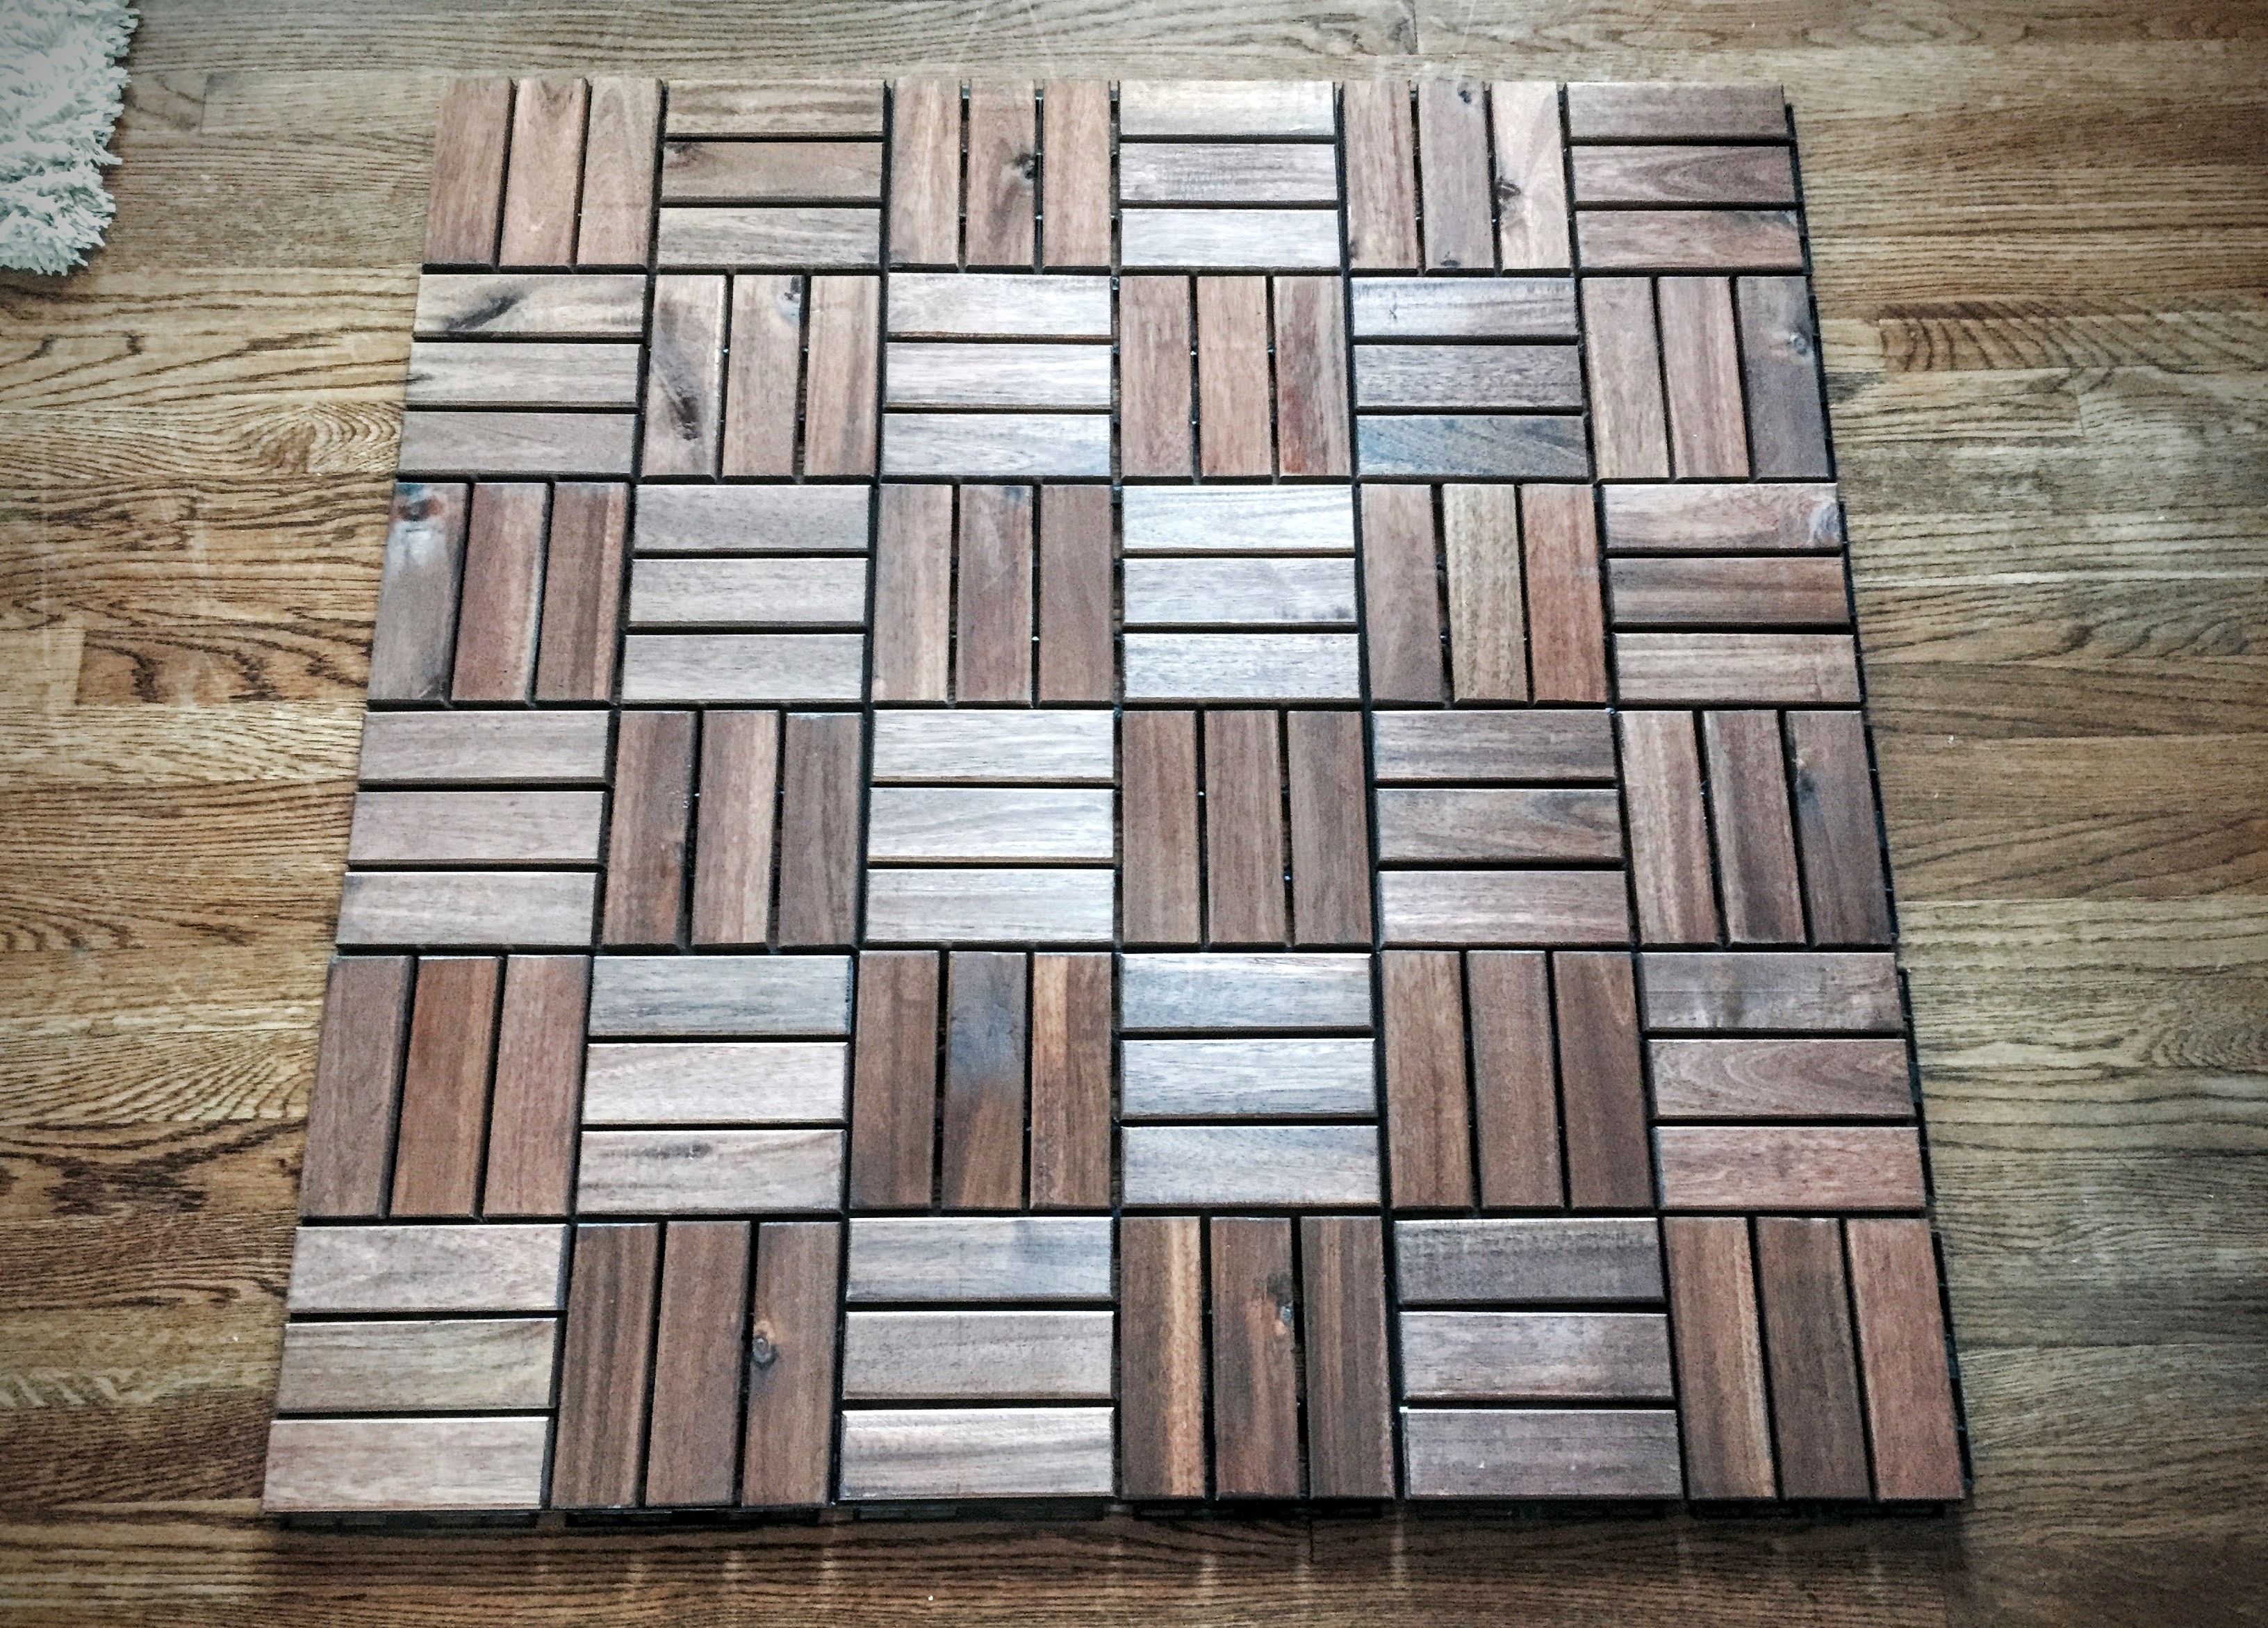
So, the GREAT news is, that if this is the size that you would like (this is the size of my square in all of the images above- 35.5″ x 35.5″), then you are ready to start nailing this beauty into the wall (you will do the staining once it is up)… Yay! This part is exciting, because after you have this in the wall, the REALLY tough part is over! It’s all fun and frills from here!
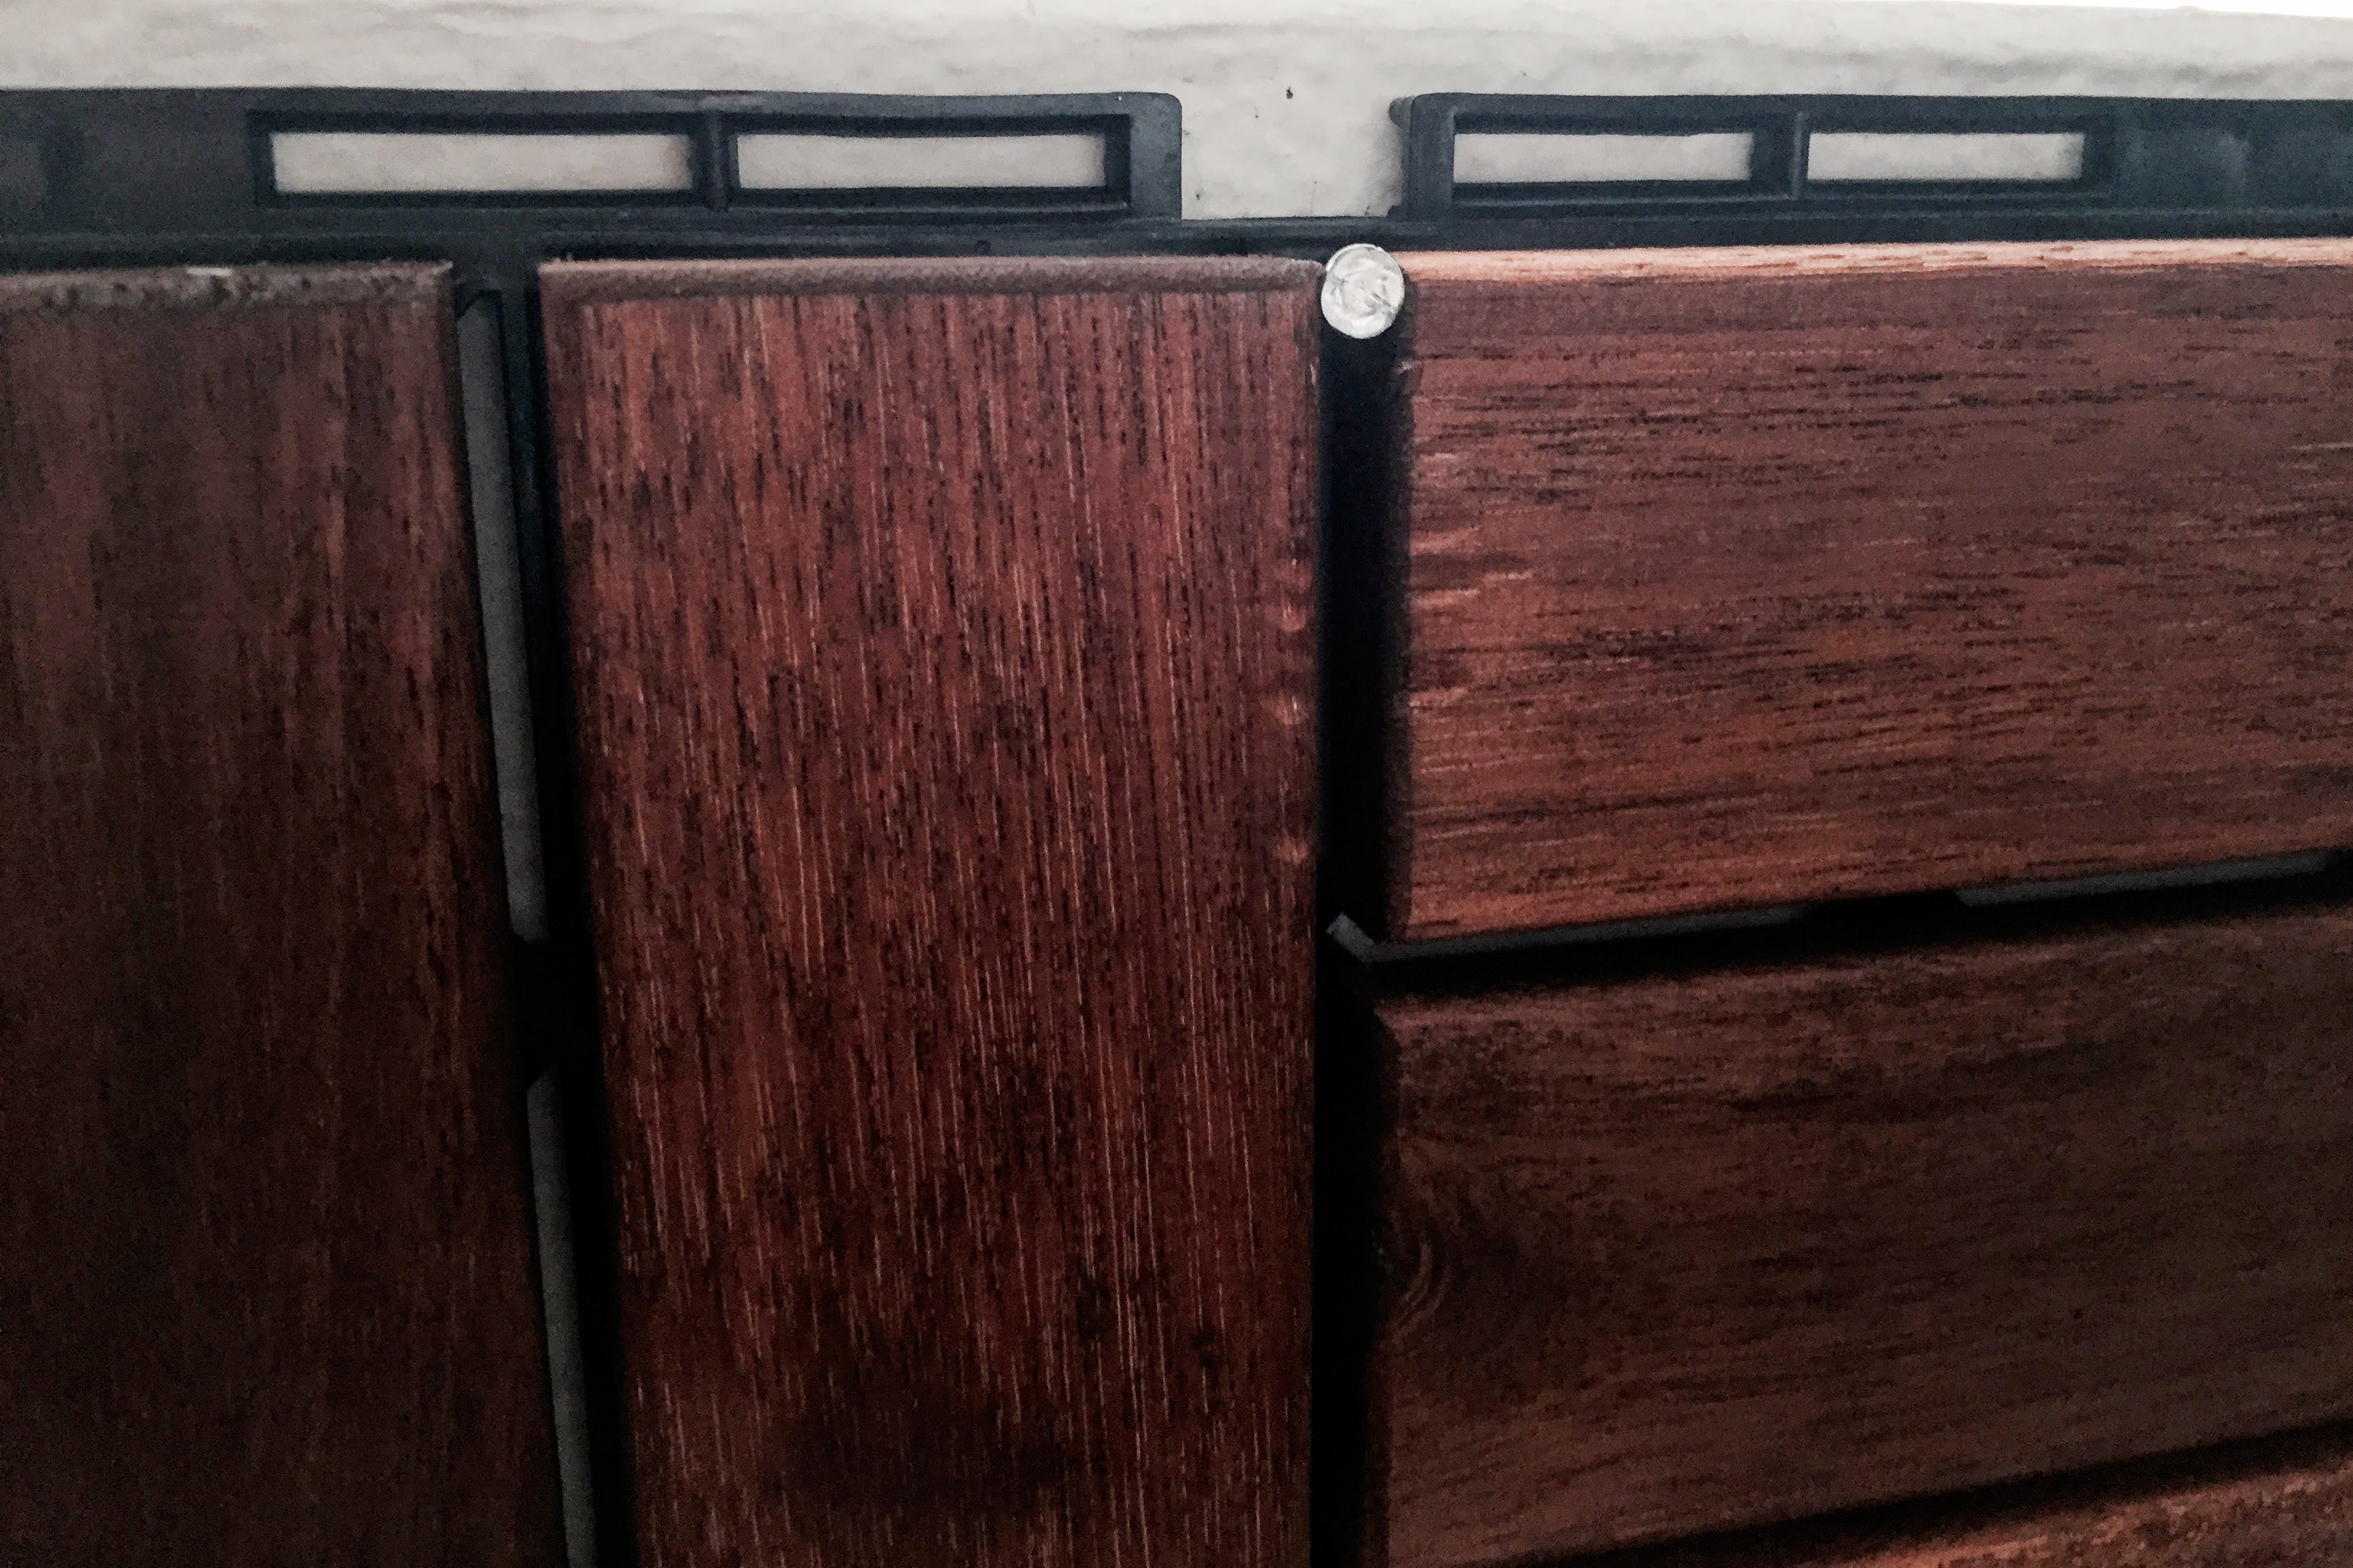
I usually start with the middle piece of the first row, and align it where I want it to go. I place one nail in the middle at the top like so:
At this point, you could put in another nail, or start adding and snapping the pieces together:
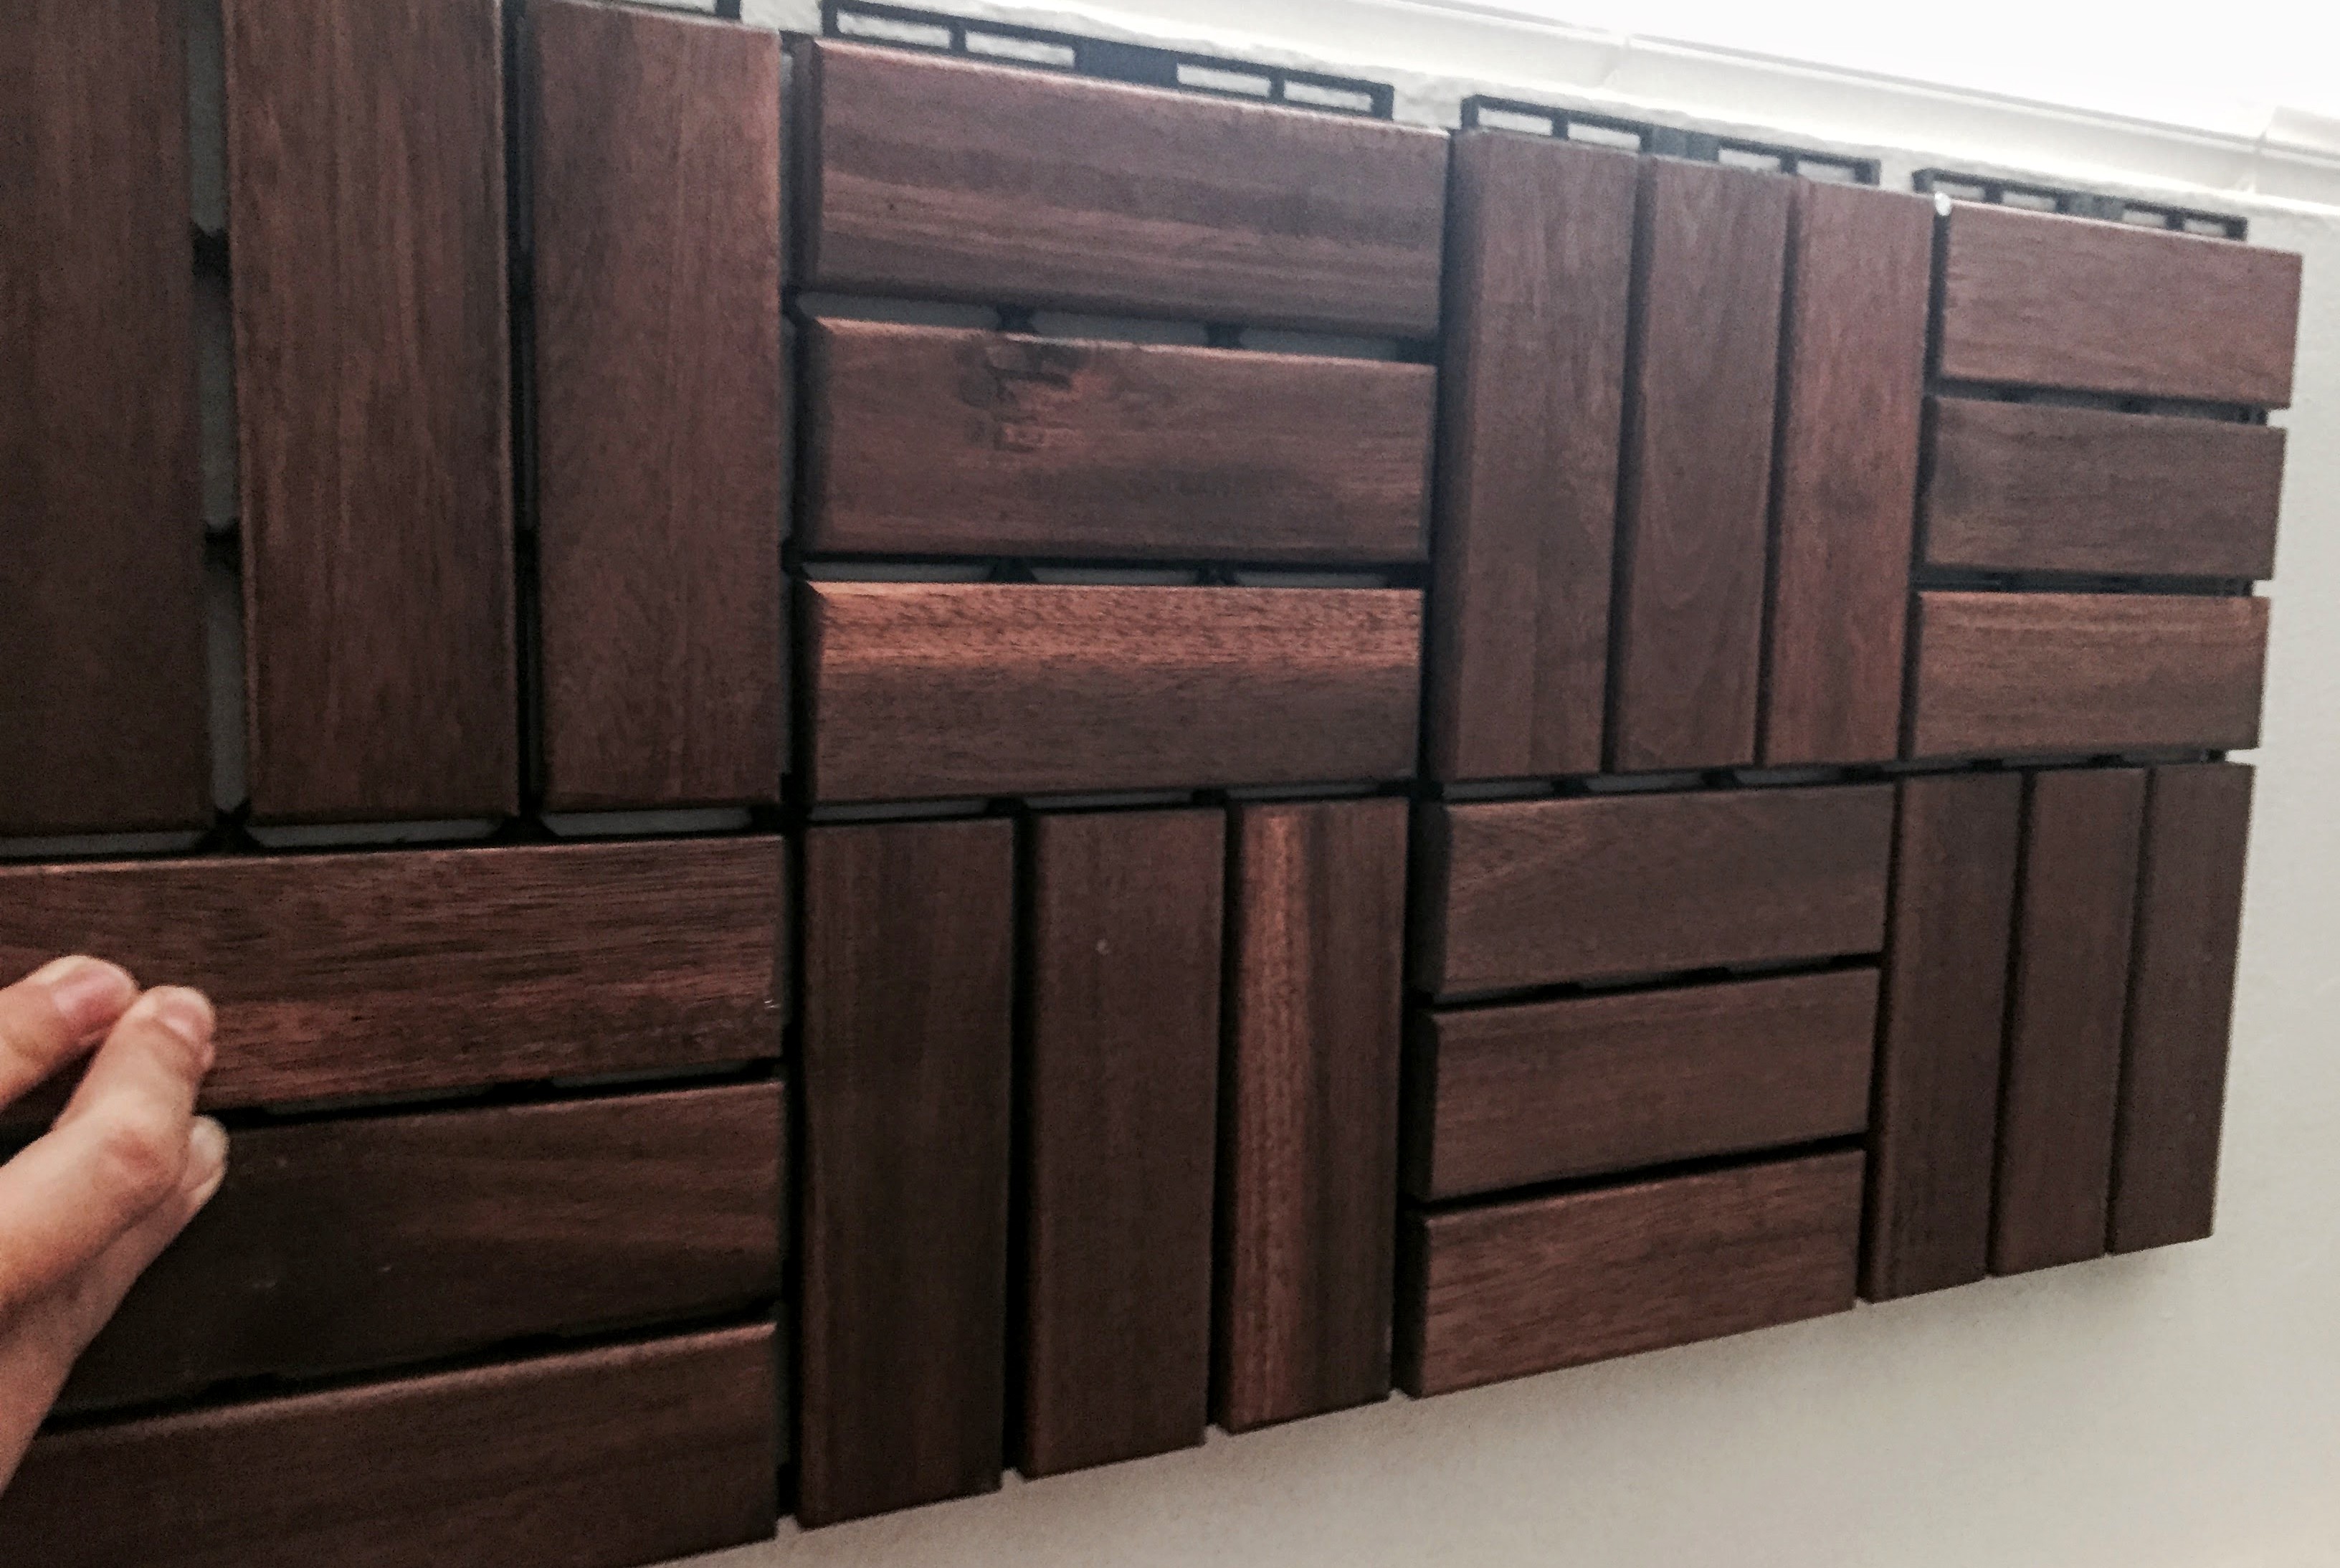
In the above image, I’ve snapped the wood pieces together in the middle and I’m about to add another nail to the top of the piece I’ve just added. After I’ve done this, and everything is looking straight, I would probably add a nail or 2 to each unit, to give it some security. You do need to allow enough give, however, to slide the snaps in underneath and attach the units together. Even after you have quite a few nails in each unit, there is a decent amount of give- it’s easier than it sounds! Once you get going, you’ll see that it’s not very complicated!
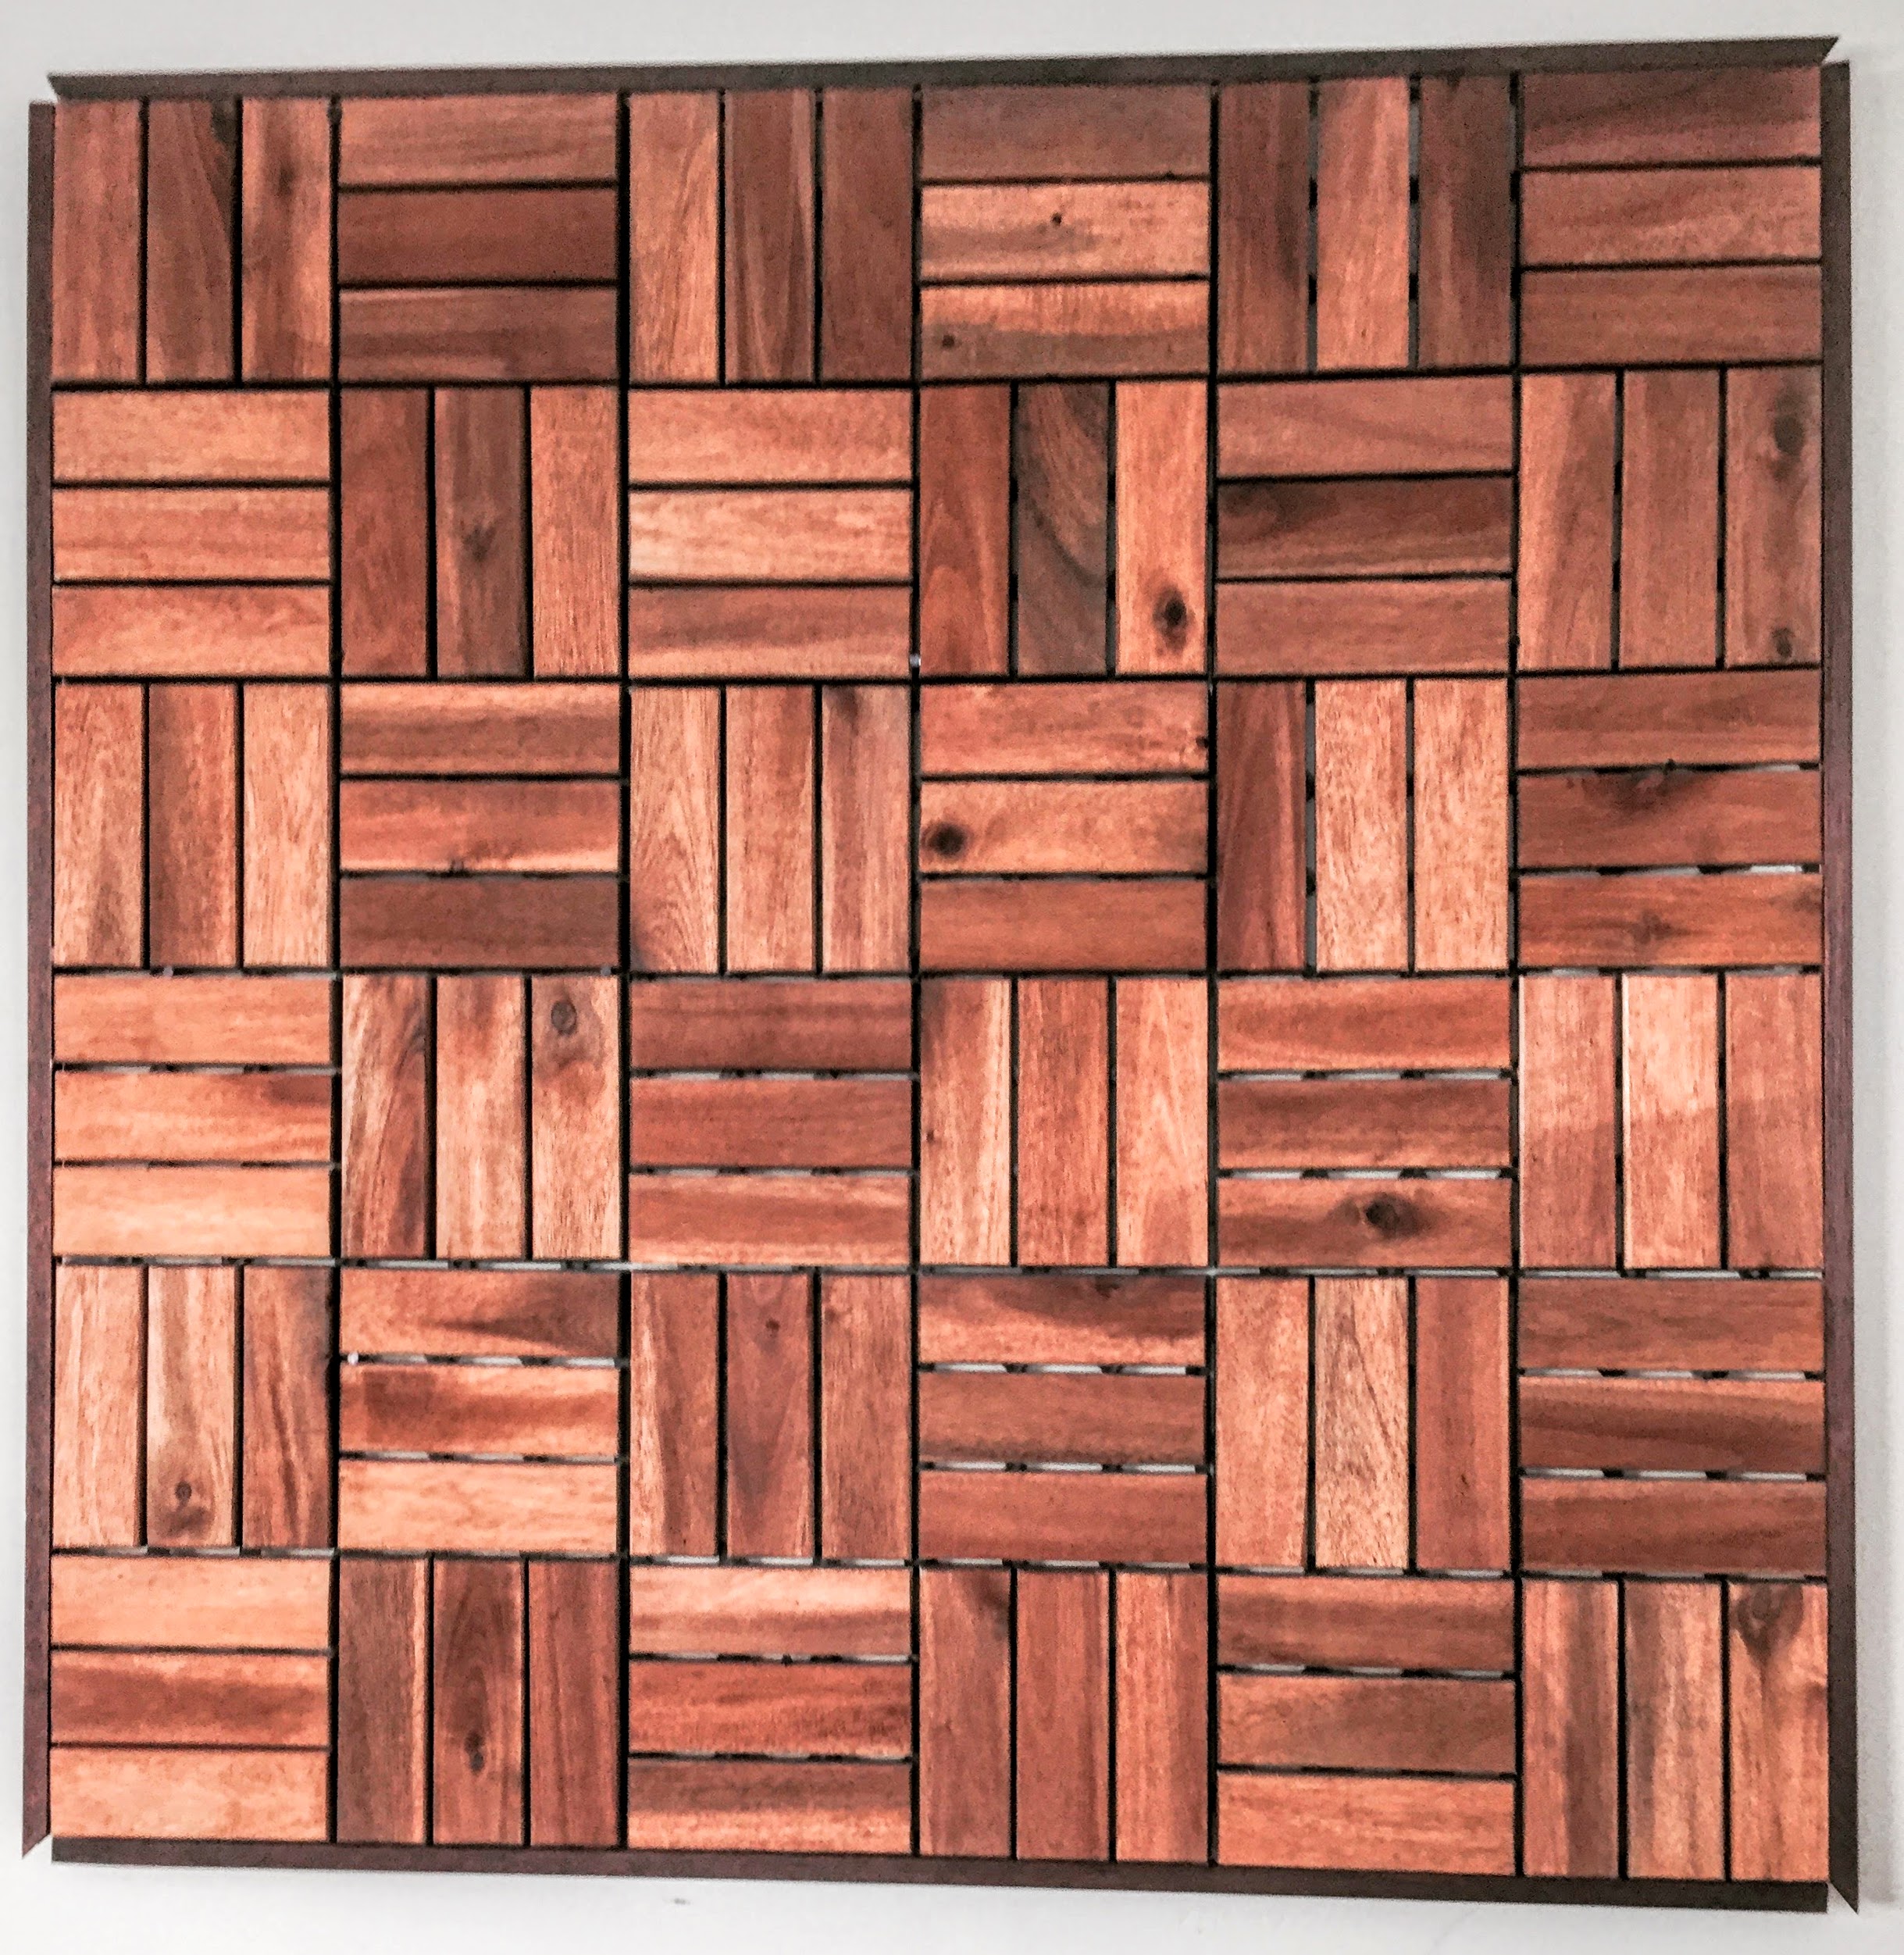
Just keep snapping the pieces together and placing nails where they’re needed, to keep things straight and secure. When you have it all up, you can add as many nails as you like to tighten and secure it. You’re only guide line for the snaps, is that you’re going to end up with a black line of snaps along 2 sides of the square once the entire square has been assembled (either the right-hand side and the bottom or the left-hand side and the top- it doesn’t really matter). Assembling it on the floor before hand is good, because you can take one piece at a time, just as it’s been assembled on the floor, and put it up on the wall.
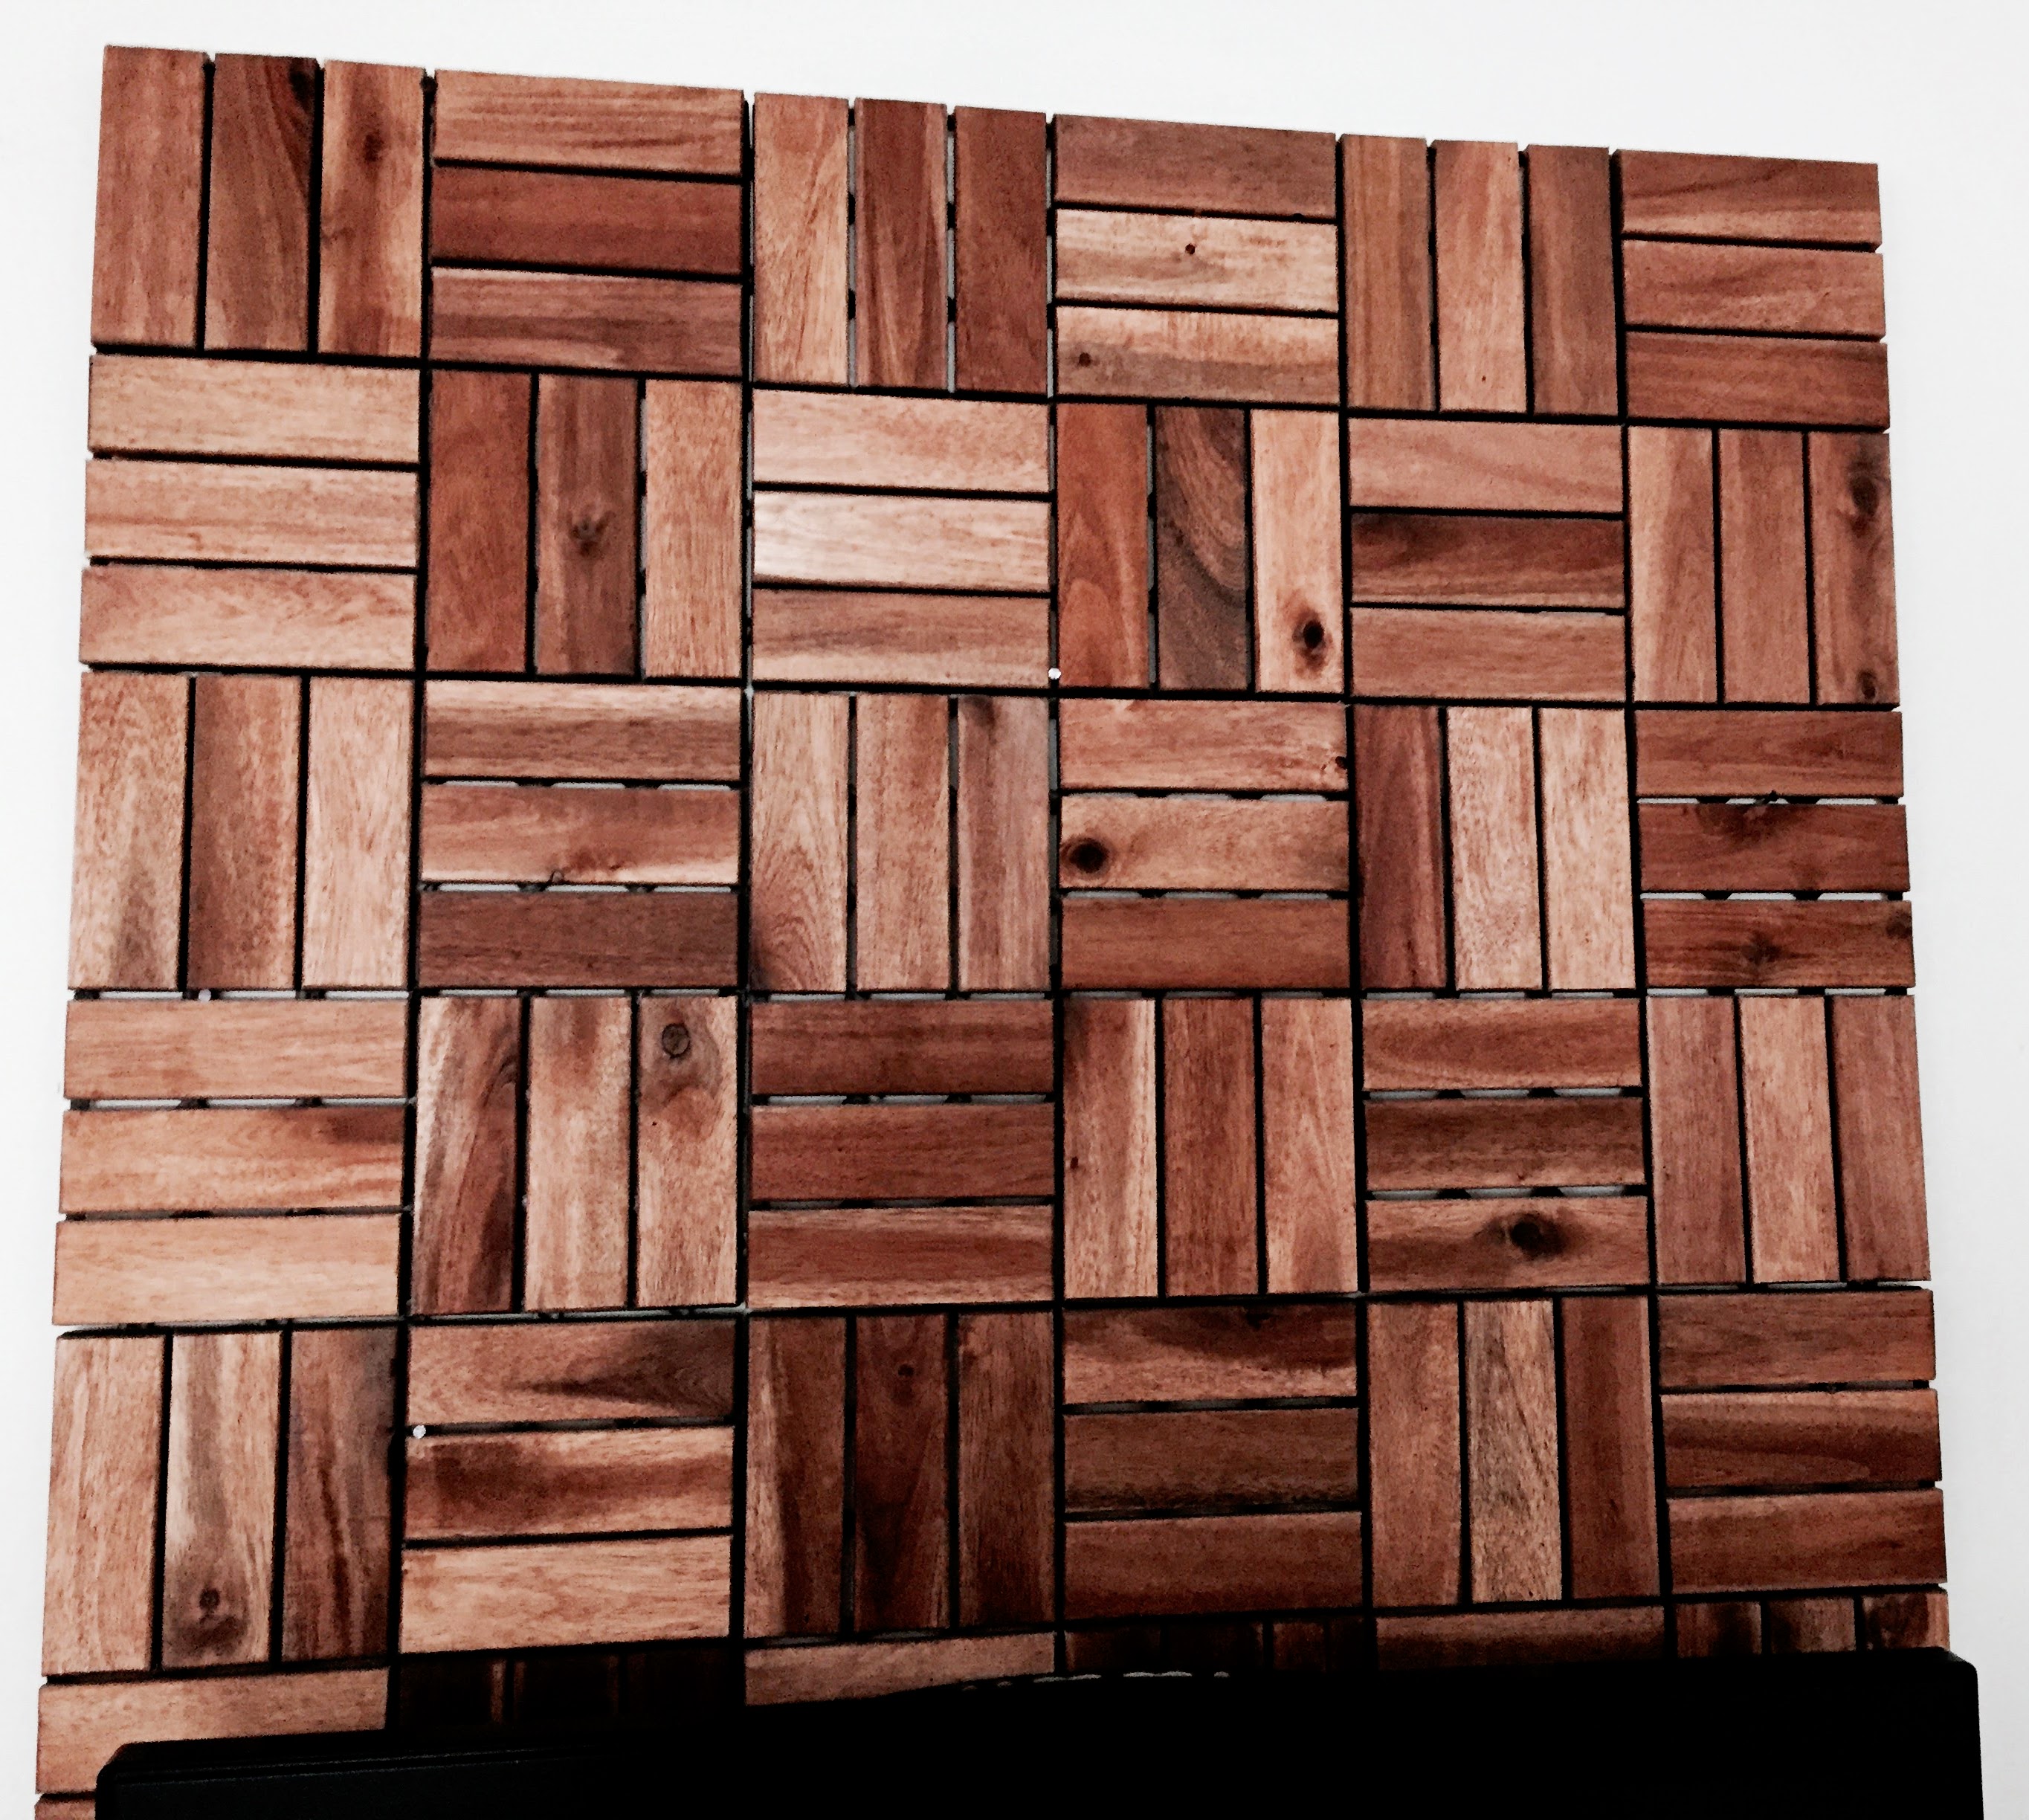
The above image is what it should look like before you add the balsa wood frame and gold corners. This is the original wood (that I bought a year ago)- as you can see, there is a lot of variation in color and it’s quite a bit lighter than what you get now. In the above image, the snaps on the top and left-hand side, have already been removed. Here is an image of what the old snaps looked like after they were cut off. It was no easy task and no matter how hard I tried, I just couldn’t get them to look good:
This is the reason I decided to add the balsa wood frame!
So, now that we have the wood up on the wall, we can start sanding, staining, lacquering, etc! You will need your sandpaper block, your stain/stains, and your lacquer. You will also need several soft rags to wipe as you go. Oh- and a sheet to cover the floor and anything of value nearby! You could stain the wood once you’ve put it together on the floor, but I like to work once it’s on the wall, because it’s secure and it doesn’t move around. Also, the lighting is better and more true to what you’re actually going to see. When it’s on the ground, it looks quite different than it does once it’s up on the wall, being cast with light from windows and indoor lamps.
So, let’s get started! You will need your stain/stains and foam brush, as well as a soft cloth or 2:
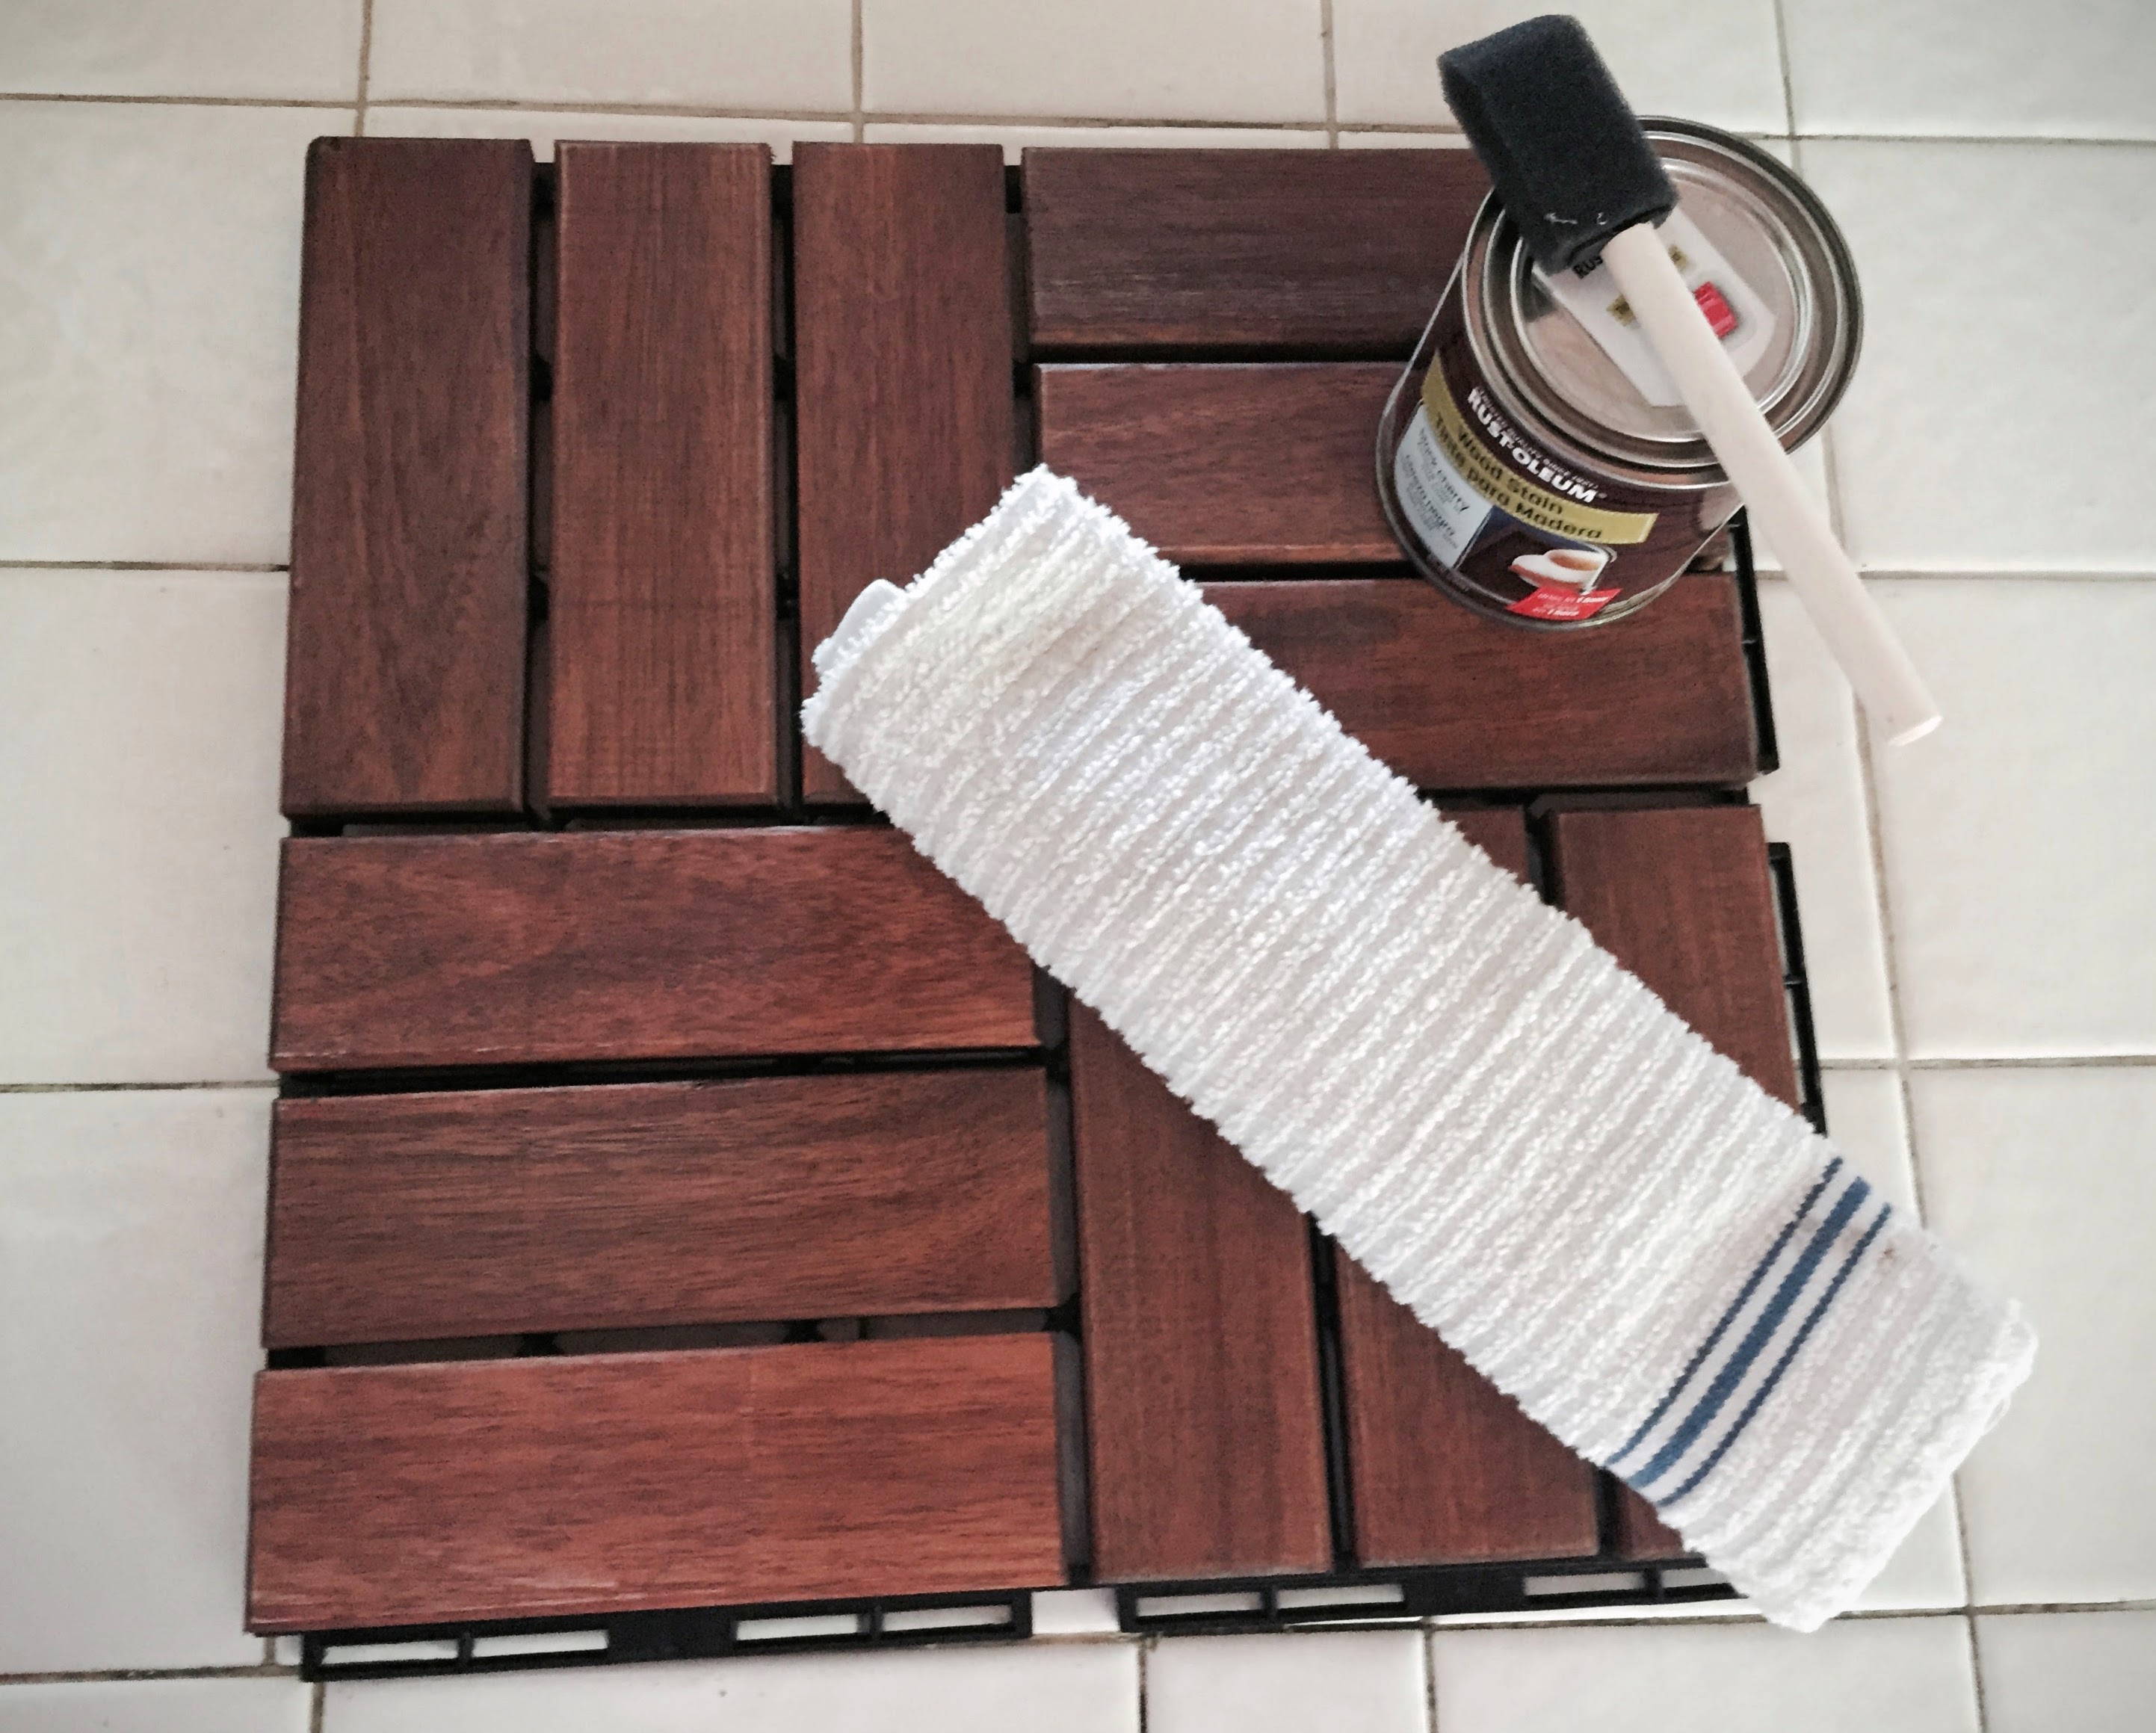
I attempted to sand the wood from the new version, and I think it’s doable, but you would need a very fine sandpaper. You could go in and sand down some of the lower pieces to lighten them, and then, in the middle, keep it the original color (above image is a pretty accurate representation of true color), and then stain the top, very dark. Or vice versa if you want the top to be lighter and the bottom to be darker. I used Rustoleum Black Cherry on one section of the block to see how it would turn out:
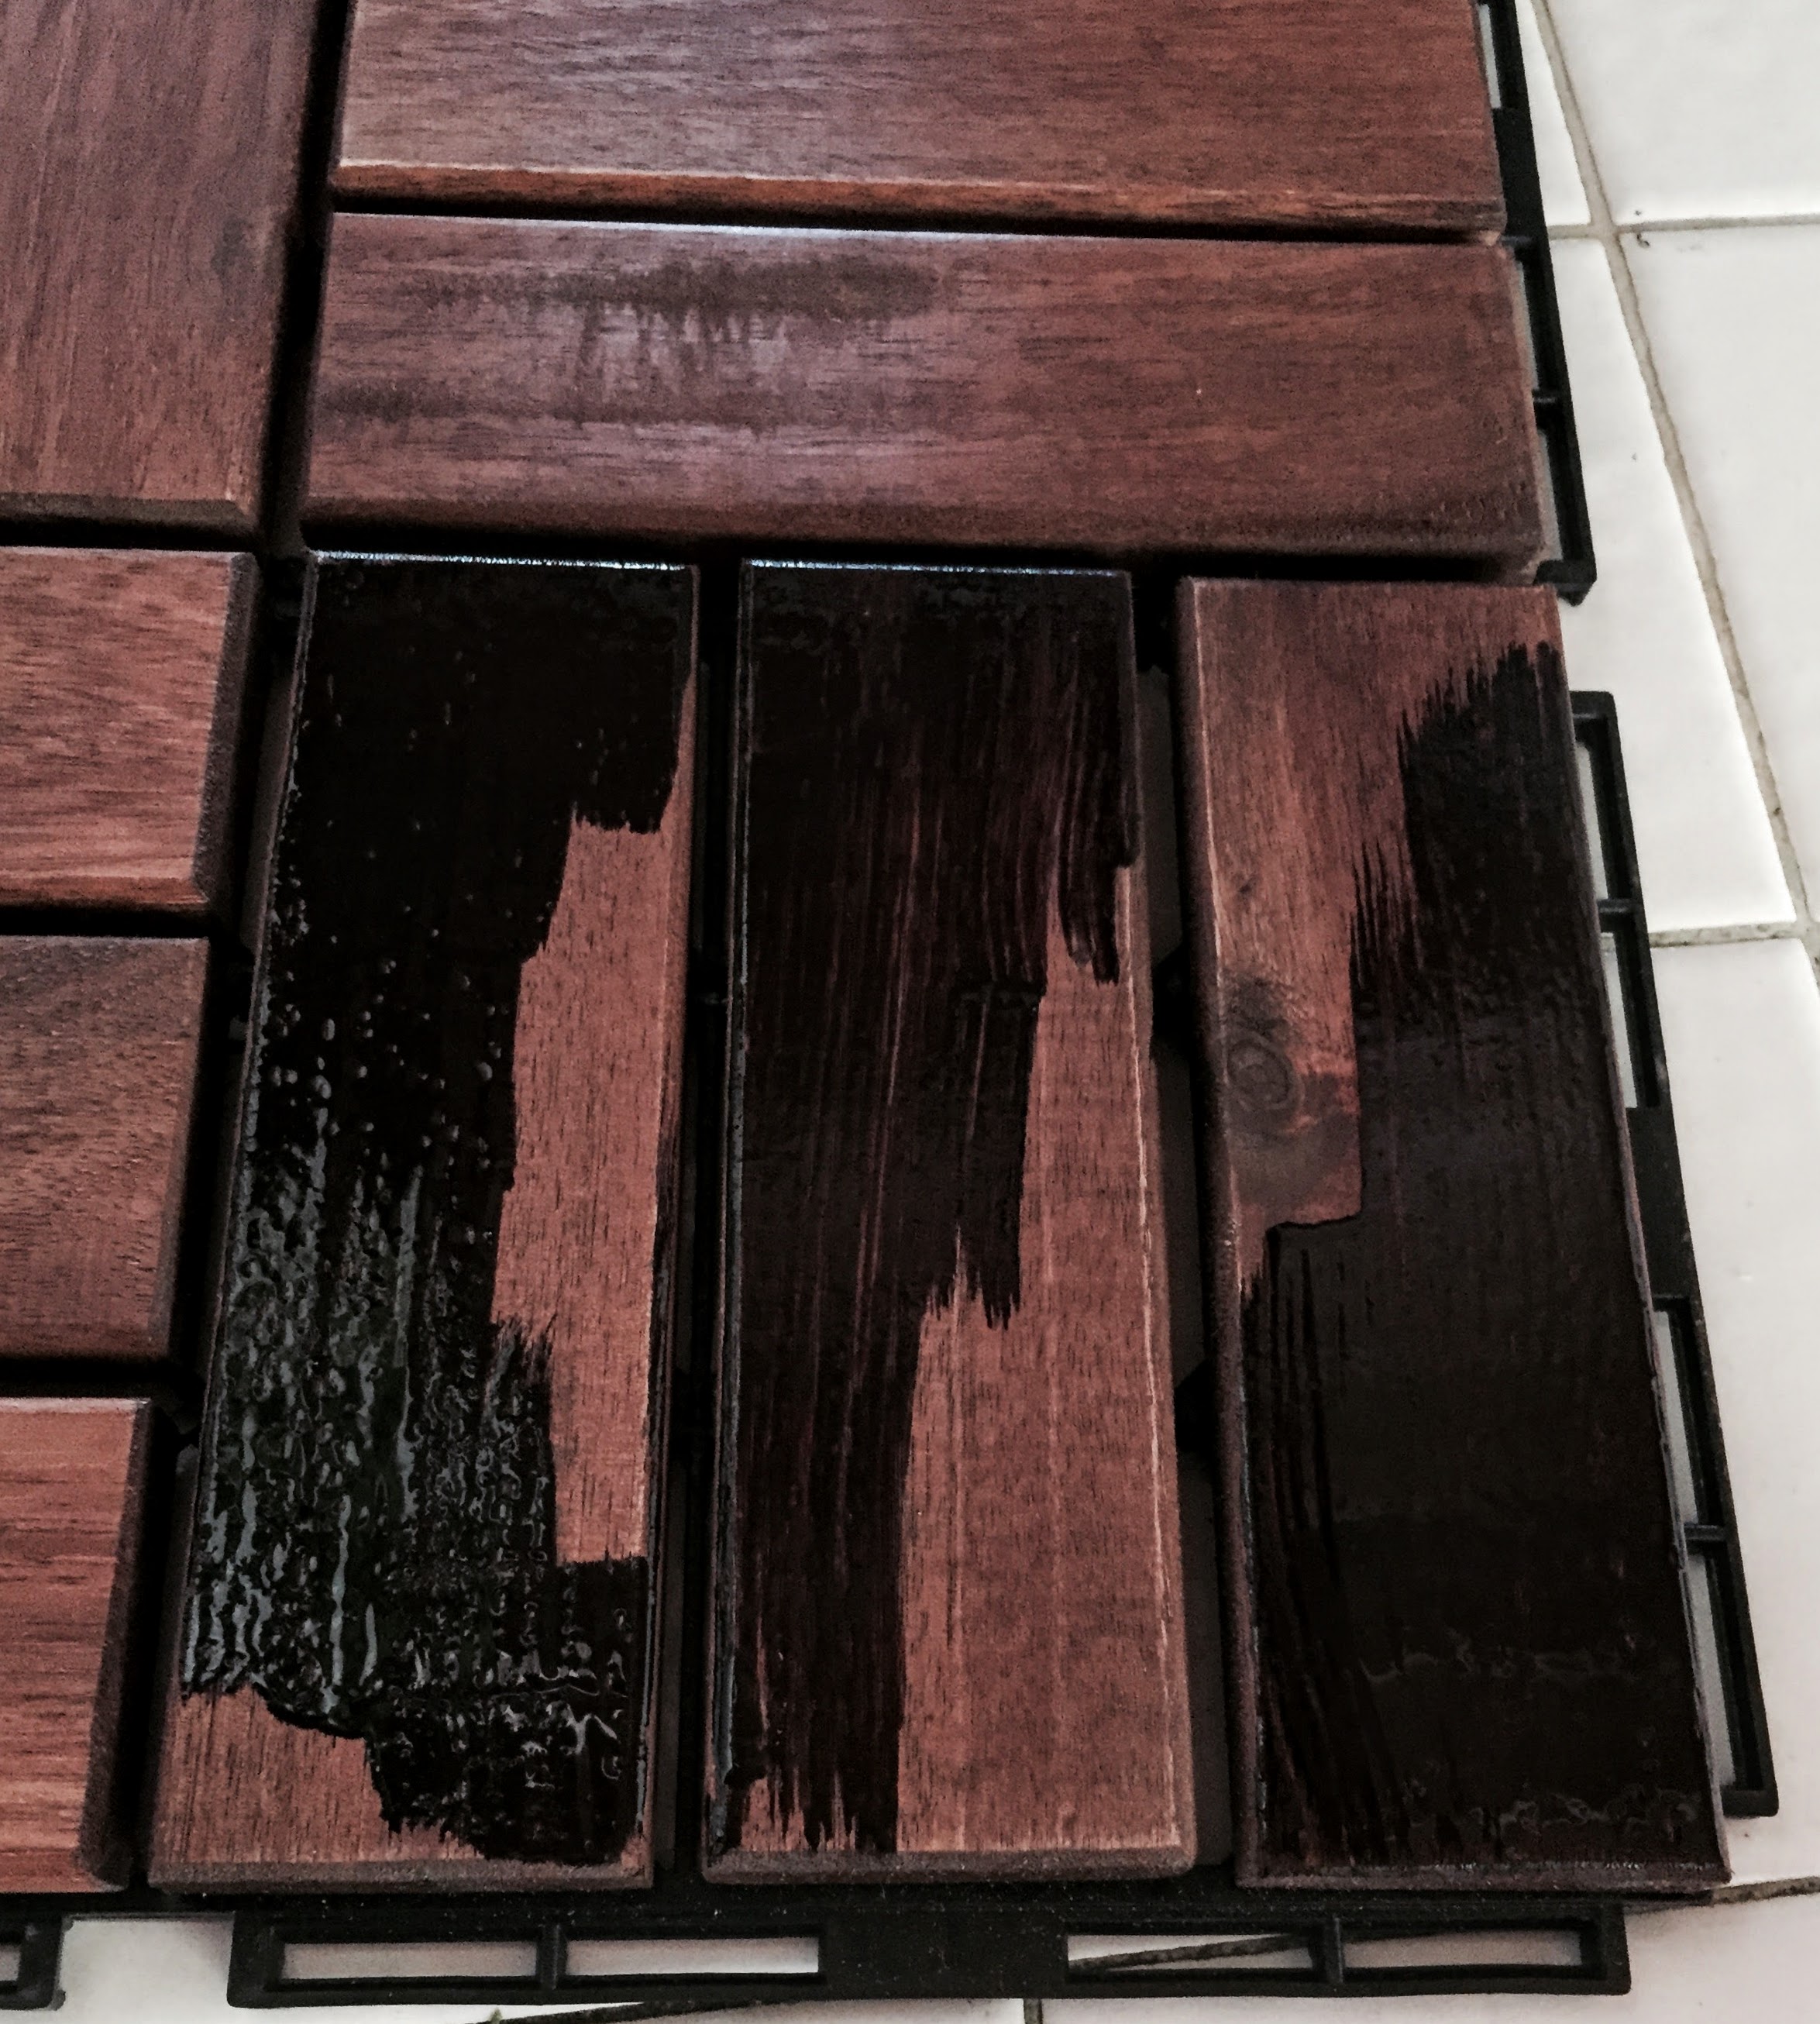
I used the foam brush to sort of shade the wood with the darker stain. Then I wiped it down::
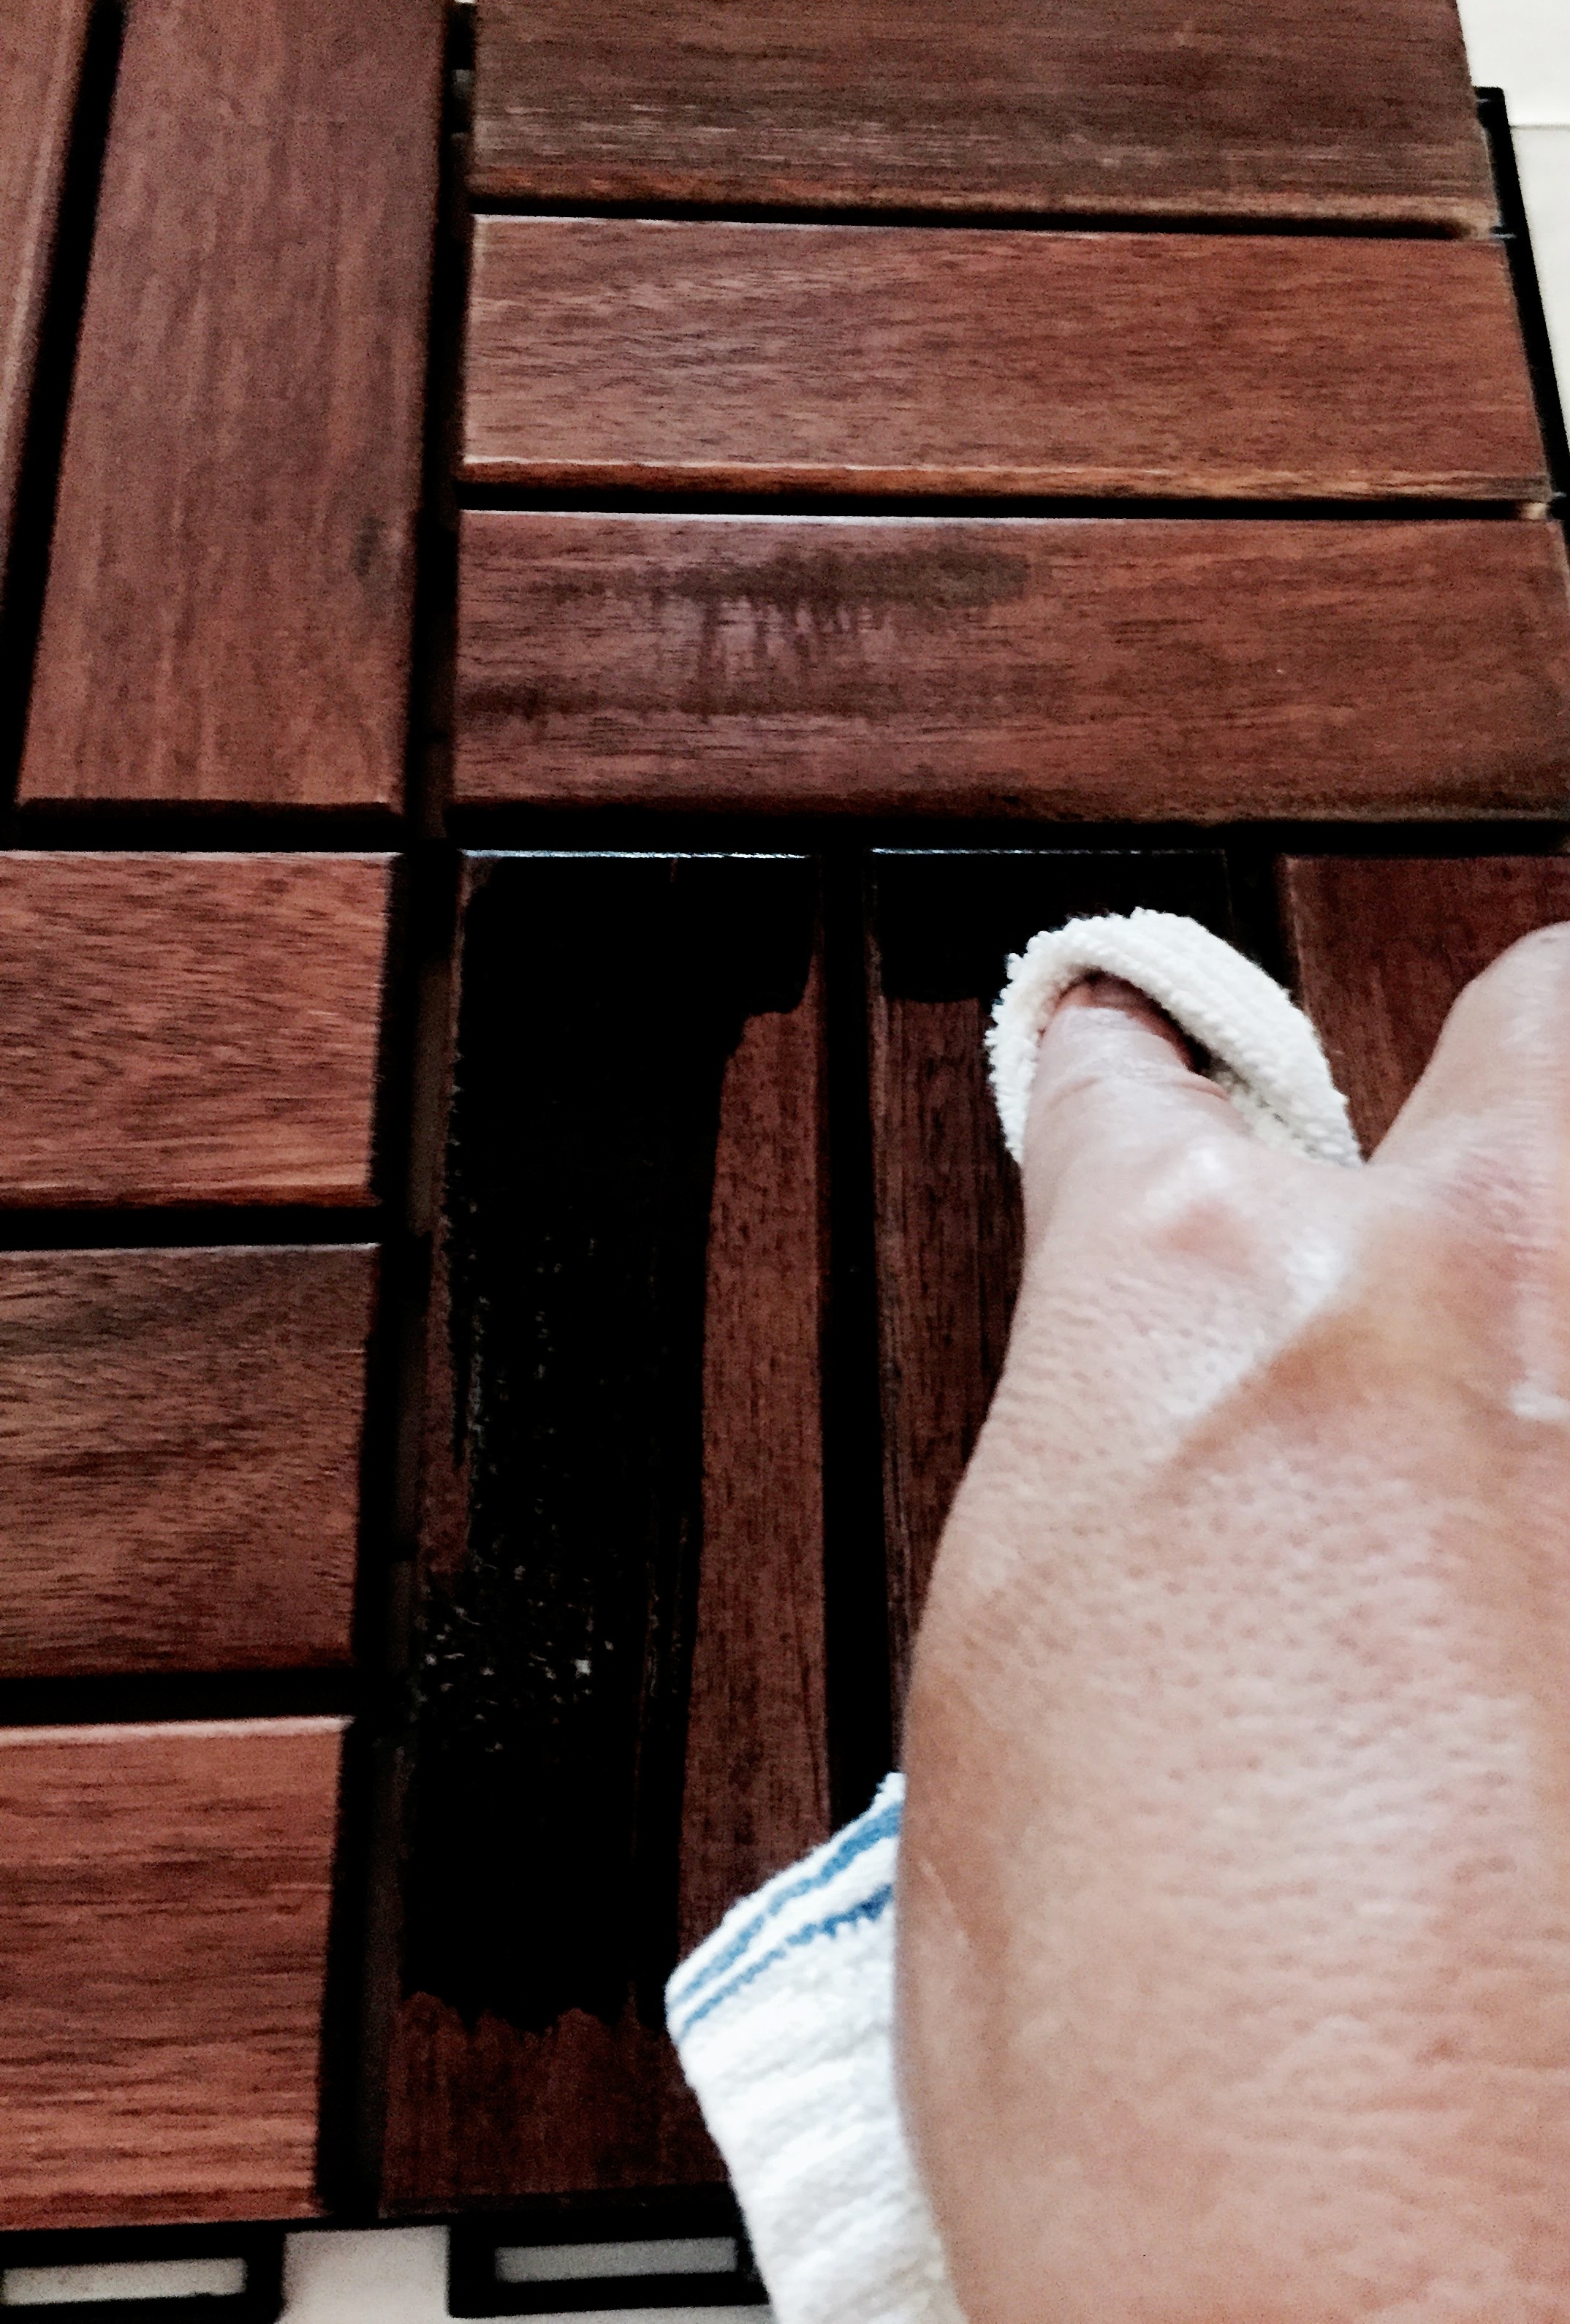
You will want to let the stain sit on the wood for a couple of minutes (1-5 min) before you start wiping it off. Also, if you want to get a subtle, shaded effect, you will have to make sure that you don’t spread the stain all over the wood when you’re wiping it away. You may have to dab it and then wipe. Here is the look you’ll achieve:
In reality, the difference between the 2 shades is MUCH more subtle than what you see in the image above, nevertheless, you can see that the lower right-hand quadrant is darker than the rest. So, if you use the Rustoleum Black Cherry, you can achieve a slightly darker effect. When you’ve first applied it and then wiped it away, the stained portion may seem VERY close to the original color (despite the variation in above image). However, once you’ve applied the lacquer, the colors and variations in tone will really come out.
So, in wrapping up how to attain the ombre effect on your backdrop, you will just have to play with the color, the variegation, sanding, etc, until you achieve the color and shading that you desire. And remember, if it all seems like too much, you can throw that wood up on the wall, hammer it in, and call it a day! Or you could throw some high gloss lacquer on it and not worry about the stain. It’s still going to be beautiful! There are many levels of difficulty and involvement, and you can choose how far you want to go.
Just a quick note here, to let you know that if you want to add lighting, now is the time to do it! My light has a cord, so it had to be added on before the frame went up (since the cord will lie behind the frame and the frame will be glued on).
So, first, I held the light up and fit the cord into the straight line of the crevice that goes right down the middle of the wood backdrop. I then, put the loose piece of balsa wood frame up on the top of the wood back drop (just like you see in the image below) and rested the bottom of the light on it. Then, I quickly got my first screw into the light. Once that was done, it was smooth sailing. It was a balancing act, but I just made sure everything (electric screwdriver, screws, etc.) were within reach. Once I had the second screw in and the light was up, I pulled the balsa wood frame piece out. I then straightened the cord and made sure it was pulled down very tightly and fit into the groove of the backdrop very comfortably. Both the top and bottom pieces of frame will eventually fit over the cord of the light. Here is an image showing what it should look like at that stage in the game. I hope this all makes sense. I think with the explanation and the pictures, you can probably figure it out, but please don’t hesitate to contact me if you have any specific questions!
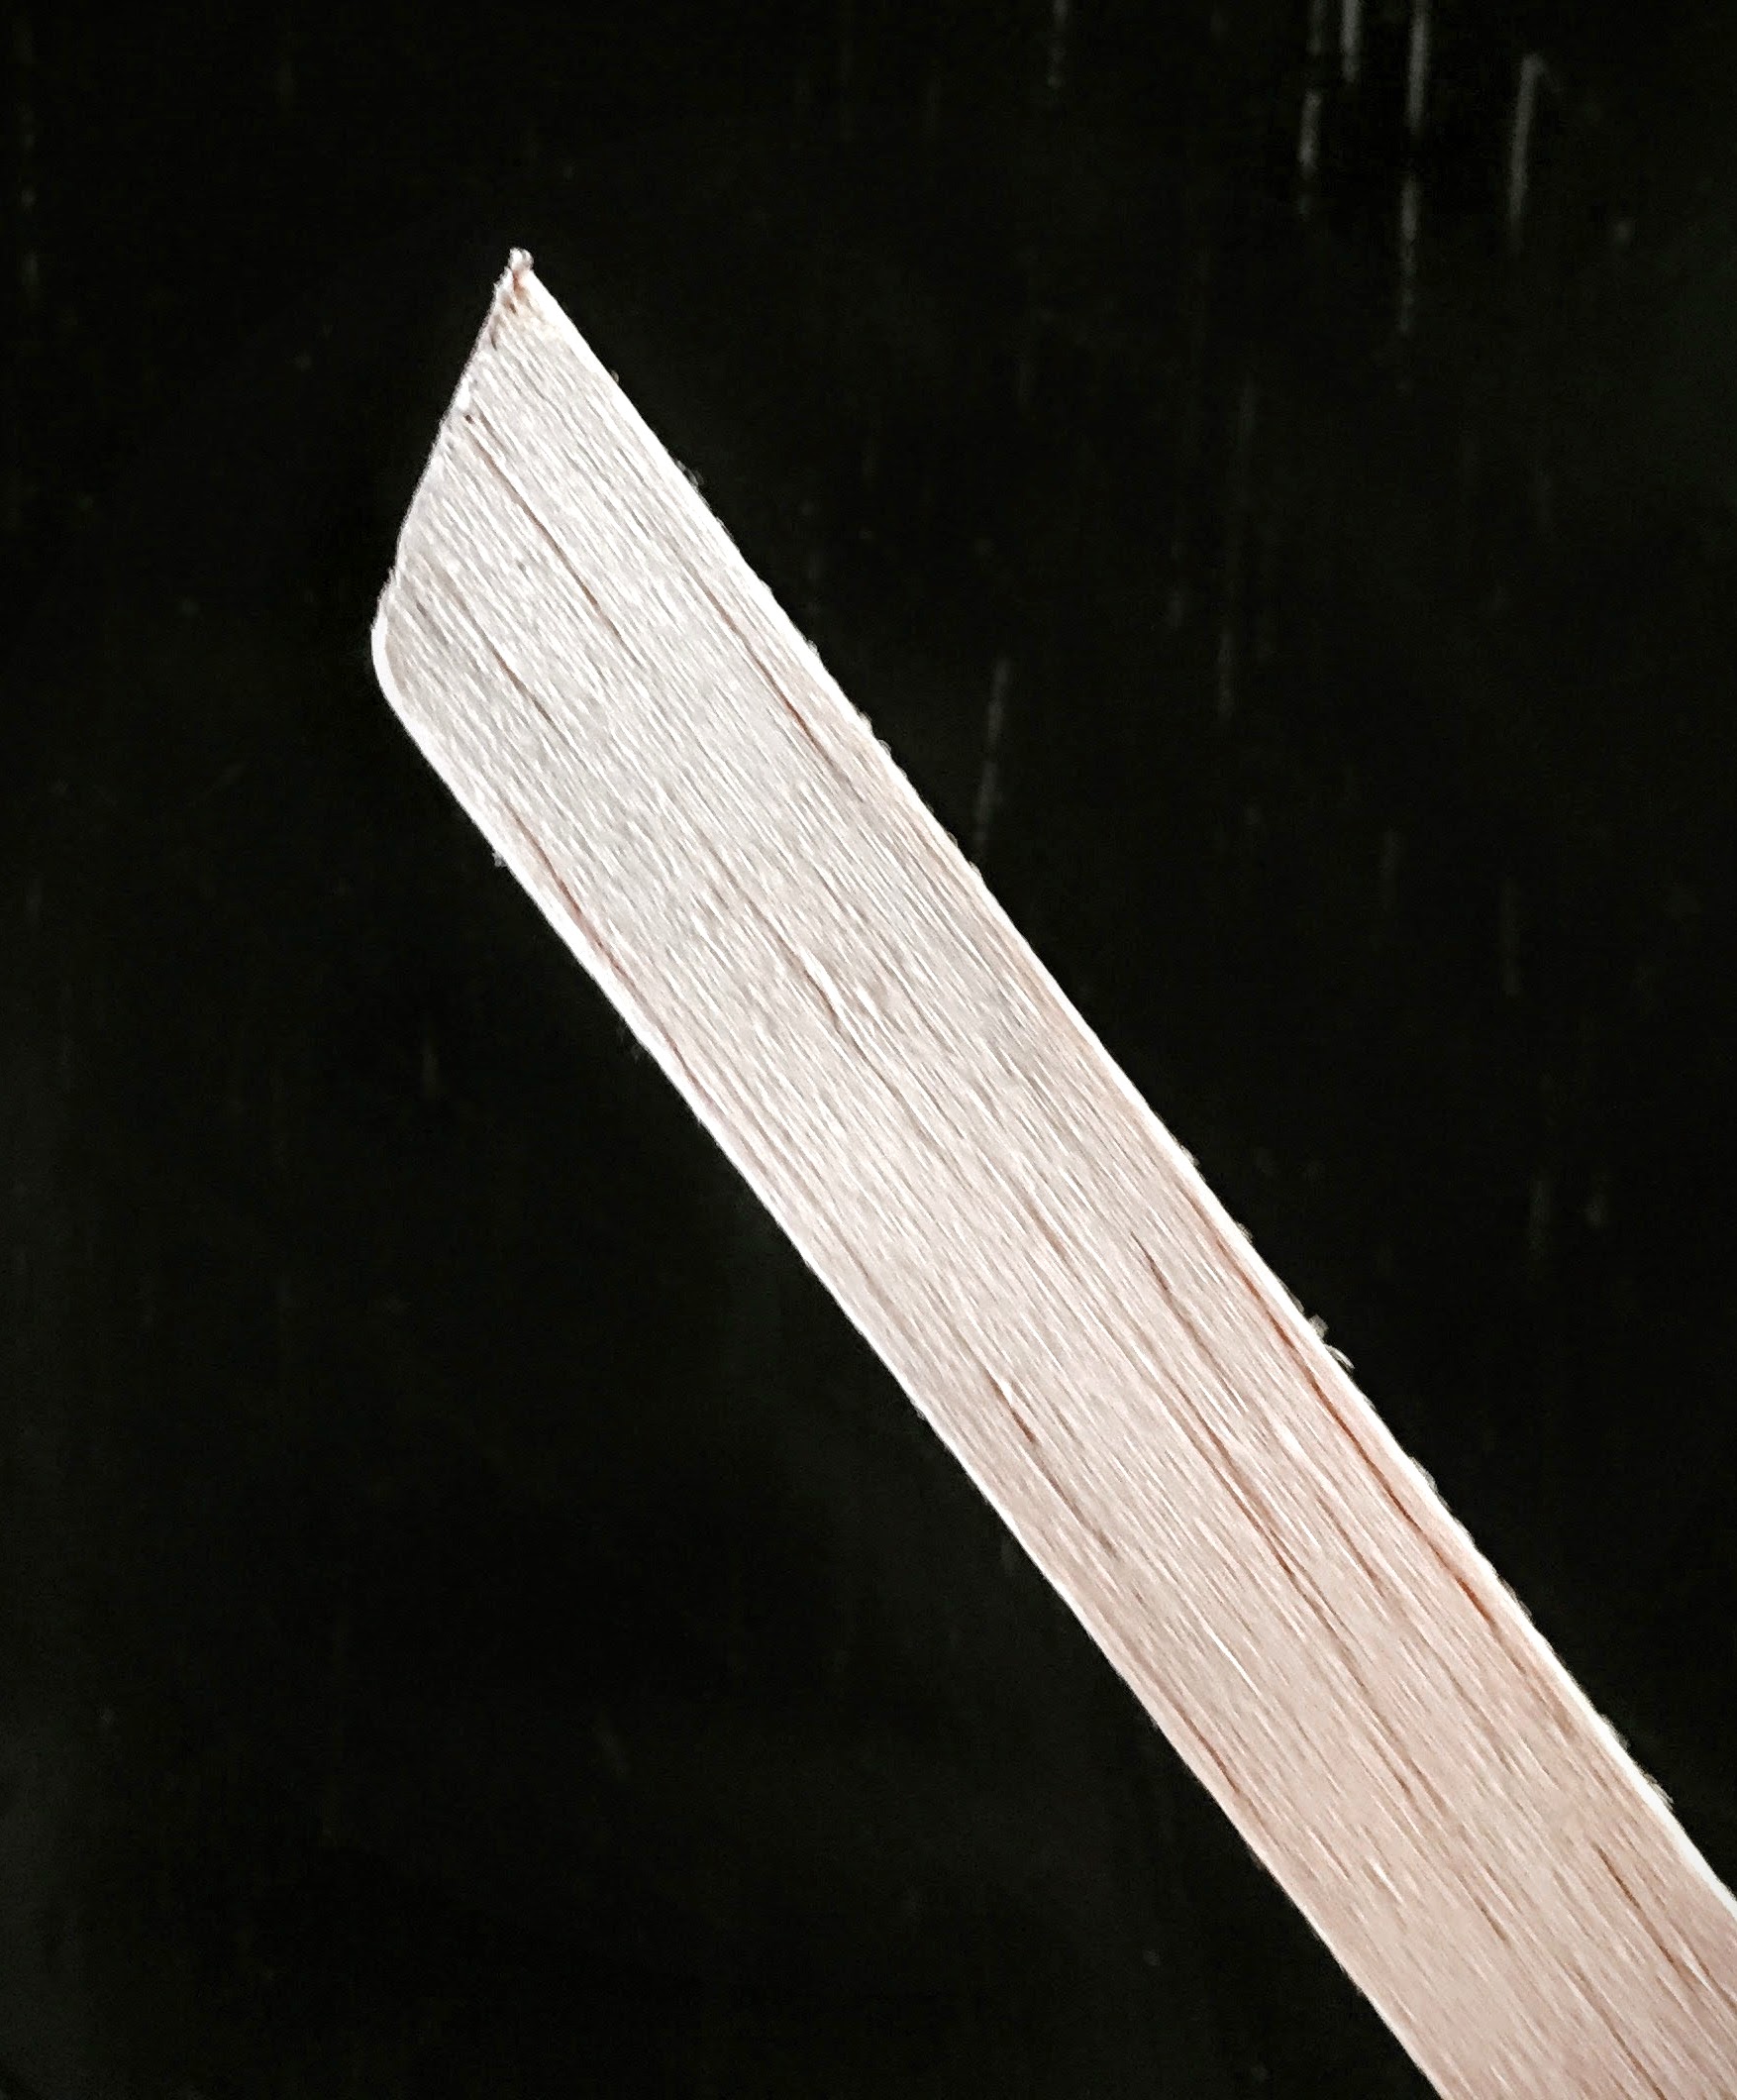
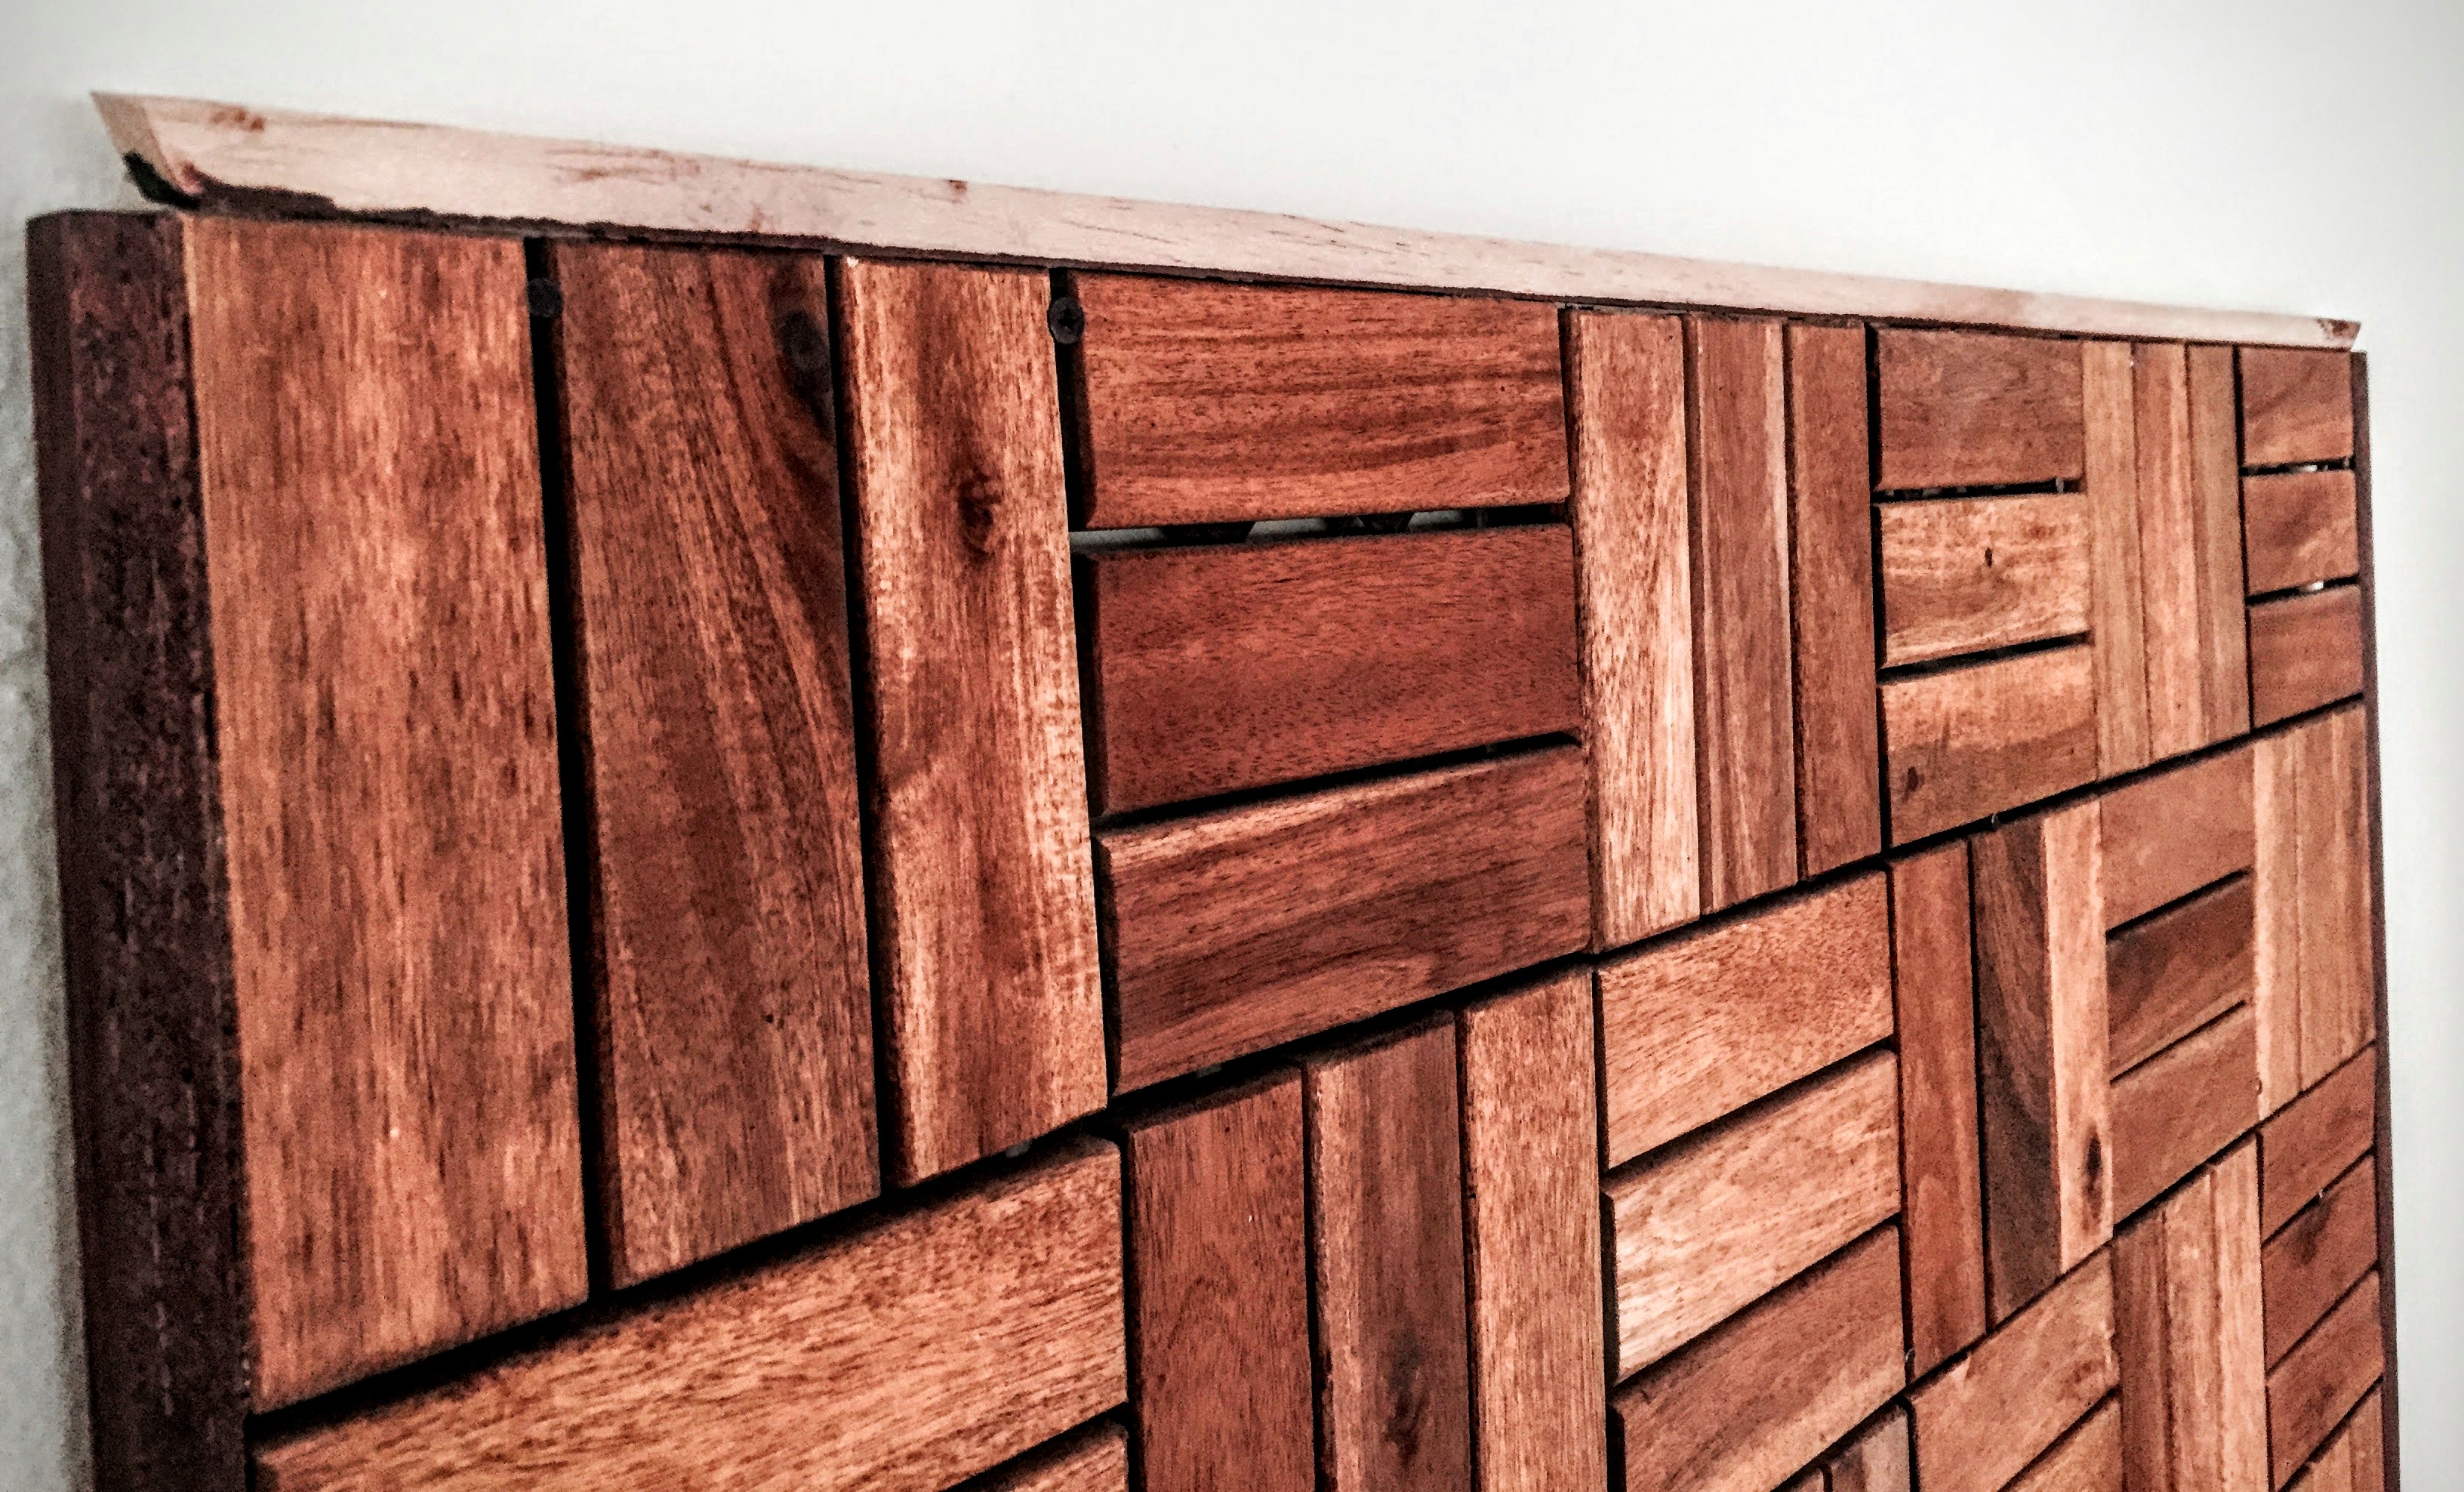
Now, moving along to the frame of the backdrop… pull out your 4 pieces of 1/2″ x 1/2″ x 36″ balsa wood. Take your first piece and set it on top of your wood frame like so:
I know that it’s pretty difficult to see the very light colored piece of wood at the top, but that is your first piece of balsa wood for the frame. You’ll want to center it, so that there is an overhang of about 1/4″ on each side- I am not one to measure. Anything. Ever. But if you would like to measure at this point, go for it. I just eyeball it and hope for the best! Then, use a pen or pencil, to mark where you will cut:
 Top Left
 Top Right
 Side Top
 Side Bottom
 Bottom Left
 Bottom Right
Top Left: You will want to go from the top corner of the balsa wood, down to meet the outer corner of the wood backdrop.
Top Right: Do the same thing on the right.
Top of both Sides: Line up the frame so that it is flush with the wood backdrop’s top corners.
Bottom of both Sides: There will be an overhang at the bottom of each side piece of frame, of just under an inch. Use your pen or pencil to mark from the bottom corner of the wood backdrop, to the outer corner of the balsa wood.
Bottom Left: Simply line up the piece of frame so that the balsa wood is flush against the lower left-hand corner of the wood backdrop.
Bottom Right: There will be an overhang of just under an inch on this side. Simply draw a straight line down onto the frame, starting from the lower right-hand corner of the backdrop.
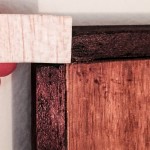
Next you will be taking your Xacto knife and making the cuts we just talked about. There should be 2 cuts on the top piece and 1 each on both sides and the bottom. I try to use the Xacto knife as slowly and carefully as possible, so that I get the straightest cut that I can. Sometimes, it is difficult to get the knife all the way through, so then I turn to my trusty scissors (Fiskars Razor Edged Large Scissors from JoAnne’s are good for this). I just try to get through it with out taking large chunks out of the wood or completely thrashing it! The wood, though very soft, is thick and chunky, so it’s a bit more challenging. You may want to buy a piece or 2 extra, just in case. Once you are done cutting, you can sand the edges you just cut. This is the front of the piece I just cut and sanded:
And this is the back of the piece I just cut:
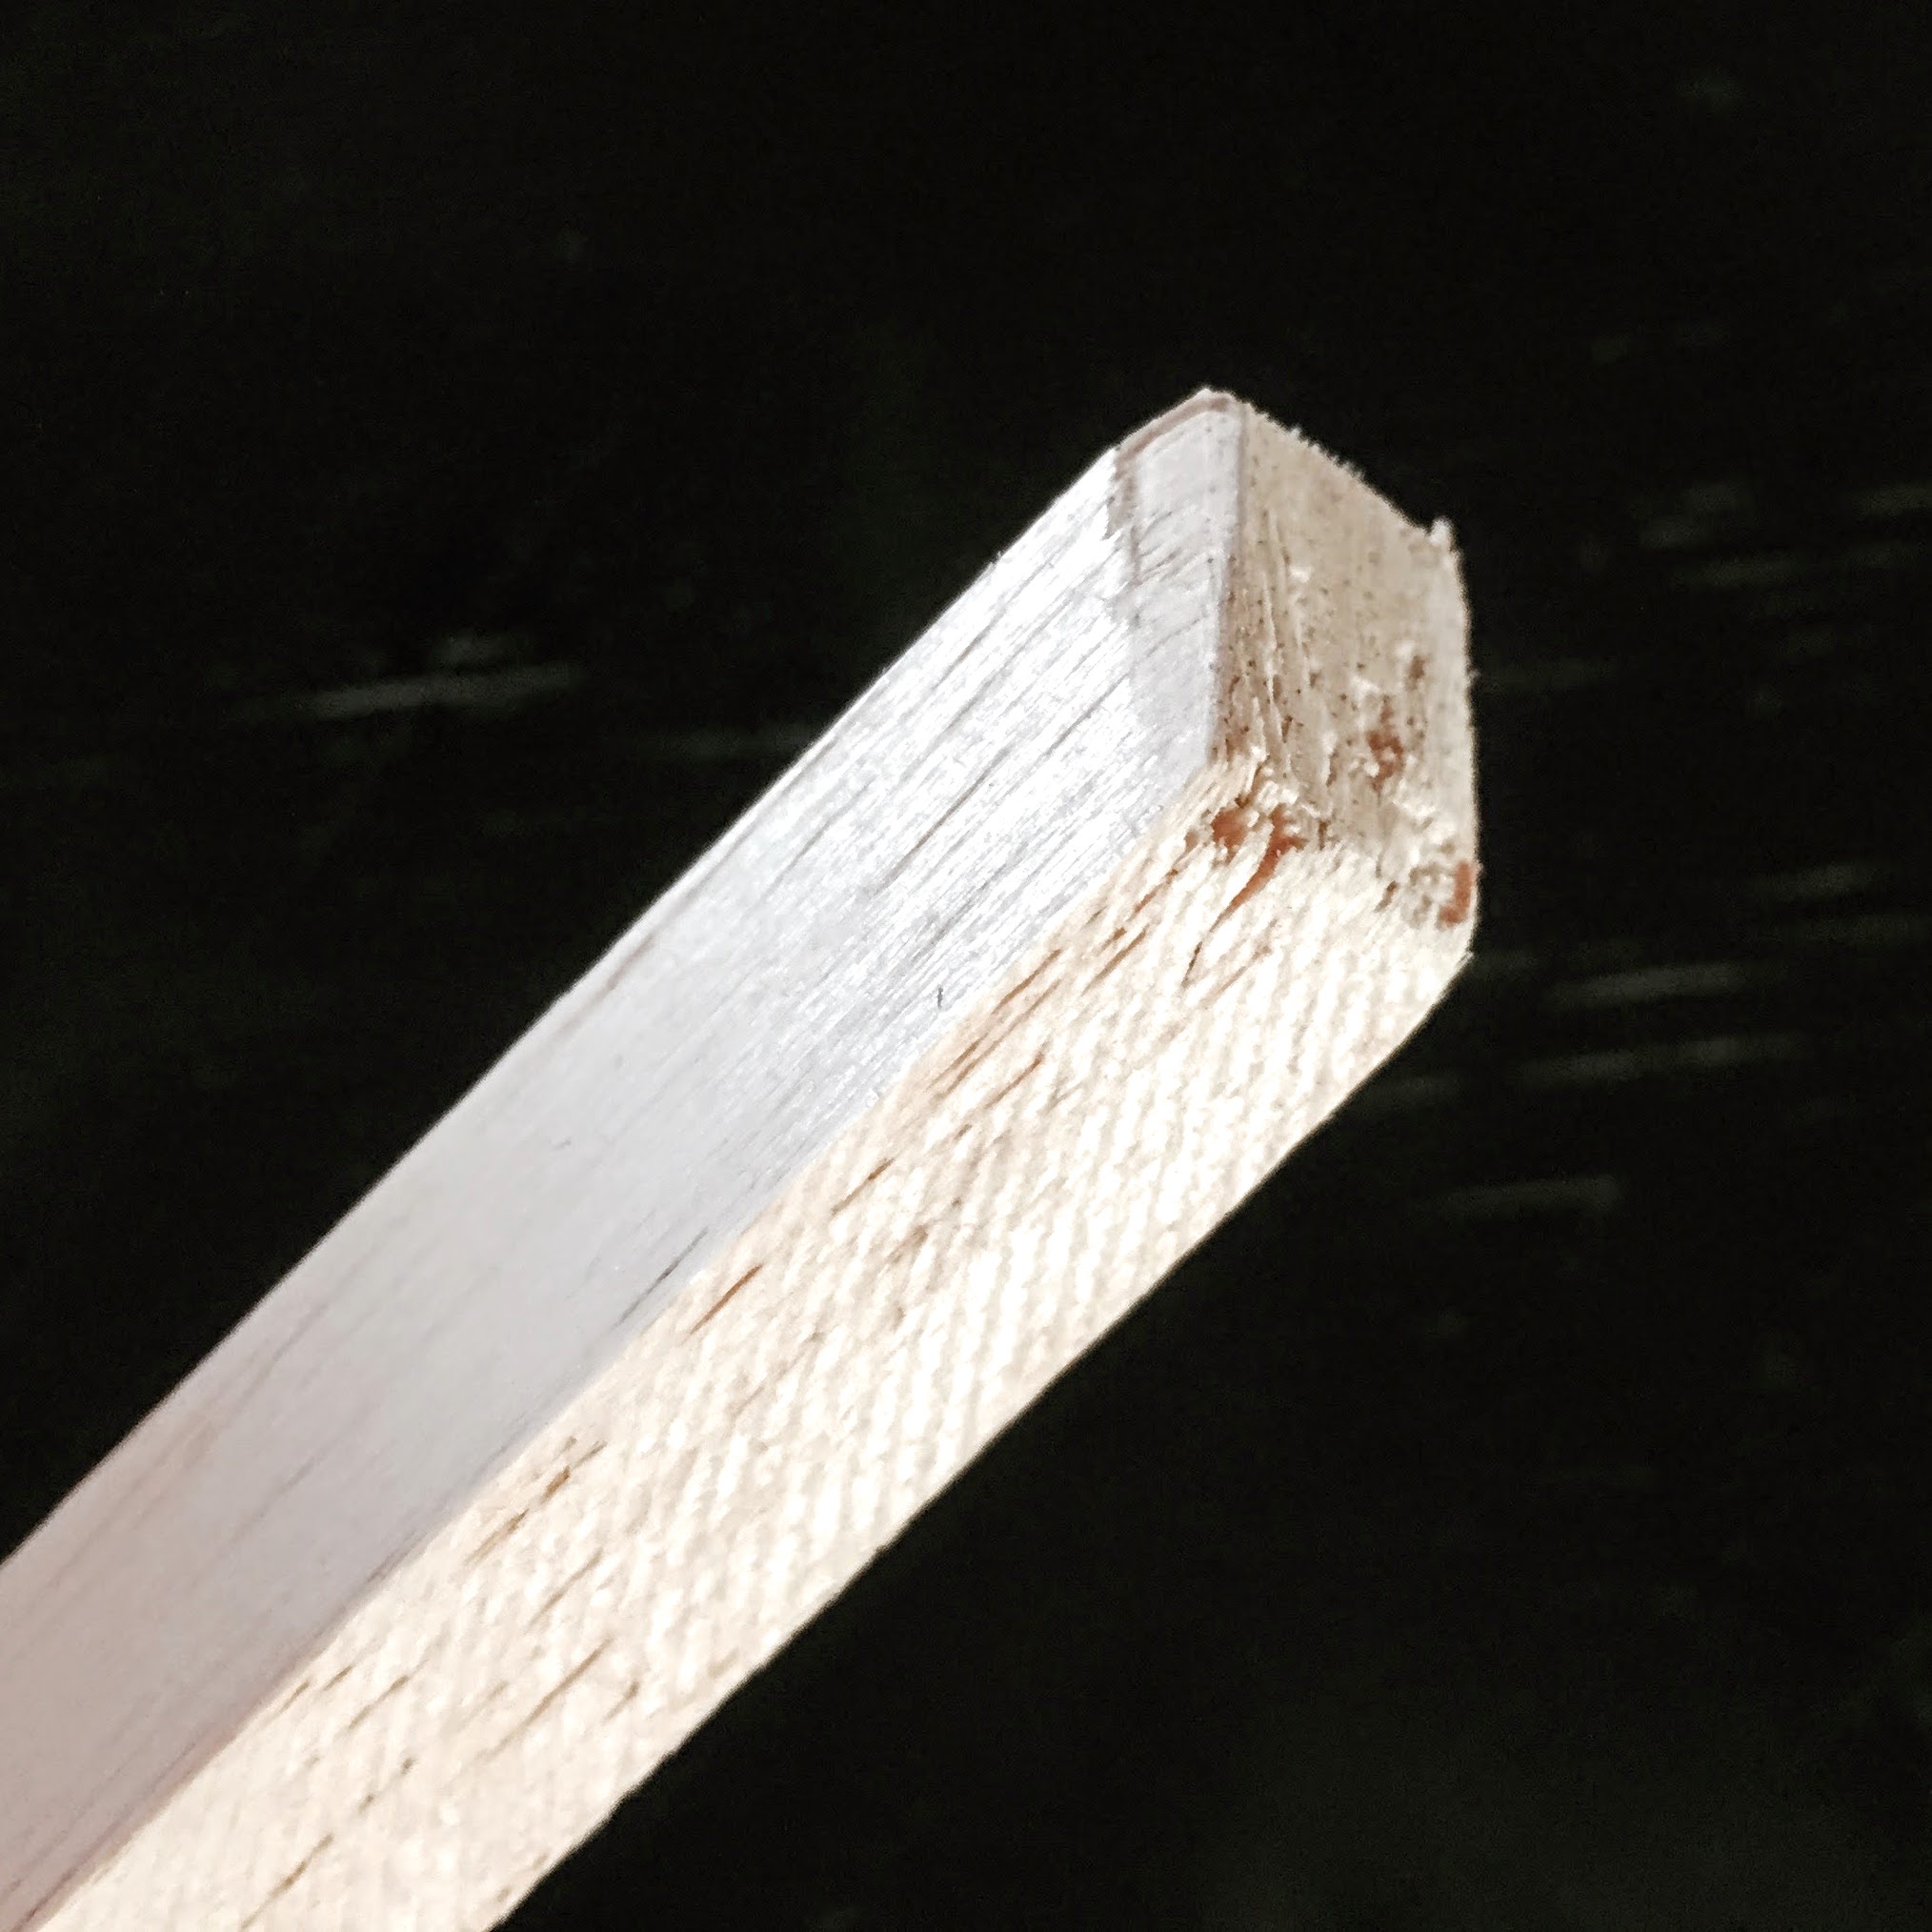
I just want you to see that it doesn’t have to be absolutely perfect. Once it is stained and lacquered, a lot of the flaws will disappear.
After you have carefully cut all 4 balsa wood frame pieces, they should look like this:
Now, we can start staining! Start by staining the one side of the balsa wood that you are going to glue down– it sounds strange, but once you’ve glued down the balsa, you can see the different color of the wood through the grooves in the backdrop (if you don’t stain it). So, you should stain the one side, wipe it down, and then glue it on immediately. If you wait for it to dry completely, the balsa wood may warp. So, do one piece at a time, stain, wipe, glue and so on. Don’t forget to use gloves (these Up & Up Latex Gloves from Target are great and about $3.50). The only thing that will get the stain off of your hands or even a tile surface, is straight acetone, which is pretty harsh stuff. It’s better to avoid using it if possible, but I would have some on hand, just in case!
You can stain the rest of the balsa wood once it has been affixed to the wood backdrop and the glue has dried. If hot glue is not working for you for some reason, you should buy something like an All- Purpose Super Glue with a Gel Consistency. Also, when gluing the balsa wood frame onto the backdrop, take care not to let the glue squish out in the front, where you will see it. Another note, is that you should attempt, as much as possible, to get the balsa wood flush with the wood backdrop– there will be about a 1/4″ of space between the balsa wood and the wall- so, you could push it back that much farther, but it looks good if it is lined up with the wood backdrop (I hope this is making sense!!! I know it’s a lot of information!). Here is the top and last piece of frame being glued to the backdrop. I’ve only stained the underside of the top piece and will be staining the rest of it, once the glue dries:
I wasn’t terribly particular about the frame matching with the ombre stain of the wood backdrop (in the original). I just did my frame all one color (MInwax Red Mahogany), and wiped it down as I went. I should note, that in the images above and below, I have not yet stained the wood backdrop portion. I would definitely suggest doing the staining before affixing the frame. For the purposes of this post, however, I am doing it the other way around! I just wanted to be able to give you a step by step on cutting and gluing the frame to the wood backdrop. Also, note that some pieces of the balsa will stain significantly darker than other pieces. This is because some of the pieces are much harder wood than others. The softer wood stains very dark, the harder pieces, lighter. Once they are lacquered, it all comes together nicely, even if they’re all slightly different colors. If the overall tone is the same, everything will look great!
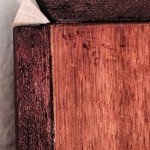
Here is the frame before you finish it off with the gold corners:
In this image, you can see very clearly where you need to make the cuts for your balsa wood frame. Also, just a note to remind you that in this image, the interior wood backdrop has not yet been stained, and nothing has been lacquered. As soon as I have finished the whole thing, I will add an updated picture to this post.
So, theoretically, if you are following along, and you’ve been building this as we go, your entire wood backdrop should already be stained and lacquered, and your frame should be stained. All you have left to do now, is to lacquer your frame! At this point, I would also suggest going in and coloring the heads of your nails with a black sharpie. It will make them virtually disappear. If you leave them silver, they’re pretty obvious, so you probably want to take the time to do this, after all the hard work you’ve put in!
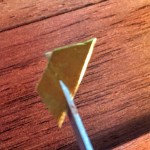
Now, for the gold corners! We’re almost there, people!!! You are going to want that thin piece of balsa wood that you bought at Michael’s (1/16″D x 3″W x 36″L). Take it and cut a small piece off (fig. 1 below)- just big enough so that it covers one of the corners of the balsa wood frame on the backdrop. I do A LOT of eyeballing and guessing and fitting-as-I-go, at this point. Hold one of the straight edges of the small piece you’ve just cut, up to the corner of the frame. Align it with the straight edge at the top of the vertical piece of the left-hand frame (fig. 2 below). Now, start cutting the triangle tiny bit by tiny bit, until you’ve managed to fit it nicely, into the corner (fig. 3 below):
-
- fig. 1
-
- fig. 2
-
- fig. 3
Now take the triangle that you’ve just created and either spray it with the 24K spray on both sides (it can get a bit unruly and fly away when you spray it- it’s a featherweight piece of wood), or you can use a gold-leaf pen (from Michael’s) to paint both sides and the edges, like so:
Once your triangle has dried, stick the gold washi tape to the front of it, cutting very carefully along each edge. If the triangle is too large for the washi tape, simply use 2 pieces. You will not be able to see it, when all is said and done:


In above images, I used gold washi tape and the gold leaf pen for all but the last image. The last triangle I did with the copper washi tape that came in the same pack as the gold, and I used this copper leaf pen. You could do any color of metallic that you would like. I’m doing copper accents in my bedroom, so I went with copper. If you prefer the copper tone, this is a beautiful Rose Gold spray paint that I would suggest for the Seagull Sunburst (it looks copperish) or you could use a copper spray paint. Also, just one more note to say that if you want the corners more squared off, you will have to do a right triangle rather than a normal triangle (the copper triangle above is a traditional triangle and gives the corners a more rounded off look). In the images of the backdrop that you see with the Seagull Sunburst, the corners are more squared off because I made them more right triangle-like. Just mess around with it and see what you come up with!
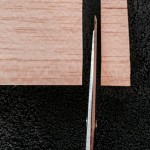
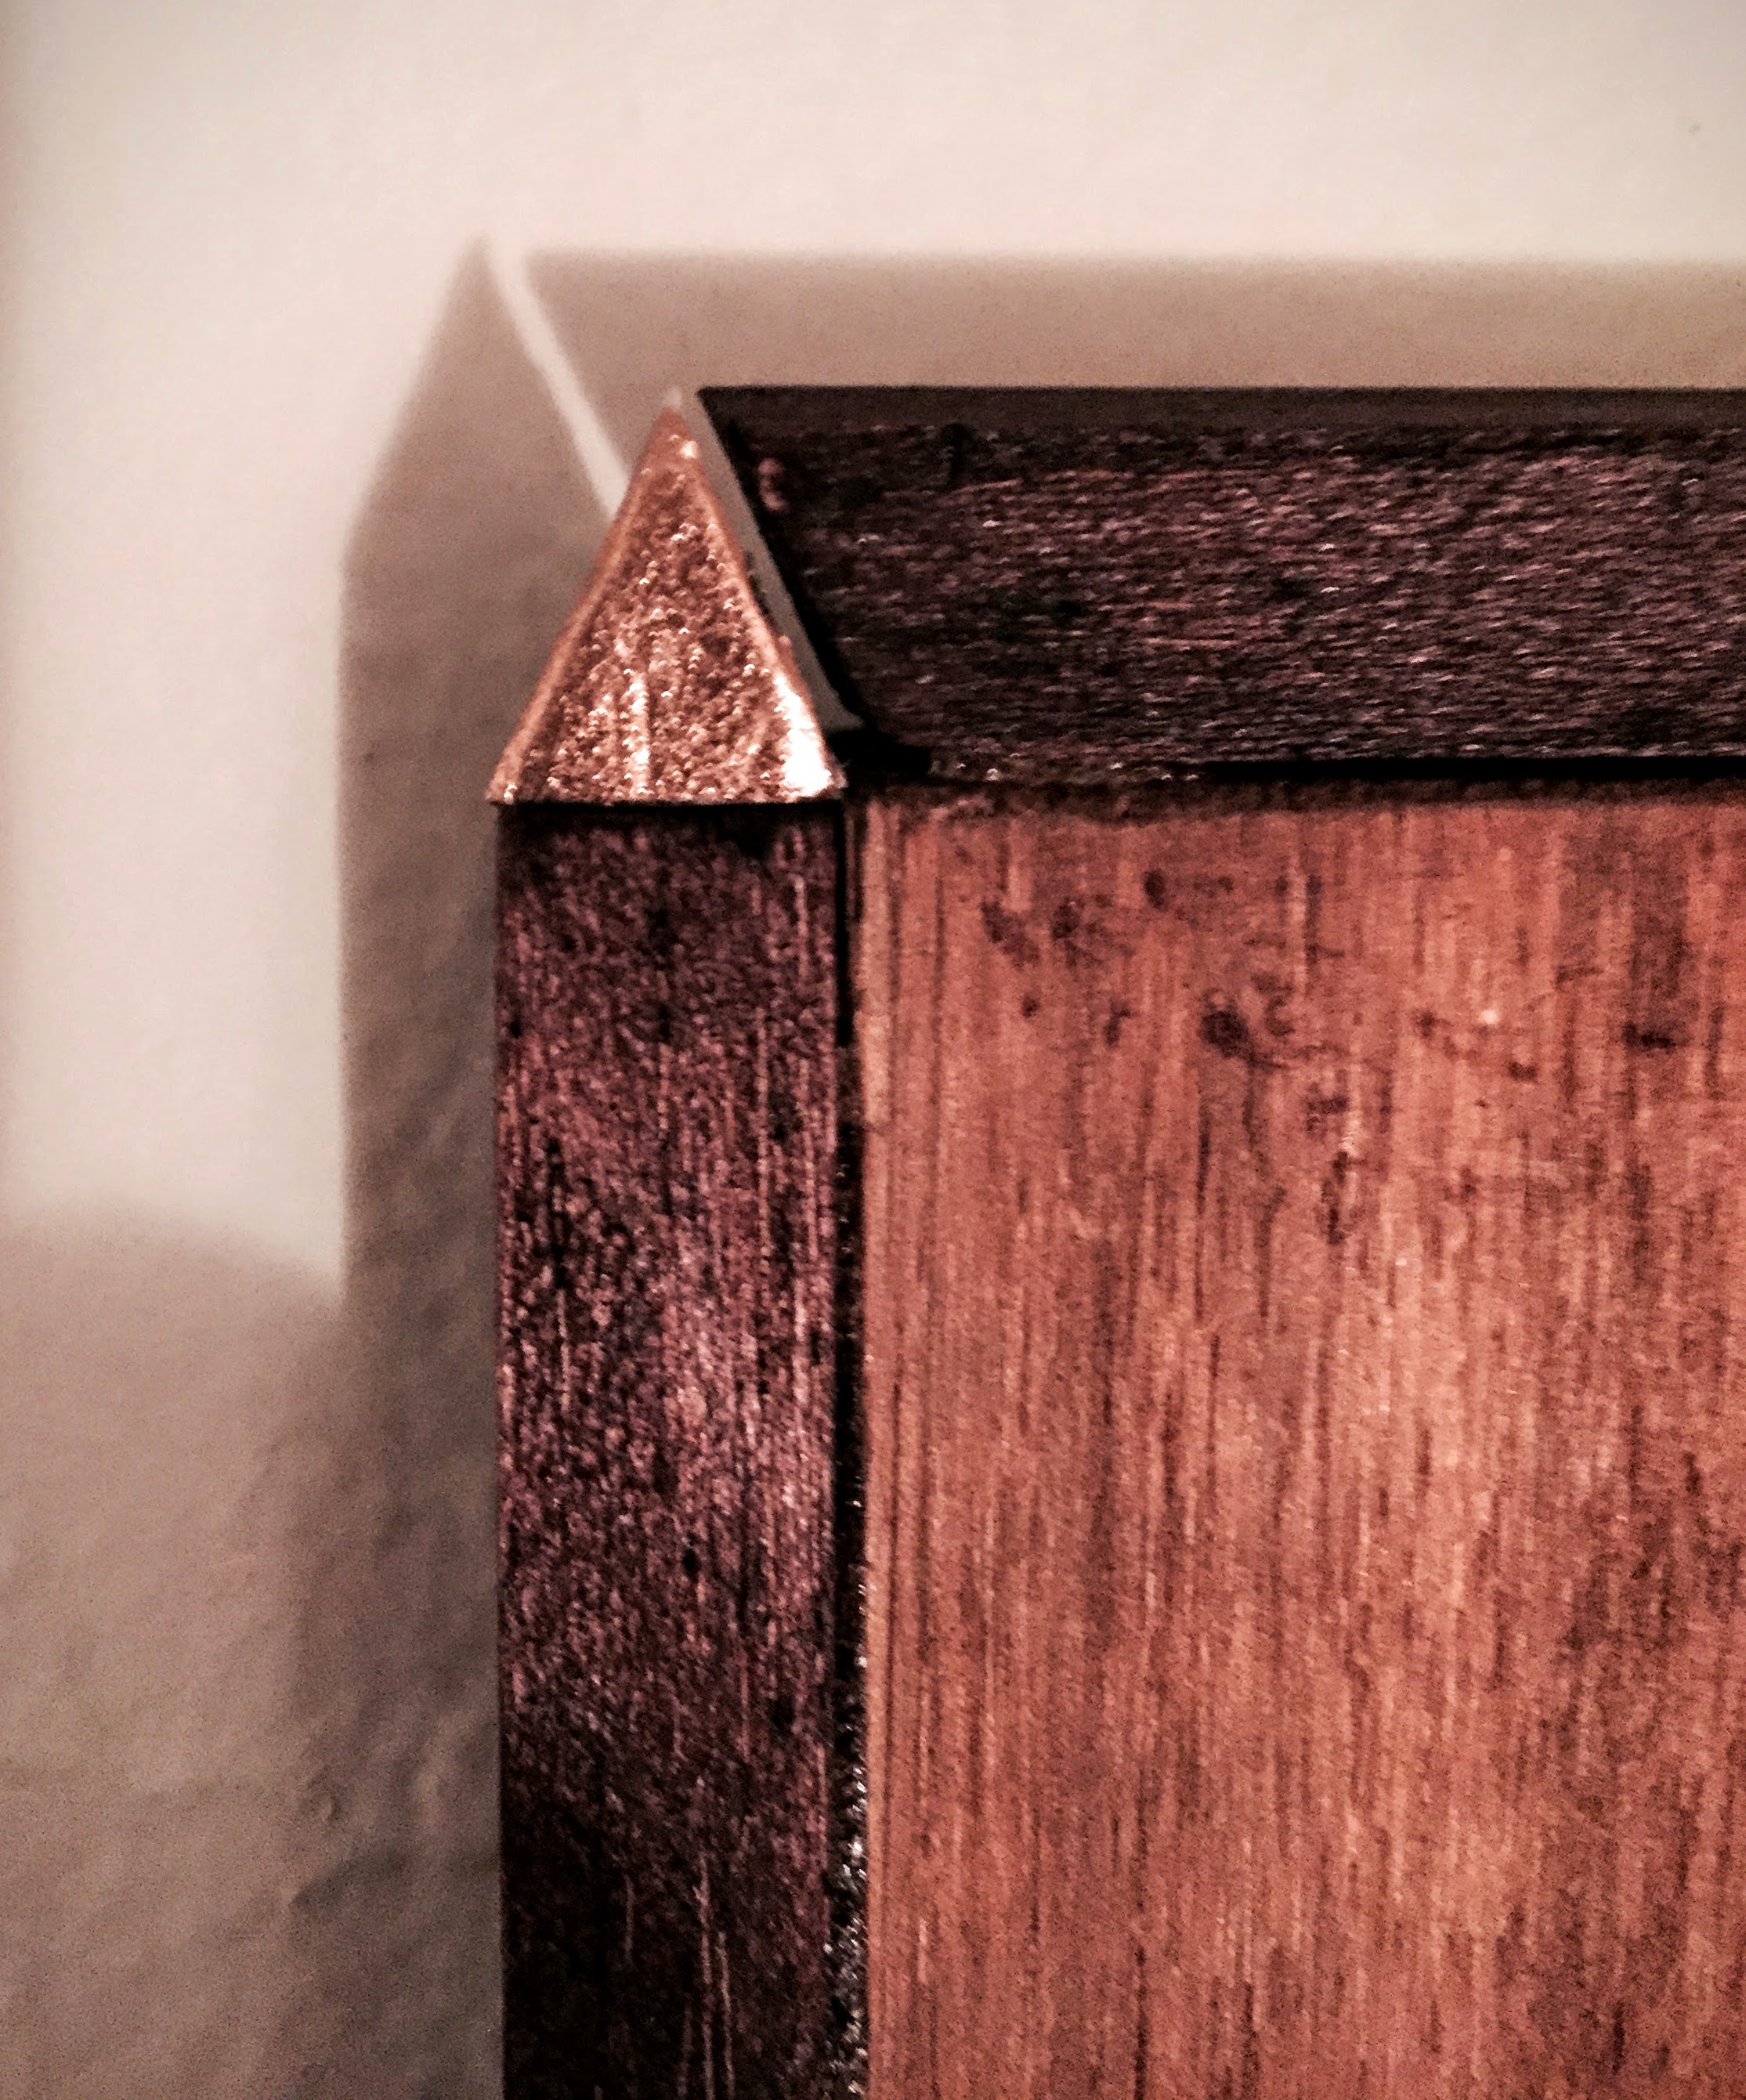
When you have finished your corner, it is ready to go up. You will need your 1 1/4″ nail with a 1/4″ head. You will want to center it right in the middle of the corner of the frame like so:
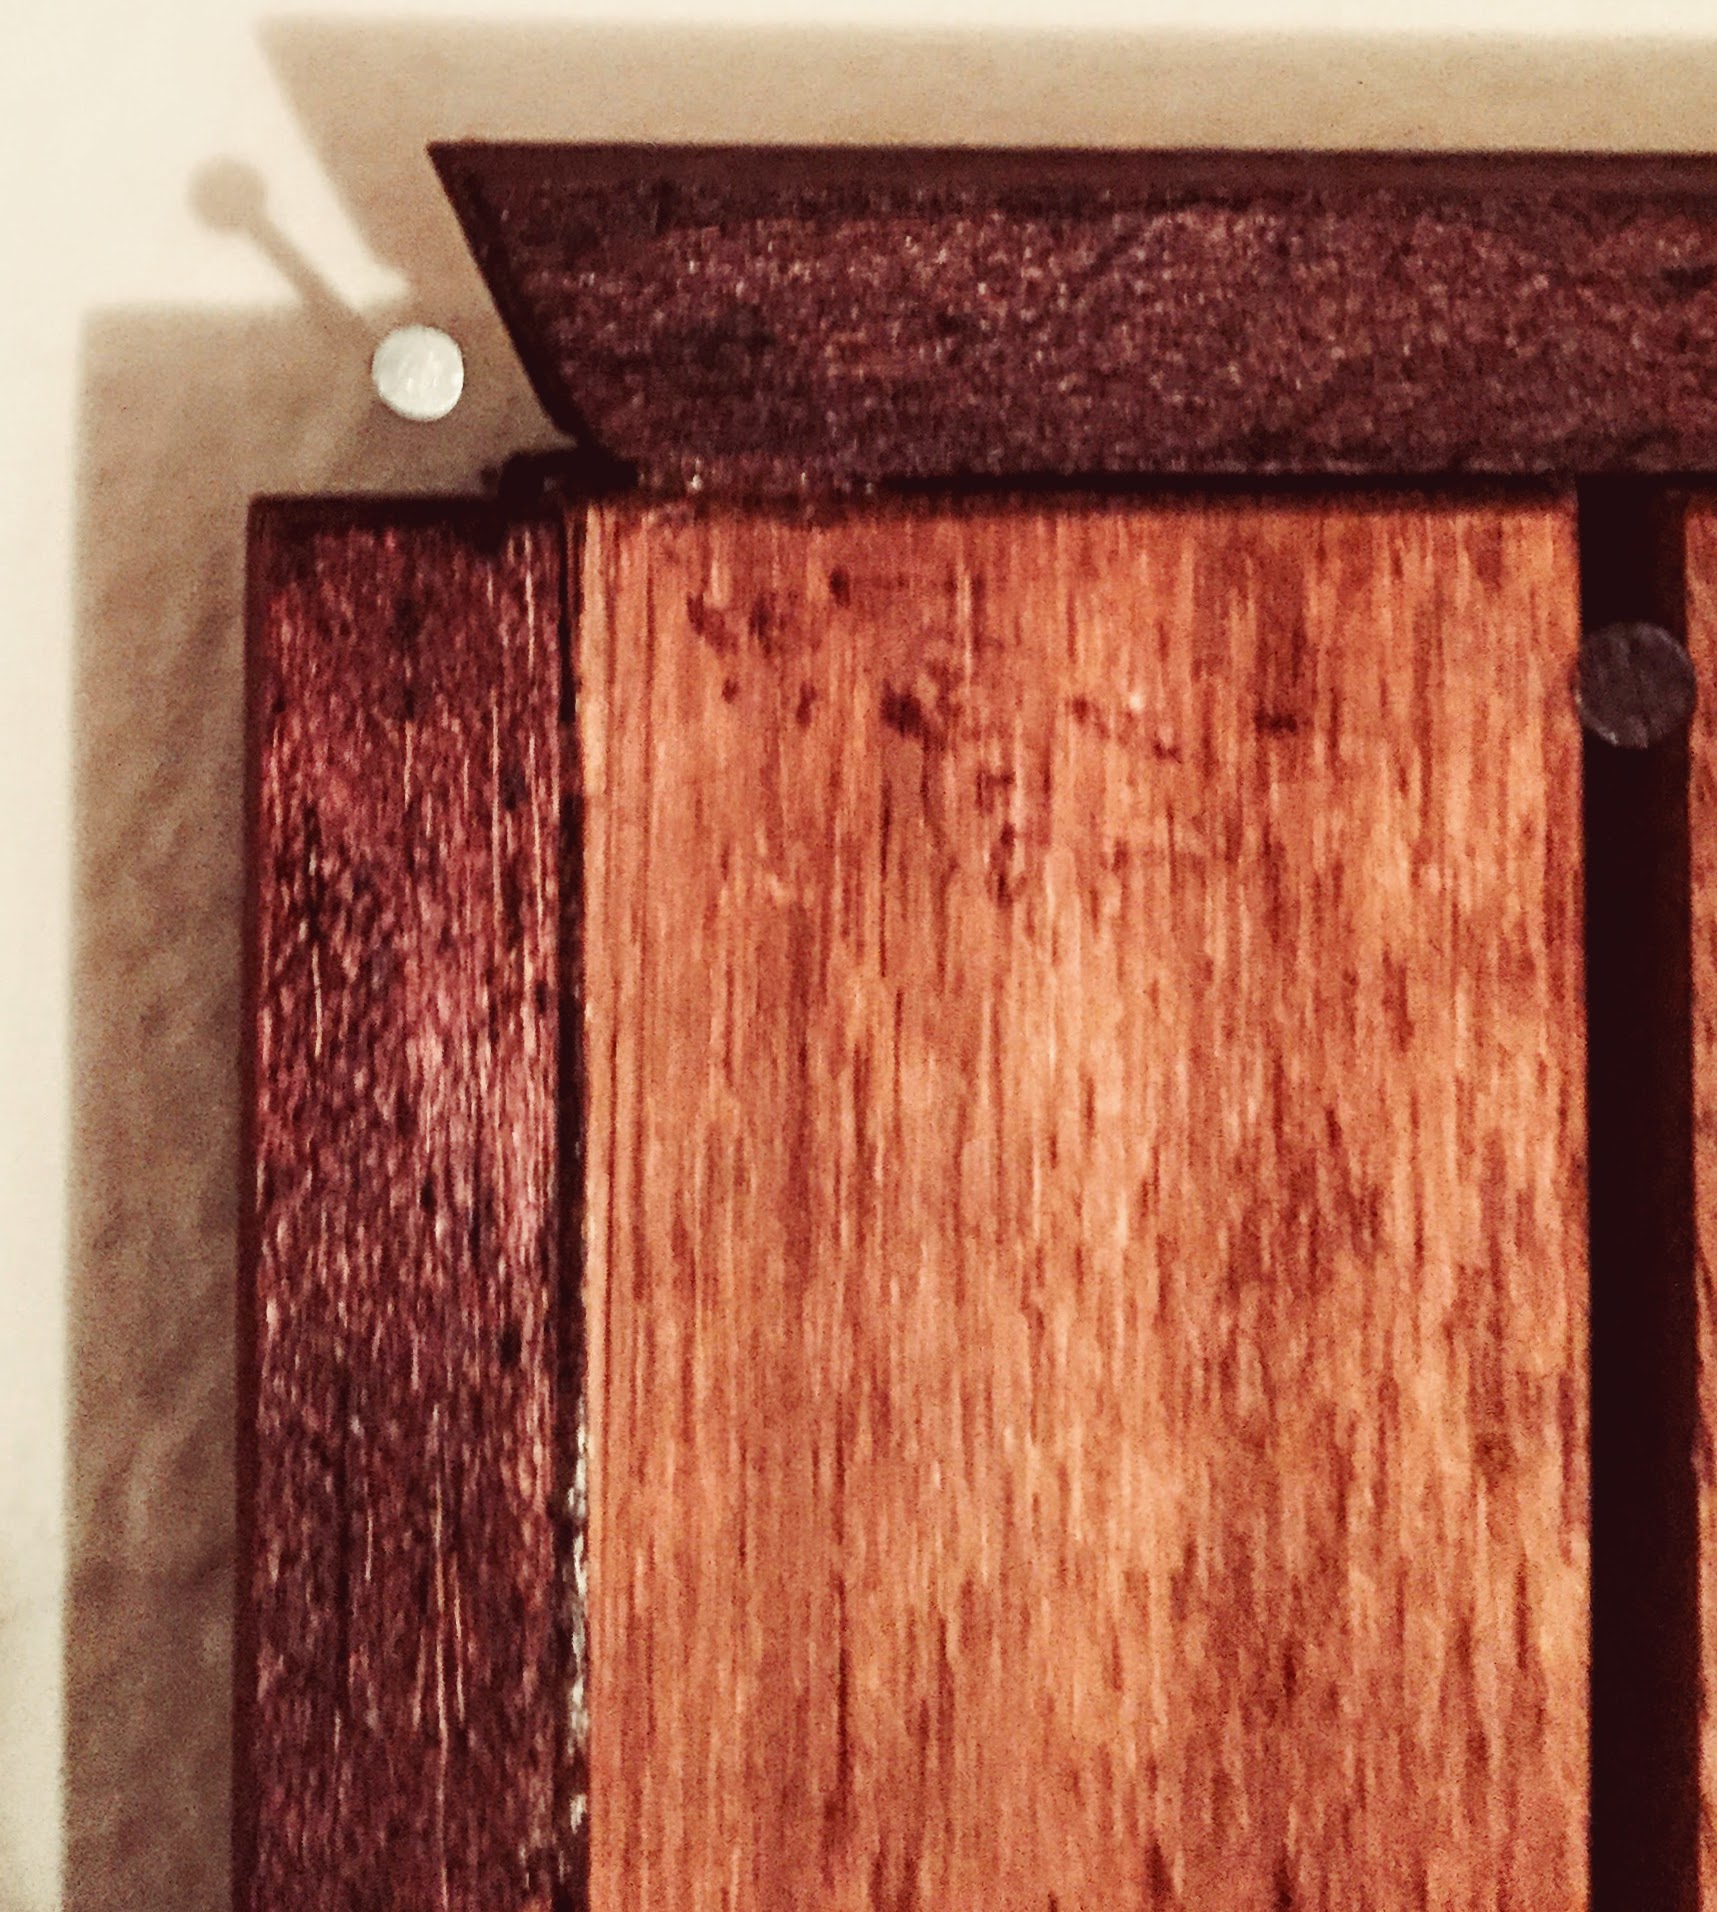
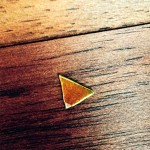
Then, you will want to hammer it in, so that when your gold corner is glued to the nail, it lies flush with the frame. So, take your triangle gold corner, place some hot glue on the back of it (hot glue is without a doubt, the way to go here), and then stick it to the nail head and straighten it so it looks good:
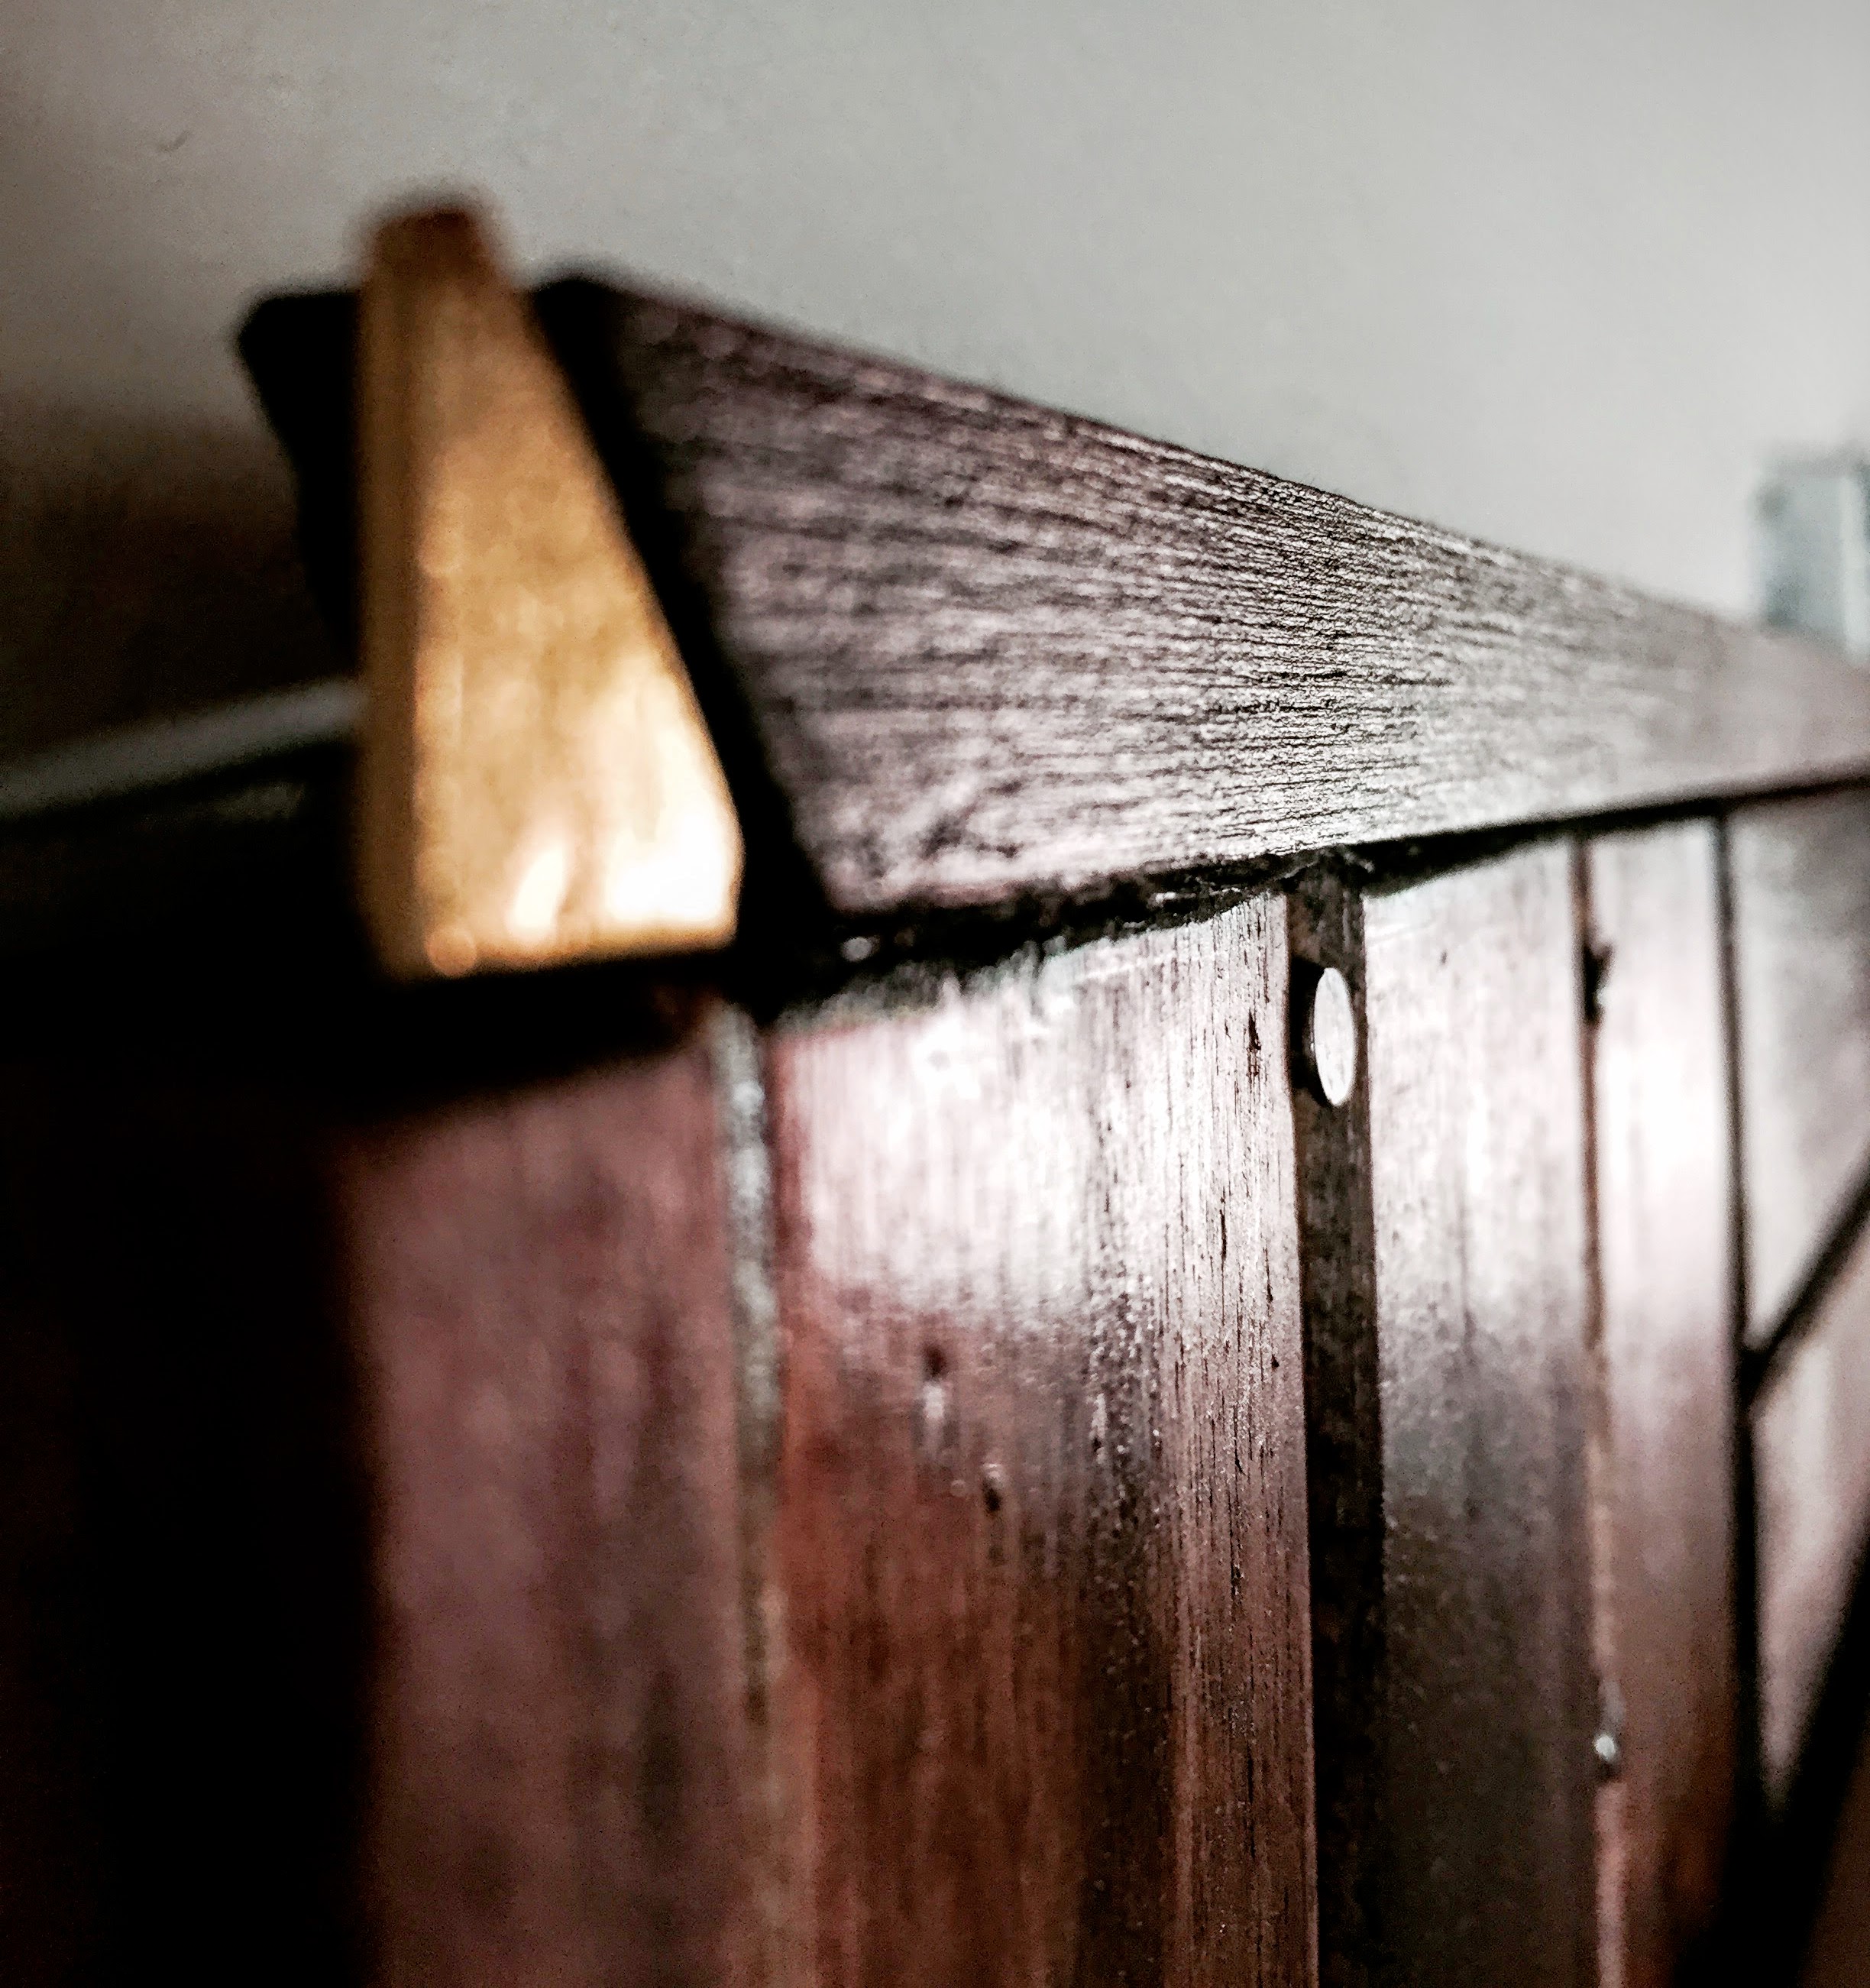
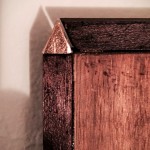
And Voila! A little jewel amid a sea of warm wood!
Now do the next 3 gold corners, and your end result will be a beautiful, stained, ombred, lacquered, and bejeweled Wood Backdrop like the one below!
And if seagulls and sunbursts aren’t your thing, then you can use this backdrop for most anything. A beautiful oil painting on canvas, a mobile you love, candles, lanterns- it’s a place to showcase something of beauty. The backdrop that I made during this post, is in my bedroom, and will have lanterns hanging down from the ceiling. I will be sure to update with pictures when I finish it off. I know I’ll love the candlelight flickering off the sheen of the warm wood.
There is just one more piece to this puzzle… the linen canvas. Super easy compared to what we’ve just done! Here is what you will need:
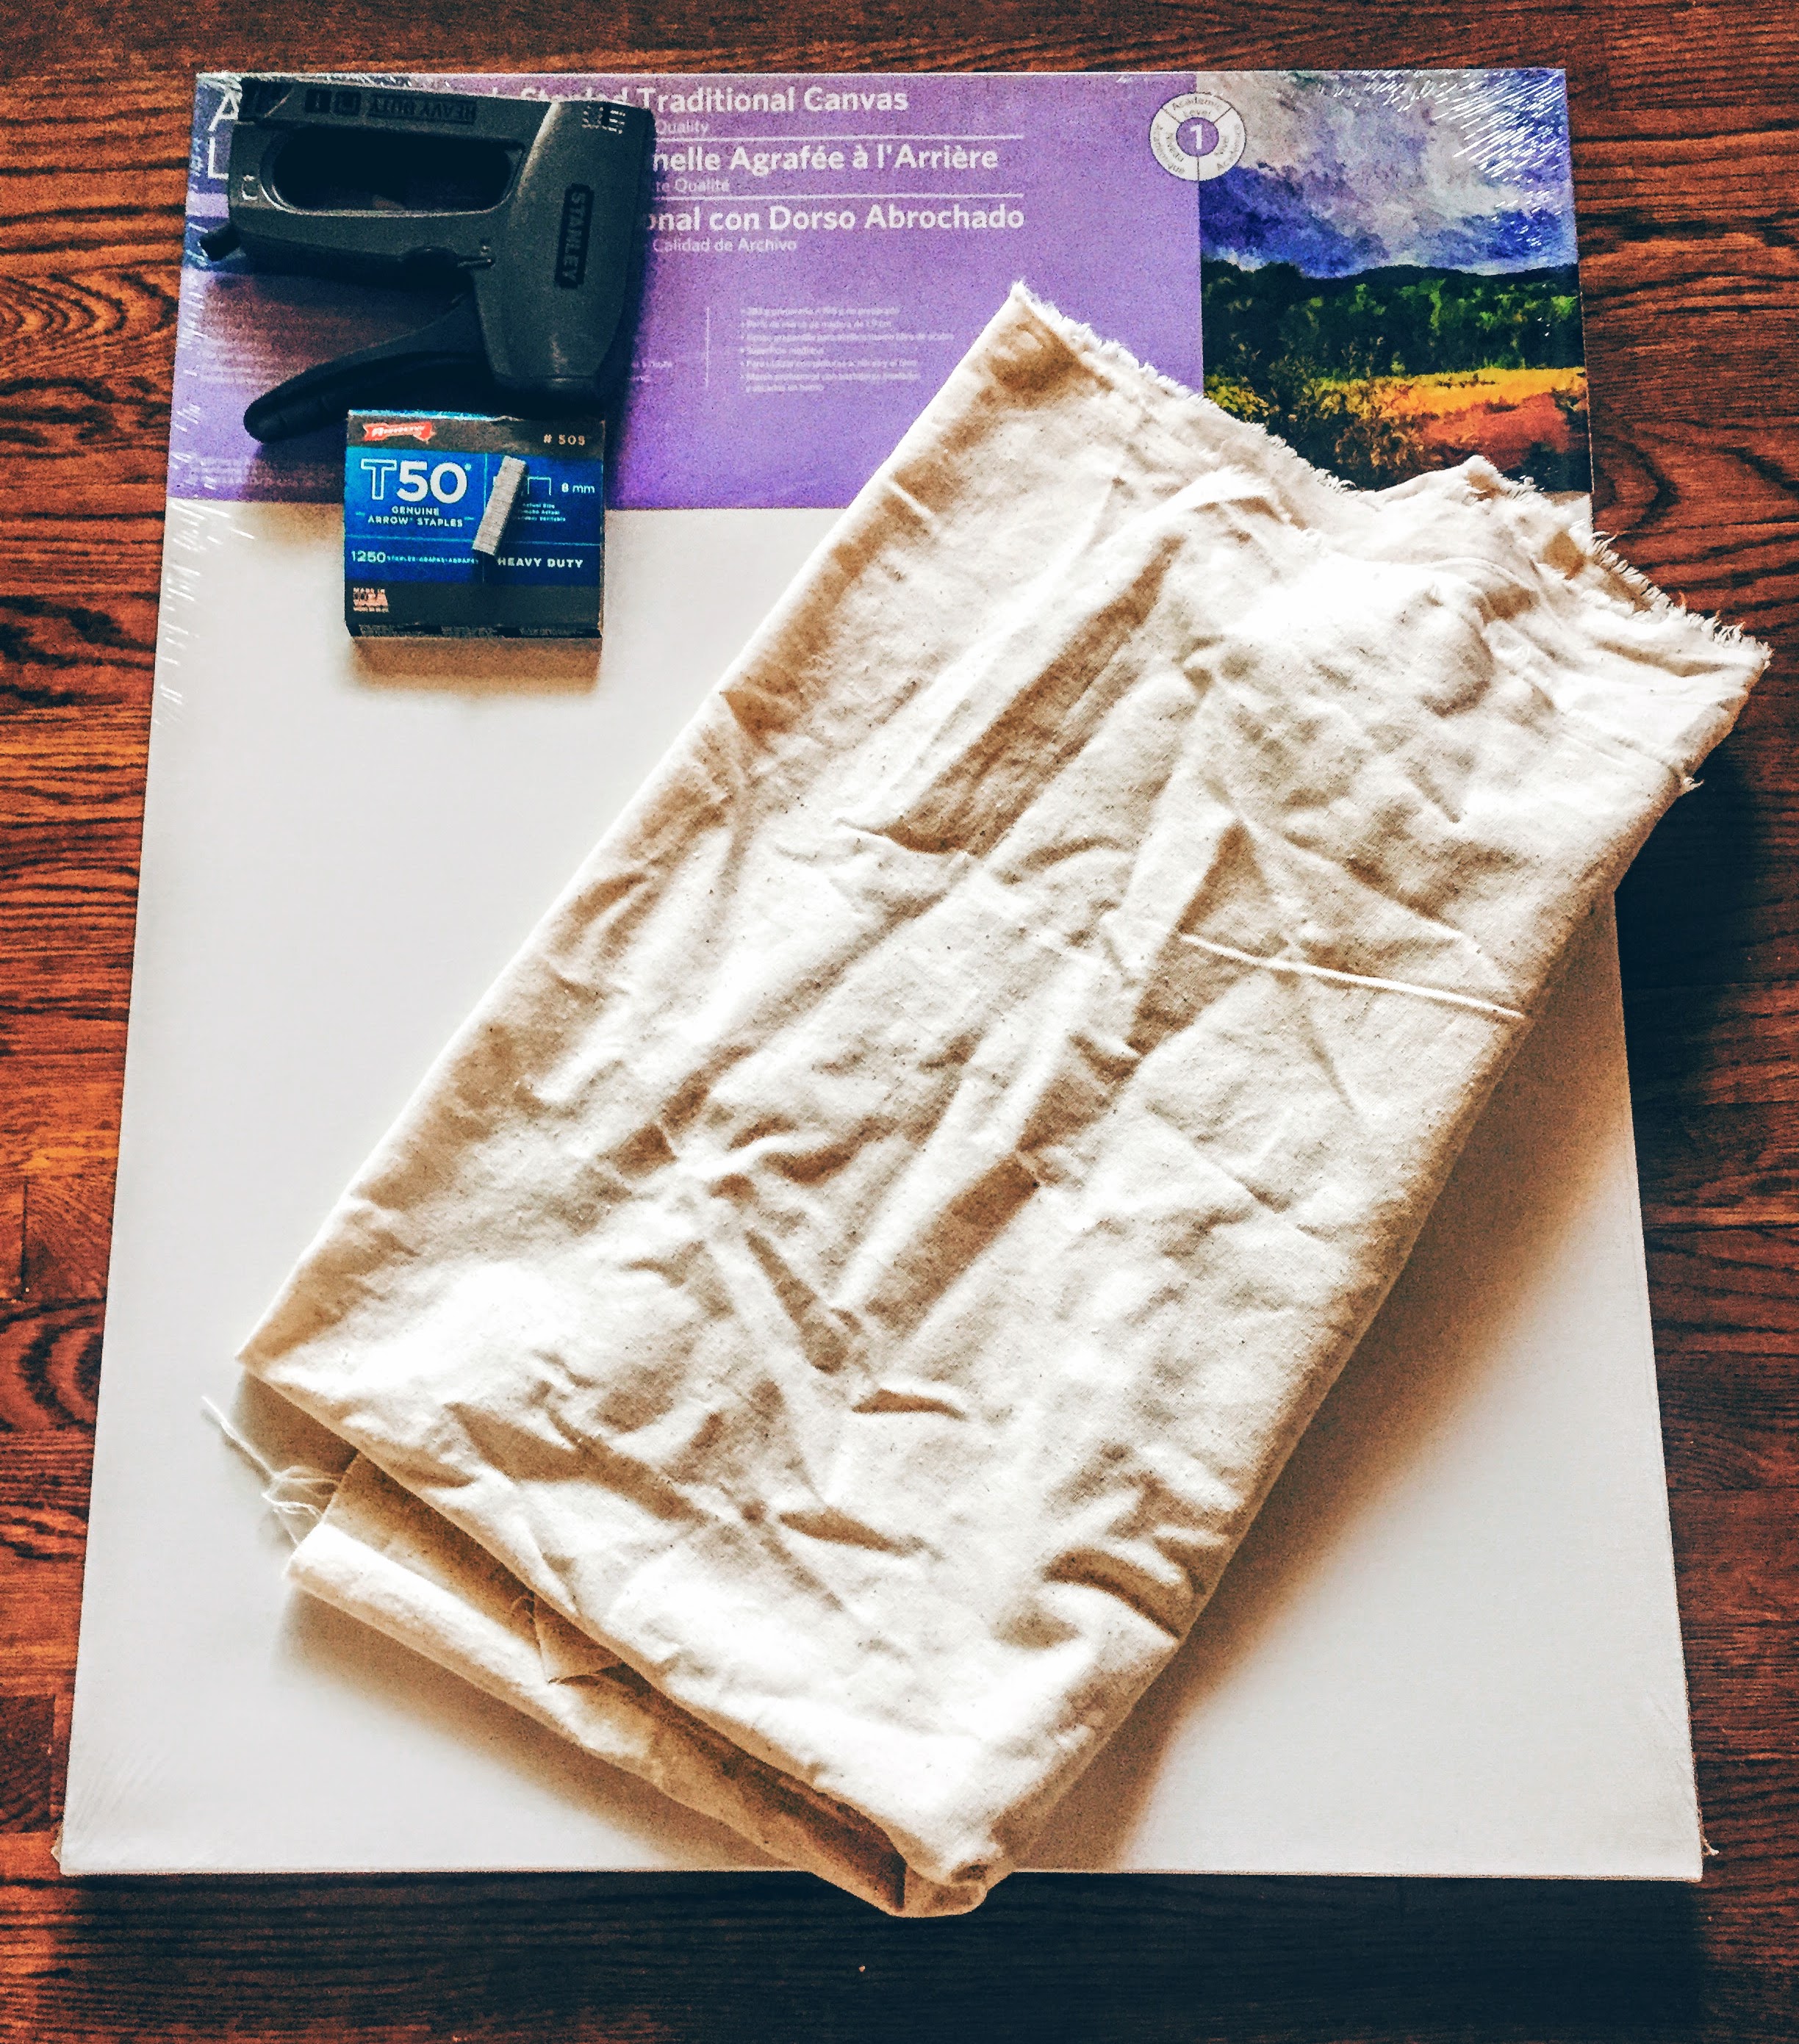
- 24″ x 30″ thin canvas (here is the one I bought at Michael’s)
- A staple gun
- 5/16″ staples (Note* Make sure that the staple gun you buy accomodates that size)- You need smaller staples because the canvas is thin.
- Linen or whatever fabric you choose (Note* A LOT of linens are a really greenish gray brown tone- I went with a more creamy , buttery color linen- it goes beautifully with the gold and doesn’t feel heavy once it’s up on the wall.
- An Iron and anti-wrinkle spray or water in a spray bottle- you will want your fabric very crisp and clean with no wrinkles when you wrap your canvas.
Let’s get started!
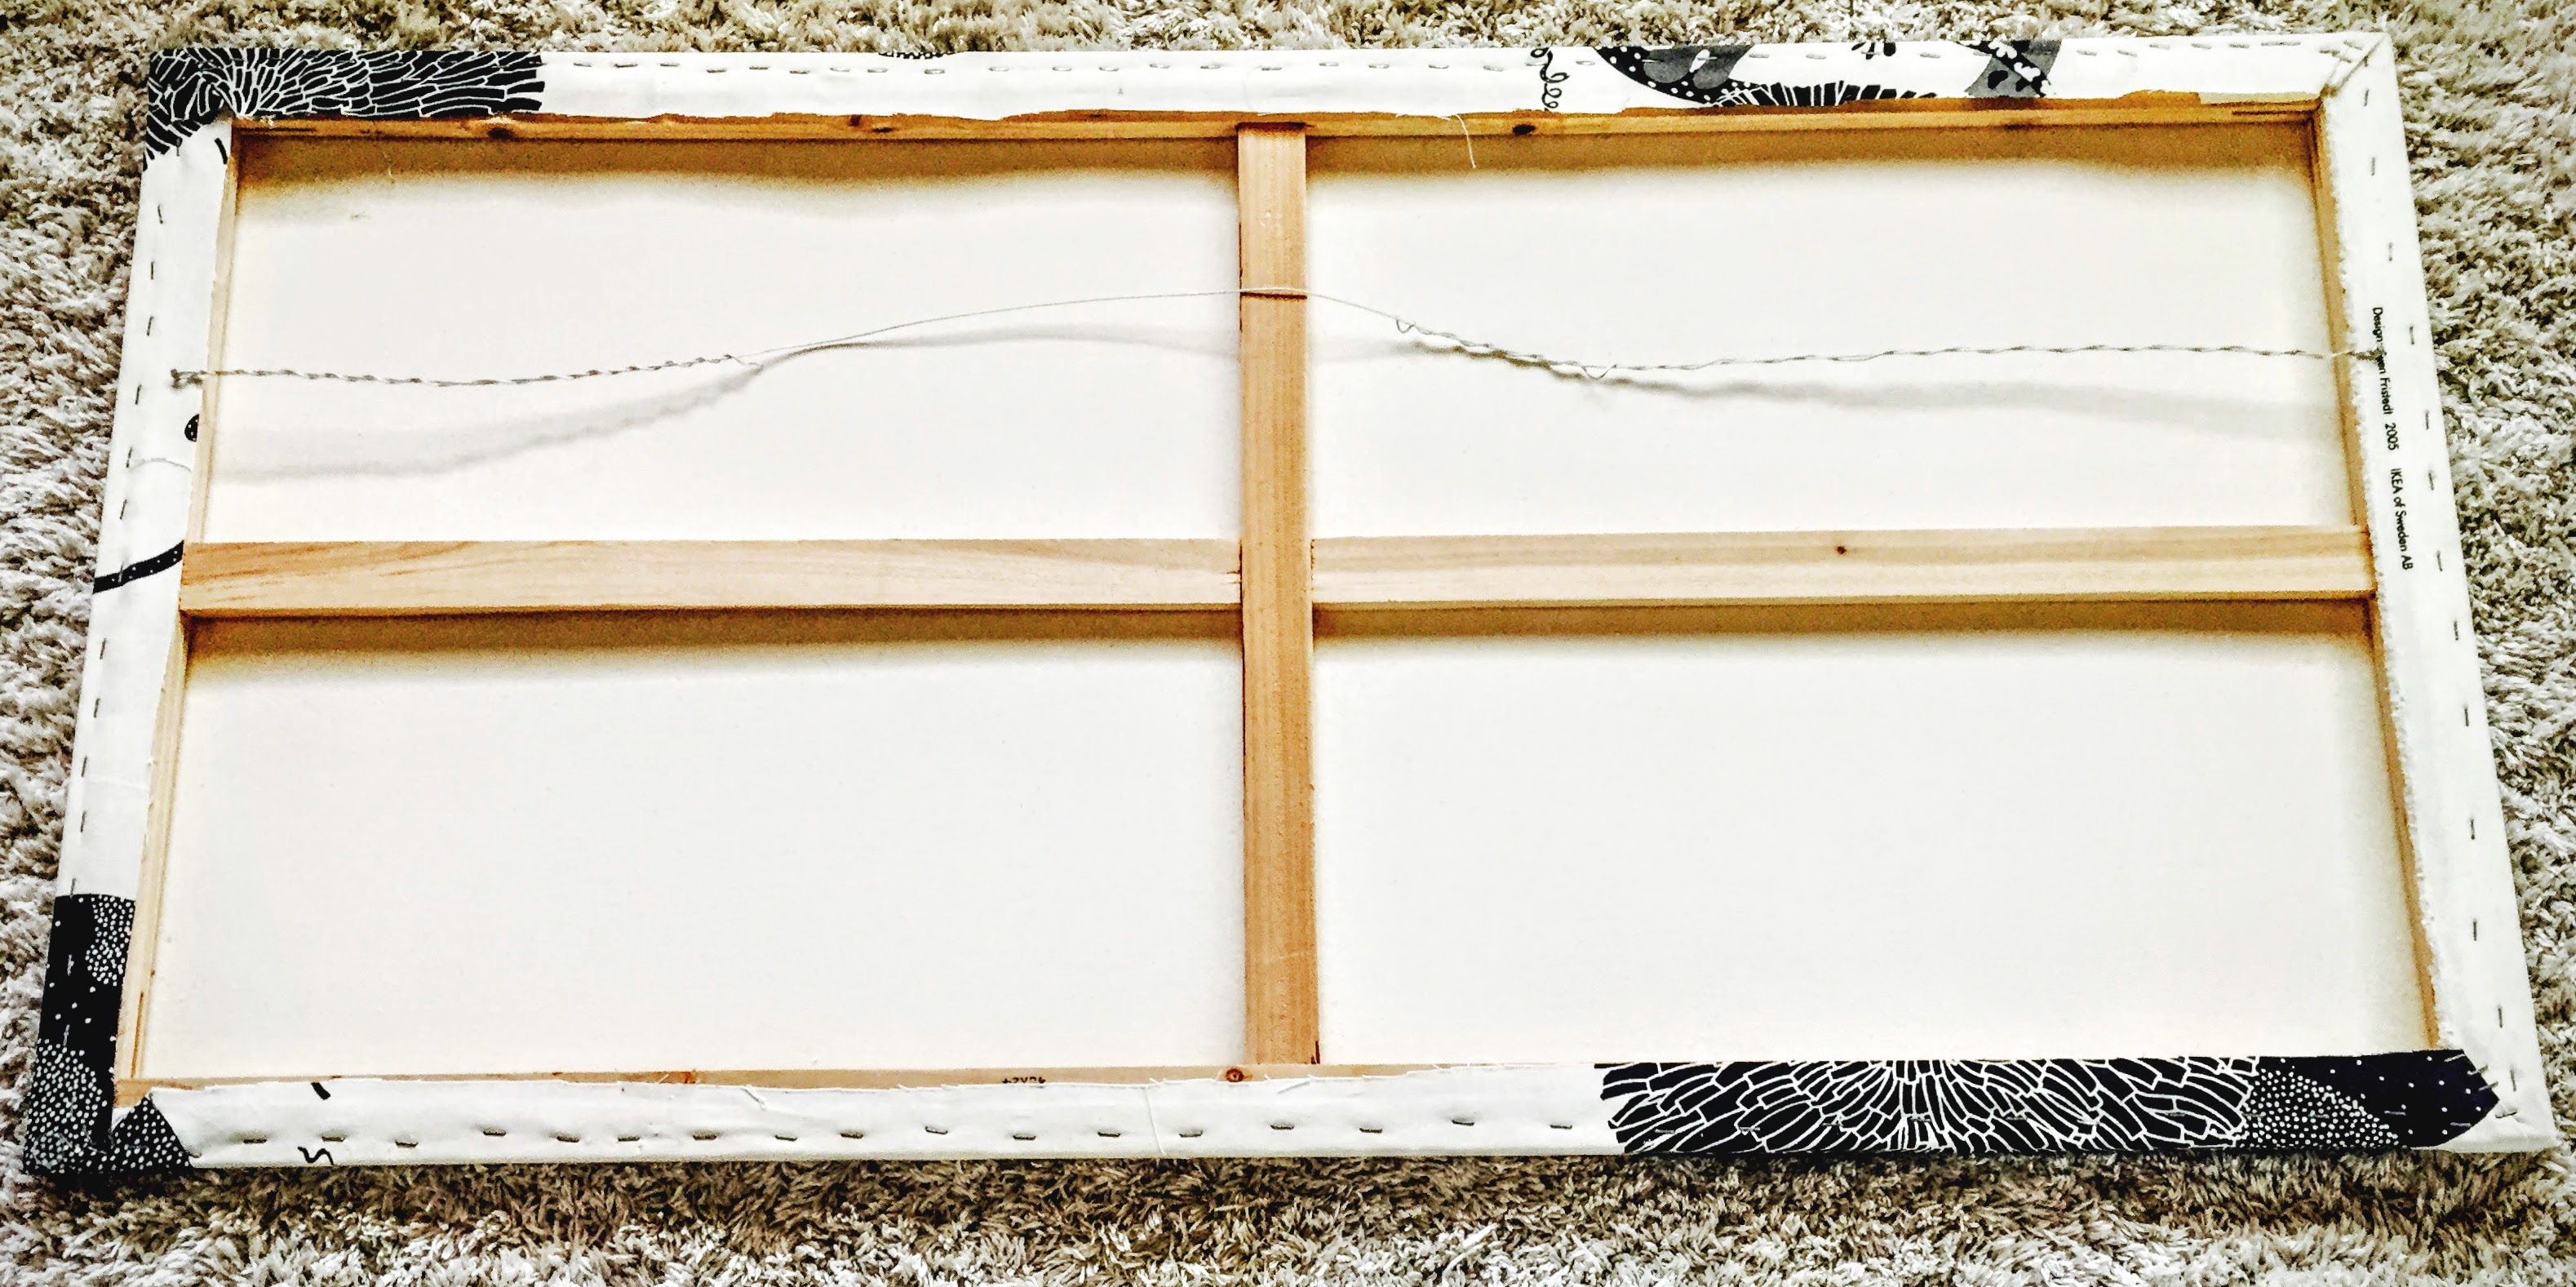
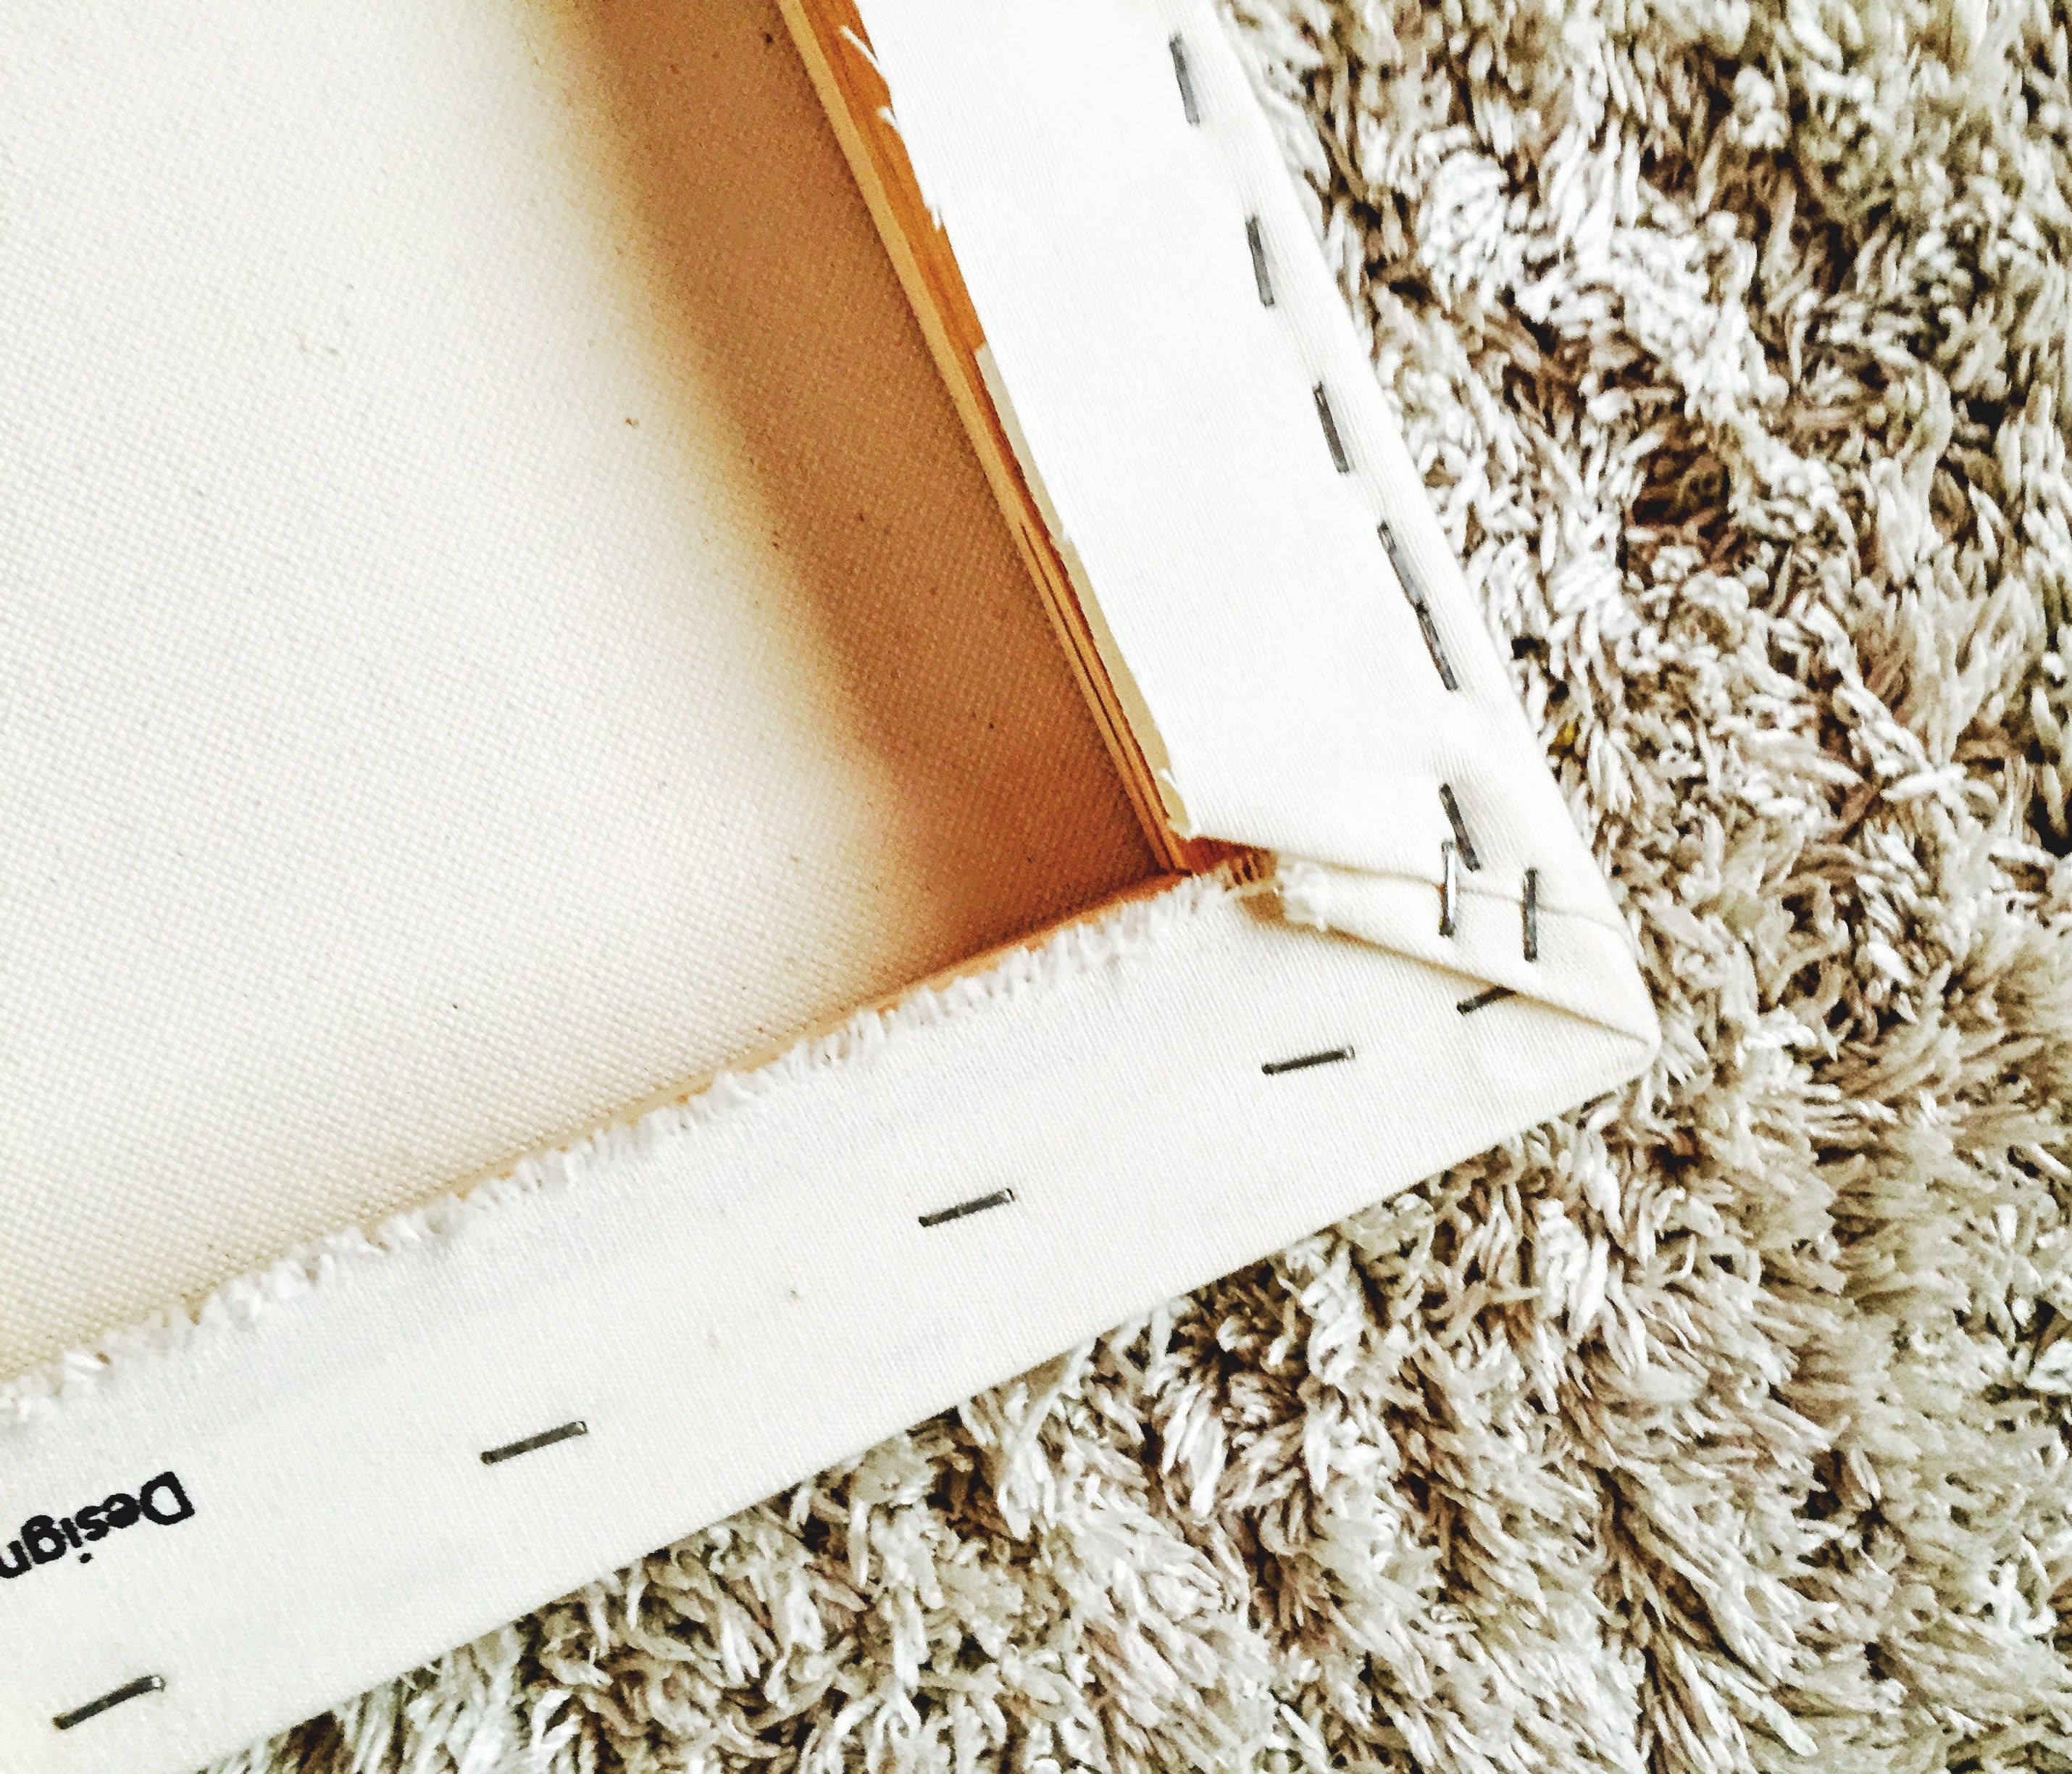
Once you have ironed your fabric, lay it face down, on a clean space on your floor. Then lay the canvas, face down on top of the fabric. Use a sharp pair of scissors (Fiskars Razor Edged Large Scissors will do the trick) and cut around the canvas, leaving about a 2″ border to wrap. Load your staple gun with your 5/16″ staples and start stapling! I usually begin in the middle at the top and go straight along stapling in both directions. Then I make sure the fabric is VERY taut, and do the bottom, starting in the middle and moving along in both directions. Then I get all the corners. Depending on how thick your fabric is, you may have to do some tight folds similar to wrapping a gift, or, if it’s thin enough, you can just kind of pull the corners down over the corners of the canvas, and put a staple or 2 in, and it looks great. You will just need to mess around with it a bit, to achieve a smooth look. You may need to cut off some excess fabric once you’ve stapled your corners. Now, move along and finish off the sides, making sure your fabric is as smooth and as tight as it can possibly be:
Once you have finished the wrapping and your fabric canvas is looking beautiful, you can hang it on the wood backdrop. I usually take a couple of small nails (the canvas is very light) and carefully hang it on the wood. If you can find a groove in the lines of the wood backdrop, that will allow you to hang your canvas straight and centered, that’s great. Then you won’t have to hammer nails into the wood backdrop. In my example, I had to actually hammer small nails into the wood backdrop to achieve the look I was going for.
Once the fabric canvas is up and straight, and exactly where you want it, you can get your sunburst and center it on the canvas. My sunburst is fairly light in weight (as most sunbursts are), so I was able to use a 1 1/2″ long nail– I don’t think a screw is an option because you have to nail through the fabric covered canvas and into the wood of the backdrop. The nail has to be long enough to go through the canvas to the wood and still have length for the sunburst to hang. So, find your spot, push the nail through the canvas until you feel the wood and hammer it in! Make sure it’s very stable and then, CAREFULLY, carefully hang your sunburst! You don’t want to lose any of those seagulls you spent so much time applying! And that’s it! Your gorgeous Seagull Sunburst with an Ombre Wood and Linen Backdrop!
We are DONE!!!!
There she is! I love it! It truly sets the tone in my living room! WOW! That was A. LONG. POST. I’m exhausted and I think I need a drink! Follow me over to my next post for a VERY simple (and short- I promise!) Late Summer Cocktail Recipe. I hope to see you there!
Thanks again for joining me and let me know if you have any specific questions. Also, PLEASE send me pictures if you make one of these guys! I would love to see different variations and creations!
Happy Nesting.
Kirstie xo