

Hi there! This is my first post ever at The Craine’s Nest and I’m so happy that you’re here. Welcome and thank you for stopping by. I’m excited to finally be starting my blog! I’ve been wanting to do this for years, but I kept putting it off. Yeah… I’m a perfectionist. Starting and finishing things is challenging for me. I always think they aren’t quite right or not exactly “perfect” enough. There are LOADS of problems that arise from this way of thinking, the most important being that you never accomplish anything! It’s all rooted in fear obviously, and I won’t go down that rabbit hole with you today, but suffice it to say, I’ve decided to get over it and get a move on with this thing. I have a lot to learn, but I also have have a lot to share. In fact, I have more projects, creations, and supplies than I know what to do with! I could start my own little retail and supplies shop. Yes. Being a perfectionist has slowed me down, but I’m here to get things going. There is NO time like the present, especially when mid-life is creeping up behind you real quick. So… I’m here now and I’m really excited to share all that I’ve loved and learned along the way! Let’s go!!!!
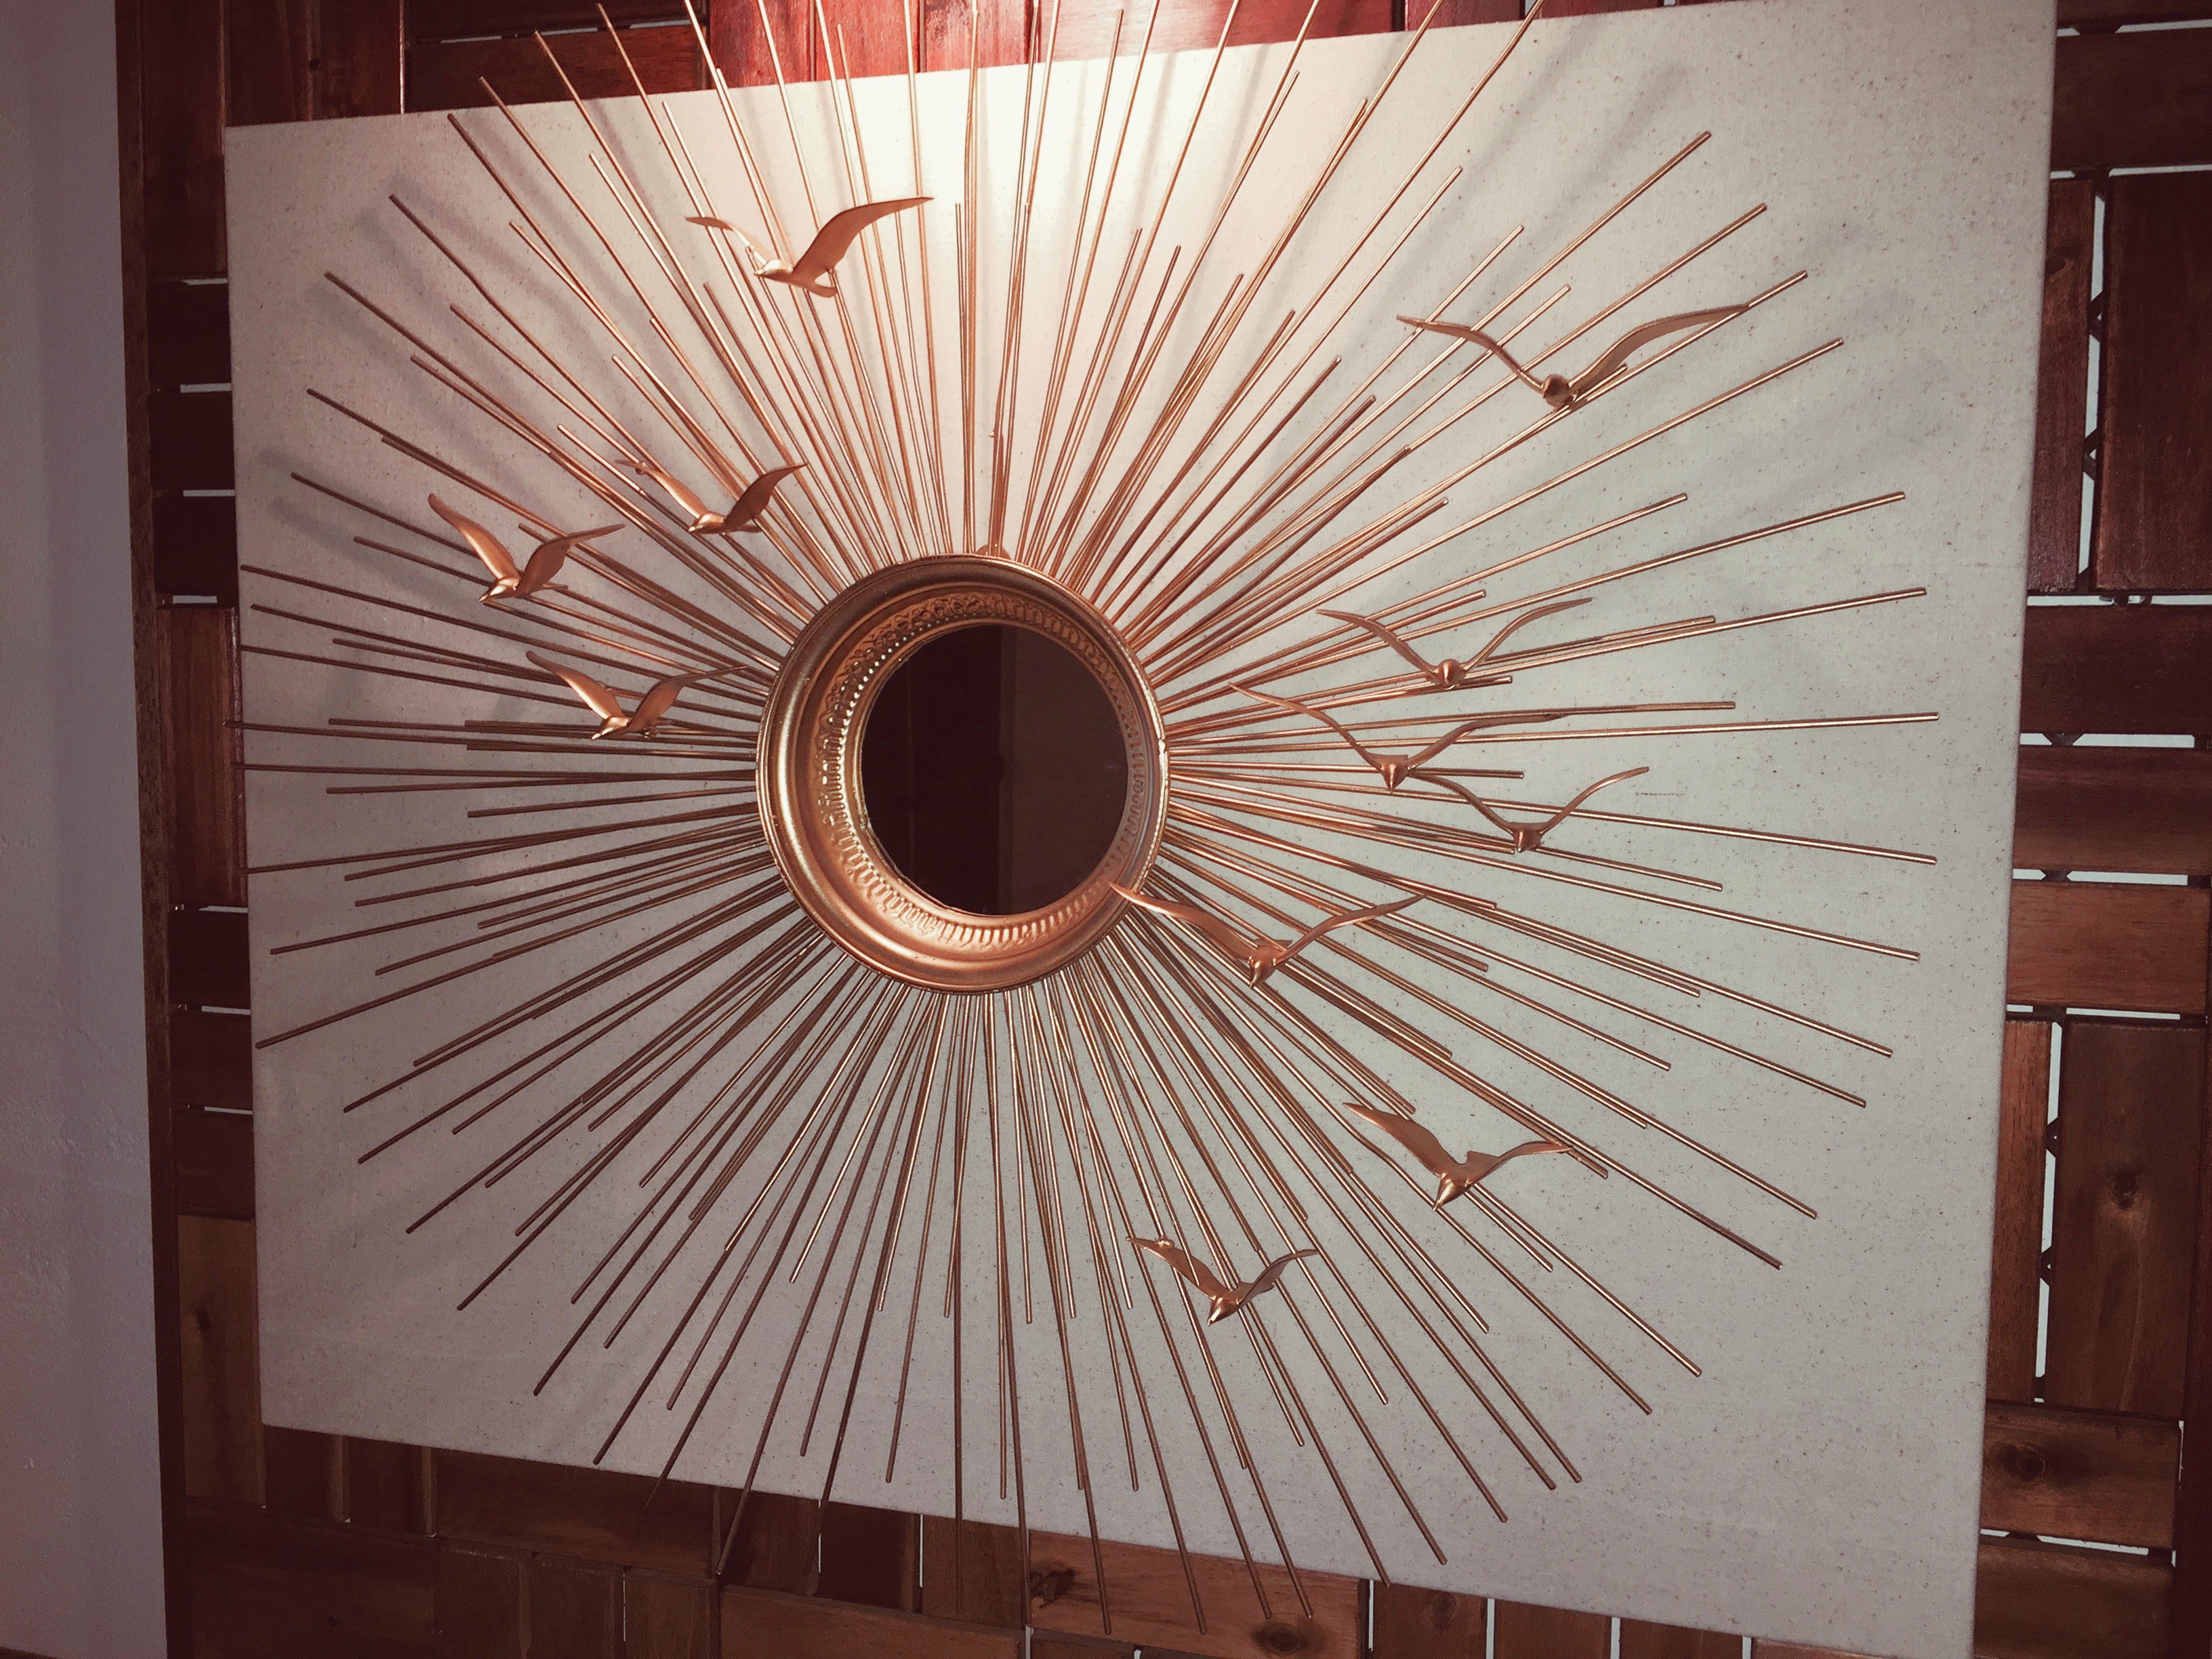
This is a Mid-Century inspired DIY/Reno that I made with a Target bought sunburst mirror. The artist/art house that inspired this piece, is called Curtis Jere. If you are a Mid Century buff, you may know this label. A couple of brothers-in-law started this company and made many a sunburst, seagull, and geometric sculpture in the 60’s and 70’s. I happened upon one of their gorgeous seagull sunburst mirrors while watching stumbling upon The Real Housewives of New York City. I, of course, don’t watch that nonsense, but I was nursing my baby, channel surfing, and there it was. Ok. Sometimes when I want to feel like a super awesome, down-to-earth person I tune in. Ok, alright… I do watch it. But only very sporadically and really only for Carole Radziwill, who was married to a Kennedy, and really and truly has a beautiful and awesome sense of style!
She renovated her apartment and hung a giant seagull sunburst mirror on the wall under her staircase. I fell in love with it and started researching what it was, who created it, where I might find it, etc. After a long and exhaustive search, I came to the conclusion that it was probably a Curtis Jere Sunburst sculpture.
The sculpture I found online that looks most like the one I saw on the show, goes for about $2,500. Curtis Jere made many variations on this sunburst, ranging in price from about $200 to $2,500 (and up, I’m sure… those are just the ones I found). The one that I happen to love and adore is $2,500. Of course. So… since paying that price for a piece of art was not in our budget, I started scouting around for mirrors and seagulls. I found this mirror at Target for 50 bucks and found the Seagulls on Etsy, You get 4 dozen for about 25 dollars, right here. Finding the seagulls was a challenge- I bought many a seagull and even tried to make my own out of clay, but nothing really worked until I found these little guys. I used a 24K Metallic Gold paint that I found at Michael’s, cut some of the seagulls down to give variation in size and shape, and sanded the bejeezus out of them… and voila! I love the result!
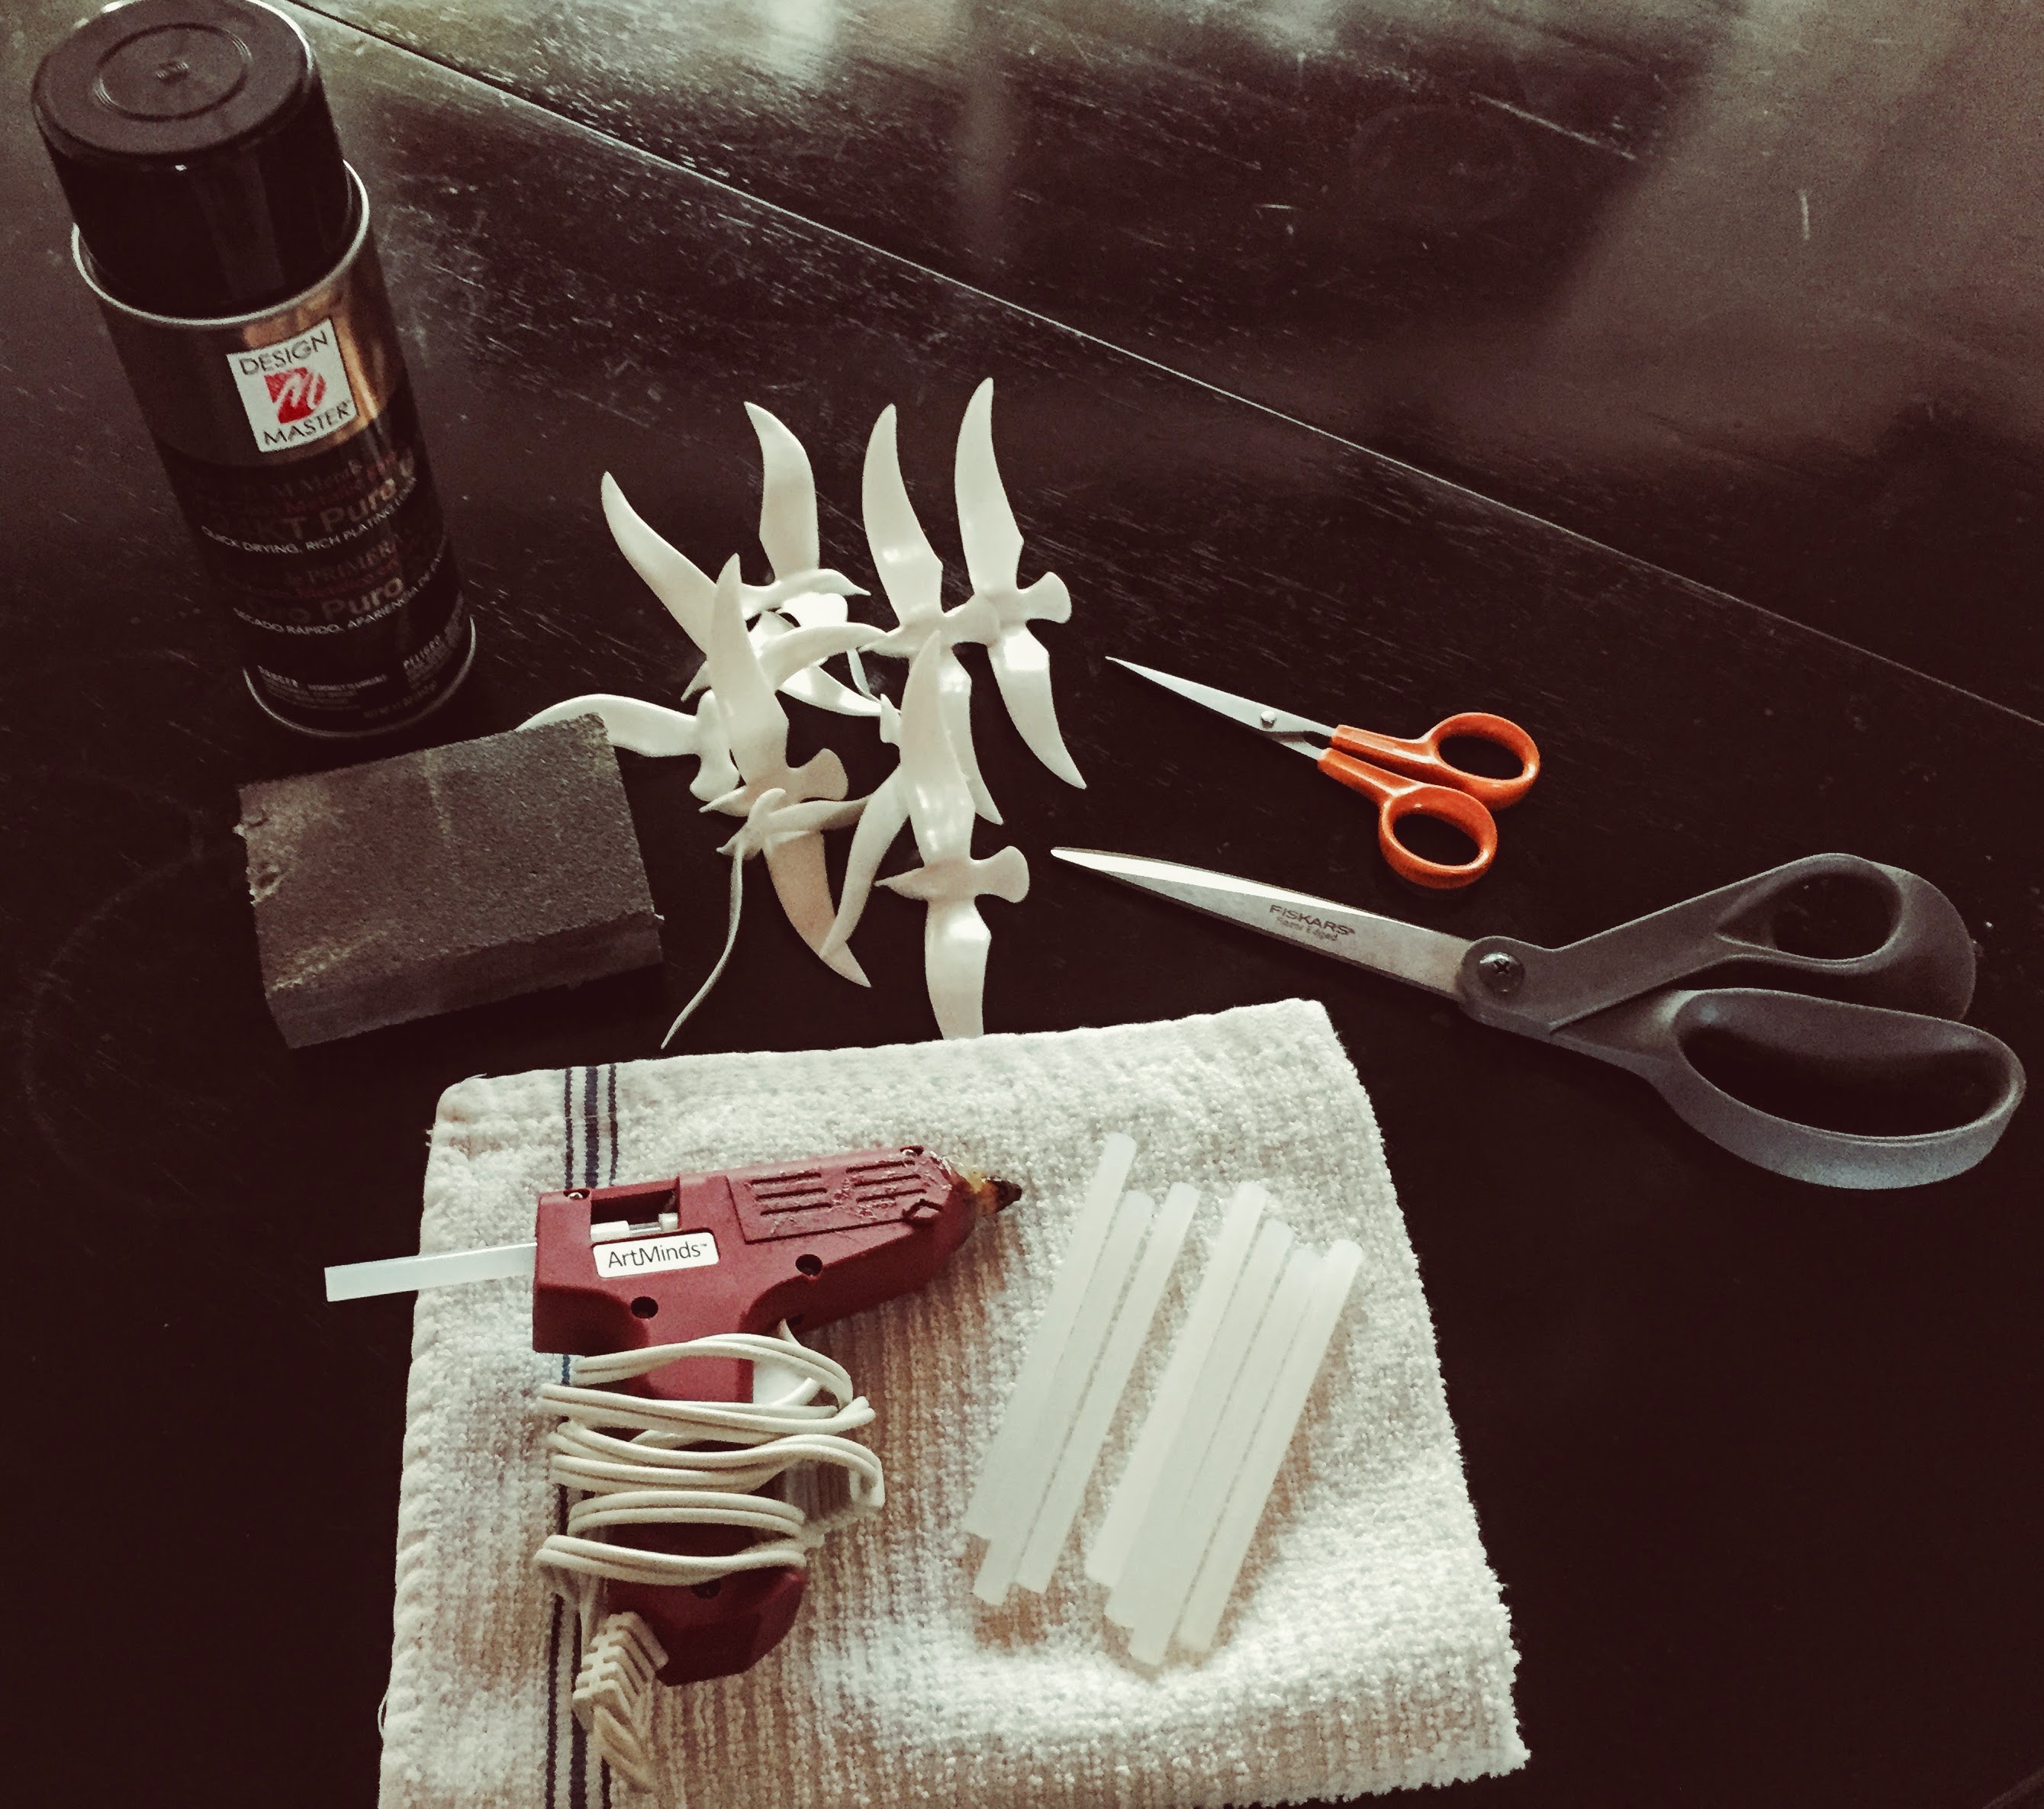
So, here is some of what you’ll need (*Note: I’ve changed some of the things that I used along the way. I sold one of these mirrors on Etsy and it needed a much stronger glue than hot glue, to keep those Seagulls on in transit from CA to PA! I also found that with the hot glue, the seagulls were popping off if the mirror was moved at all, so I have some different glue options for you, below):
- Sunburst Mirror (options listed further on in post)
- Seagulls (click on link above)
- Round Mirror to fit into middle. The mirror it came with originally, was a convex, sort of fish eye thing. I thought it looked tacky, so I went to Michaels and bought a flat round mirror the same size, for something like 5 bucks!
- 2 cans of 24K Gold Paint (Click on link above or below)- or whatever color you decide upon.
- Sandpaper
- 2 pairs of sharp scissors
- Gluegun and gluesticks
- E6000 or E6000 Industrial Strength Adhesive; JB Weld Quik Set or JB Weld Clear Weld
- Soft rag to wipe down seagulls after sanding
- Paint brush to clean prongs of Sunburst before painting
I bought this 24K Gold paint at Michael’s (don’t accidentally buy the Gold Medal paint by the same brand- the front label looks almost identical, but it’s a very different tone). I would probably buy 2 cans. I started by removing the mirror from the middle of the sunburst, and turning it over, so the front side of the sculpture was facing down (I just set it on top of a sheet in my backyard). I then sprayed light coats over the whole thing, allowing the coats to dry in between, until it was thoroughly painted. The metallic paint dries quickly. You could obviously do this project in any color of metallic or any color of the rainbow, for that matter! I think it would be beautiful in a light blue green or a coral. This particular gold is very soft looking- it’s not an abrasive, brassy gold… sooo… getting back to what we were talking about… once that side has totally dried, flip it over, and paint the front side in the same manner. Once the whole thing is very dry, find a place to hang it, so you can work on placing and gluing the seagulls.
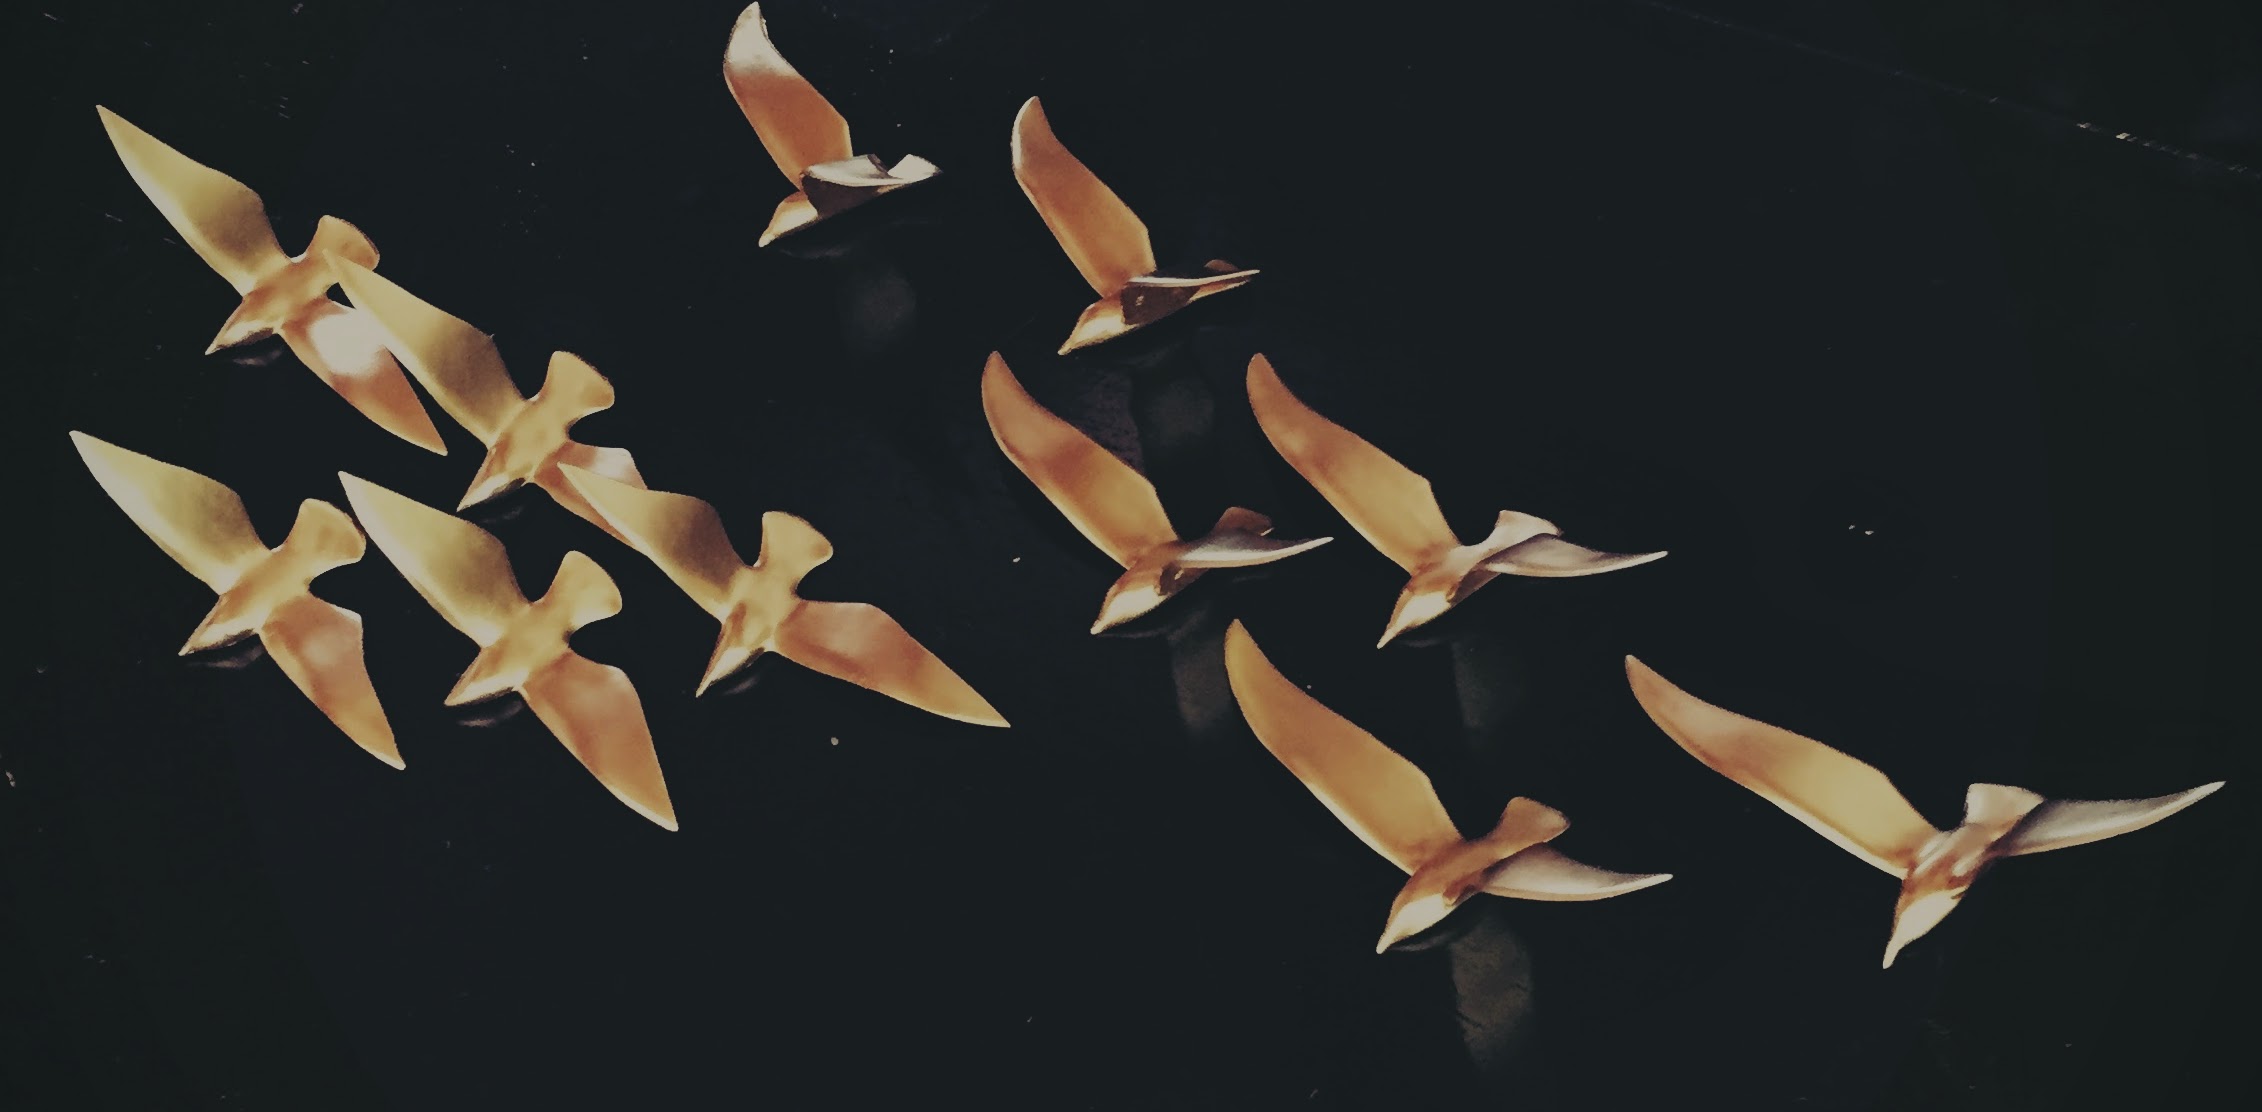
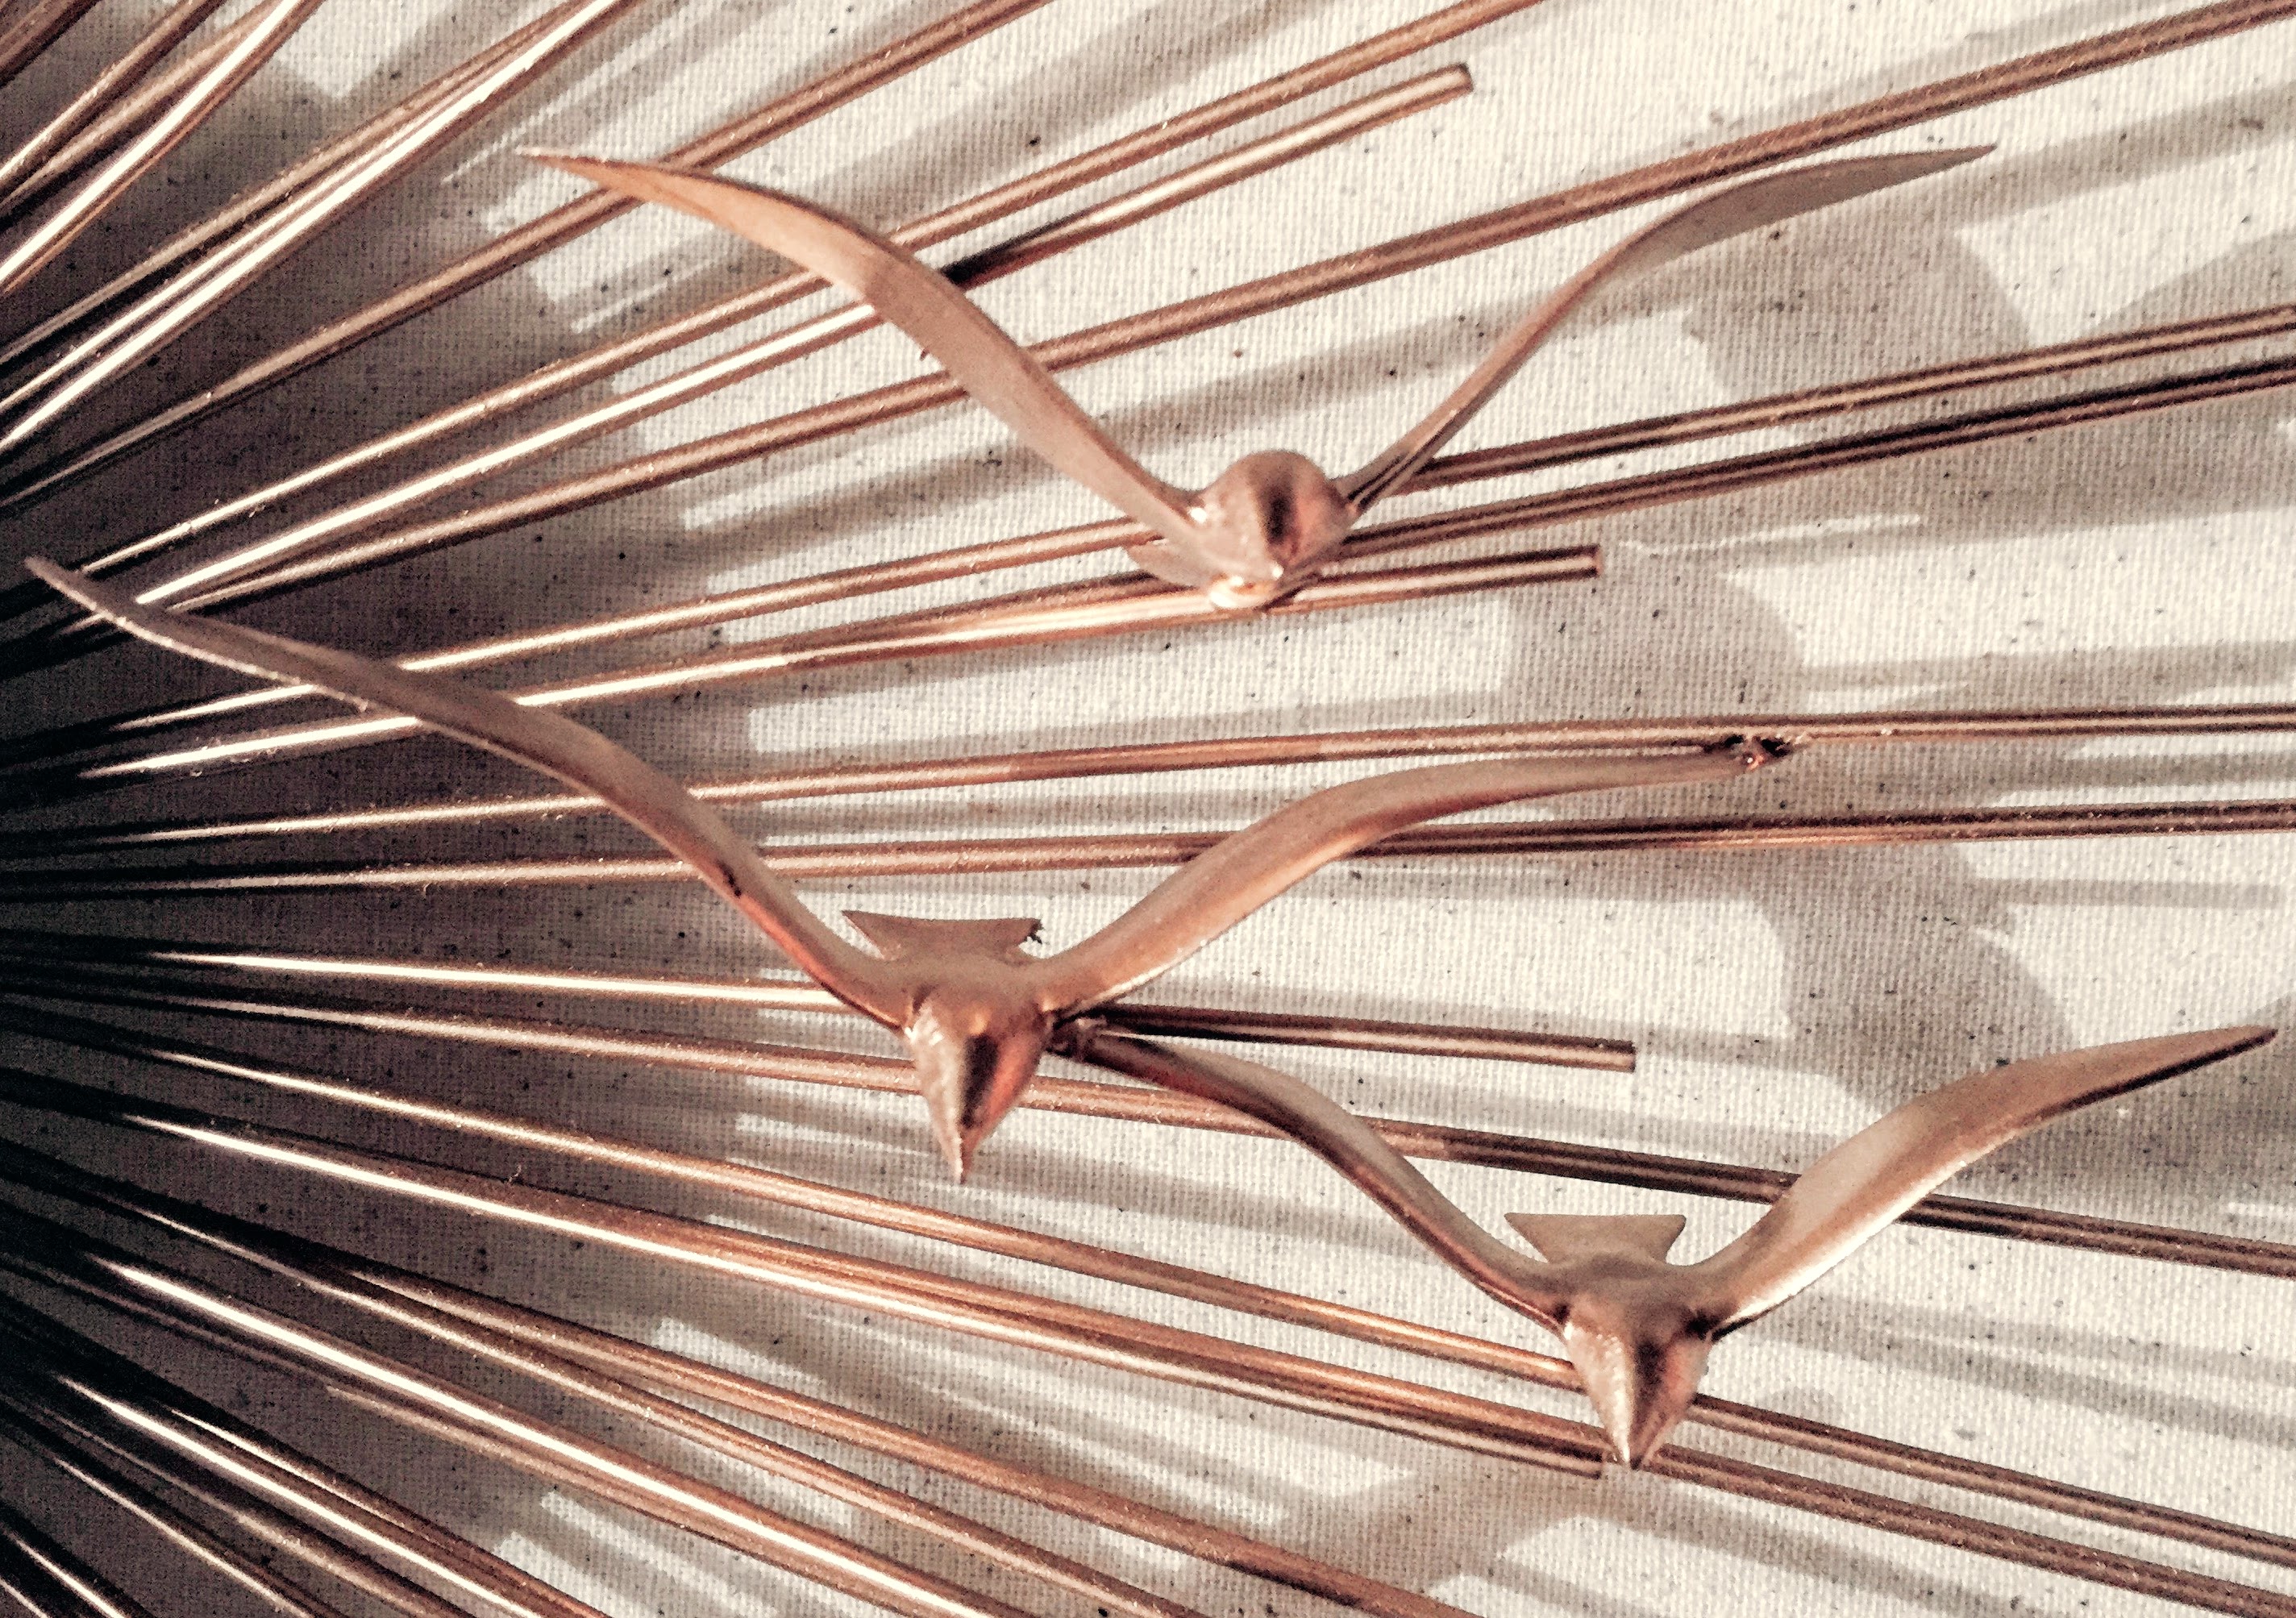
You will want to find a wall to hang your sunburst, so you can work on it comfortably. You’ll need a nail or screw to hang it on and you’ll want it to be low enough, so you can work without having to reach too much. So, now that you’ve found a safe and spacious place to hang your sunburst let’s get started on the seagulls! The seagulls are hard plastic and they are all the same size, so I cut many of them down, to look like smaller seagulls. You simply cut the tips of their wings down to the size you would like, sand the rough edges away, and you will have a variety of sizes, as seen below (these seagulls have already been painted gold):
I usually start with the big scissors (Fiskars Razor Edged Large Scissors bought at JoAnne’s, shown in the supplies picture above) and then fine tune with the little orange ones (Fiskars Fine Tip Little Orange Handle Scissors bought at JoAnne’s, also shown in supplies picture above). I then take the sandpaper block and sand down the edges I have cut. After that, I go in around the face and beak where there is a plastic line from the mold. I sand the line off and then sand the underbelly where a manufacturer name has been stamped. I sand the name off as well as I can, then sand the wings a little, and presto! Your seagulls are ready to paint!
I begin by facing them all beaks down (as shown here). This allows you to paint both the top and bottom of the seagull and they dry well in this position. The 24 kt is exceptionally easy to work with, in that it REALLY sticks well to the plastic. Nevertheless, try to do just light coats. Be forewarned that if you attempt to use normal spray paint colors like blue, pink, coral etc., they have a hard time adhering to the plastic of the seagulls. It IS possible, as you will see in some future posts I do (using different colors), but it takes more patience, more dry time, and you may end up with some drips. When the seagulls are fully covered with the gold paint (and are dry), flip them over so that the beaks are sticking up and finish them off. Let the seagulls and sunburst dry thoroughly, before gluing on the seagulls. Preferably overnight.
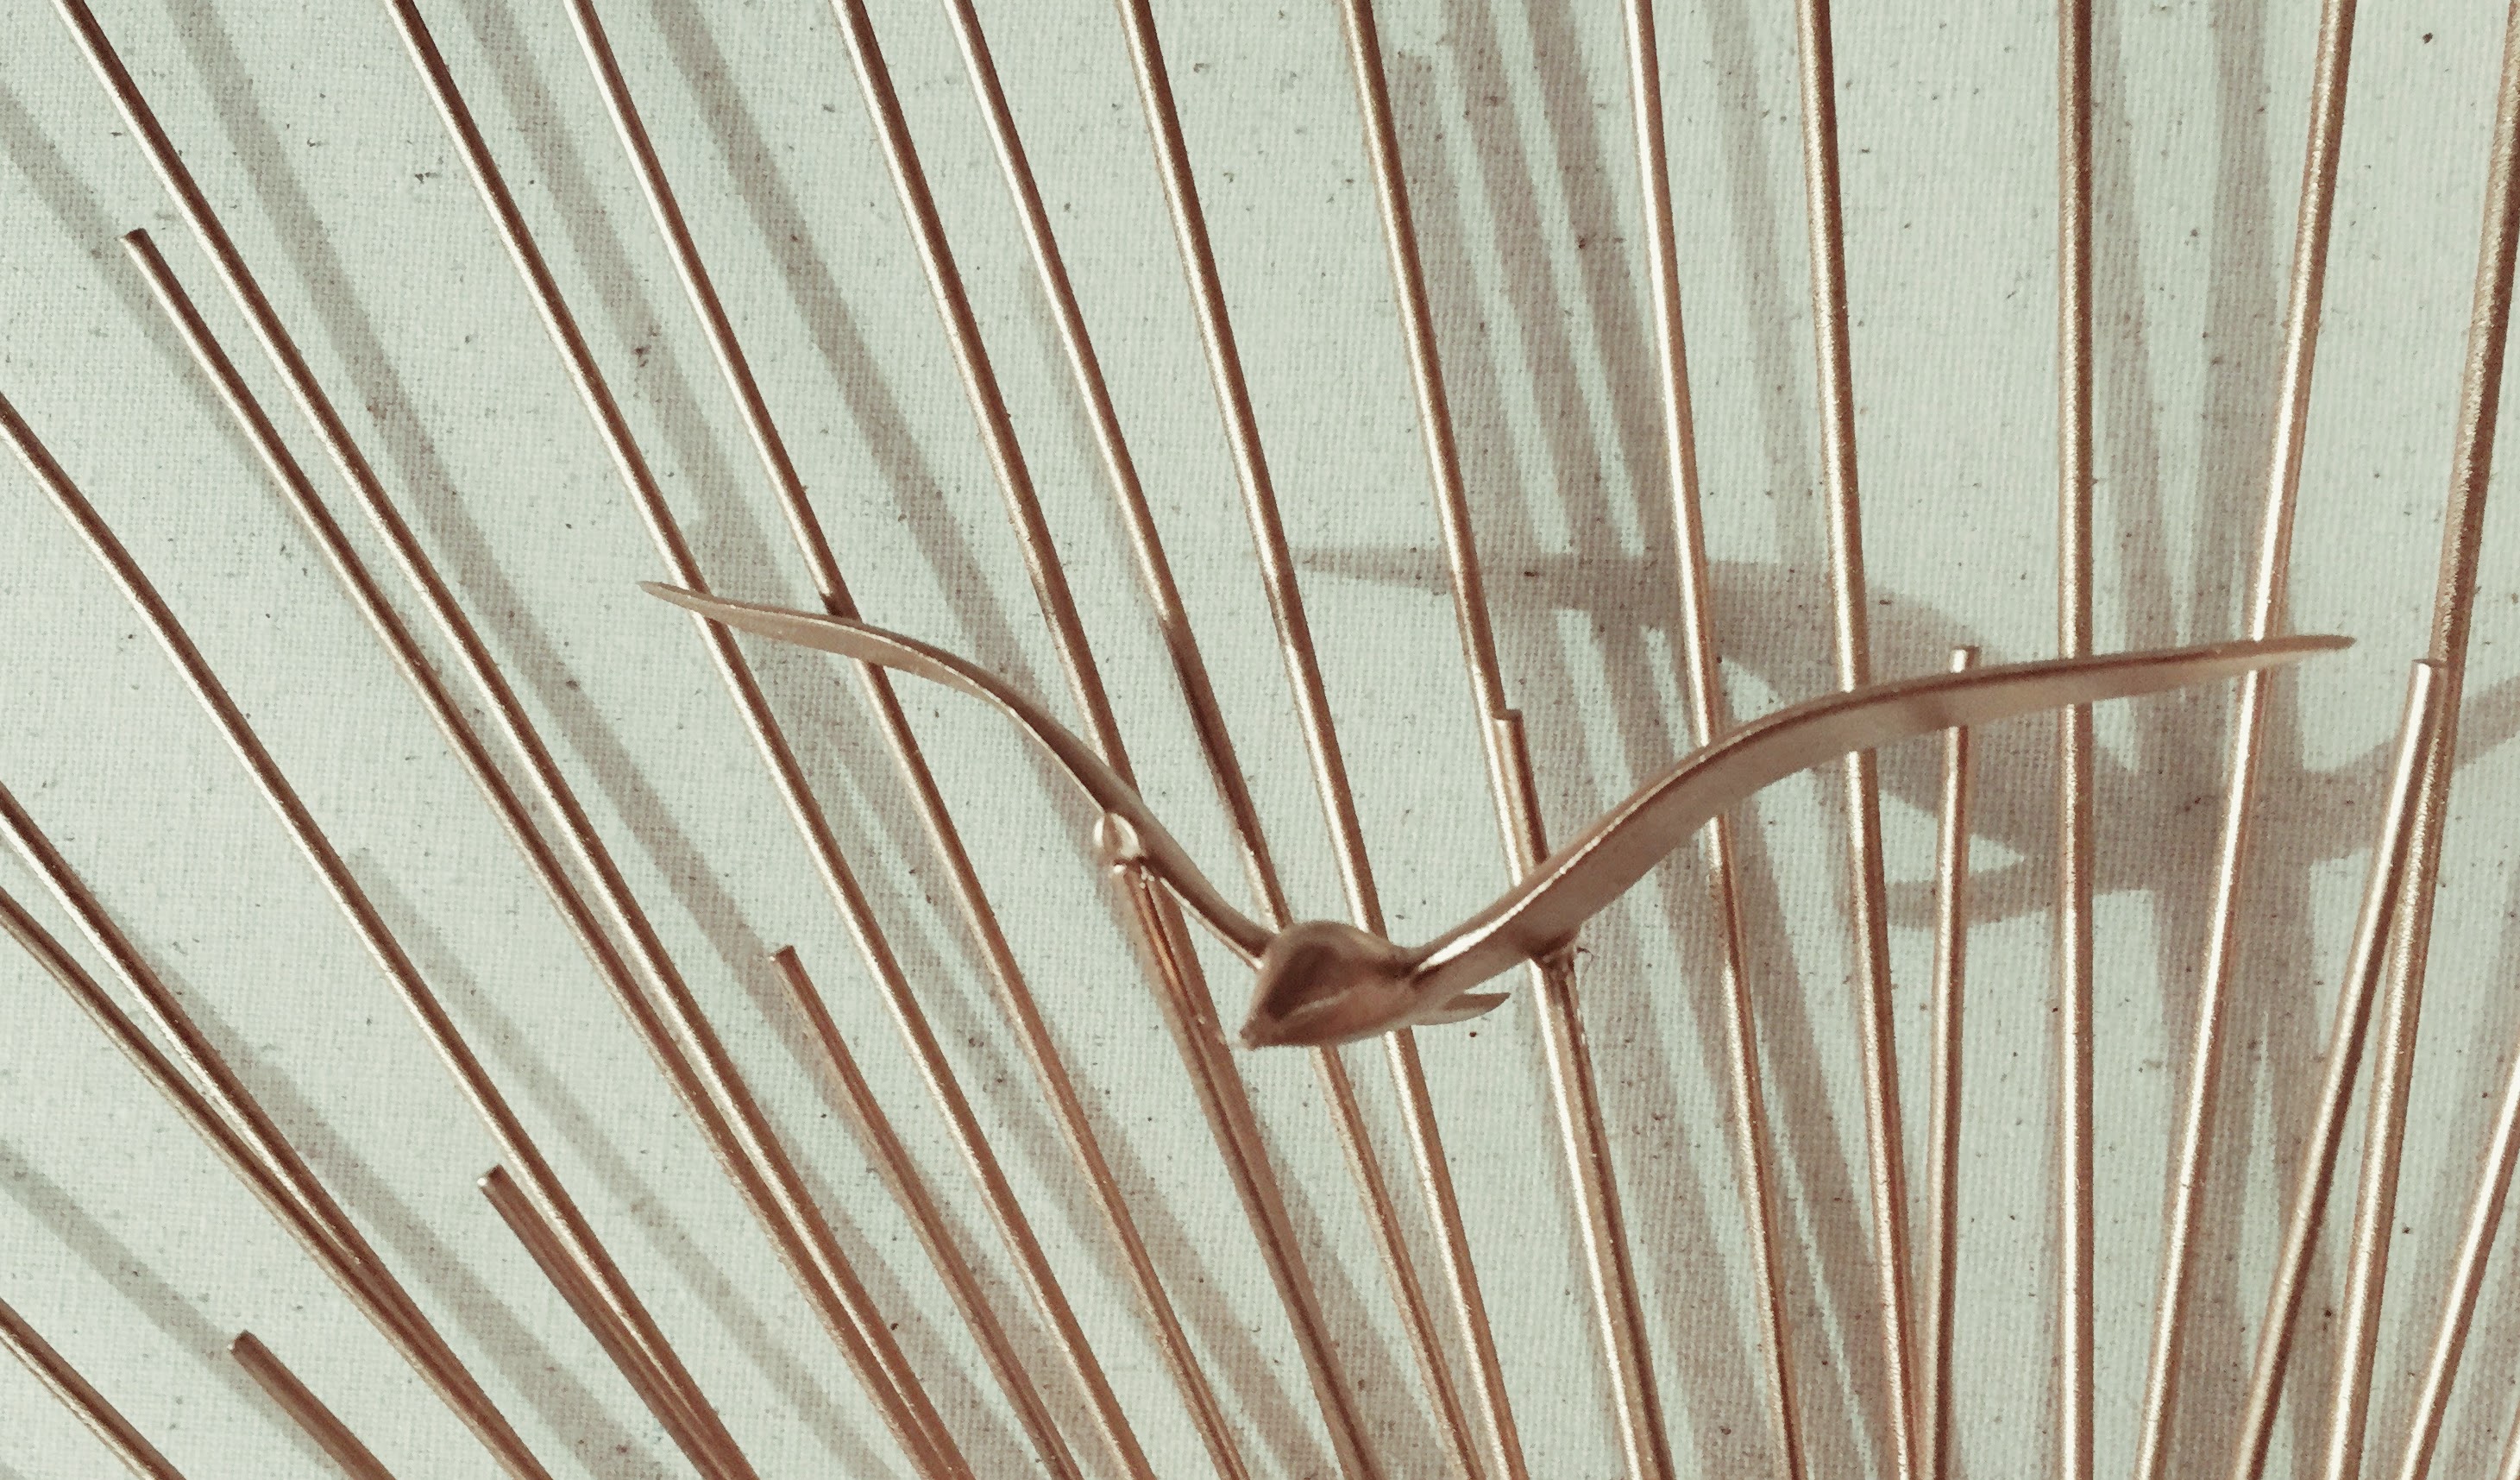
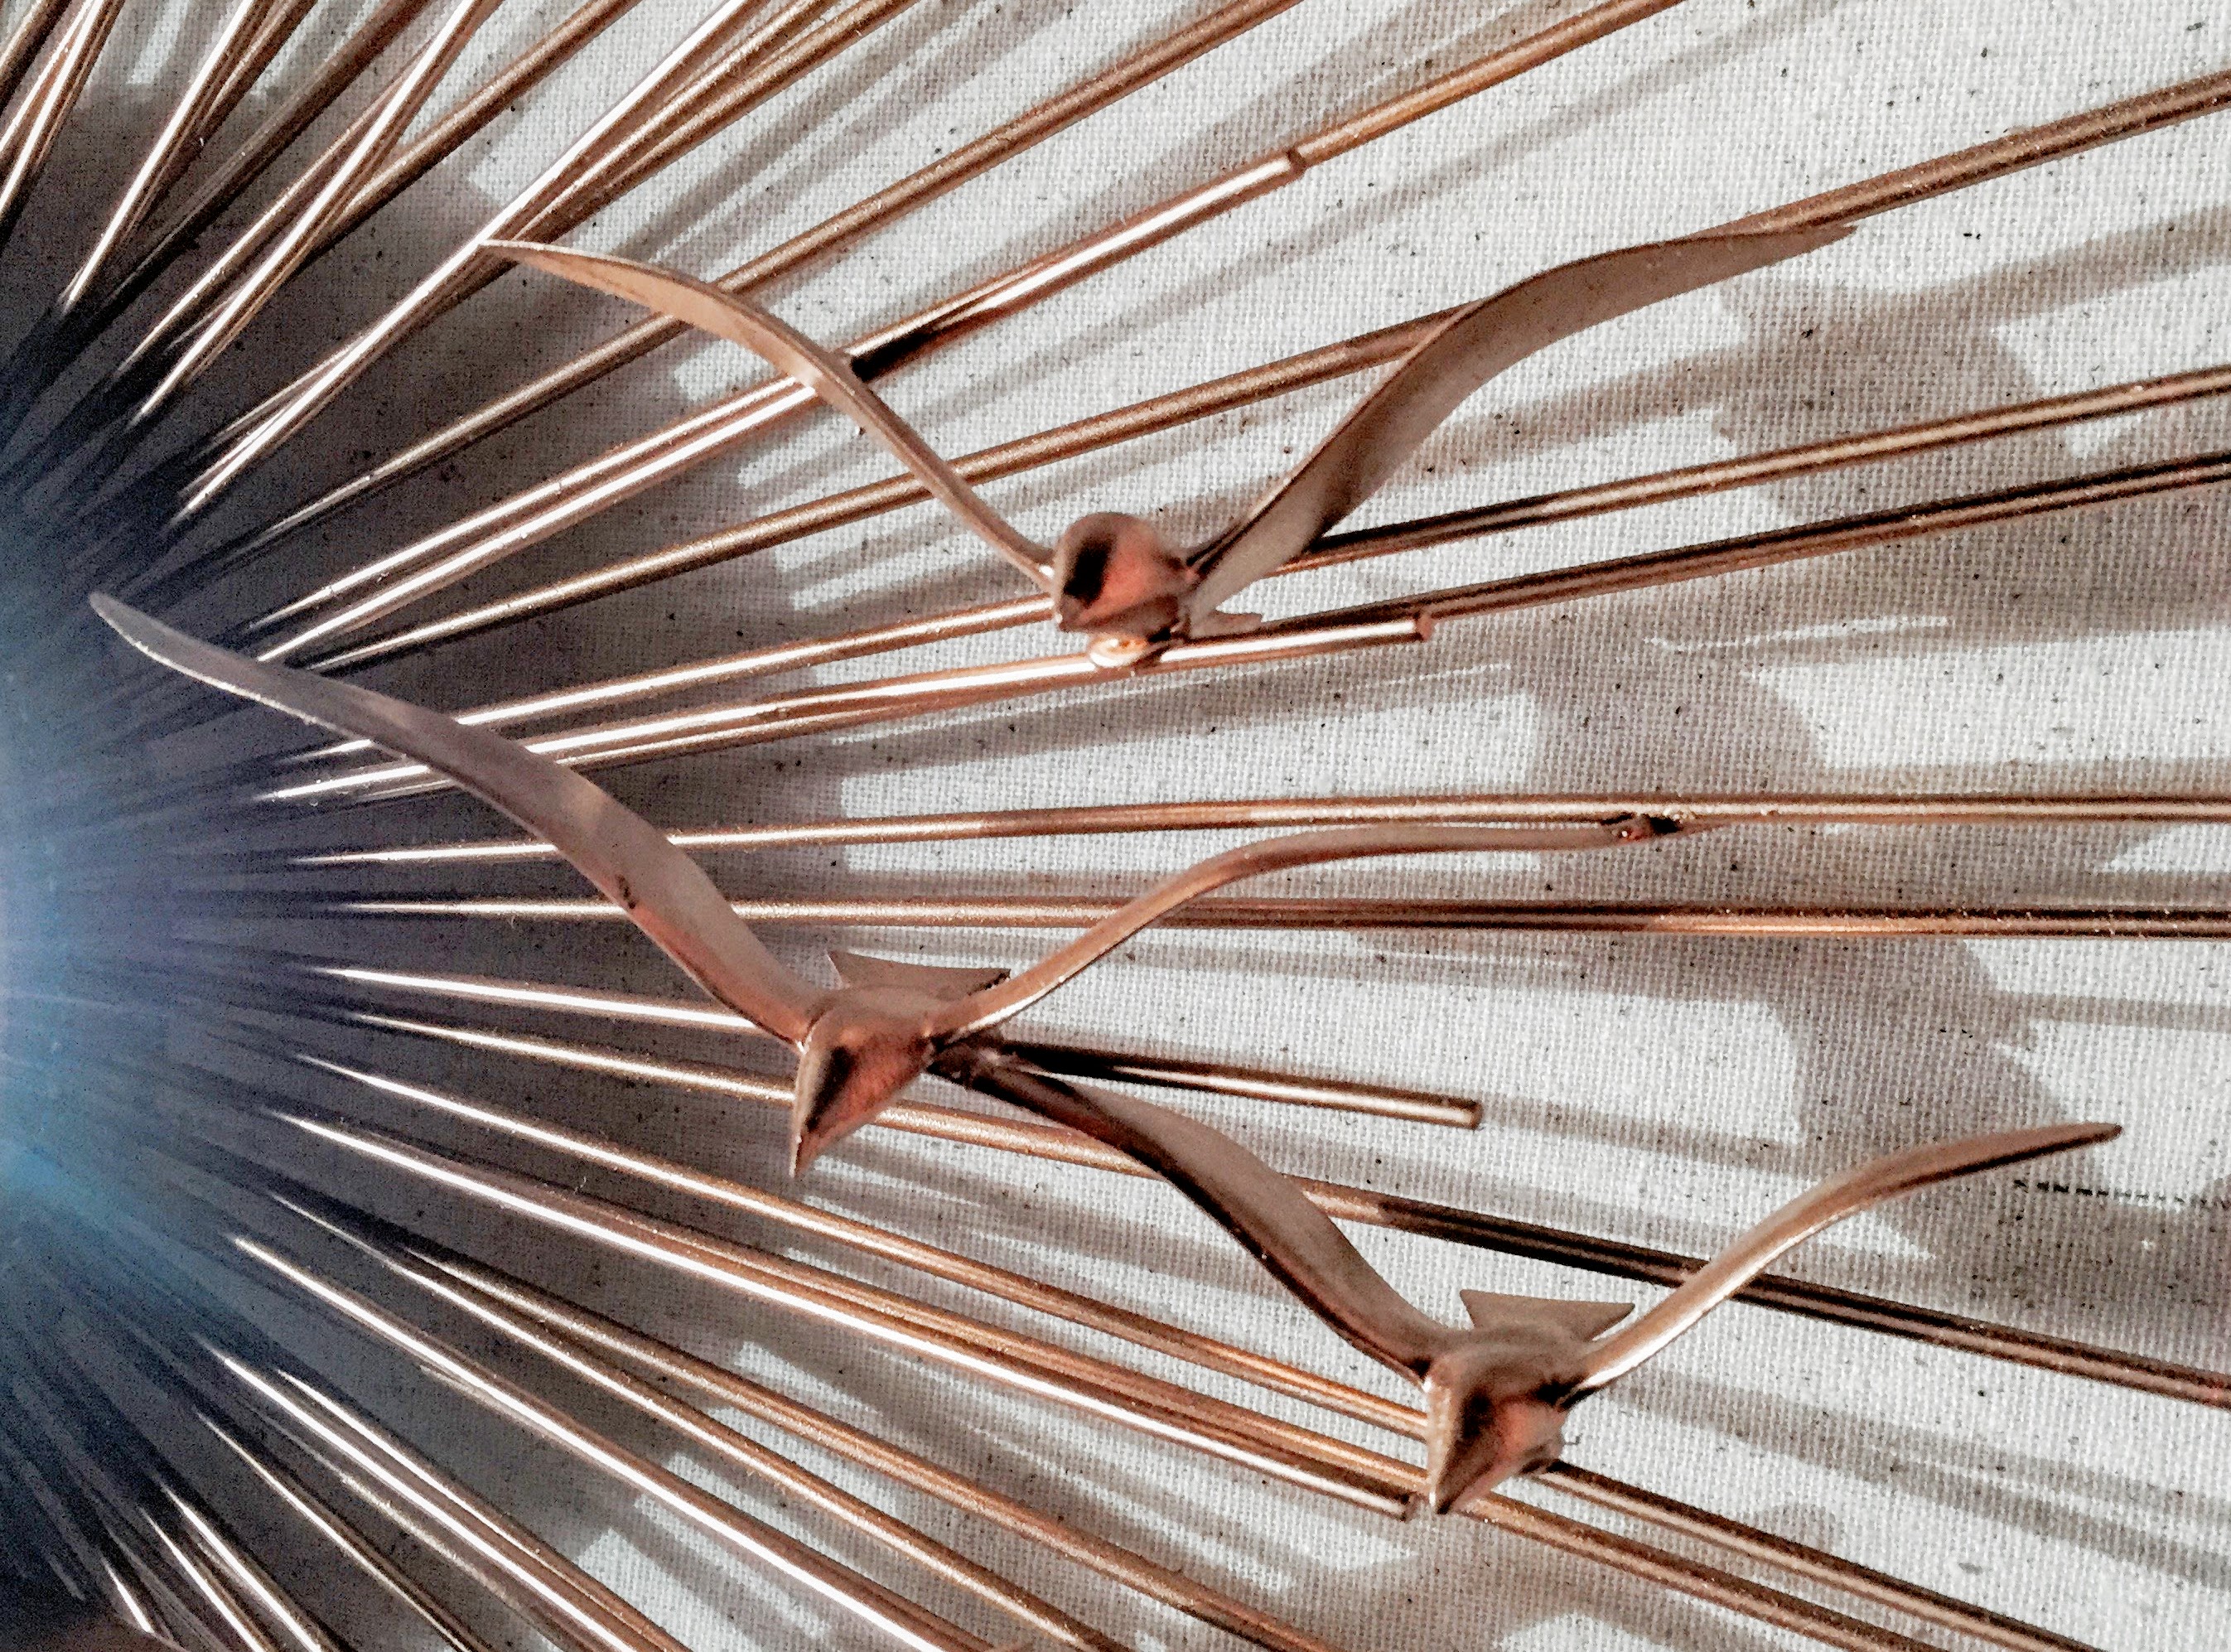
Next, (once everything is very dry and ready to go) plug in your glue gun. I might suggest trying a gel superglue or a gel epoxy of some kind. A combo of E6000 and hotglue works pretty well. I tried normal super glue and it didn’t work. The glue gun works, but sometimes the seagulls pop off easily. Don’t worry about trying different spots for the birds and pulling them off if the placement isn’t just right- at the end, we will do a final touch up spray. Also, I think it looks just fine if there is a small blob of glue, because when you do the touch up spray, it ends up looking like welding (as seen above). You will need the seagull to attach to at least 2 different points on your sunburst. If you look in the image above, you can see quite clearly where the wing is attached on the left side of the picture. The right side of the image is not so obvious, but it’s just to the right of the body and up the backside of the wing, about a quarter of an inch. It may also be attached about 3/4 up the same wing. This is a very magnified picture- you can’t see the glue in real life, unless you look VERY closely, nevertheless, there is some clean up involved if you use hot glue. What you will want to do, if you use hot glue, is to make sure that you carefully remove all the strings of glue that are left behind. Also, if a big blob is hanging down and has dried, you can try to cut at least some of it off with the tiny orange scissors shown in the picture above. You should also use these scissors to remove the strings of hot glue.
*Note: Here I am, popping in a few months later, to give some pointers on the gluing process, that I’ve learned along the way! I sold this mirror on Etsy and I had to re-glue the seagulls so that they wouldn’t fall off in transit from CA to Pennsylvania. I used JB Weld Quik Set. It was great stuff at the end of the day, but fairly hard to work with. You have to mix up 2 glues and they dry incredibly fast. So, what I learned, was to mix just a small amount for one seagull at a time. I used a Q-tip and my fingers to apply. It’s sticky, and messy and you sort of have to wipe away strings of glue, while holding your seagull in place. It usually takes about 2 minutes of holding it in place, before you can let it go, safely. Wherever I could, I glued each seagull at 3 points of contact with the prongs. It will look like a big mess when you’ve glued on all your seagulls, but once it’s completely dry- I would give it 24 hours- you can take a 320 grain sandpaper, and sand down the glue and surrounding area. Once you’ve sanded really well, you can go in with a paintbrush and clean the prongs really well. We will be respraying, so you want to make sure that there is no sand paper dust or debris on the sunburst. Gluing on the seagulls is a test of patience and strength!!! I think I screamed out loud a couple of times, but was so happy with myself when it was done! I think JB Weld is probably your best bet if you can deal with the mess. There is a clear JB Weld Quik Set Epoxy that I listed. Maybe that would be easier to work with? E6000 and hot glue combo is also an option. You will have to mess around with it and decide. The sunburst made it to PA intact, using JB Weld and shipping through Box Brothers of San Diego. They are AWESOME. WAY less expensive than UPS or Kinko’s and extremely helpful, pleasant, and know what they are doing with delicate items, art, and furniture. And if it all sounds like too much, contact me and I can make you one! Price would vary with size and sunburst being used.
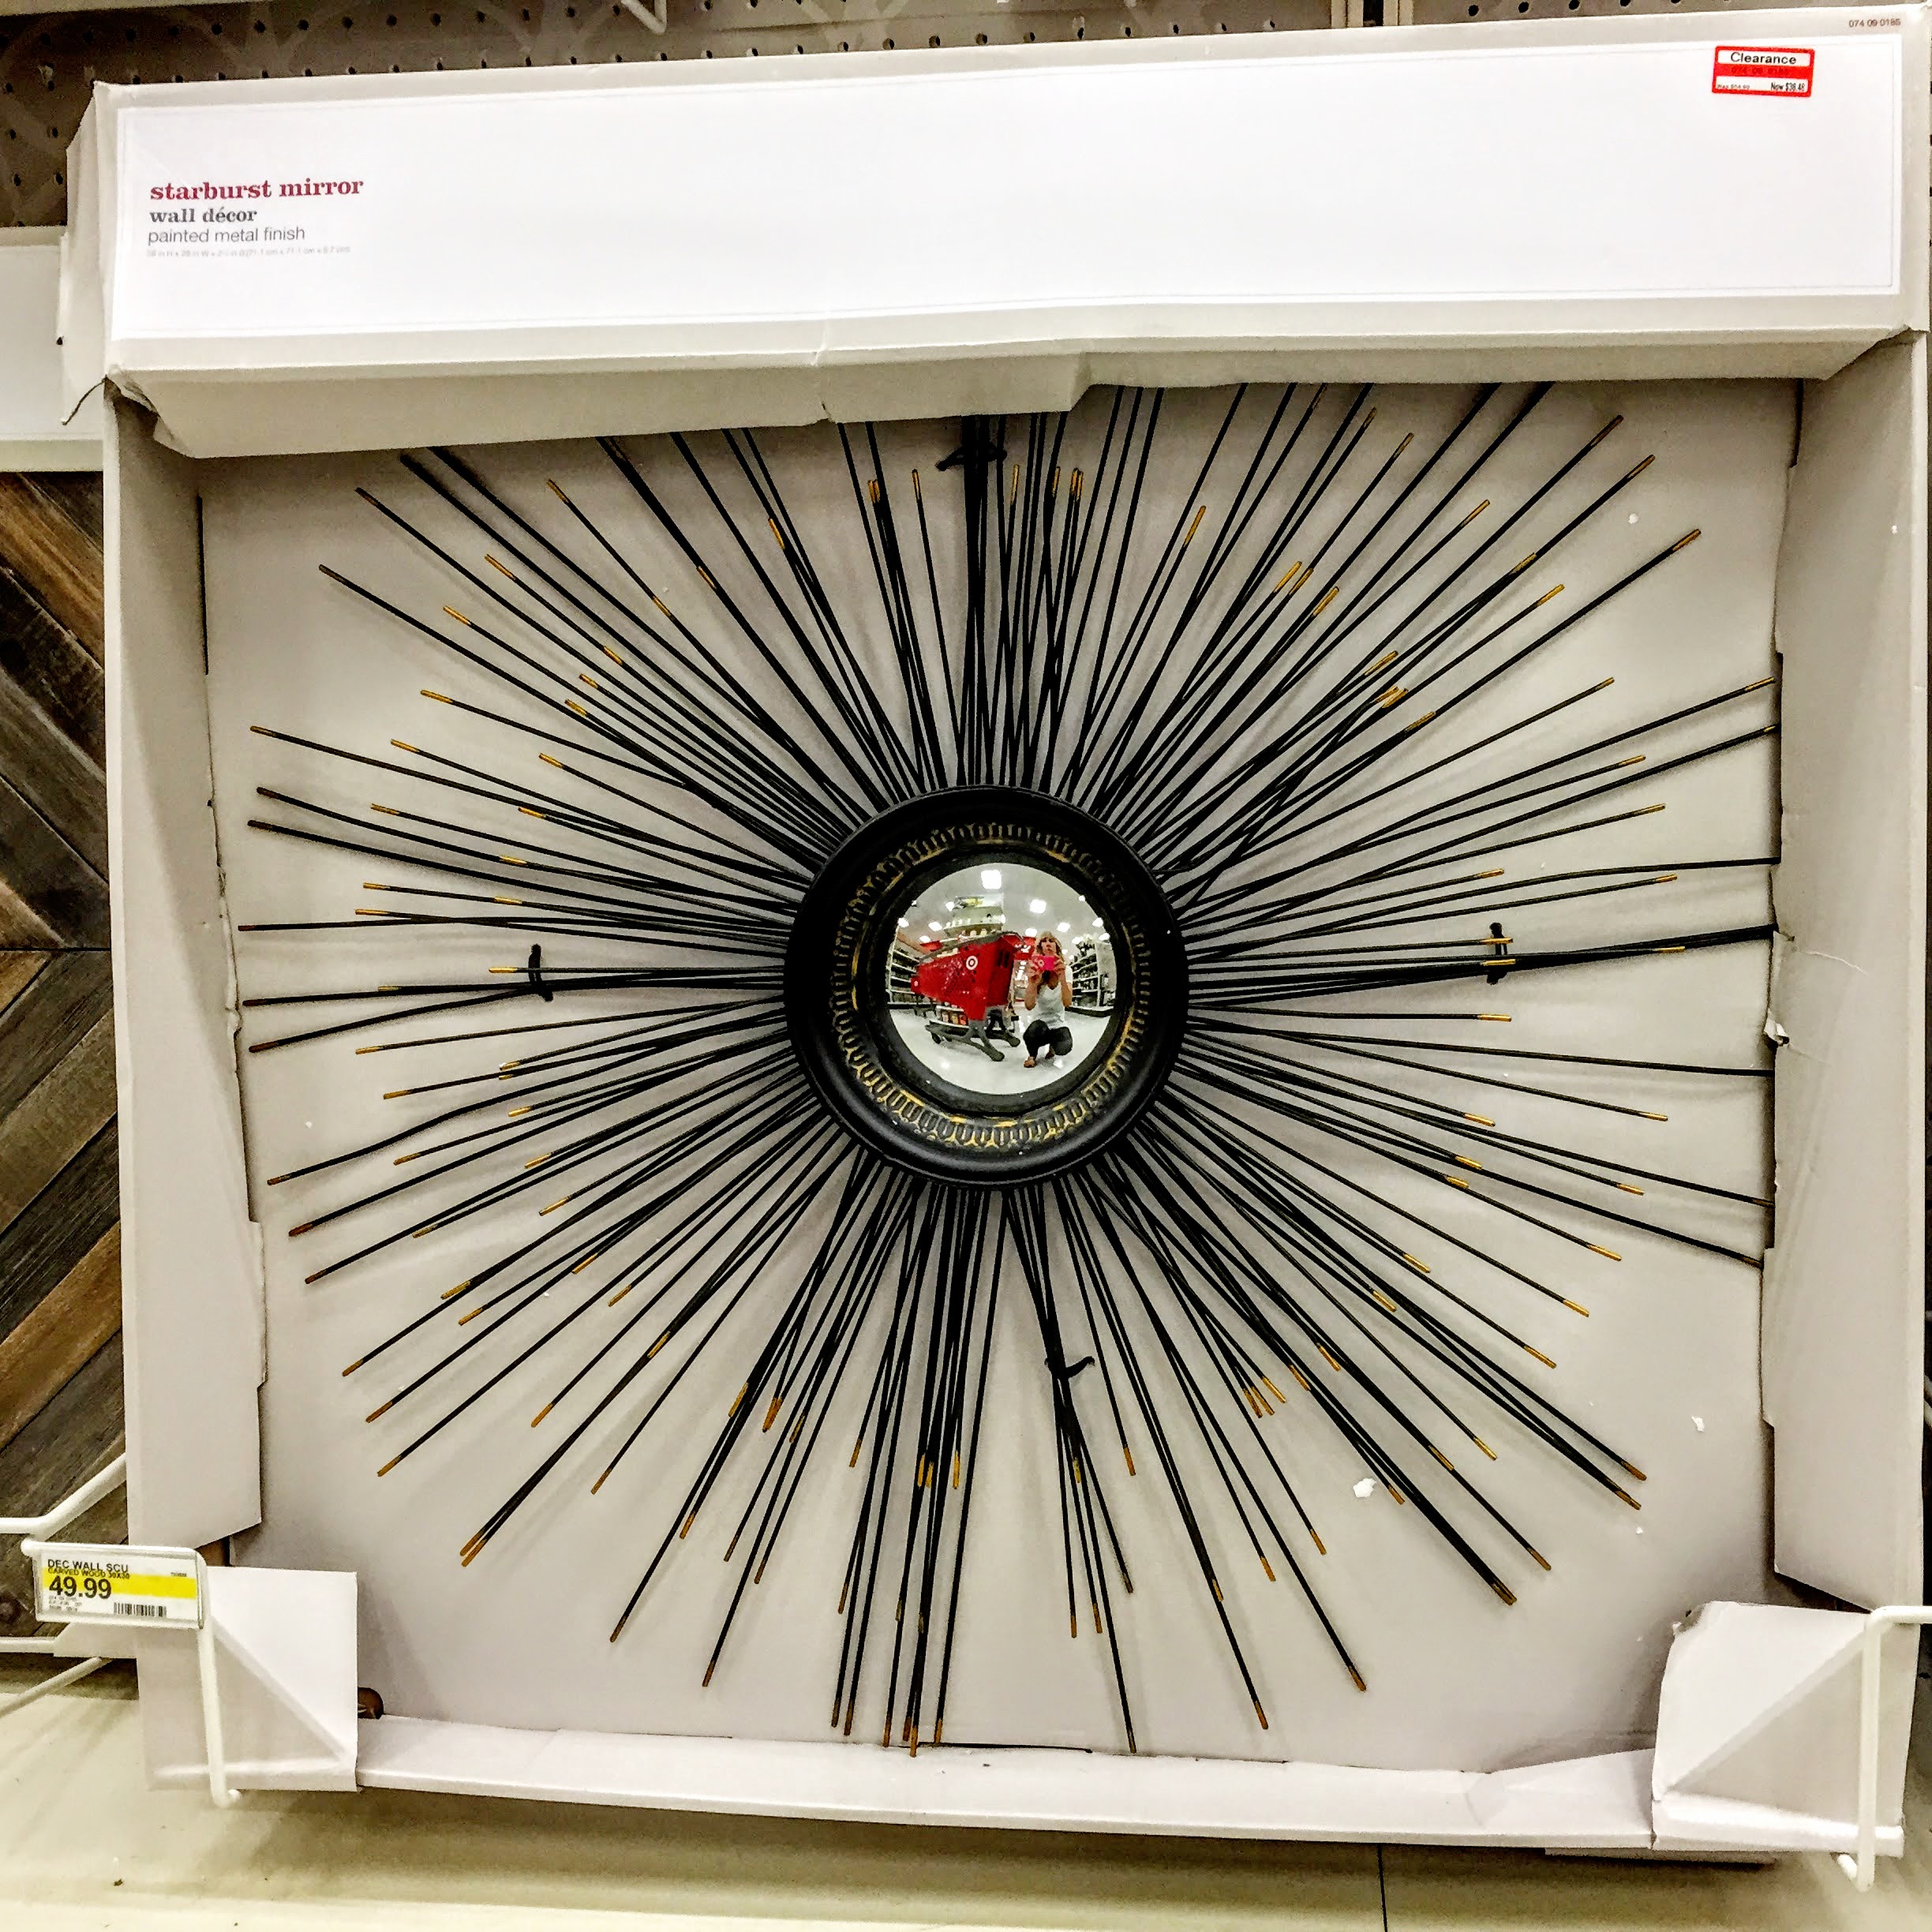
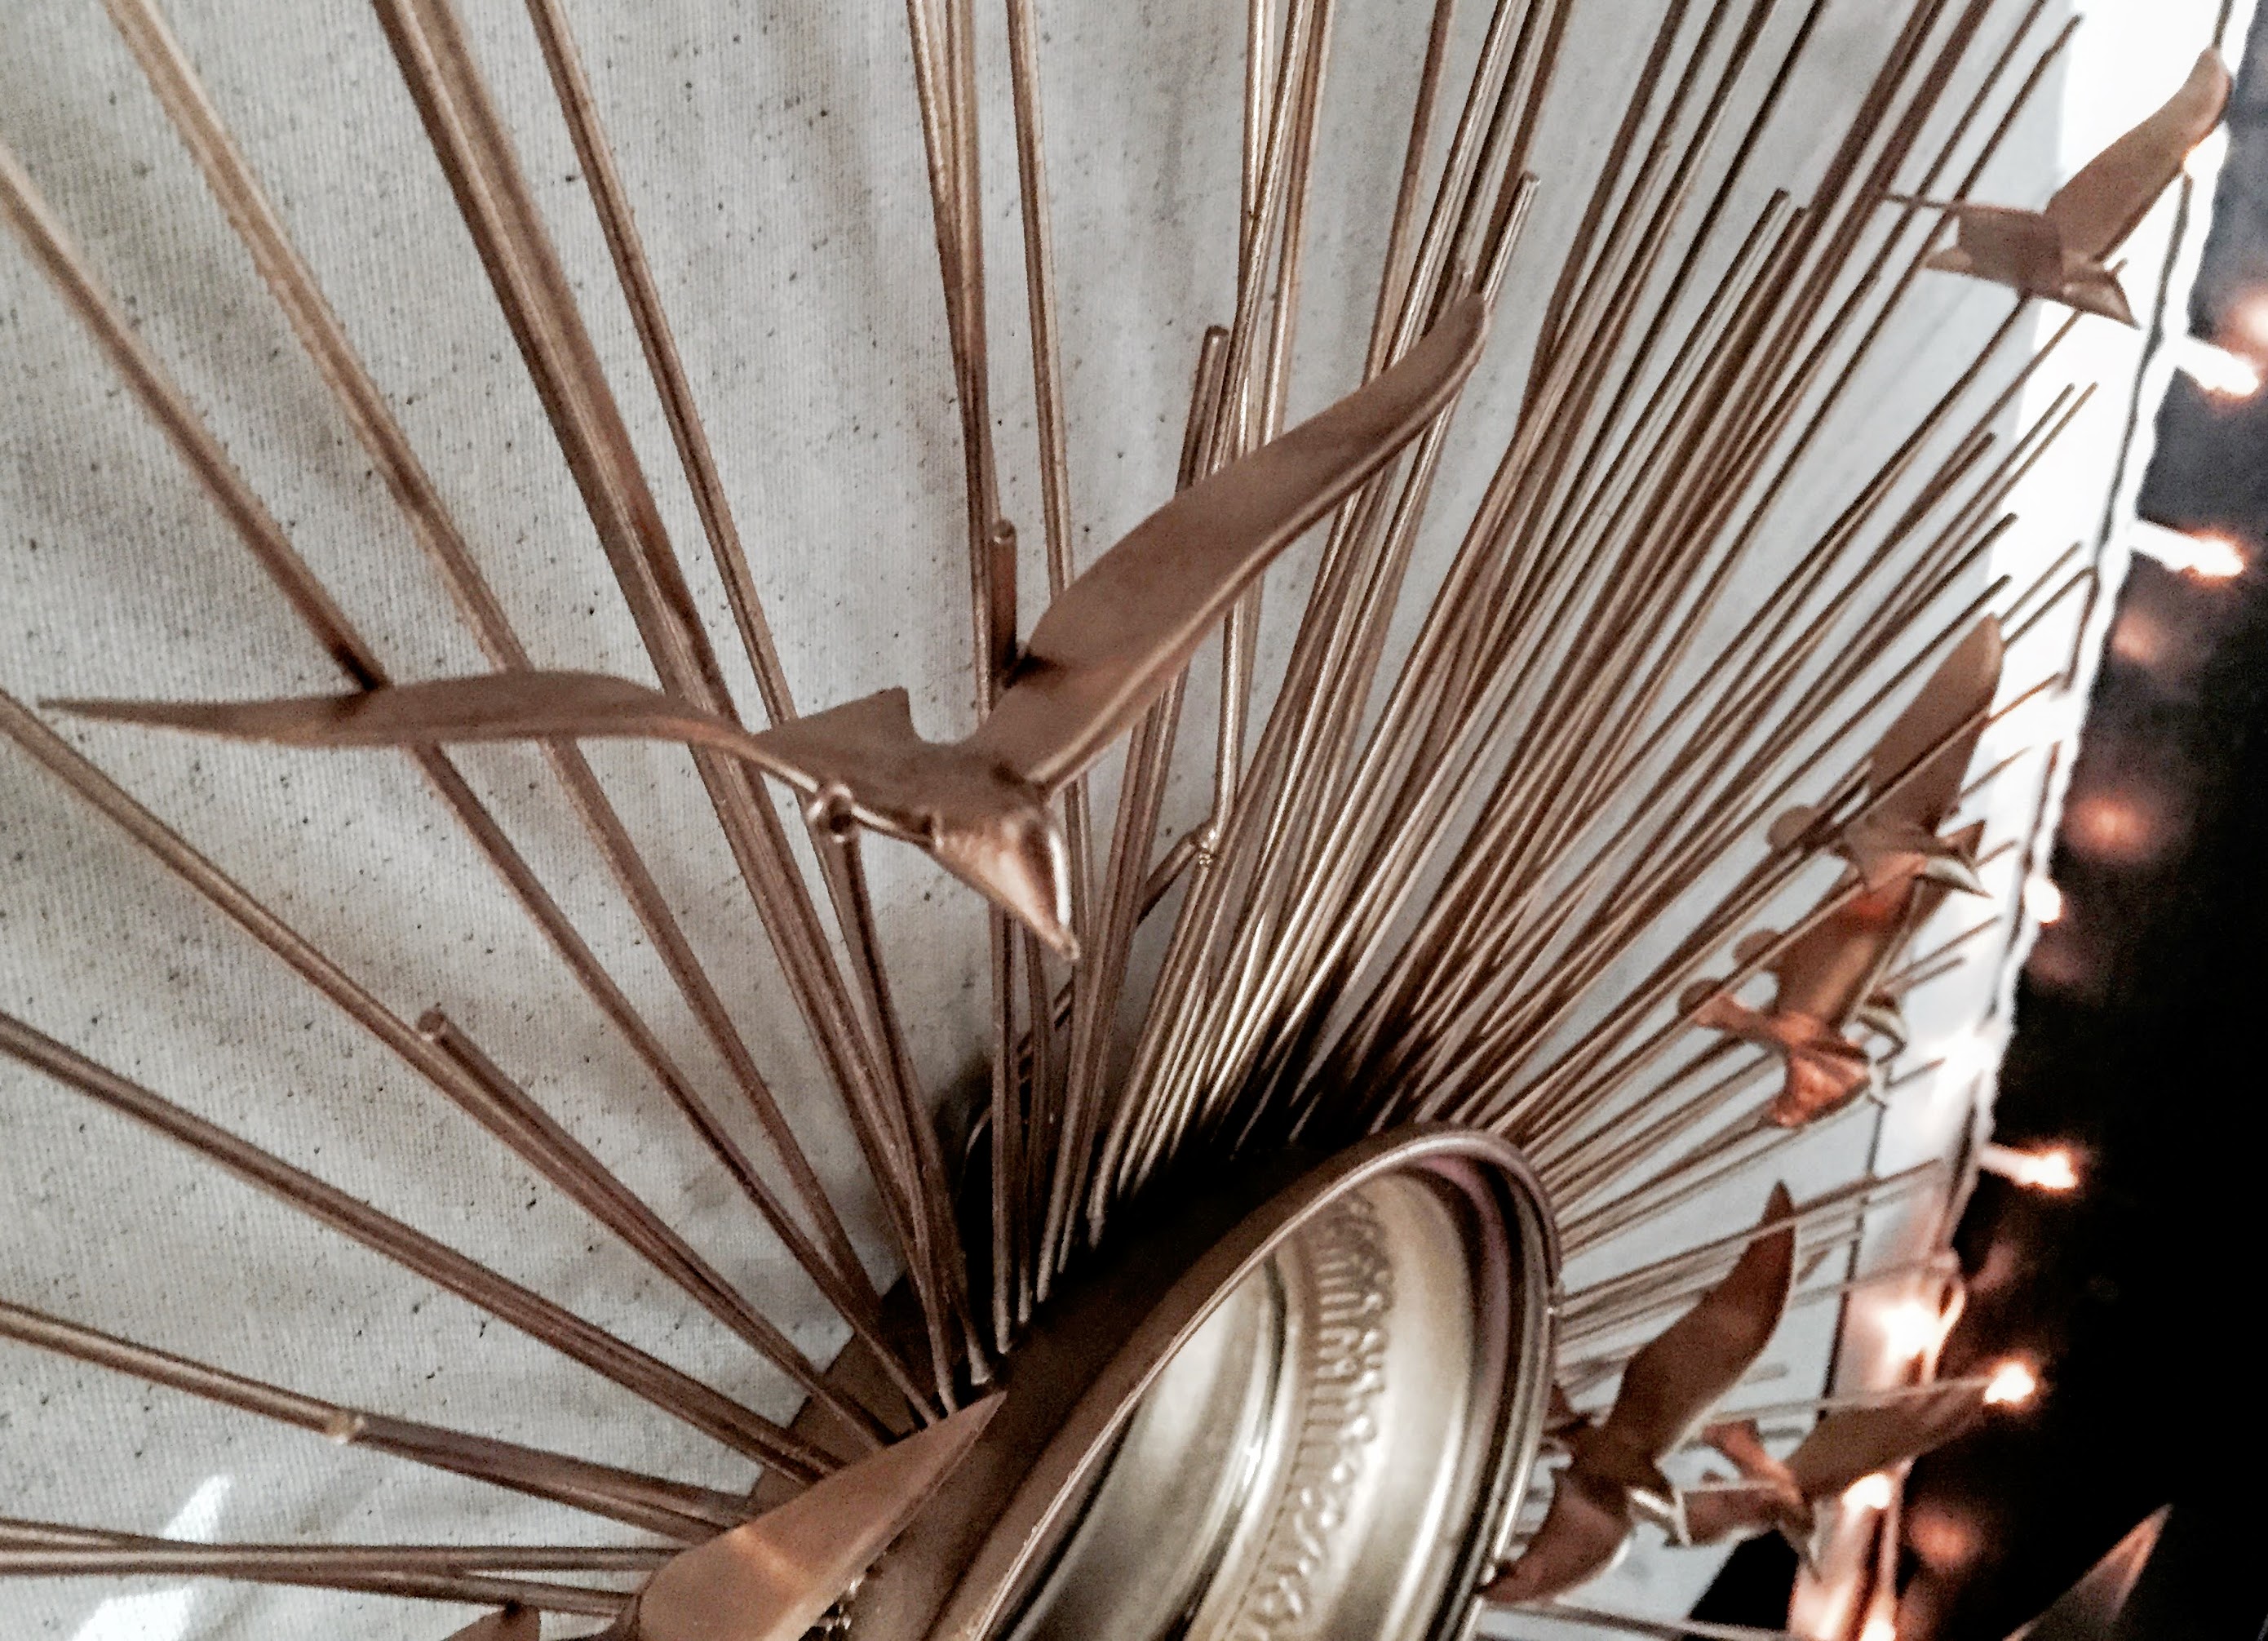
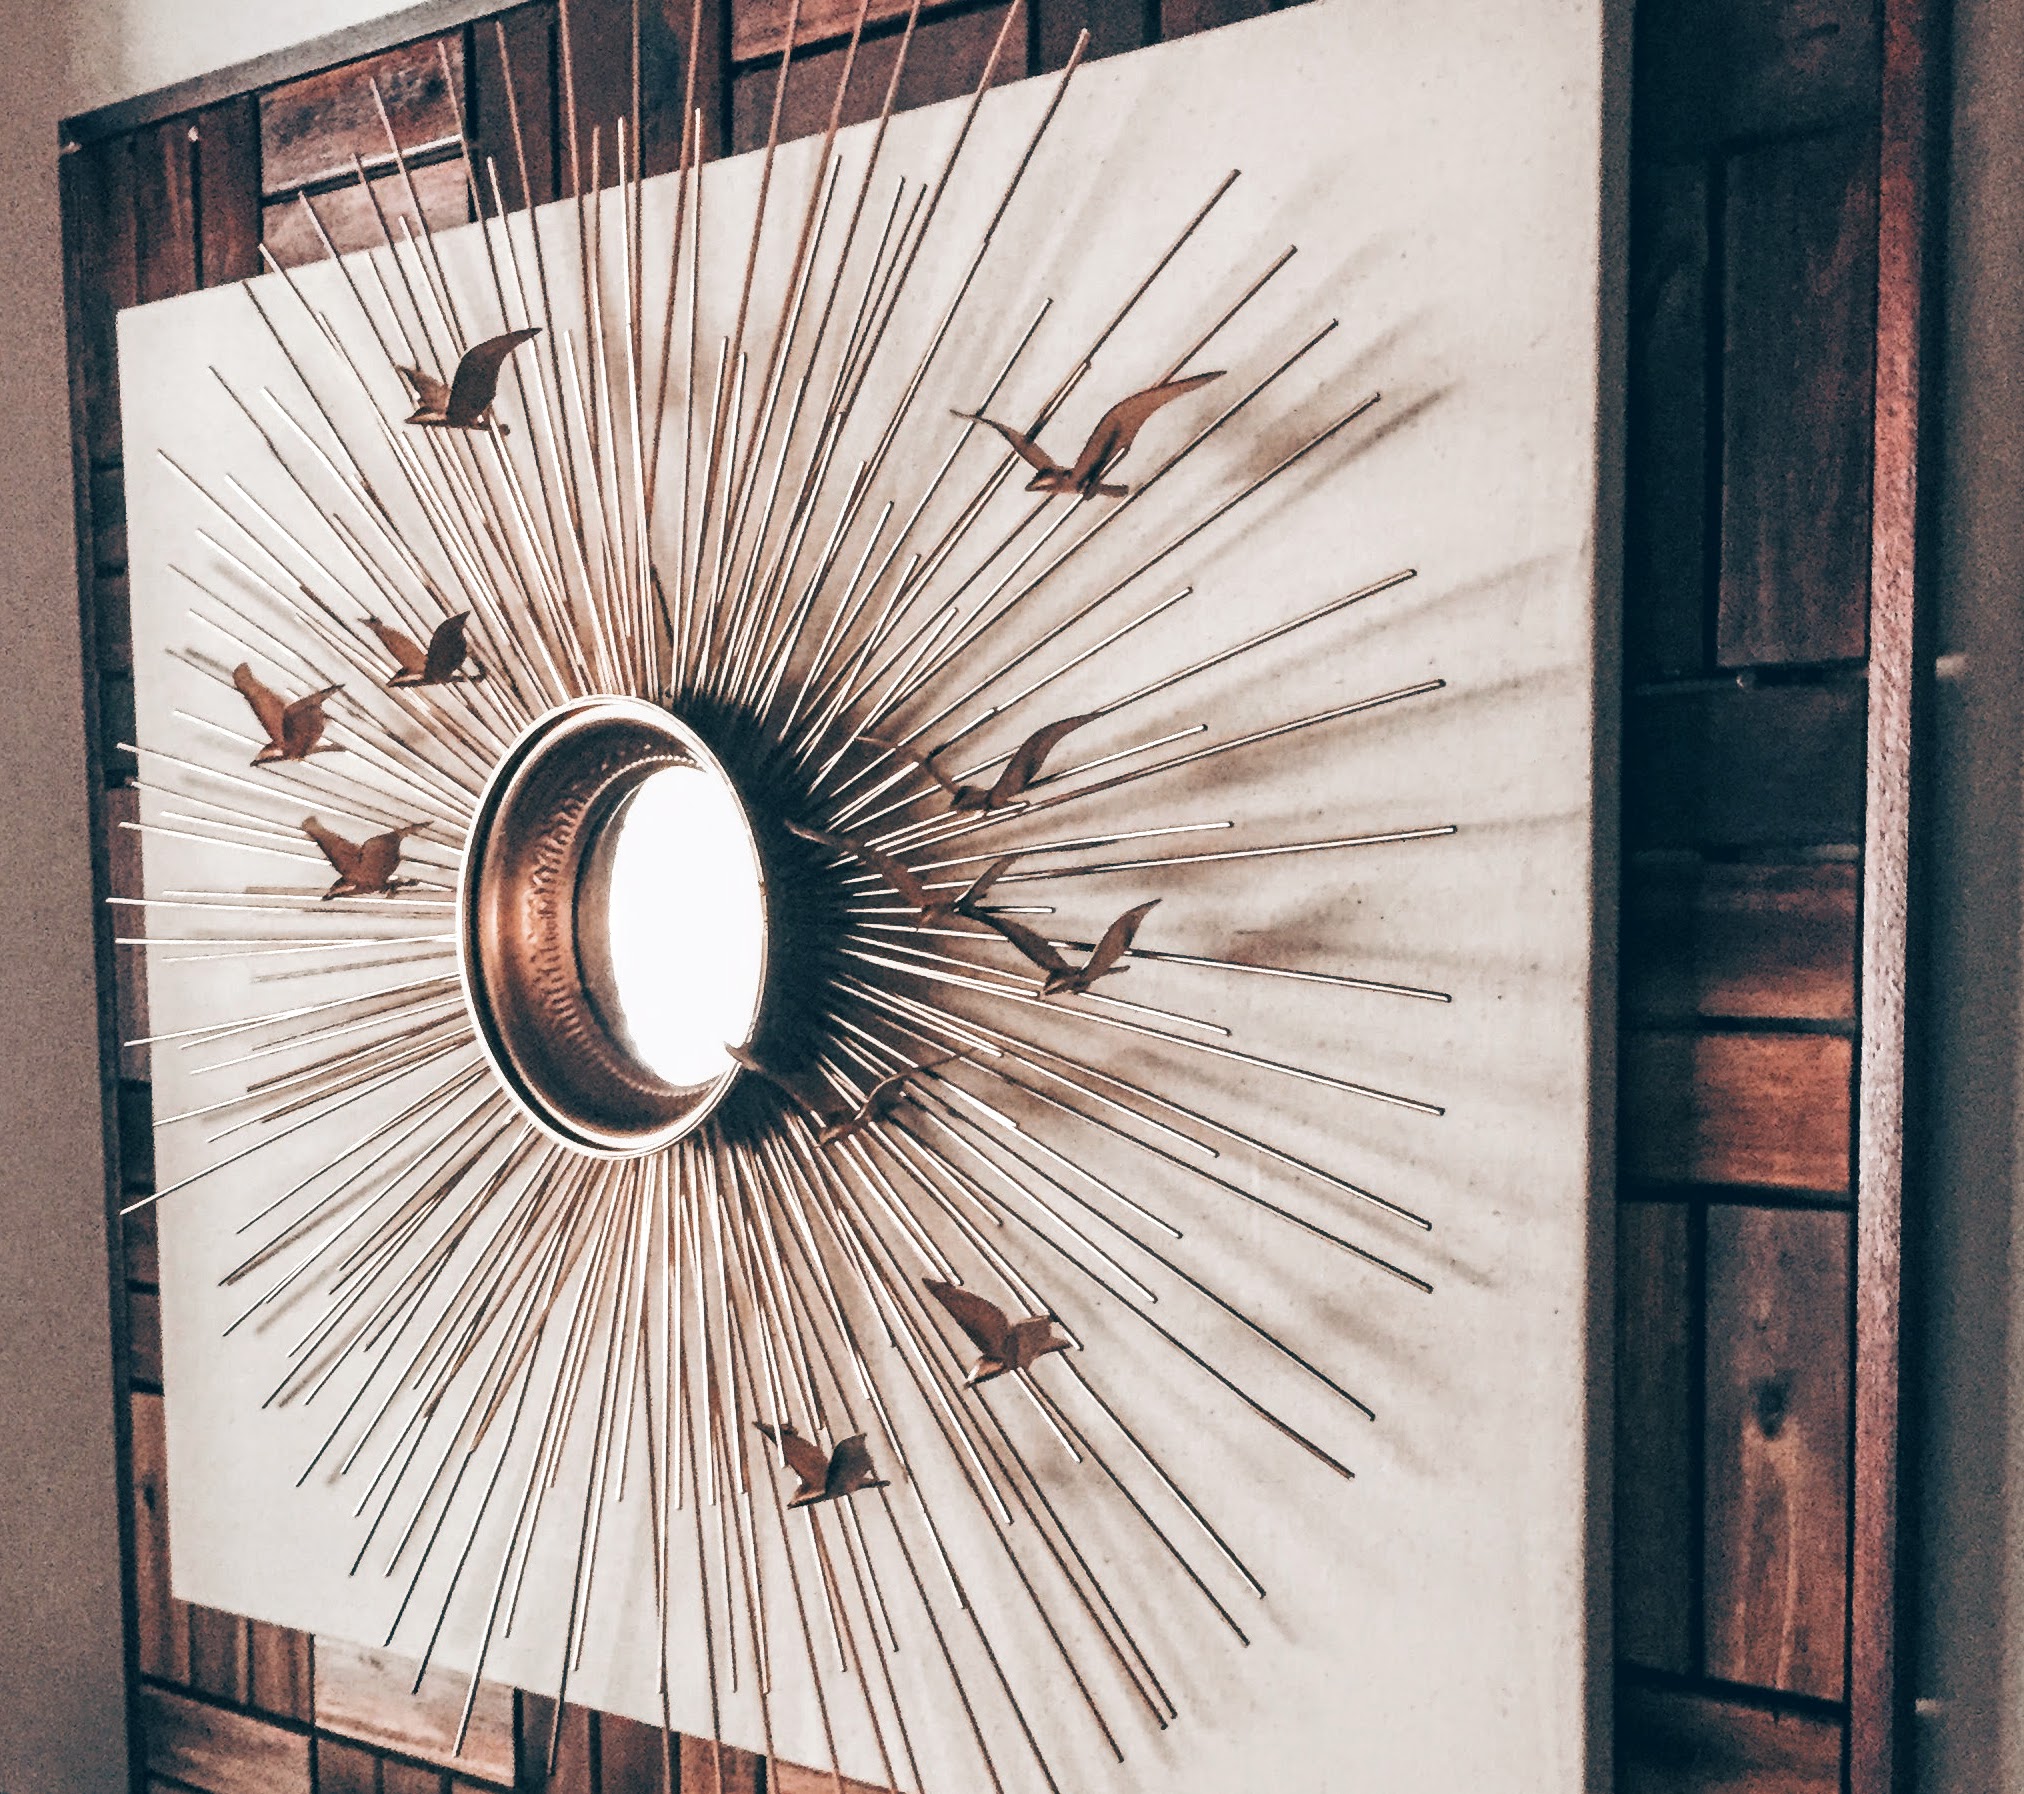
As you can see in the image below, the prongs of this sunburst are multidimensional. You have to have this type of sunburst for this project, so that the seagulls can rest on the prongs. It cannot be the type of sunburst that lies flat against the wall. The sunburst I bought at Target is no longer available, as far as I can tell. I think I saw it at my Target as recently as a month ago, but last time I checked, there were no more left. I checked online at Target and I couldn’t find it there, either. It was originally black with a little gold brushed in the middle- you may still be able to find it at some Targets. When I bought it, it was marked down to $49.99. Here are a couple of sunbursts that I found online at Target, that are similar in price and style: Oversized Gold Sunburst Mirror- 24″- $89.99 and the Gold Safavieh Bedford Sunburst Mirror- $99.99. If you want to go a little higher in price, there is a gorgeous option at Dot and Bo for $169.99.
*Note: Went to Target today, and the starburst that I used, is back in stock. It is being clearanced, and is on sale for $38.48 (the original price was $54.99). Here it is (kinda unattractive originally, huh?!):
In all of the options above, the prongs probably lie flatter than the prongs on the sunburst that I used. However, I think that you could probably pull them out and manipulate them slightly, to create a more multidimensional sunburst.
Once you have placed and glued all of your seagulls and you are satisfied with your creation, you can VERY carefully remove it from where you have hung it, and take it back outside to do the final touch up spray. Just hit any areas that have been damaged by the hot glue, making sure the paint looks even. Also, if you give the spots of glue a spray, you will give the seagulls a “welded on” effect. Once you’ve finished this step, the whole thing comes together beautifully! When it’s dry, put the mirror back into the sunburst, very, very carefully. I bought a flat mirror at Michael’s to fit in the middle, because the original was a fisheye and I didn’t like the look of it. It looked cheap and “too much” with all the seagulls. The original mirror was a bit hard to remove and the new one was a little difficult to put back in- take your time with it, and be patient. You don’t want any of your seagulls to pop off!
So, for about $80 ($50 for sunburst + about $6 for the number of seagulls I used, which was 11 + about $14 for 2 cans of 24K spray + $5 for JB Weld+ $5 for the flat mirror from Michaels), you have a beautiful centerpiece for your living room. All that is left now is to showcase your gorgeous Mid-Century Sunburst creation!
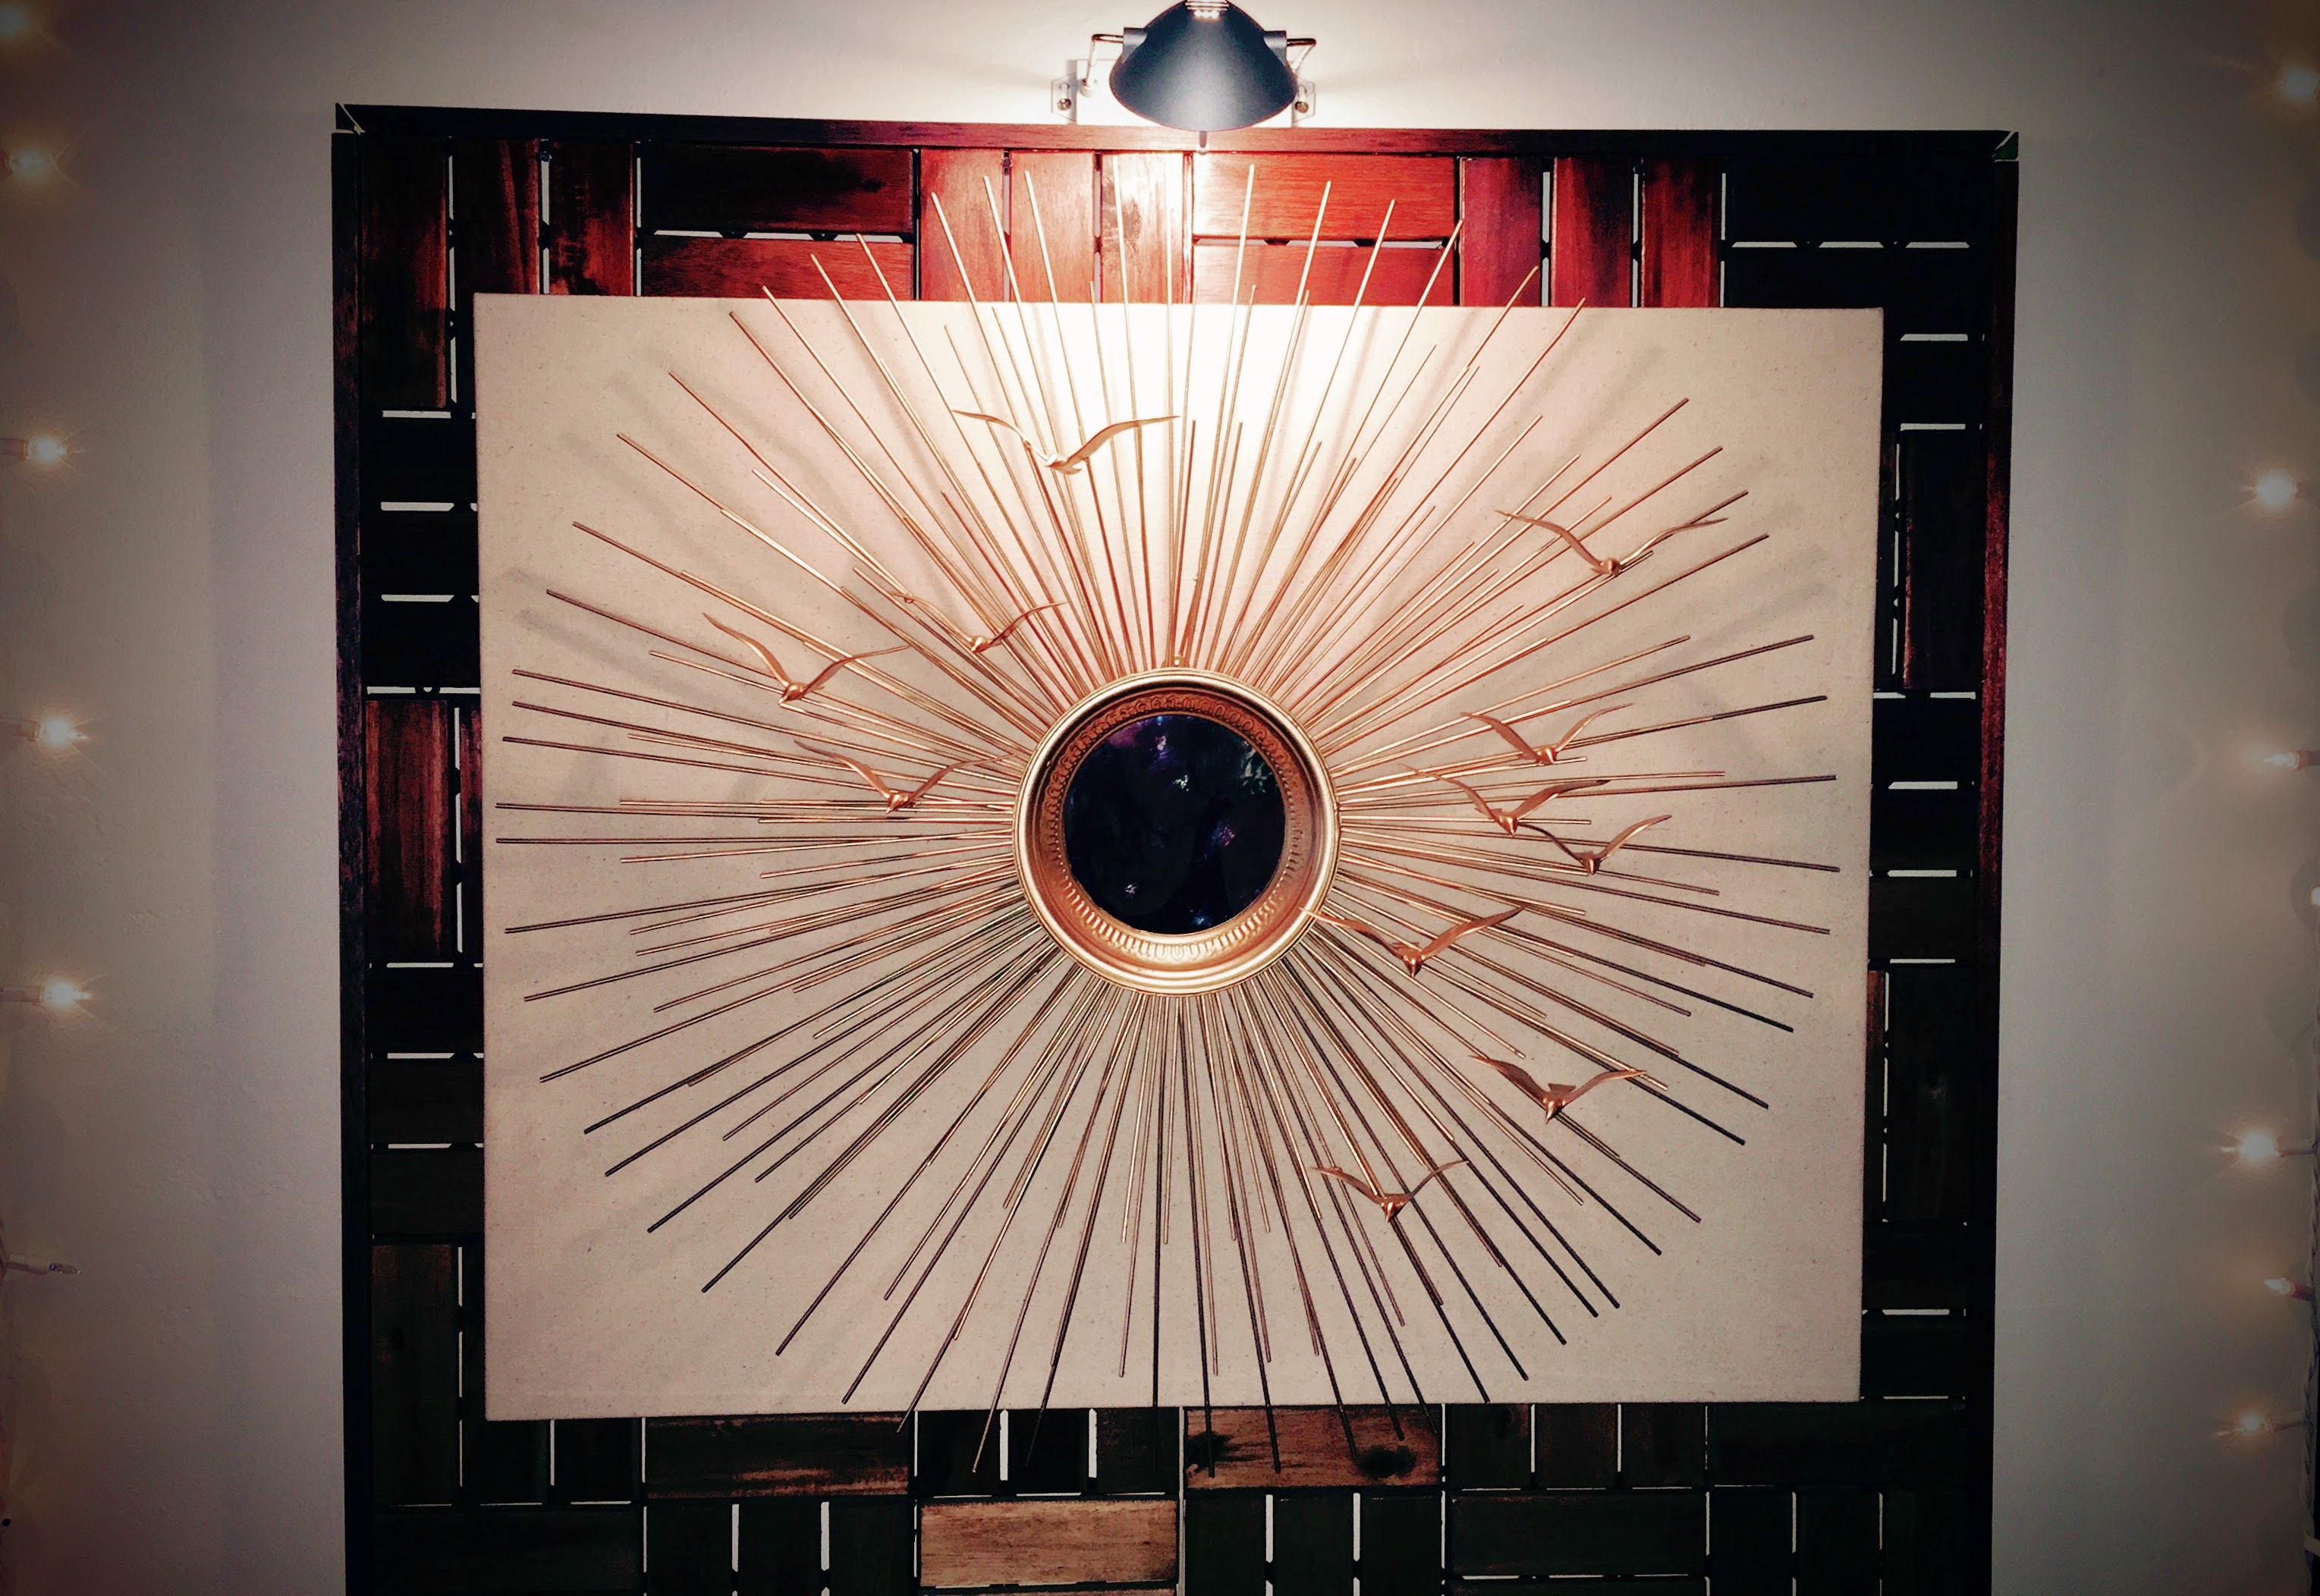
Thank you so much for checking out my first post! I’m excited to spend more time with you in the future! Please stay tuned for my next DIY post, which will give you the how-to on the linen and wood display behind the sunburst. Thanks again for stopping by…
Happy Nesting.
Kirstie xo
PS: I just want to take a quick moment to let you know what I’ve learned over the last few months in creating and then recreating this project:
First: You will need a stronger glue than just the hot glue. Either an E6000/Hot Glue combo or JB Weld. You may also want to have a hot glue gun ready when you’re working with the JB Weld because sometimes those stinkin’ seagulls just flat out refuse to adhere to the sunburst. Hot glue makes the short term more dealable by making those seagulls stick more quickly, while the JB Weld ensures the long term.
Second: I would NOT paint before gluing AND I would sand the prongs of the sunburst a bit, so that maybe the seagulls adhere more readily. Make sure you take a fluffy paint brush and get rid of all the debris. You don’t want any debris on the prongs when you spray paint.
Third: Allow your seagulls 24-48 hours of dry time after gluing and then go in and sand down all the glue clumps with a 320 grain sand paper. Once again, you have to take a paint brush and get into all the prongs to get rid of the debris. If you don’t do a thorough job here, your spray will be bumpy and weird. If you take the time to do this step well, when you go to spray, everything will be smooth and beautiful.
Fourth: VERY light even coats when you go in, to spray paint. Not too close, or you’ll mess up those seagulls and you don’t want to do that after all your efforts so far. Spray the back side first, standing the mirror up against something, if possible. Hopefully, guarded from wind and sun. I put a large cardboard box underneath and behind mine, and stood it against a chainlink fence. Once the back side is totally dry, flip it, and do the front.
Hope that helps! Let me know if you have any questions or need any help! xo
Wow Kirstie! I love your blog, it makes me want to buy a mid-century house or… just decorate the one I have 🙂
Thank you! Lmk how I can help!
love this project and thank you for all the details on how I too can make this on my own. I can hardly wait to get to work!
Thanks, Stefanie! Lmk if you have any questions or if I can help in any way! 😉
Awesome Pictures and Descriptions!