


Hi there and welcome to The Craine’s Nest!
Today, I’ll be showing you a modern take on gift wrapping that’s perfect for your Spring Occasion. Whether your heading to a wedding, baby shower, or birthday party, you’ll be able to find something in this variety of wrapping options, that works for you. From bohemian to romantic to beachy, these gift wraps are beautiful and unique.
My usual practice is to grab something right before a party, throw it in a bag with some tissue paper, and call it a day… but, I do love wrapping presents (especially if I’m not rushed!), and I had fun creating these packages. Painting the wrap and making the boxes would be a great afternoon project to do with the kids, and if you’re an organized-planner-type, you can do it ahead of time. It’s always nice to have things on hand when you need them. Done in advance or on the spot, you’ll find that even the most practical person, really appreciates a beautifully wrapped gift!
Giving a thoughtfully wrapped present creates a bit of ceremony. The person receiving the gift knows you took the time to make it special, and in turn, takes just a little more time to appreciate it. It’s a “stop and smell the roses” opportunity. Also, having a beautiful package available for a gift to inhabit, might just inspire and motivate you to buy that present ahead of time, instead of rushing to get it at the very last minute!
So, let’s get started!
Here are the things that I used for my packages, but you could go to your local craft store and get creative!
- This type of Brown Parcel Wrap. I bought this particular one at the 99 Cent Store. It’s also sold here at Target, or you might be able to pick it up at the post office.
- This Wood Grain “Ribbon”. I bought it at Michael’s.
- This Polkadot Cork Washi Tape. Michael’s. Washi Tape section. I want to say it’s sold in a 2-pack with a chevron cork washi tape.
- This Wood Grain Washi Tape. Michael’s. Washi Tape section. I think this one is sold in a 3 pack.
- These wood letters at Michael’s. They have so many shapes and sizes of these things, that you could accommodate a small, medium, large, or even extra large gift!
- Faux Succulents/Airplants. I bought the ones in this post at Target, but last I checked, they didn’t have them anymore. They may, however, have a new selection. I think they were 2-3 bucks when I bought them. This website has a good selection of faux succulents and airplants. Just make sure you get the proper size for you gift, if you’re ordering online.
- Faux Flowers. These and this one I bought at Michael’s. I always remove the green parts because they look kind of tacky to me.
- Real leaves of any kind, the size and shape appropriate for your package. I used one of these on my “LOVE” gift. Leaves look beautiful with metallic spray because the paint emphasizes all of the veins and details.
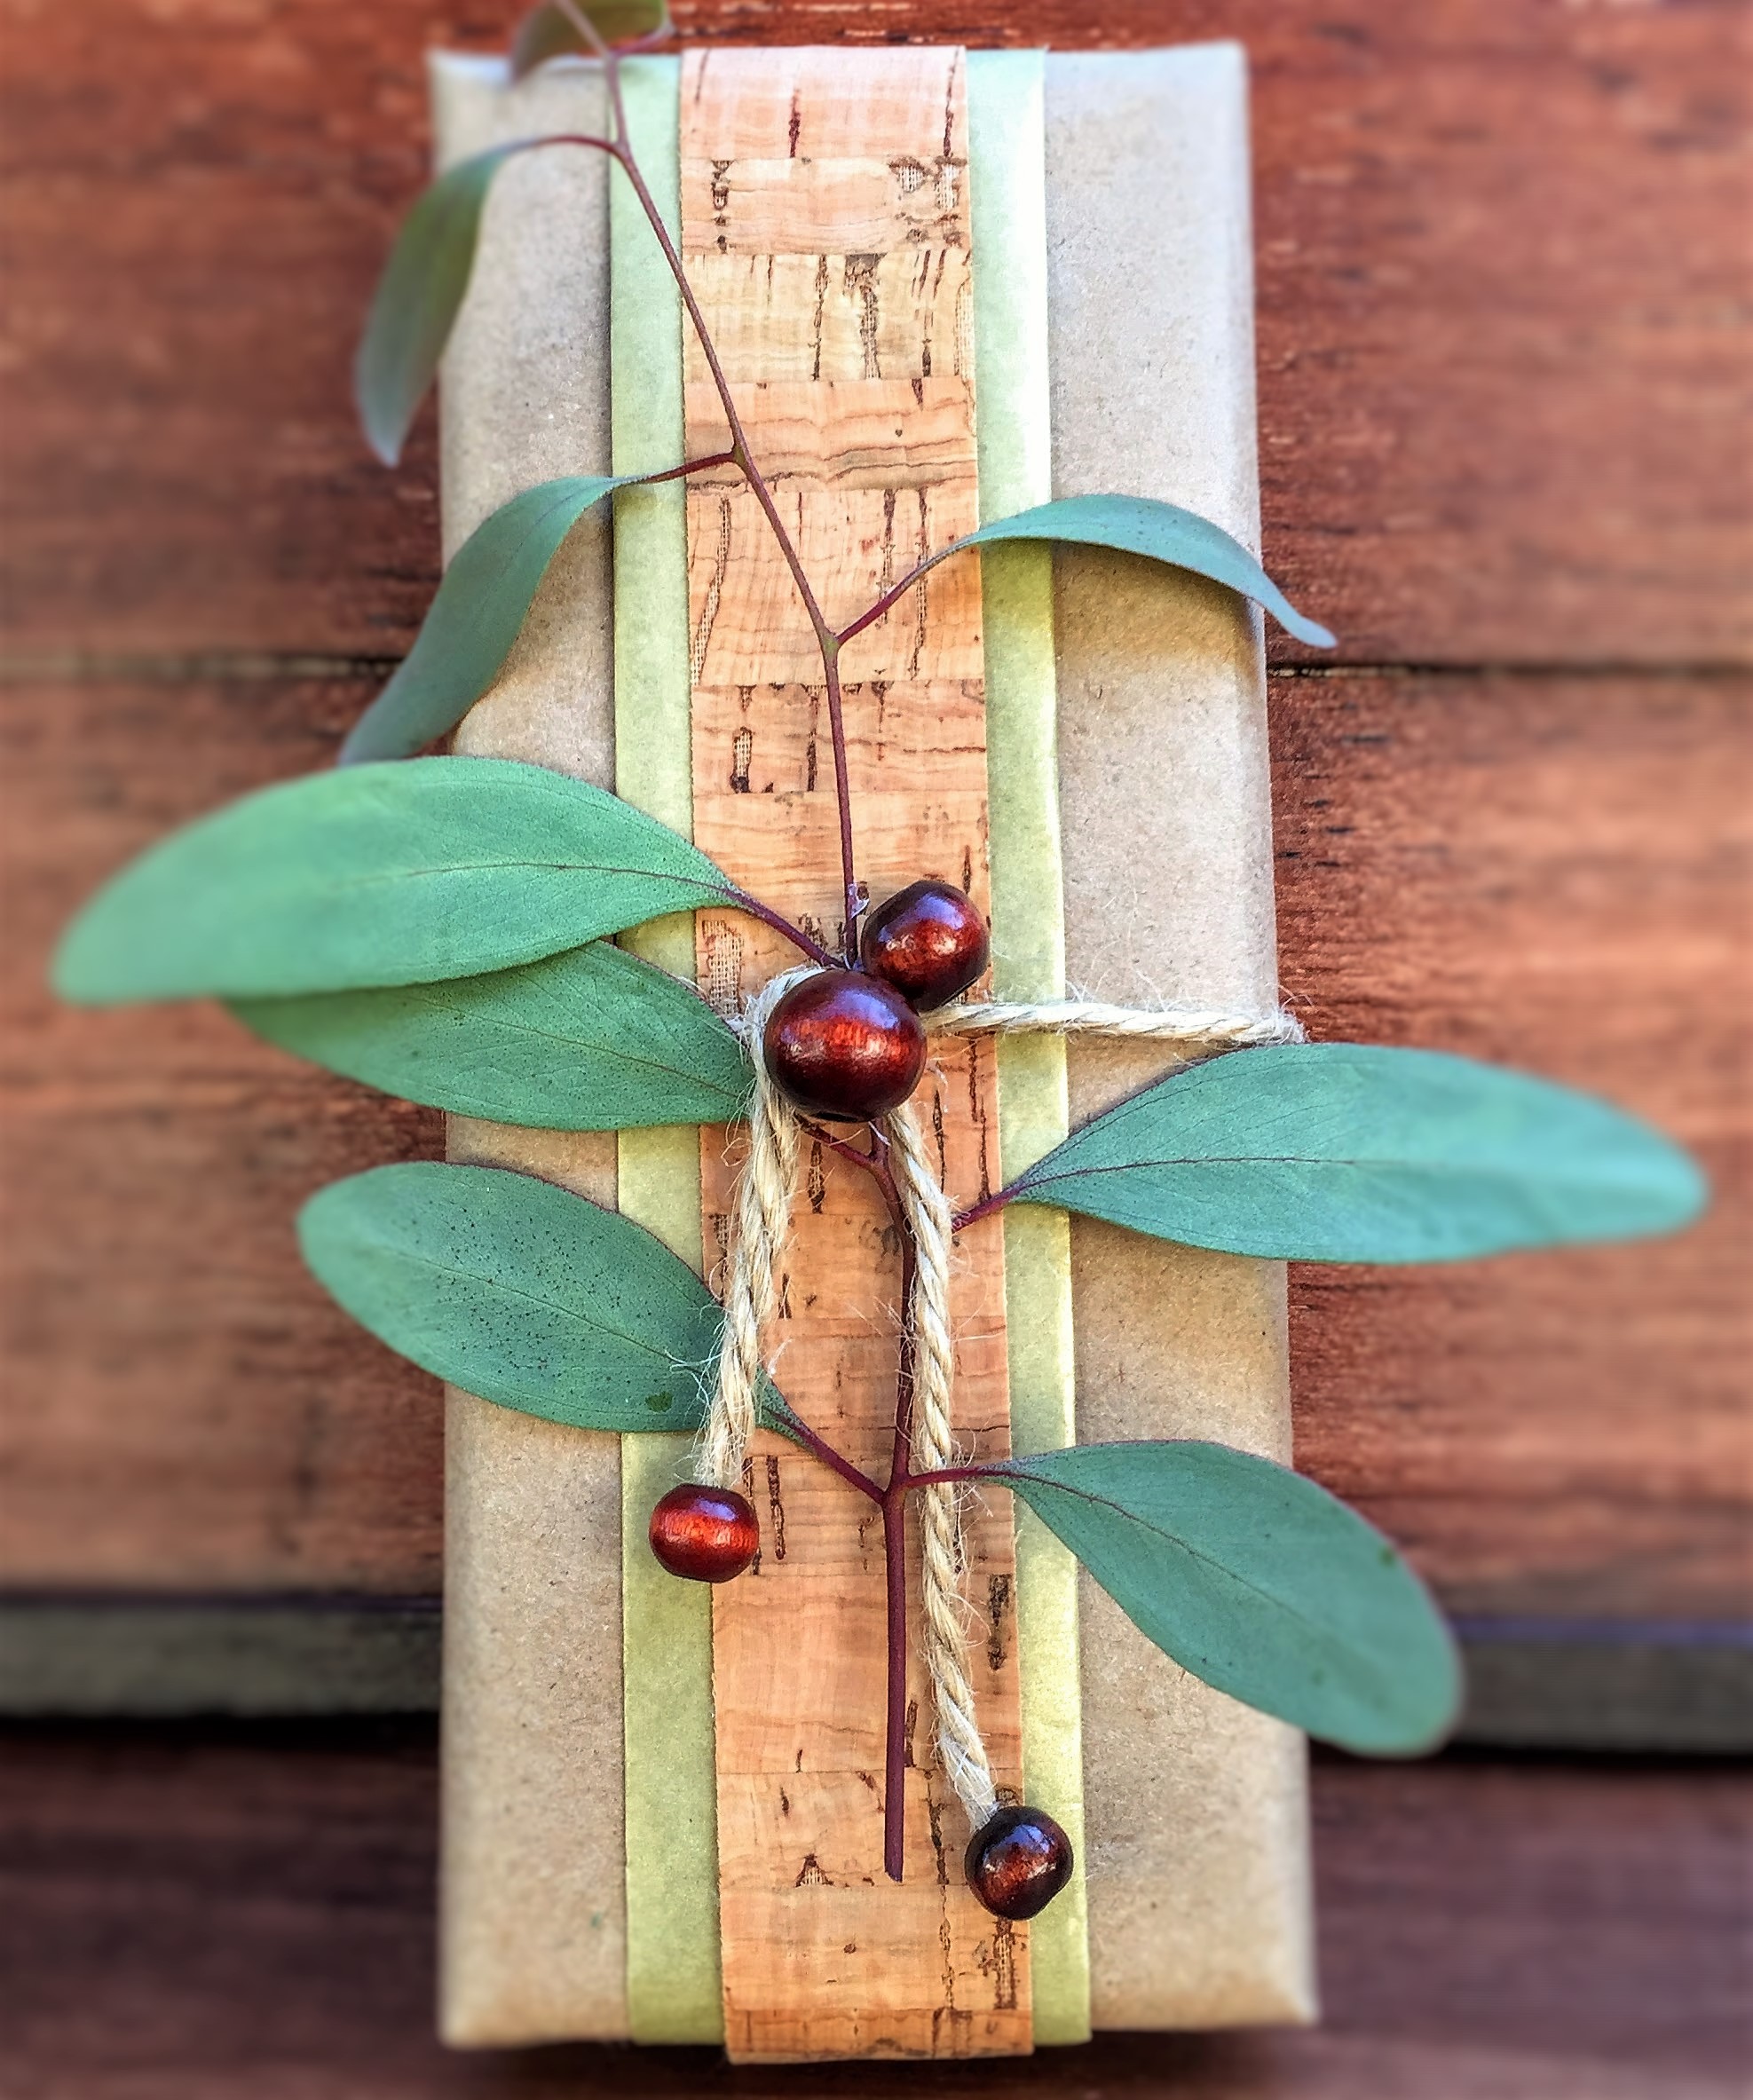
- Real plants- I used a eucalyptus branch (as seen in the image, just above), because it dries nicely and I love the colors.
- These Wood Beads. JoAnne’s. Come in a bag of different sizes.
- These Seagulls. Etsy.
- Starfish. Bought at Michaels in a net bag of about 5 or 6.
- Twine. Michael’s.
- 1/4″ nails. I used gold and they look great. I bought gold and nickel 1/2″ nails at Dixieline, but they are slightly too long, so you’ll want to find 1/4″ nails. You can probably find them at Home Depot, Lowe’s, or Amazon.
- Spray Paint- I used Copper Metallic, Ballet Slipper Pink, and 24K Gold.
- Acrylic paint- I use these little bottles from Michael’s. The Martha Stewart brand is more expensive than the other, but probably a better color selection. I usually end up mixing colors to get the tone I want anyway, especially when painting on the brown parcel paper.
- These Martha Stewart Round Sponge Blotters to make Polka Dots. I could only find one of mine for the picture, but they come in a pack with all different sizes. Michael’s.
- This Monster Pack of Tissue Paper with every color of the rainbow. Michael’s.
- This type of mini crate. I bought this at Michel’s a while ago, but these are pretty popular and you could probably find them at Michael’s, Hobby Lobby, or Target.
- I bought this striped box and the other oval shaped containers in the Dollar Bin at Target. Once again, you could find different gift boxes/containers at Michael’s, Hobby Lobby, or Target.
- Felt- all you need is a tiny circle. Michael’s has squares of felt for about 50 cents
- Hammer
- Hot Glue Gun
I’m going to give you some quick pointers on wrapping these beauties! I have 8 different wrappings to demonstrate, so you may want to scroll through to the one you want, instead of reading them all.
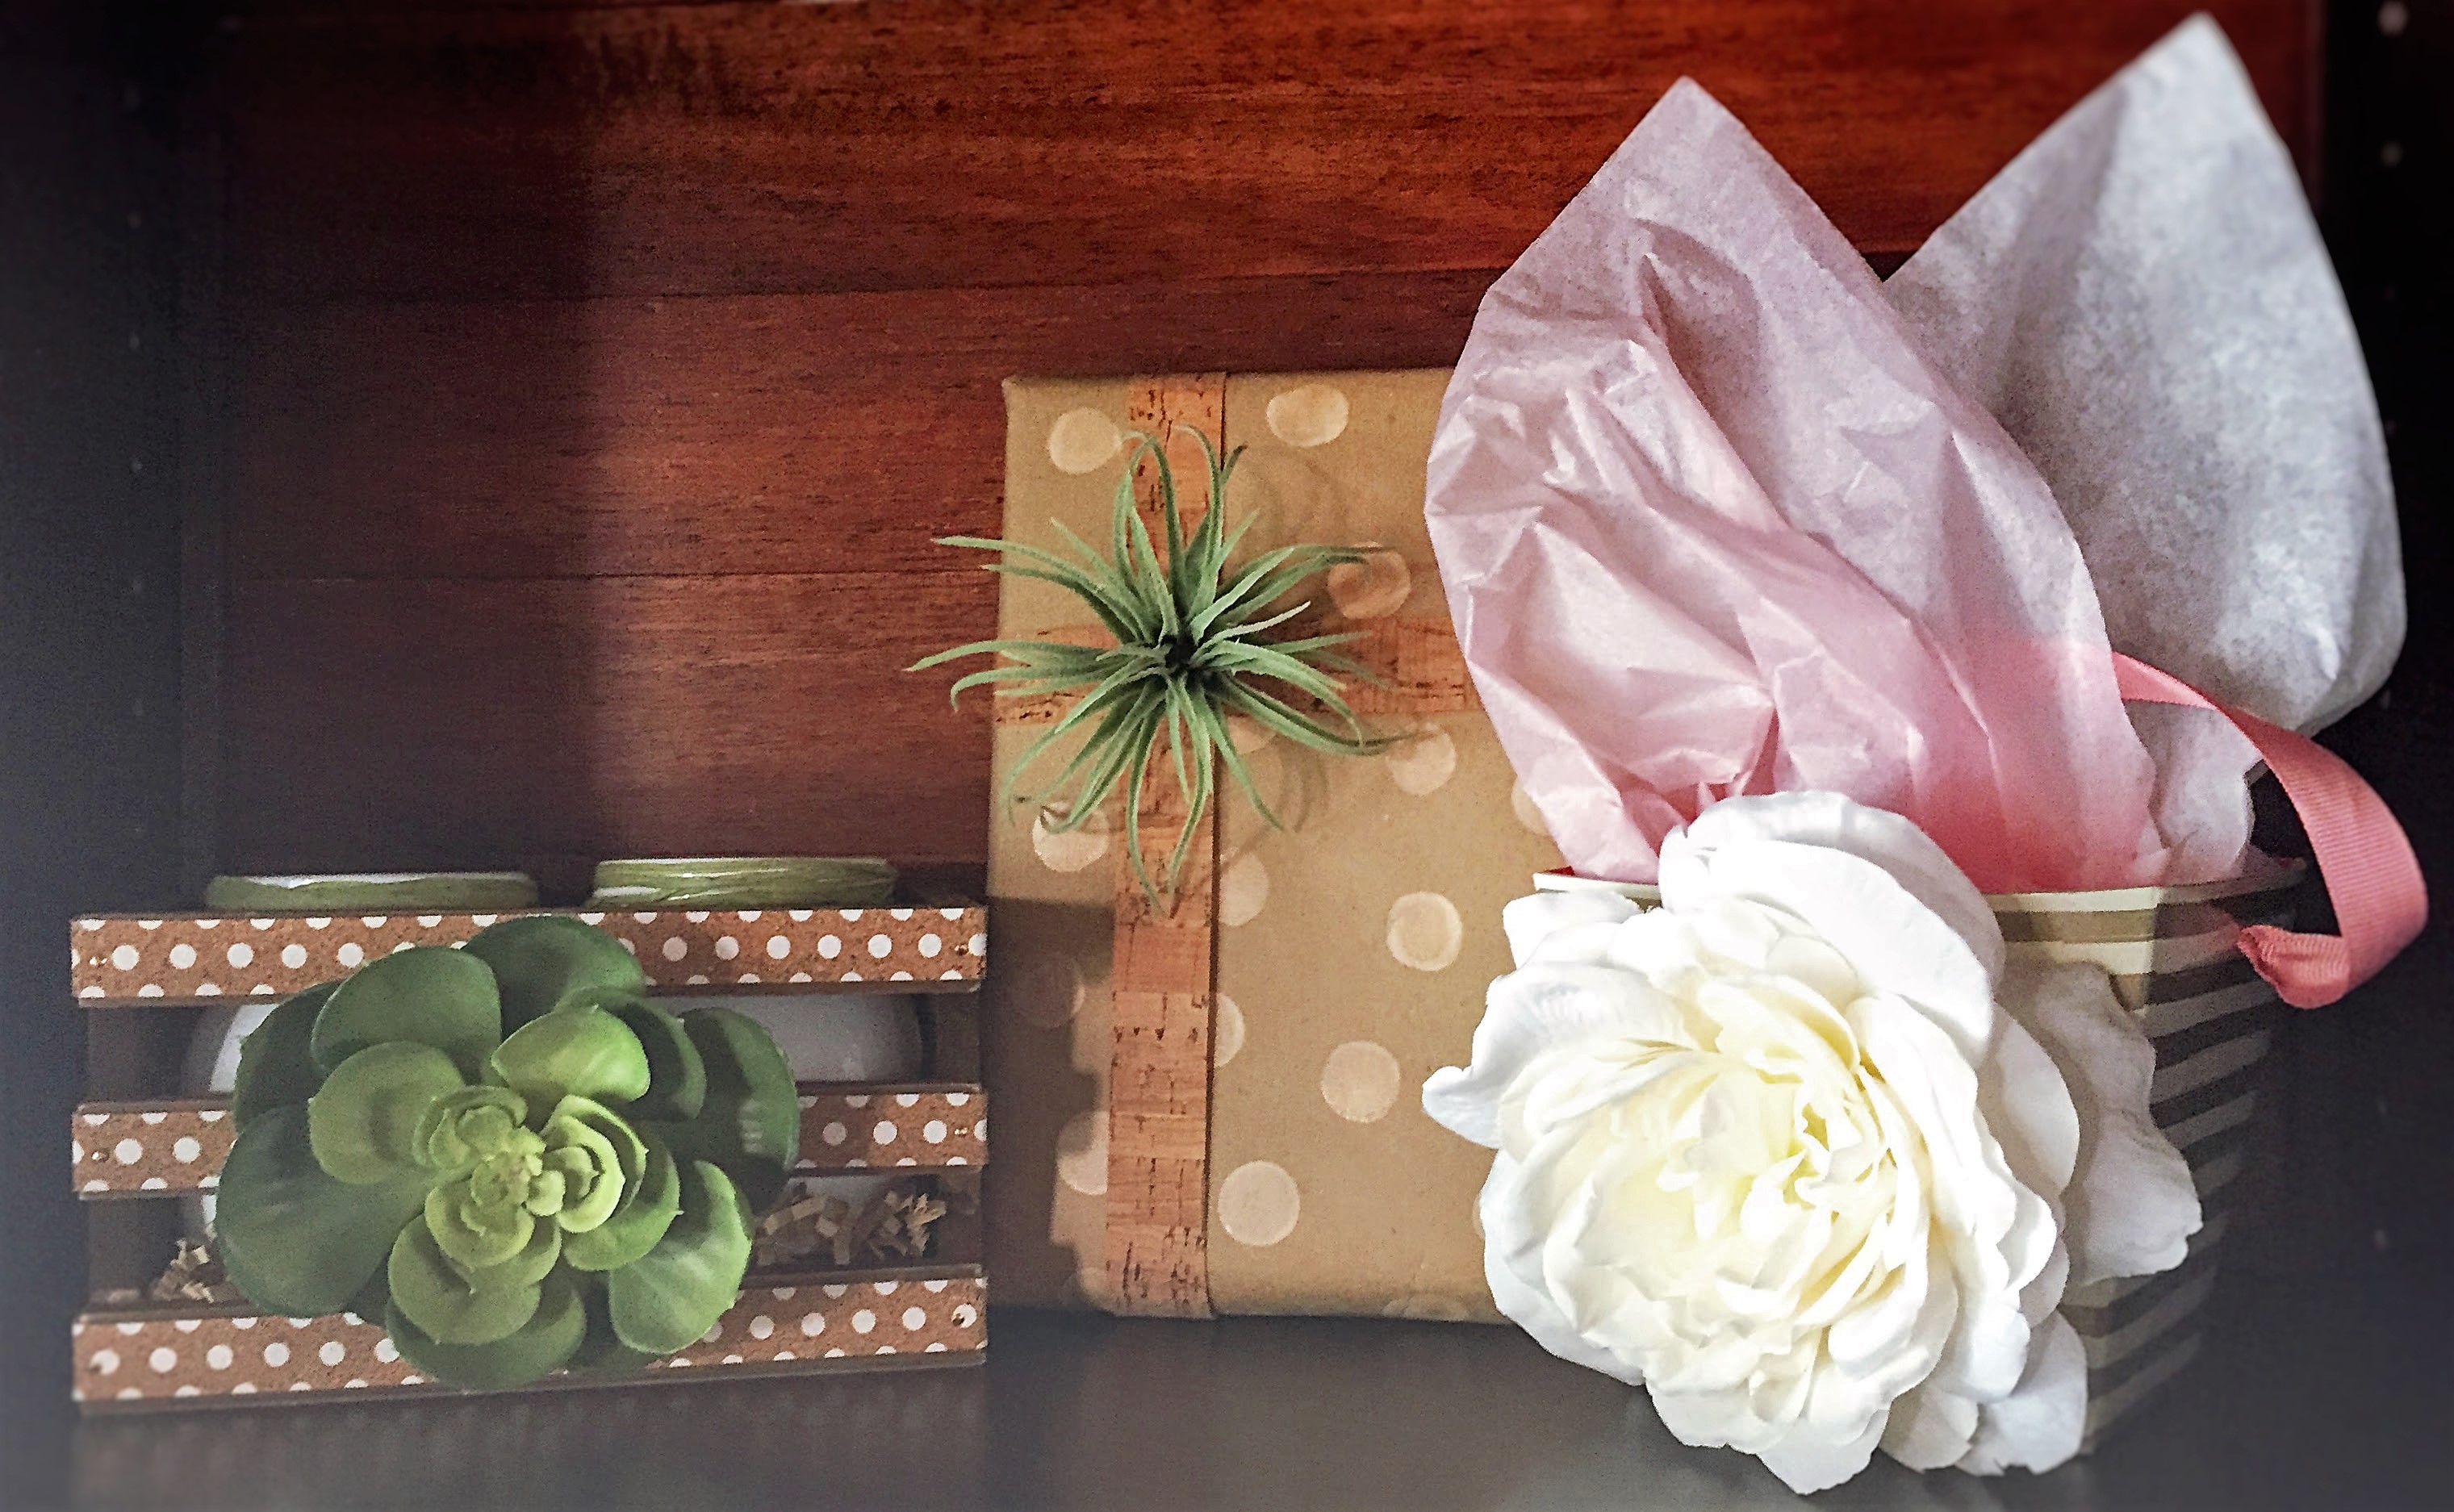
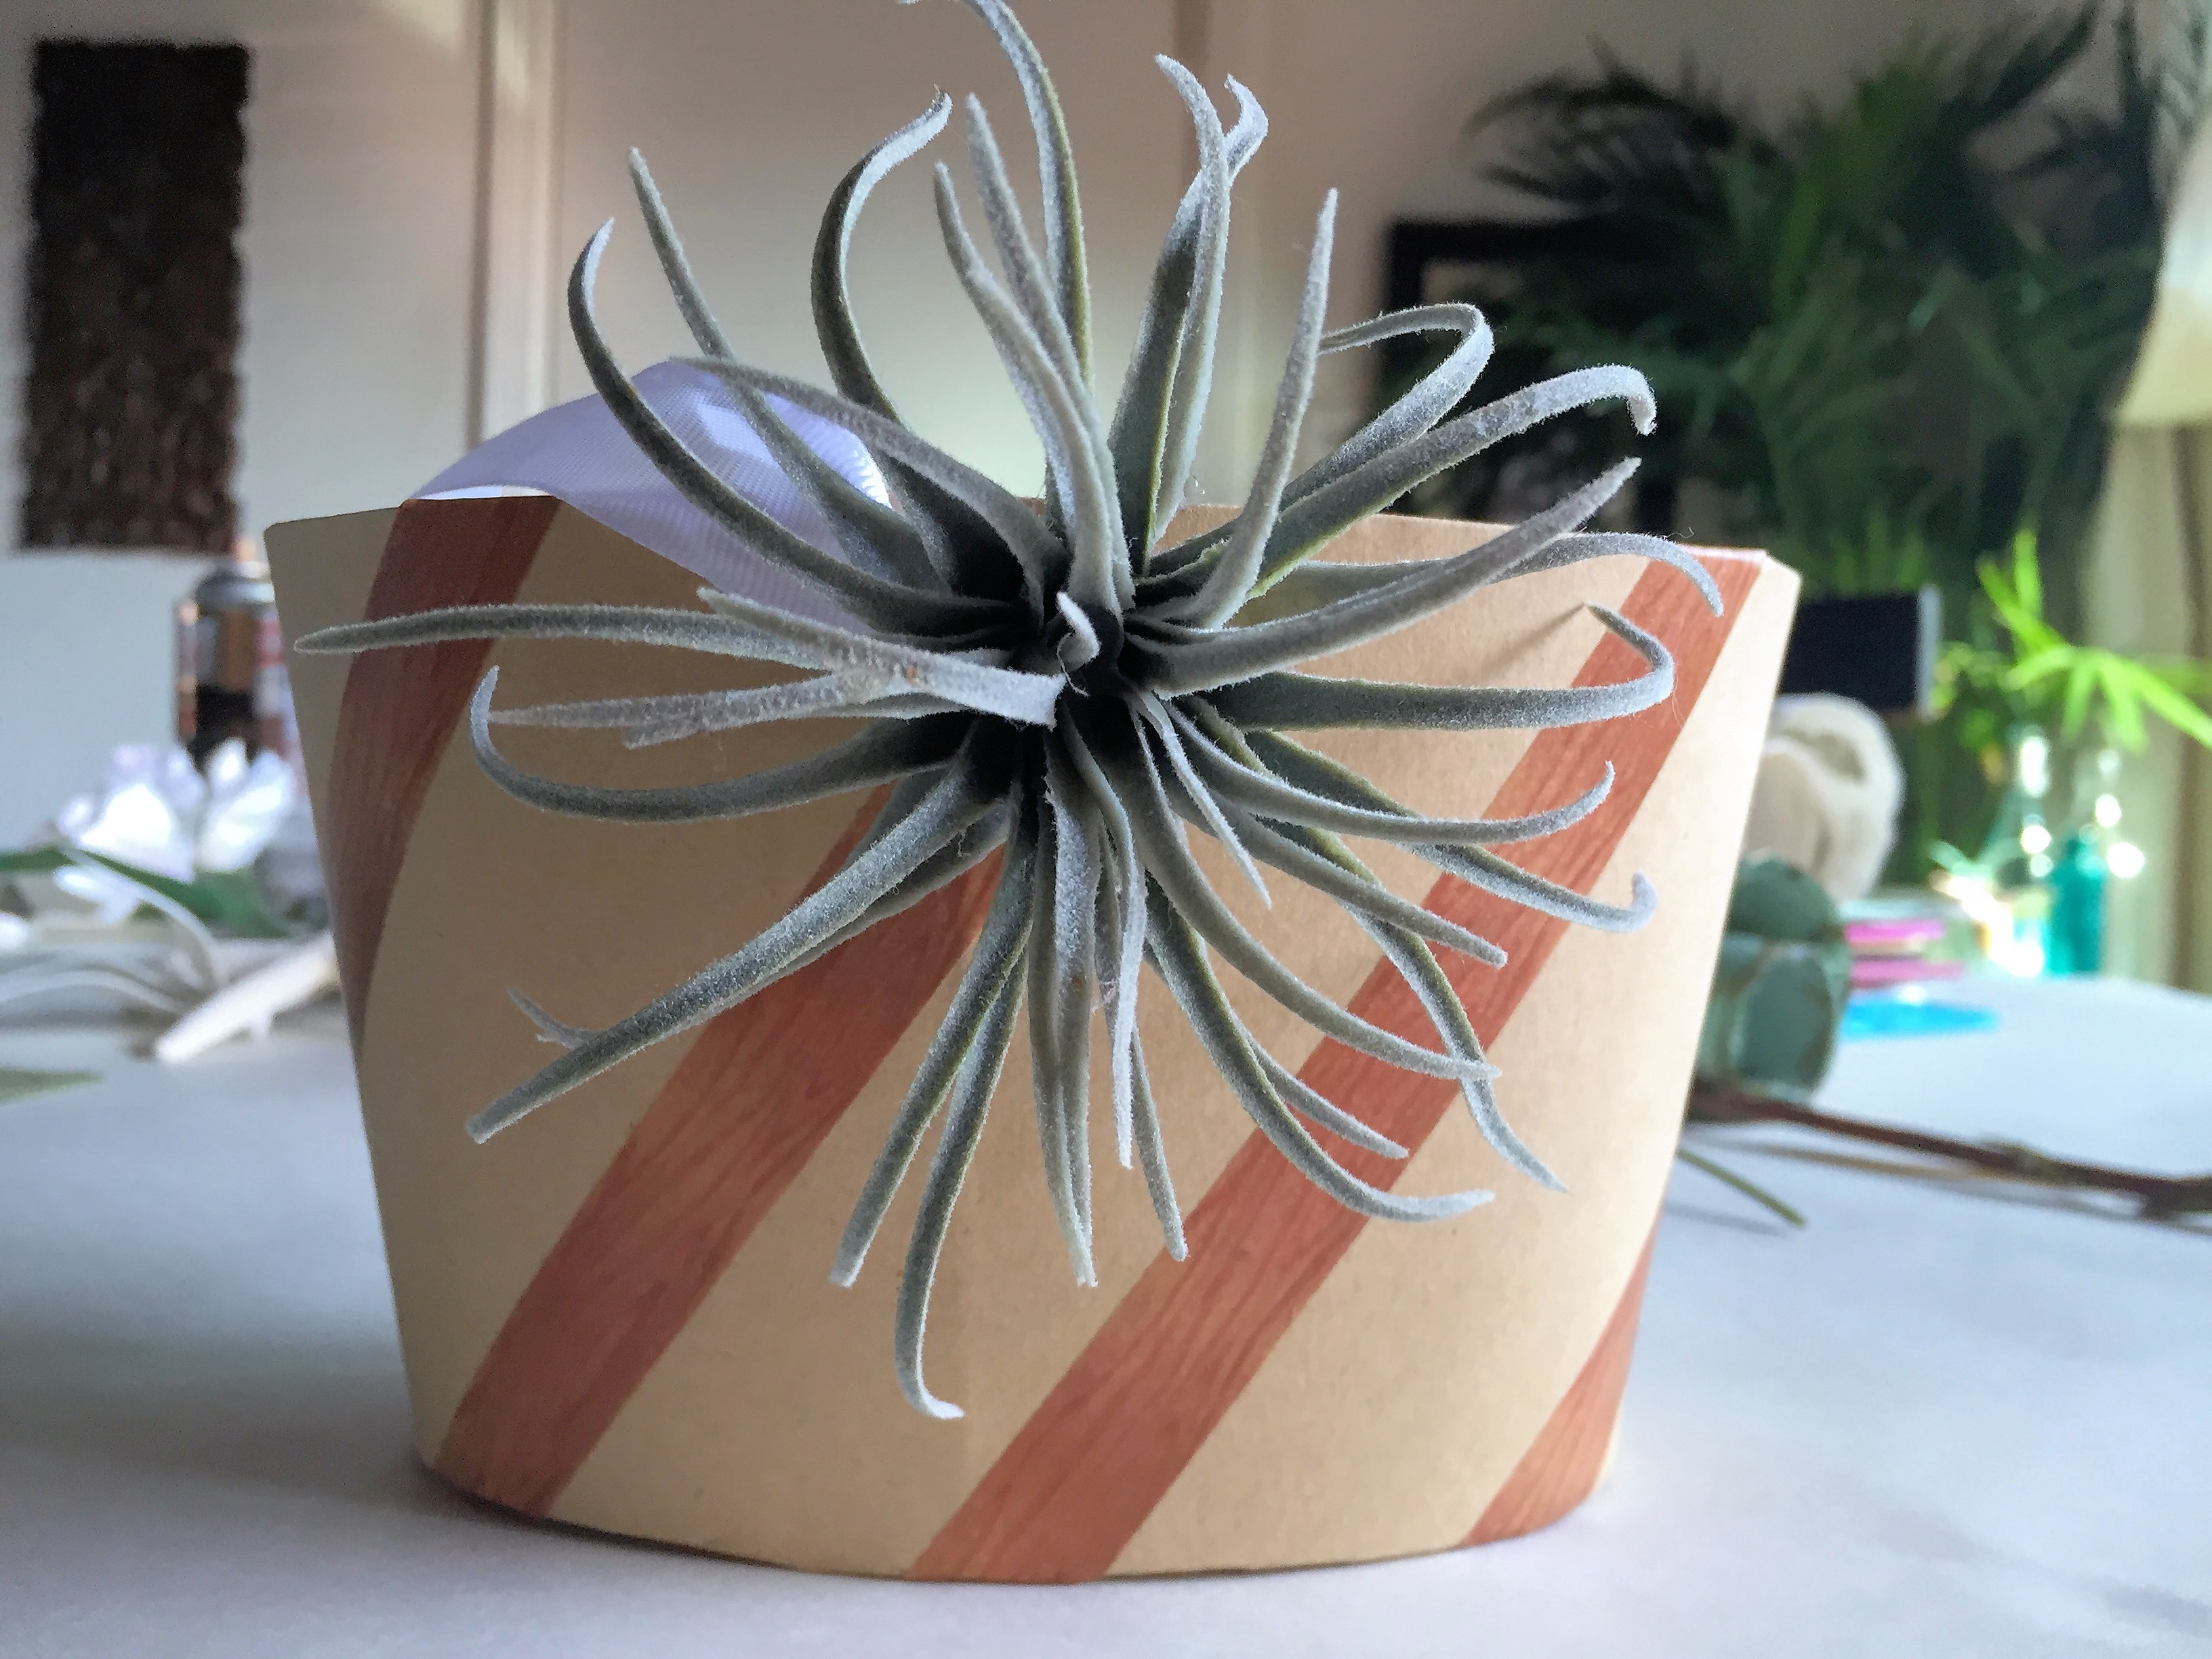
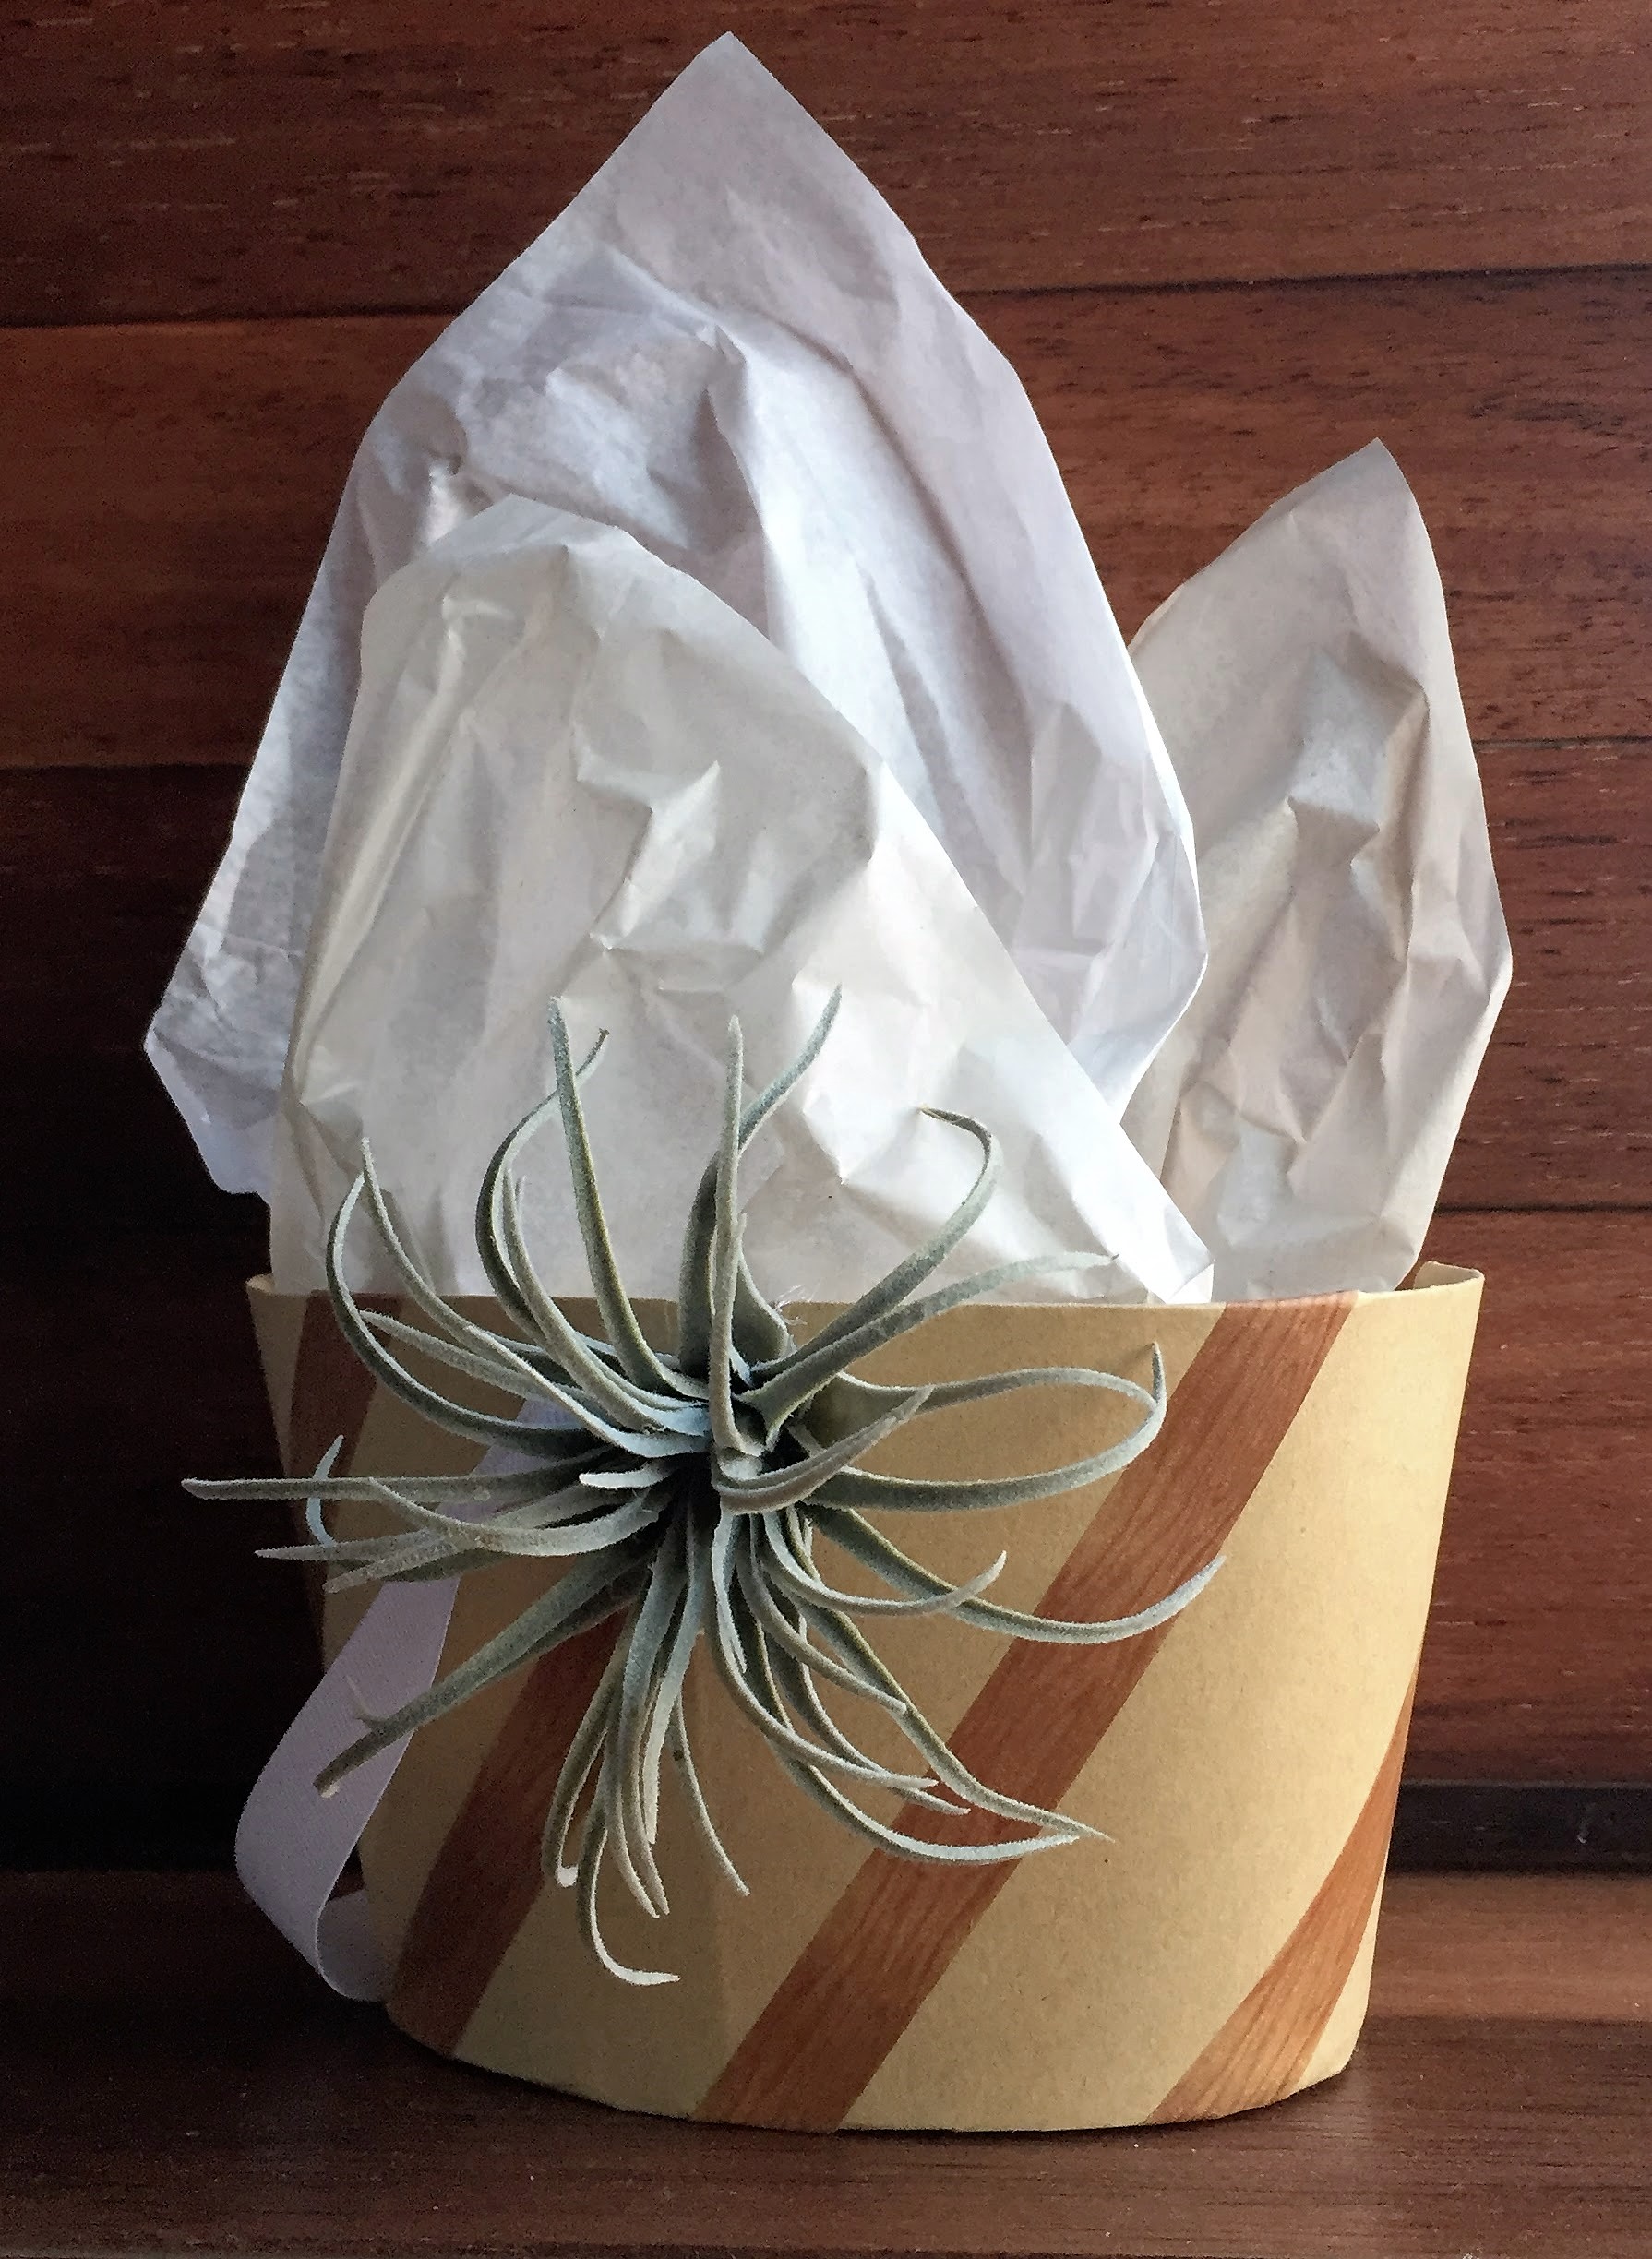
#1 The Airplant, Wood, and Polka Dots Wrap

This wrap, which is probably my favorite, starts with brown parcel paper. I wrapped my gift and then painted the circles. You could obviously do the painting ahead of time, but I’m an on-the-spot sort of person (ie: procrastinator!). I used these 2 paint colors and mixed them together. When I tried to use the metallic by itself, it barely showed up on the brown paper, so I had to lighten it up. Take your round blotter and put it in the paint, making sure to test it on a scrap piece. You don’t need much paint, but the round needs to be covered. You can also turn the blotter when you apply the paint if you want a heavier application. The circles don’t have to be perfect! I applied them to the front, back, and sides of the gift.
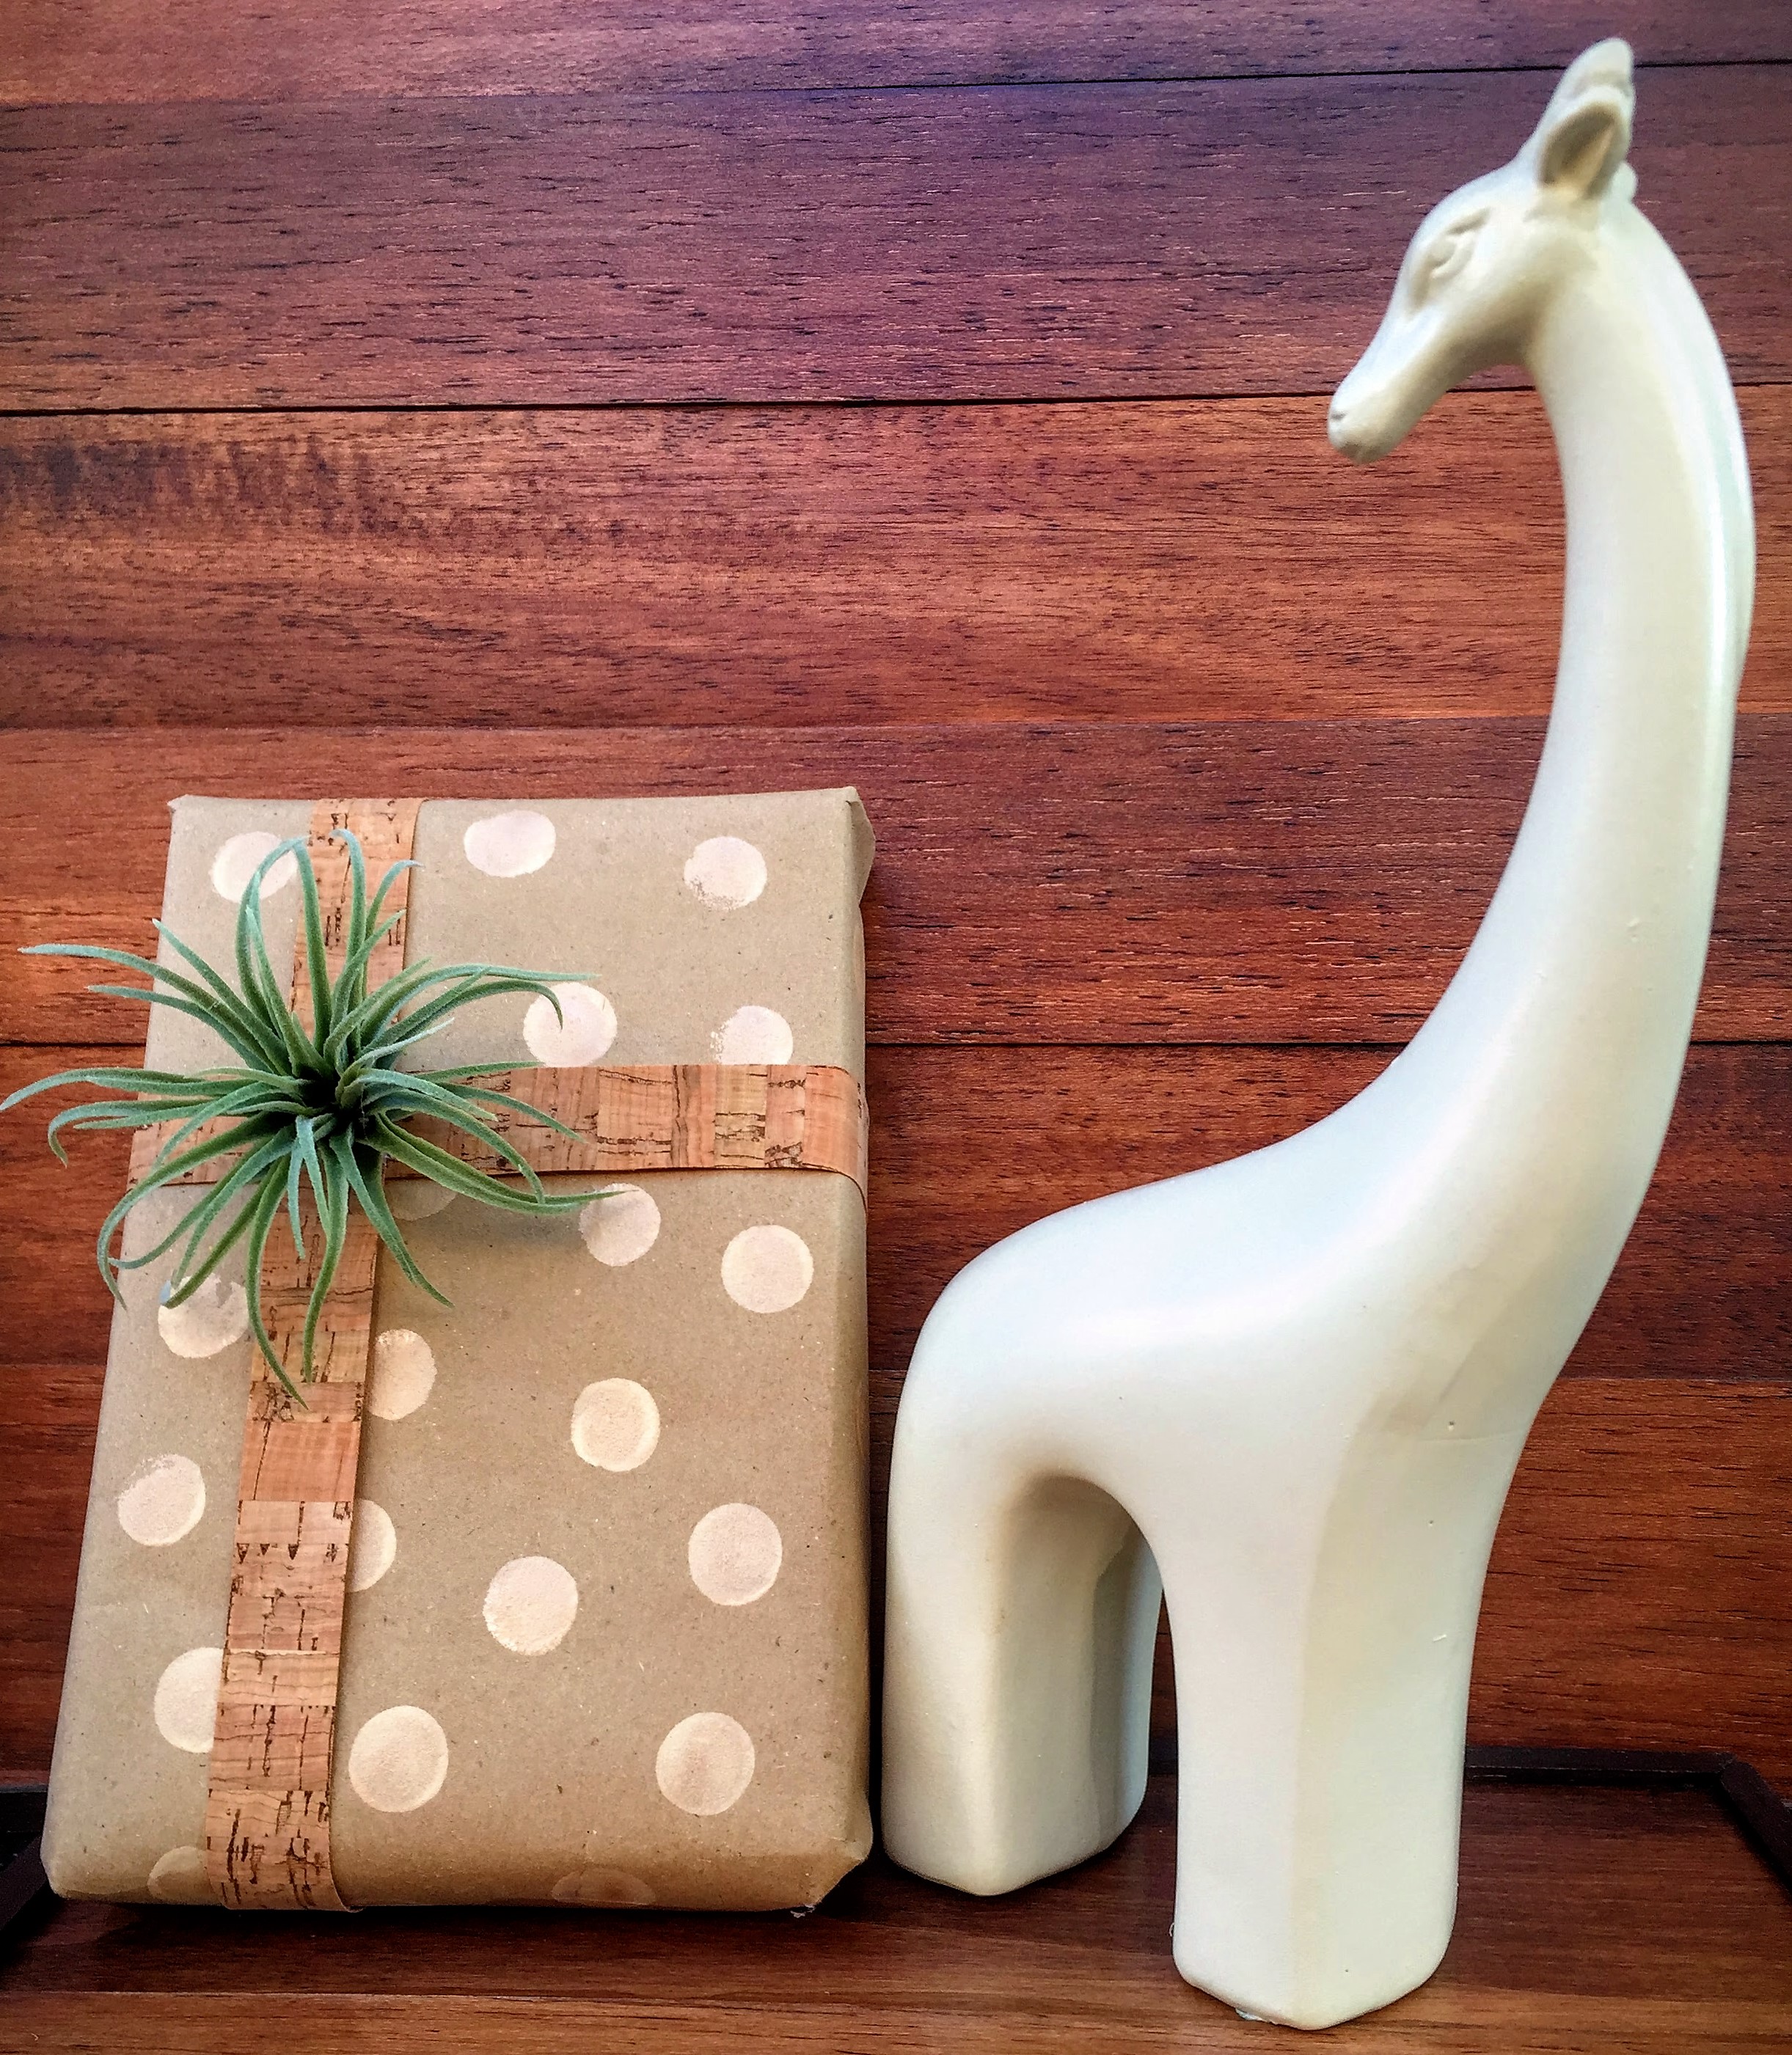
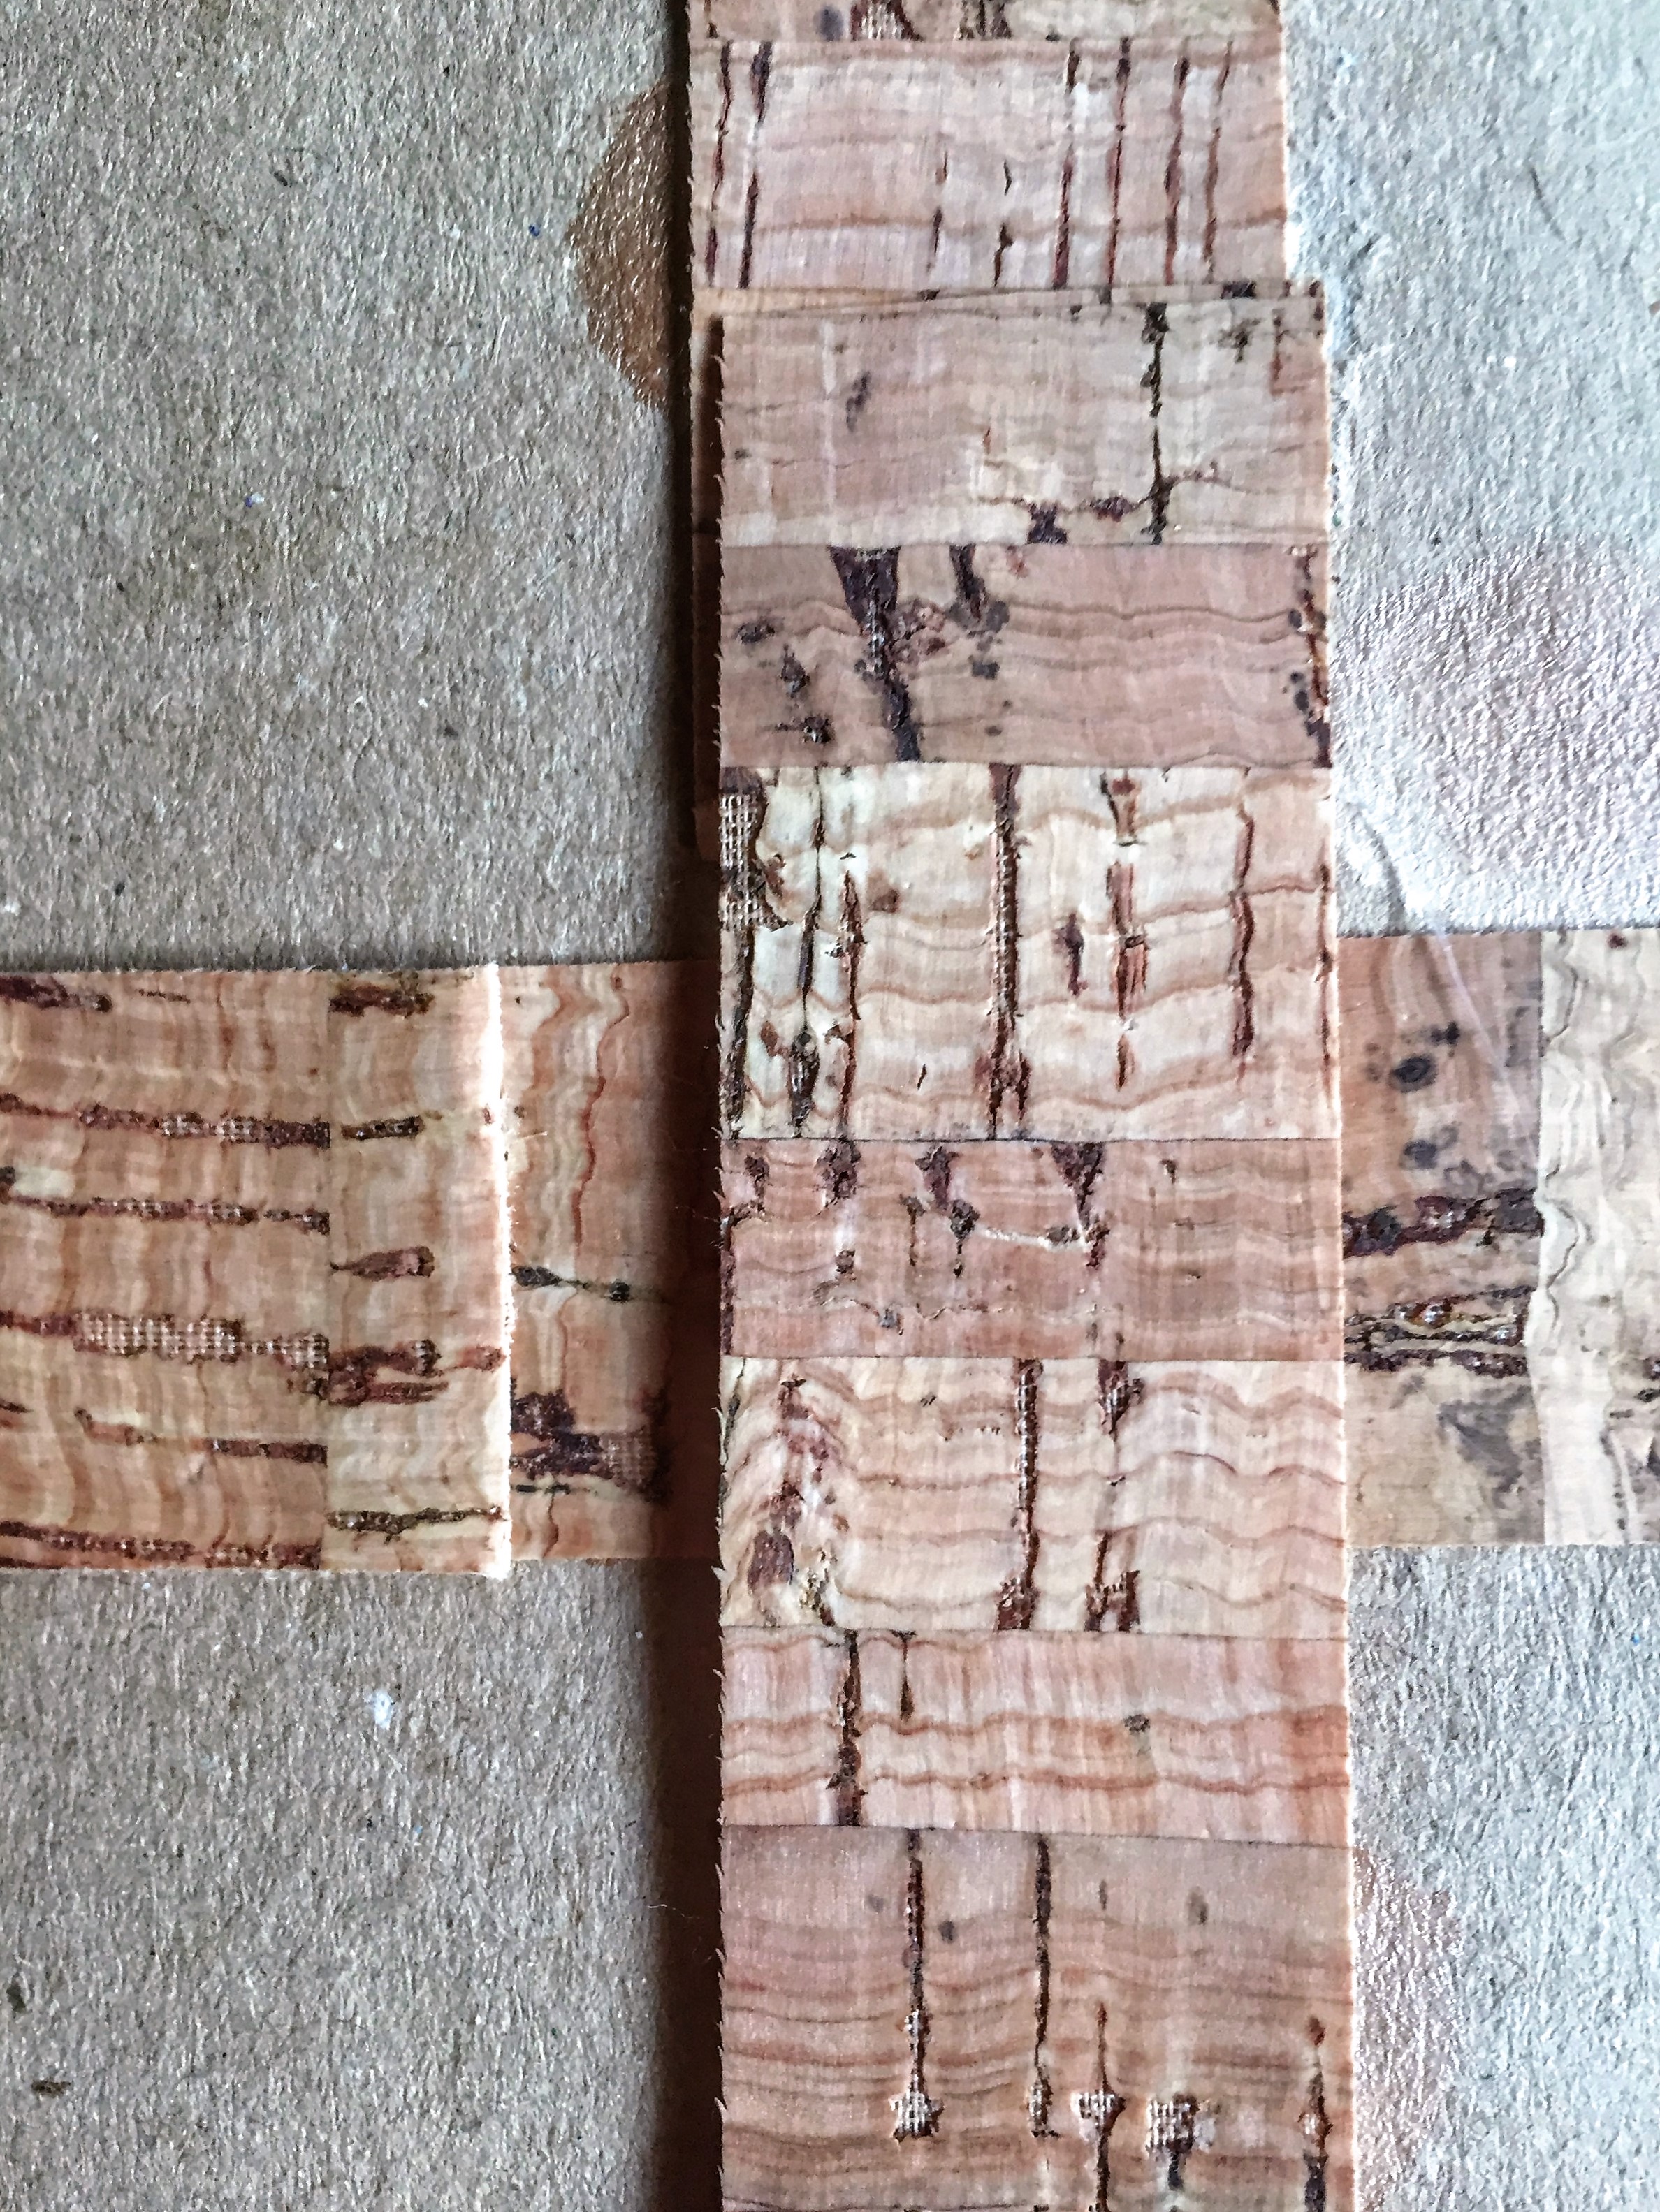
Once your paint is dry, take two strips of the wood grain ribbon, one to fit across and one to fit lengthwise. Apply a thin line of glue along the length of the ribbon (on the top of the package), and apply to the package, making sure it’s straight. In the back, where the ribbon meets, add more glue to make sure it’s tight. Repeat for the horizontal ribbon. The back will look something like this when you’re done:
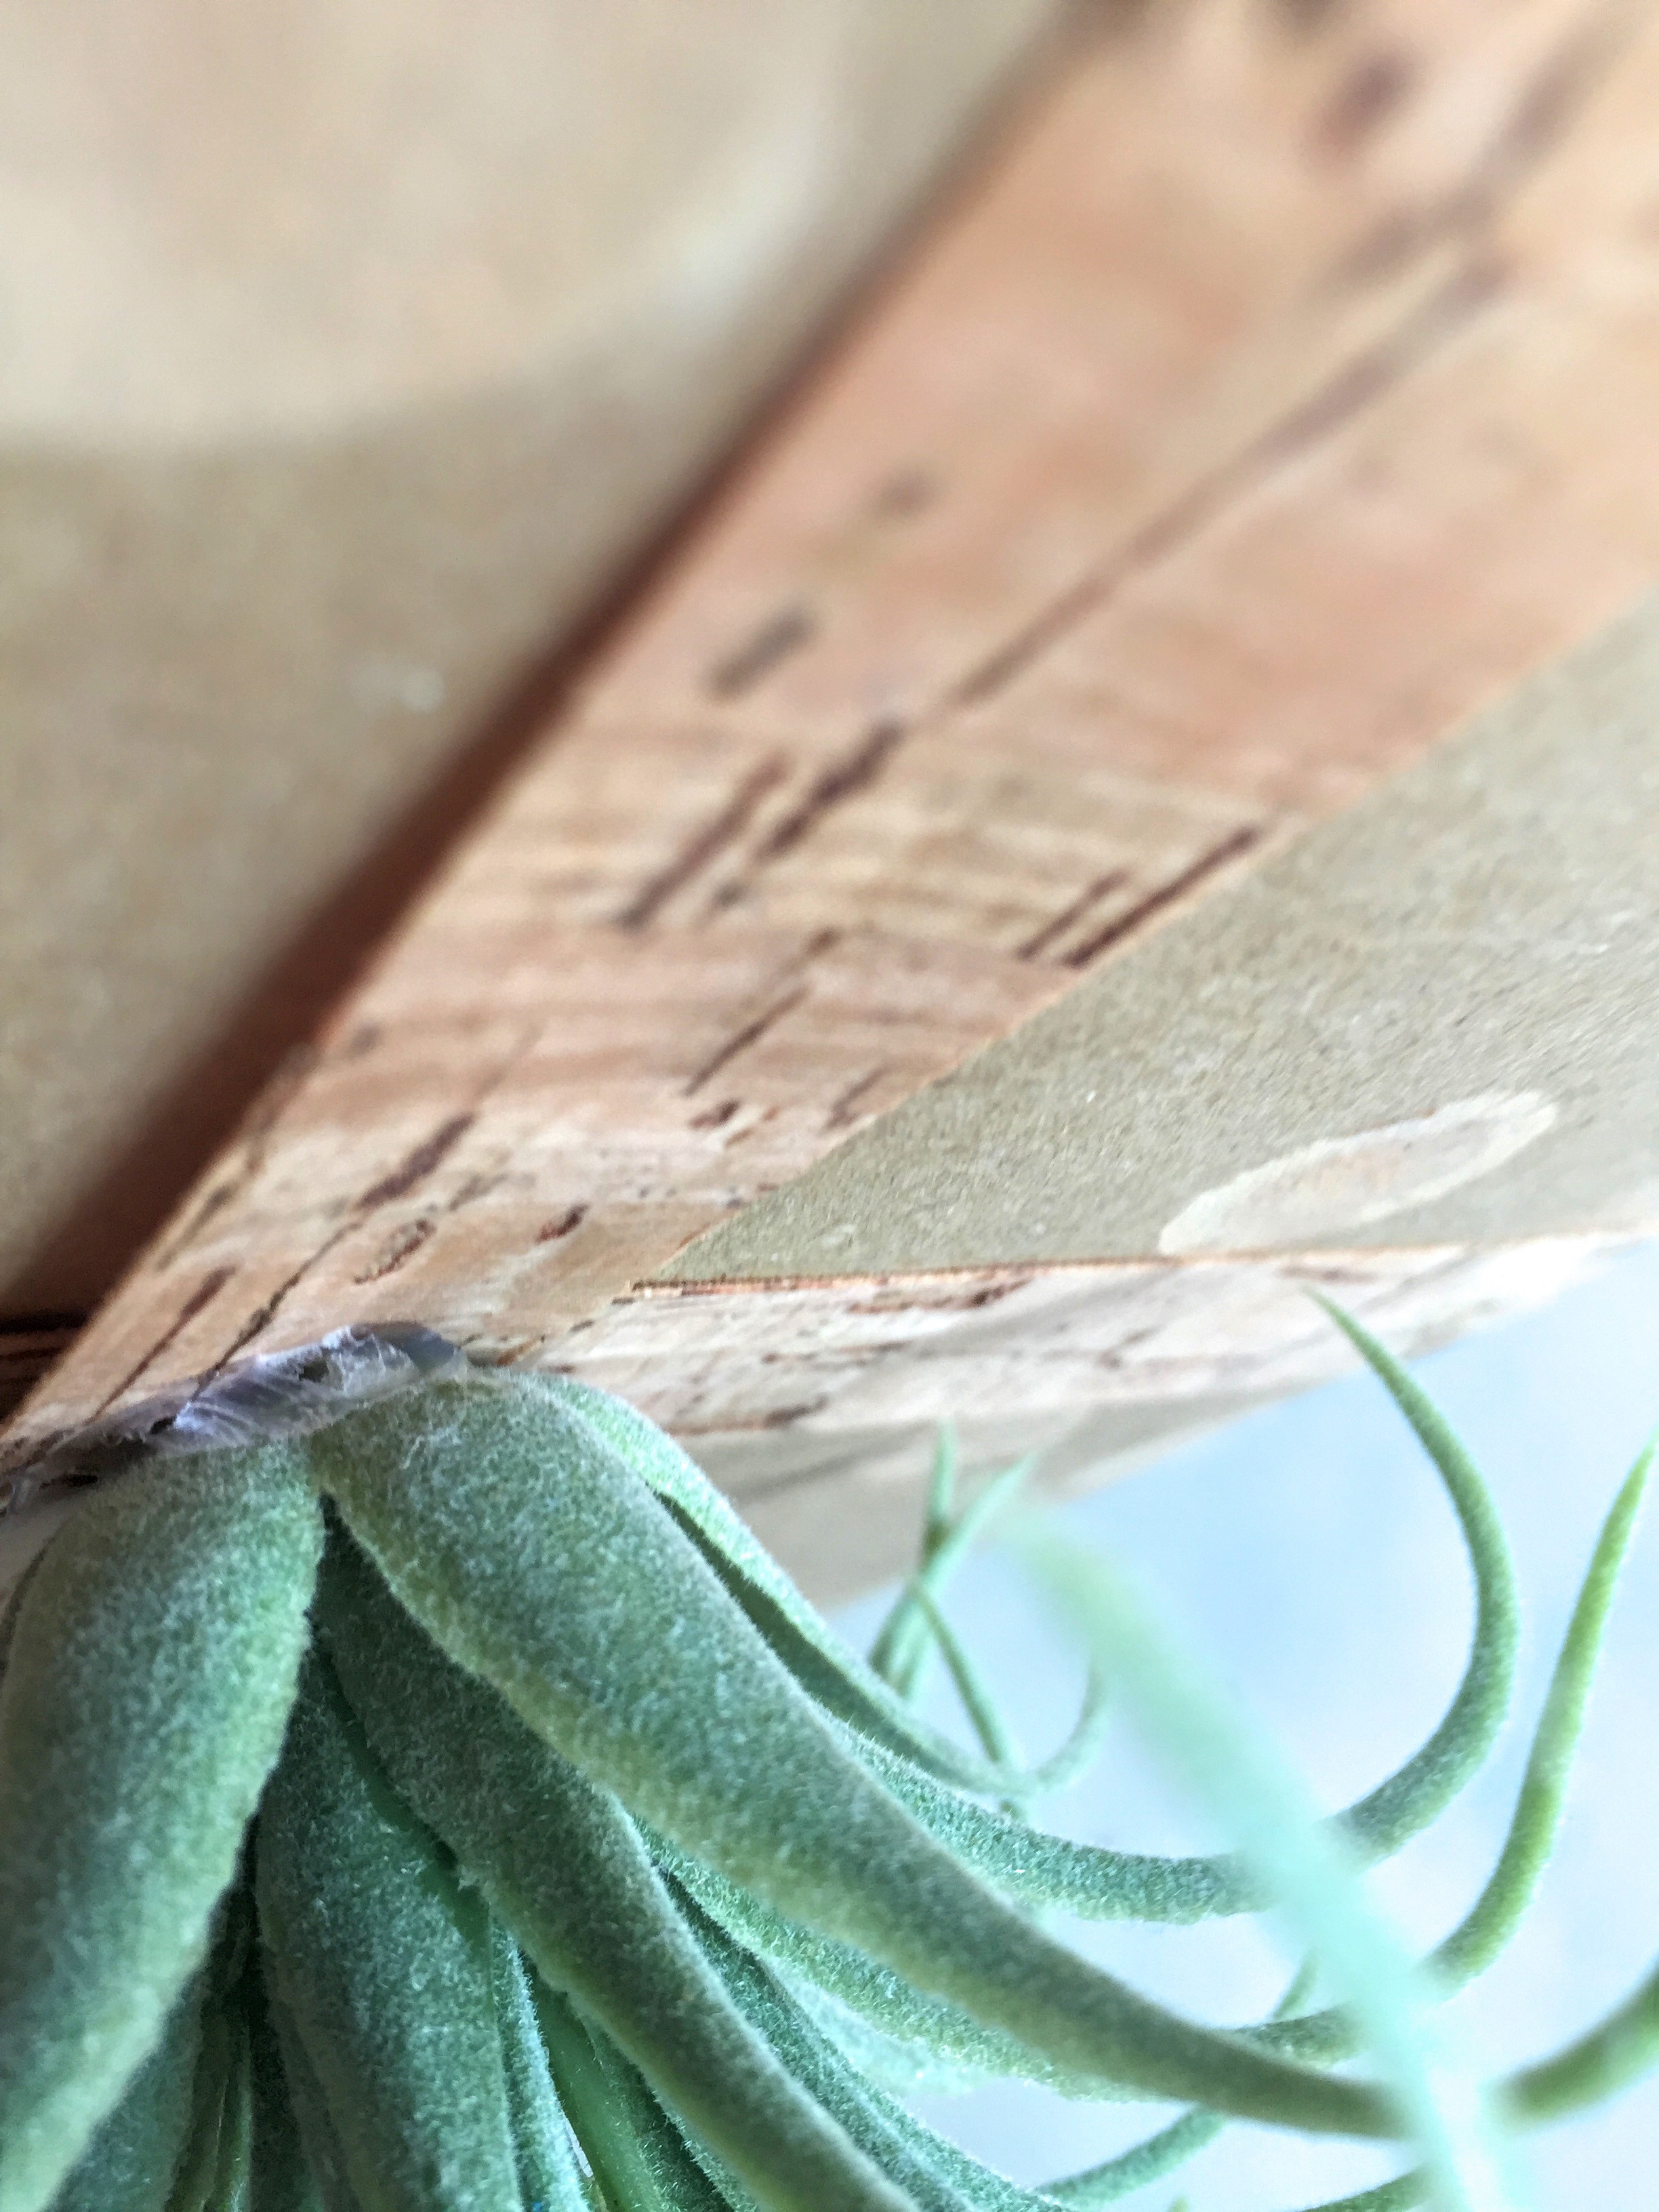
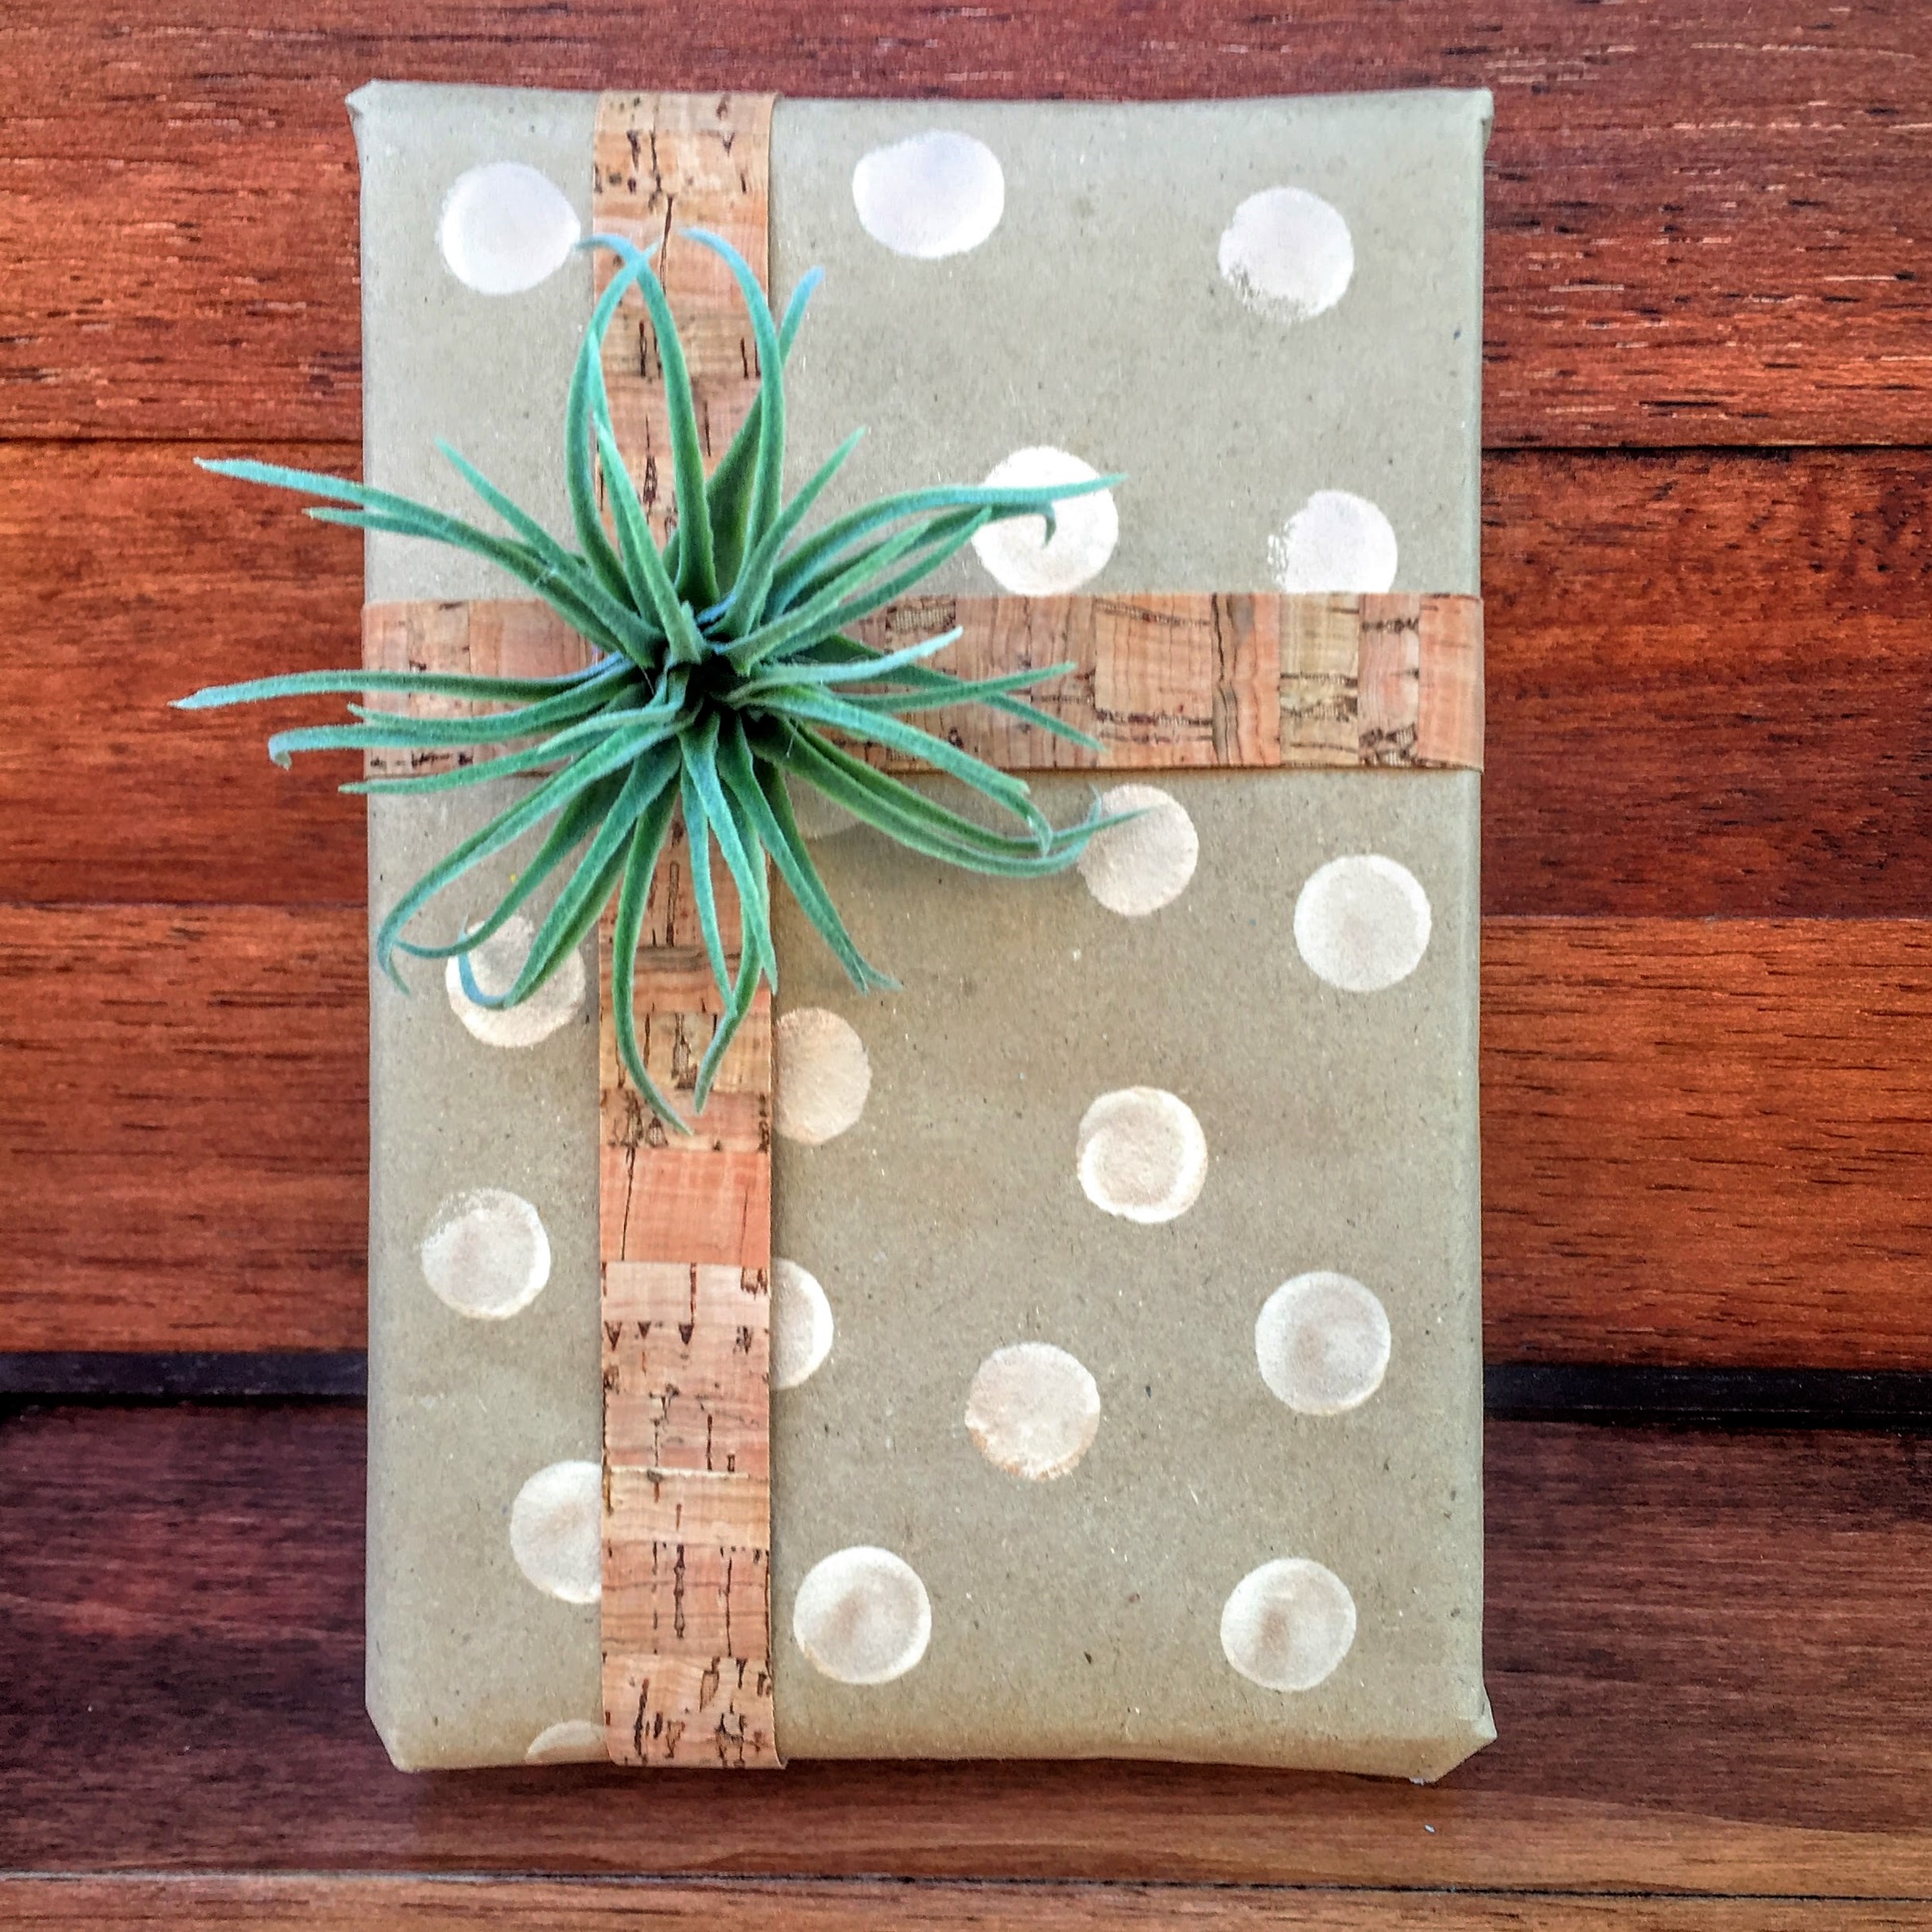
Next, cut off the stem of your airplant or succulent and hot glue it on, where the ribbons meet in the front:
That’s it for that one. Pretty simple! This wrap could be the inspiration for a living area for me. I pretty much want my entire house to look and feel like this! Very earthy with lots of wood, plants, and pops of metallic.
Next up…
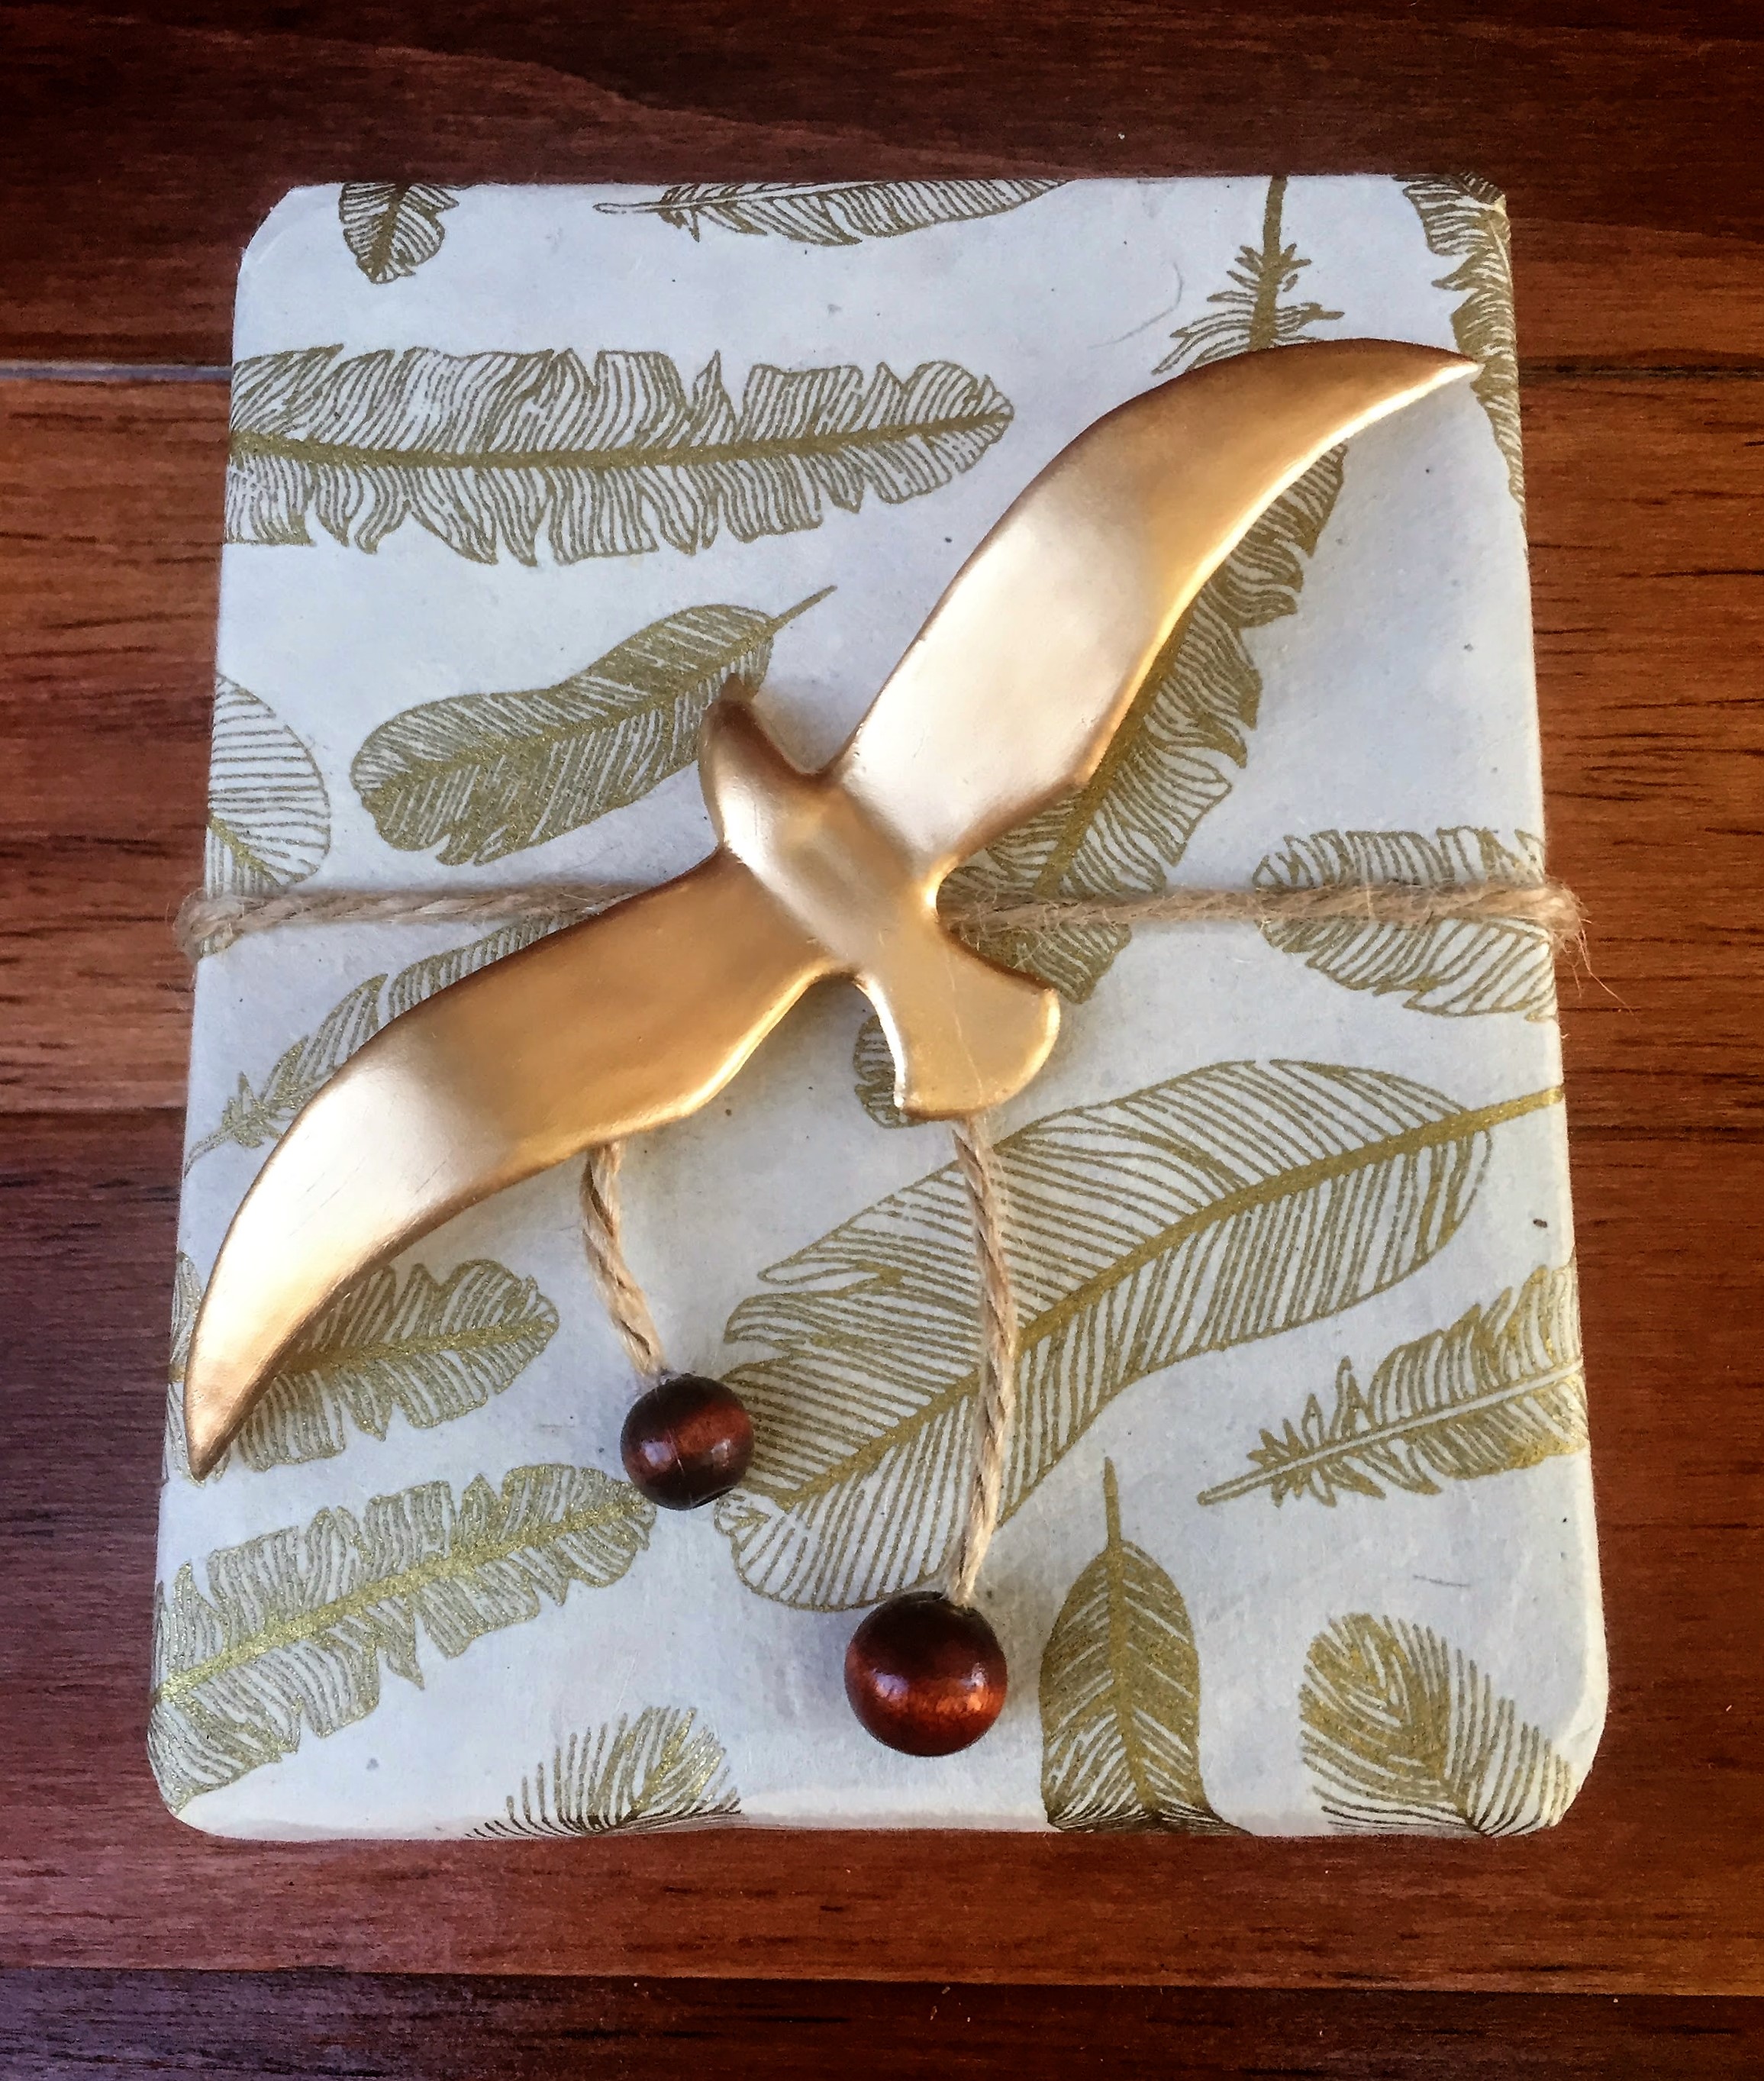
#2 The Seagull and Feather Wrap
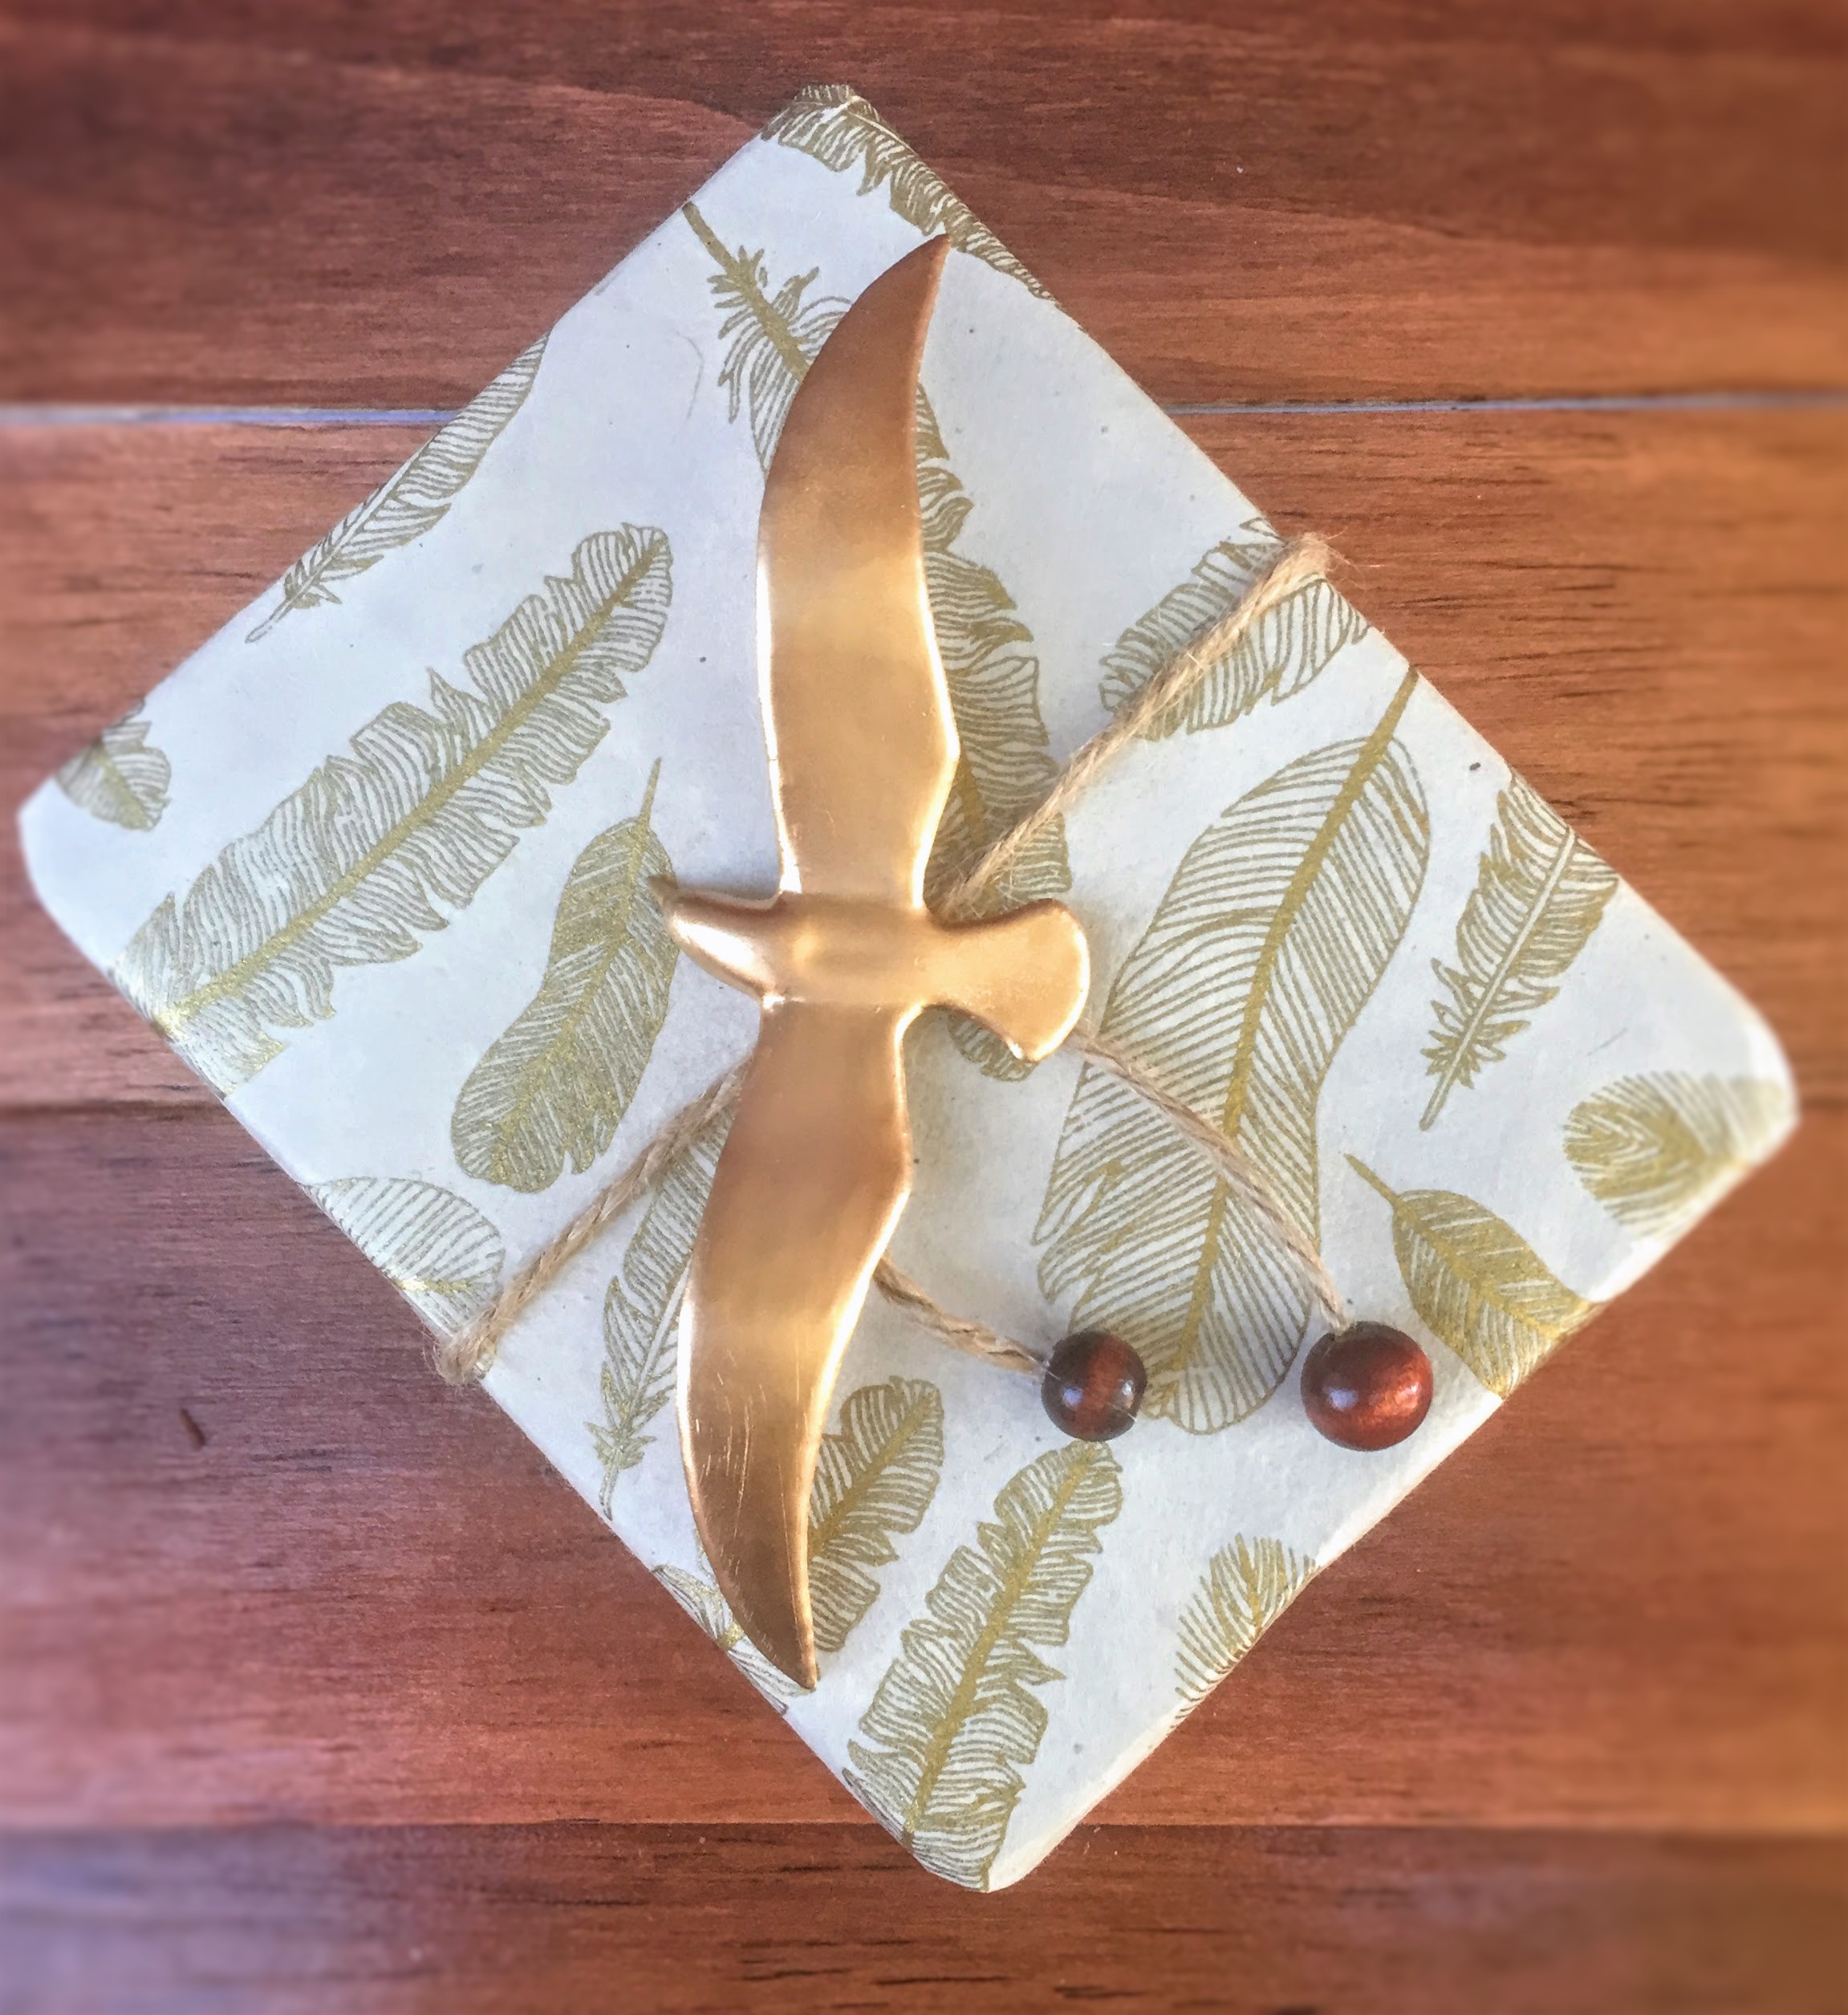
Wrap your gift with this beautiful feather wrap from World Market. Take your twine (I used the one on the spool from Michael’s). Wrap it horizontally and tie the twine, but DON’T knot it. The seagull has to lay on the tie and the knot would create too much bulk. Figure out where you want the tie to land on your package (mine was right in the middle), put a dab of hot glue there, and then tie as tightly as you can. The tie should land on the hot glue so that it sticks down, nice and tight, and then pull the 2 ends of the twine downward, so that they’re laying more or less where you want them to be, once your seagull is on.
Now, take your seagull (that you’ve already sanded and painted- I used this 24K Gold– for a more in-depth demonstration of cutting down, sanding, and painting your seagulls, please go to my DIY Seagull Bottle Stoppers Post) and put another bit of hot glue on the top of the twine where you just tied it. Position your seagull where you want it (on top of the hot glue), making sure it’s very stable and tight, and pull your twine ends down, so they’re where you want them to be, using the hot glut to hold them in place:
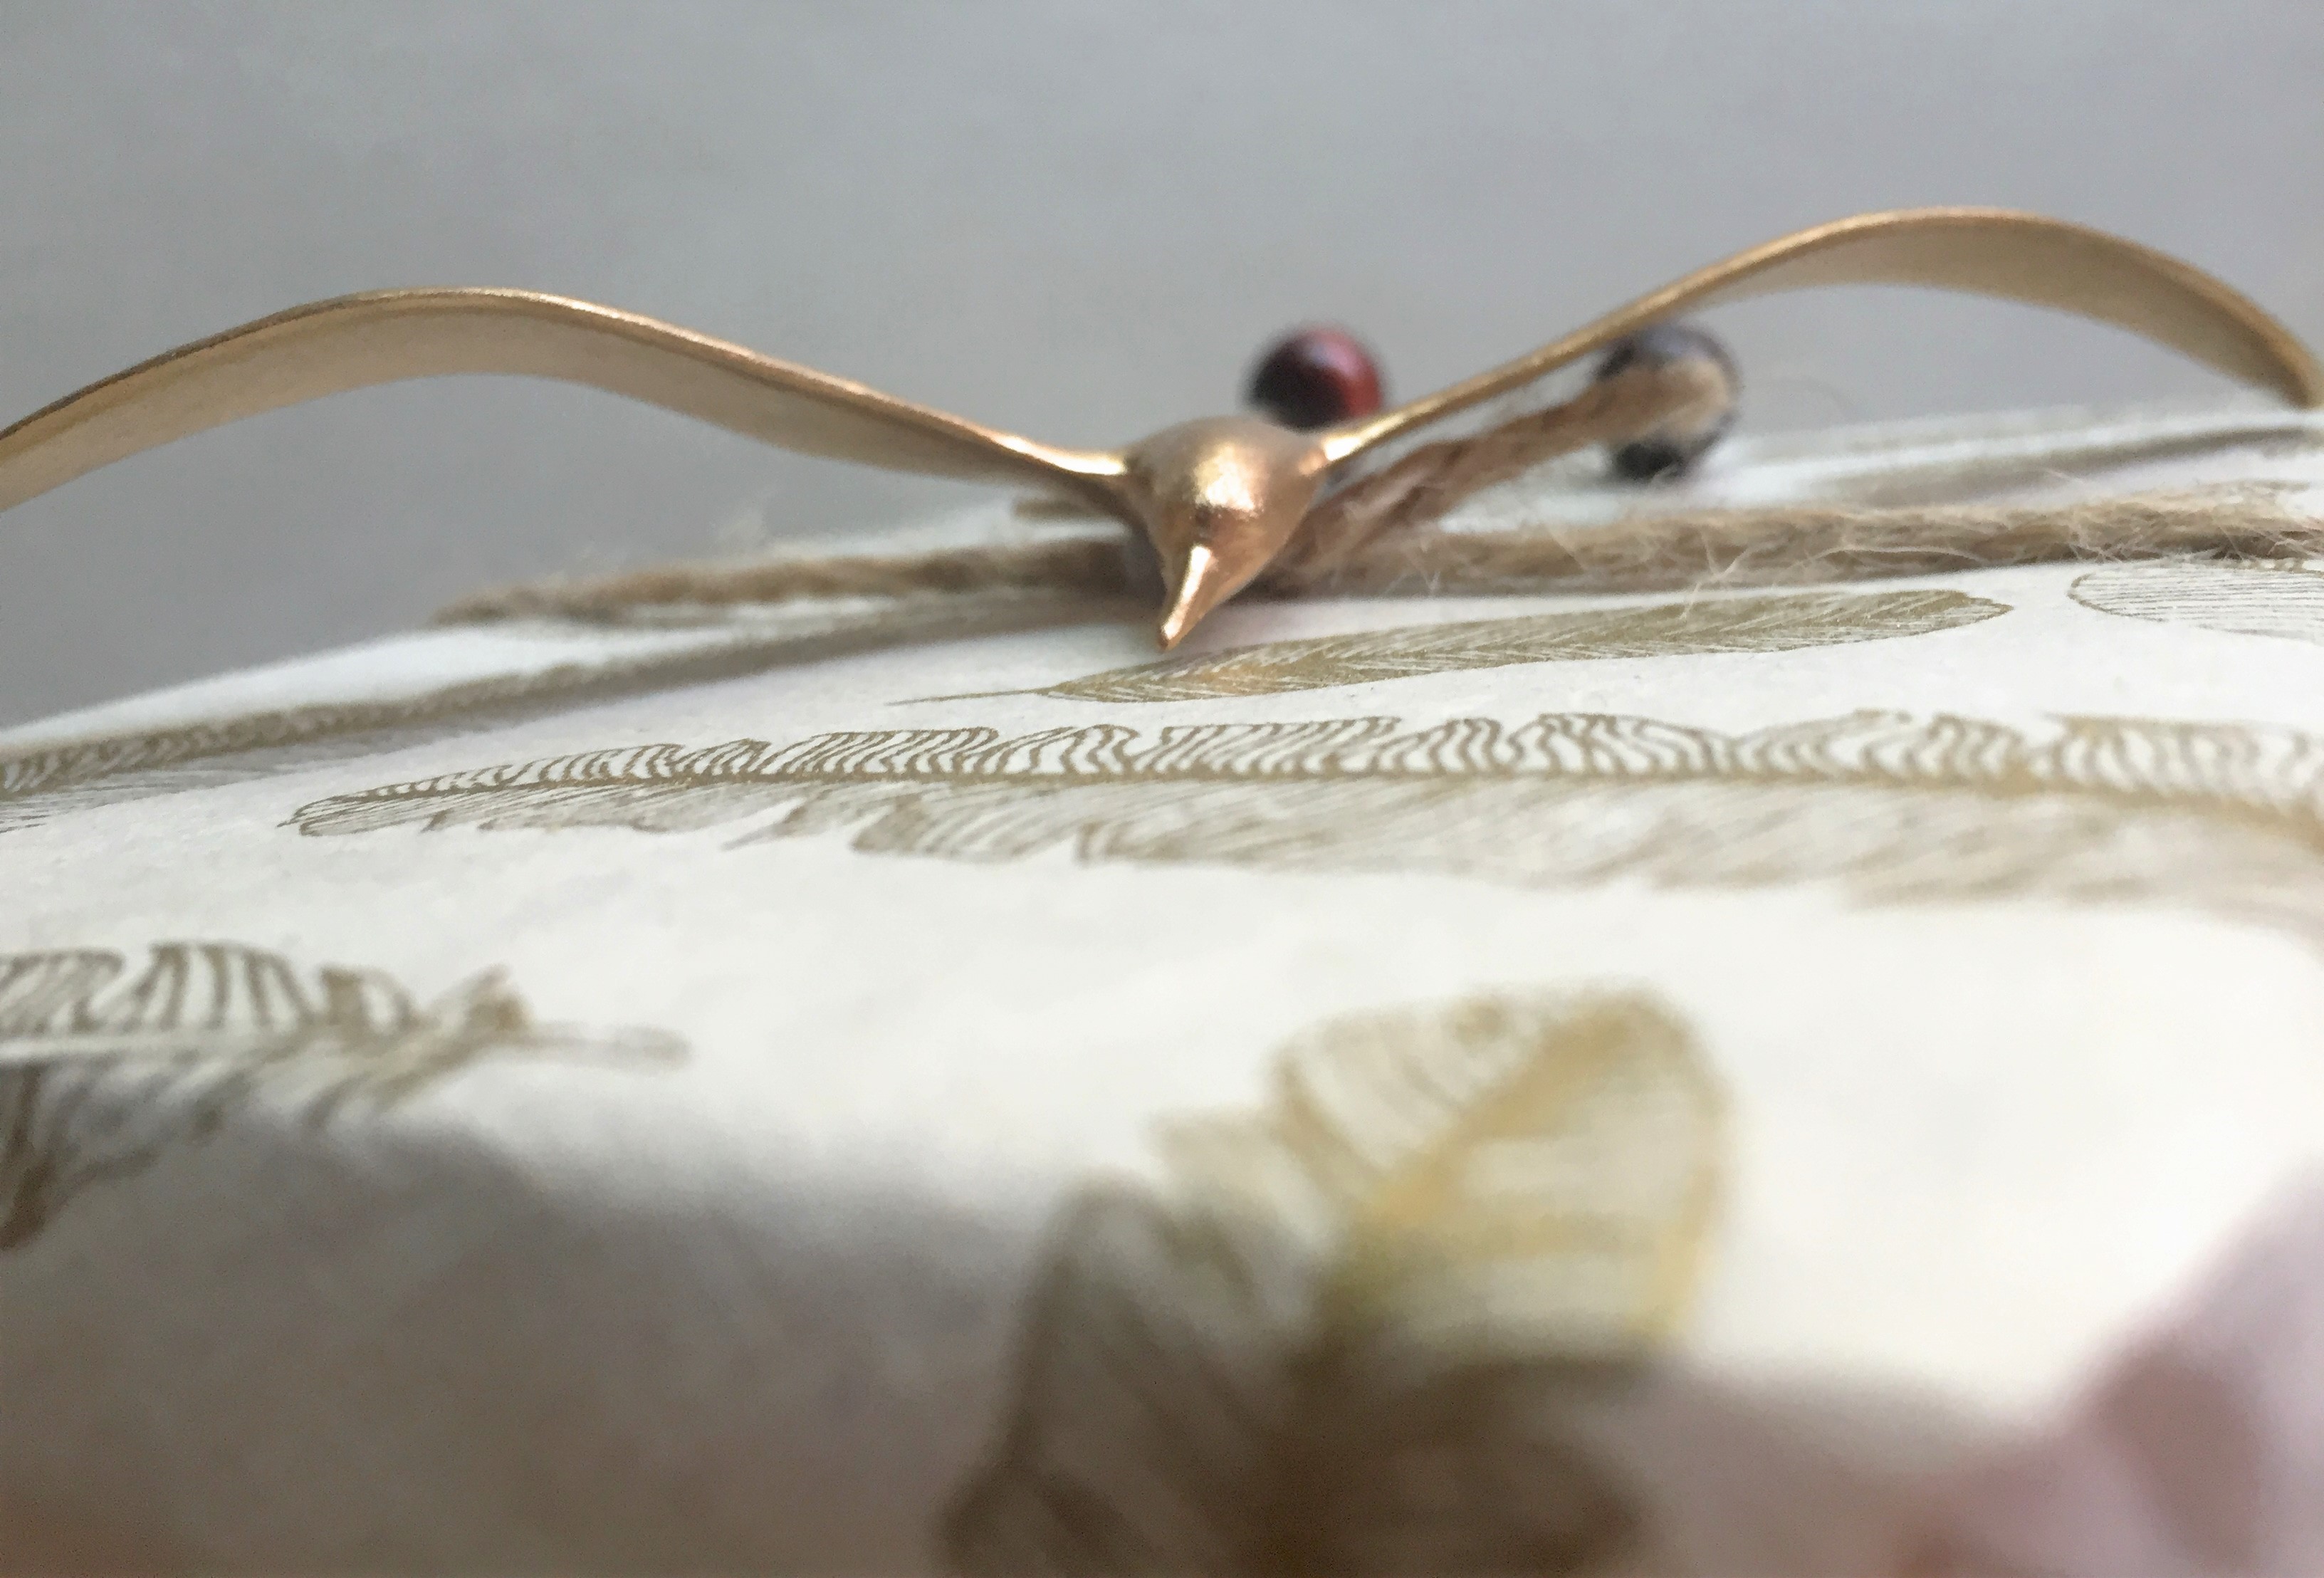
Next, take the ends of your twine and put a dot of hot glue on the end each (one at a time). Take a piece of paper or paper towel (to protect your hands from the hot glue), and use it to wind the twine end tightly, creating a hard end for the bead to go on to. Take a small bead, put a little more hot glue on the end of your twine and stick the twine into the bead as far as it will go. The hot glue should hold it on. Repeat for the other end (I used 2 different sized beads). Remove any strings of hot glue that are hanging around and voila! Your beautiful bohemian wrap is ready to go!
Now, onto…
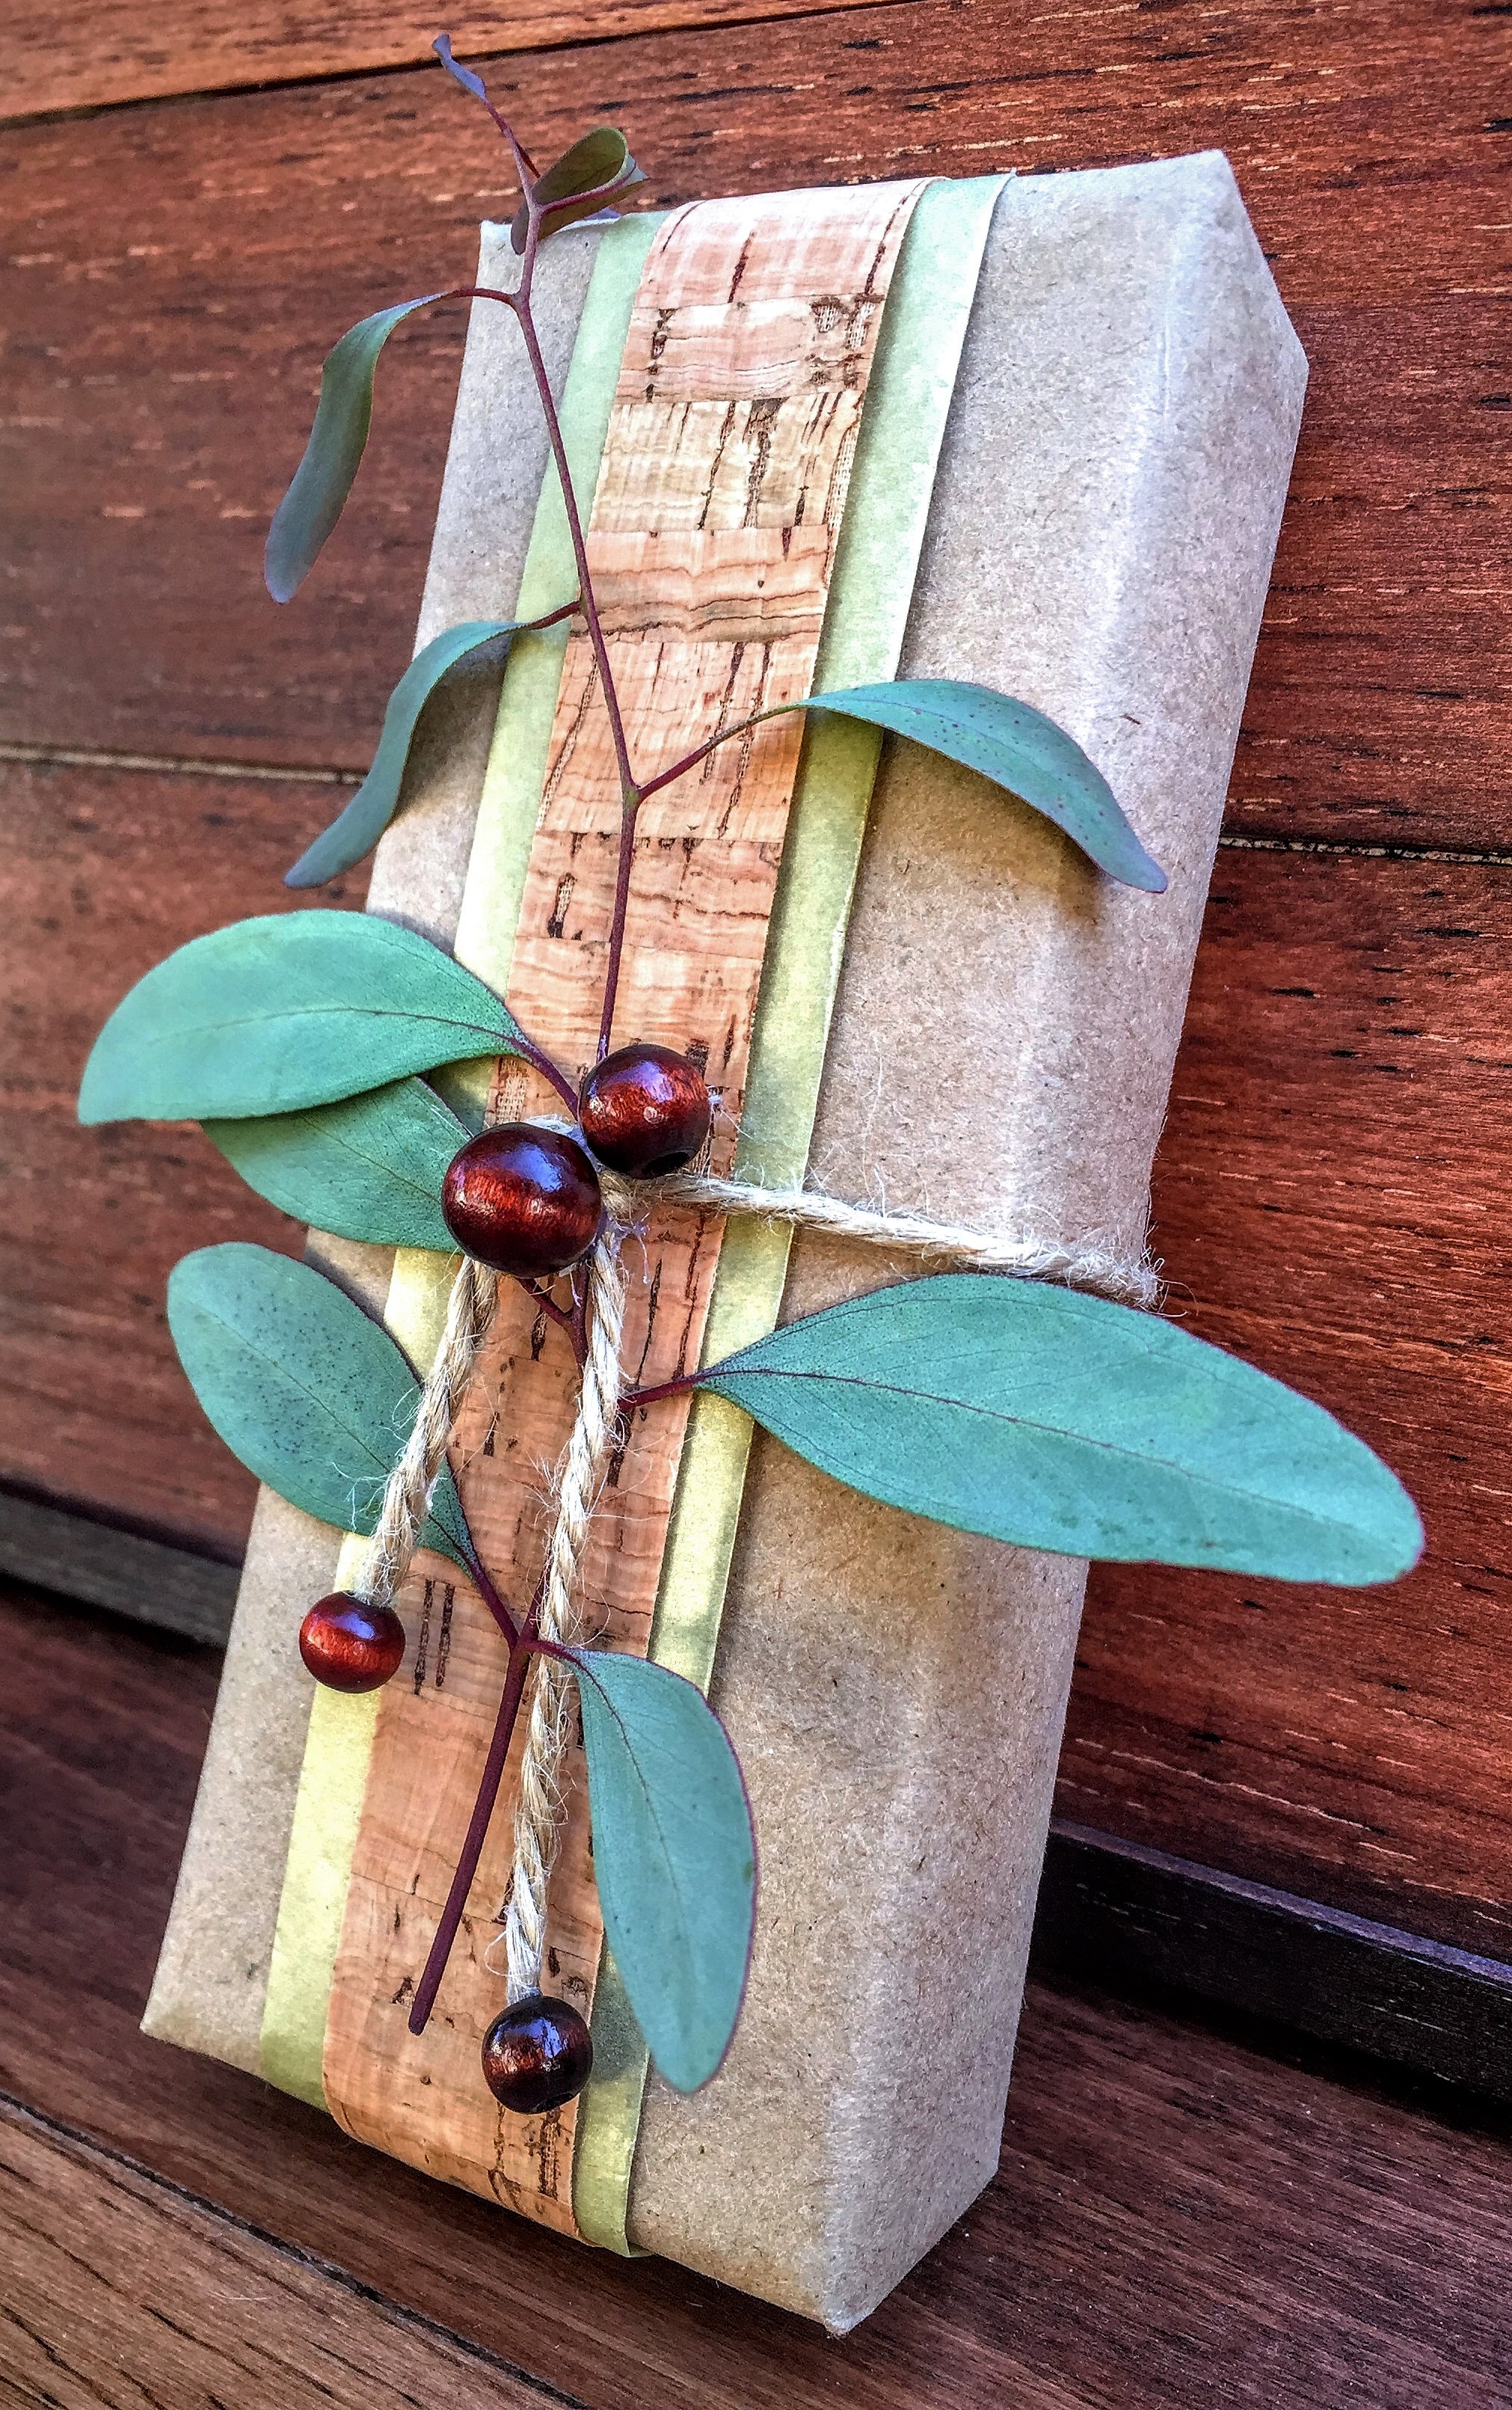
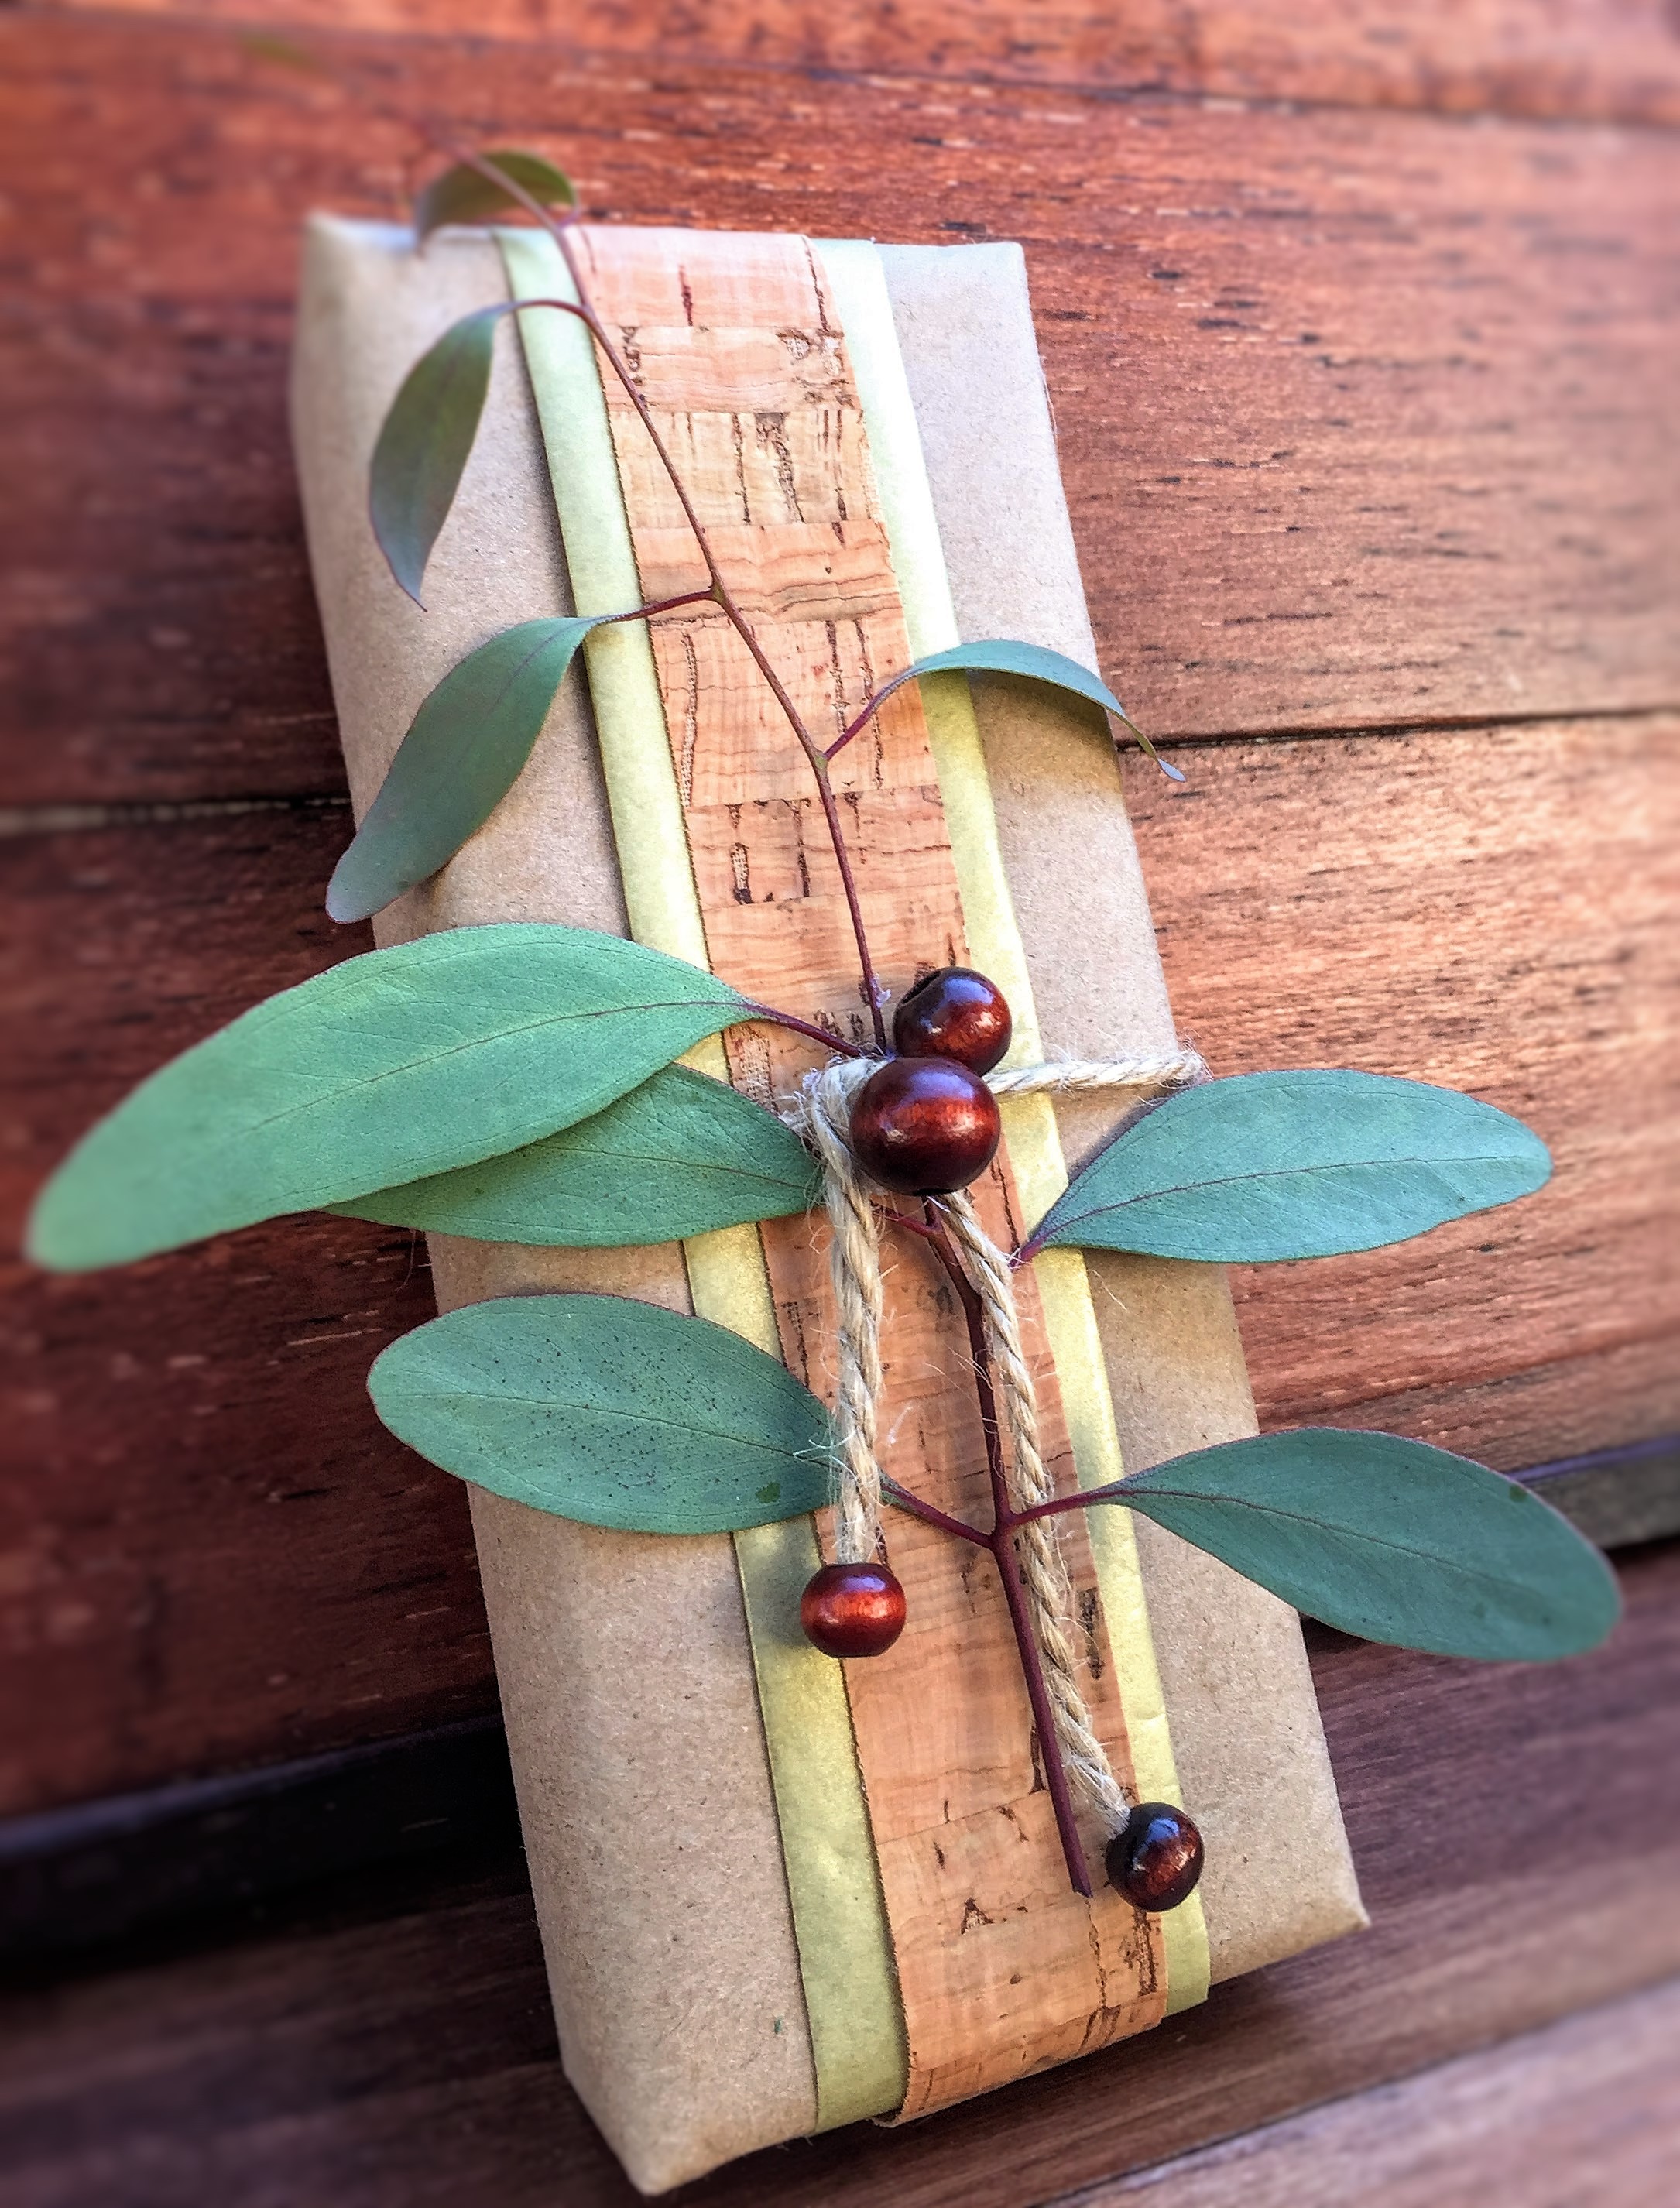
#3 The Eucalyptus and Wood Grain Wrap
Wrap your gift in brown paper and then take whatever color of tissue paper you’ll be using. Cut one of the lengths off the end where you find the crease:
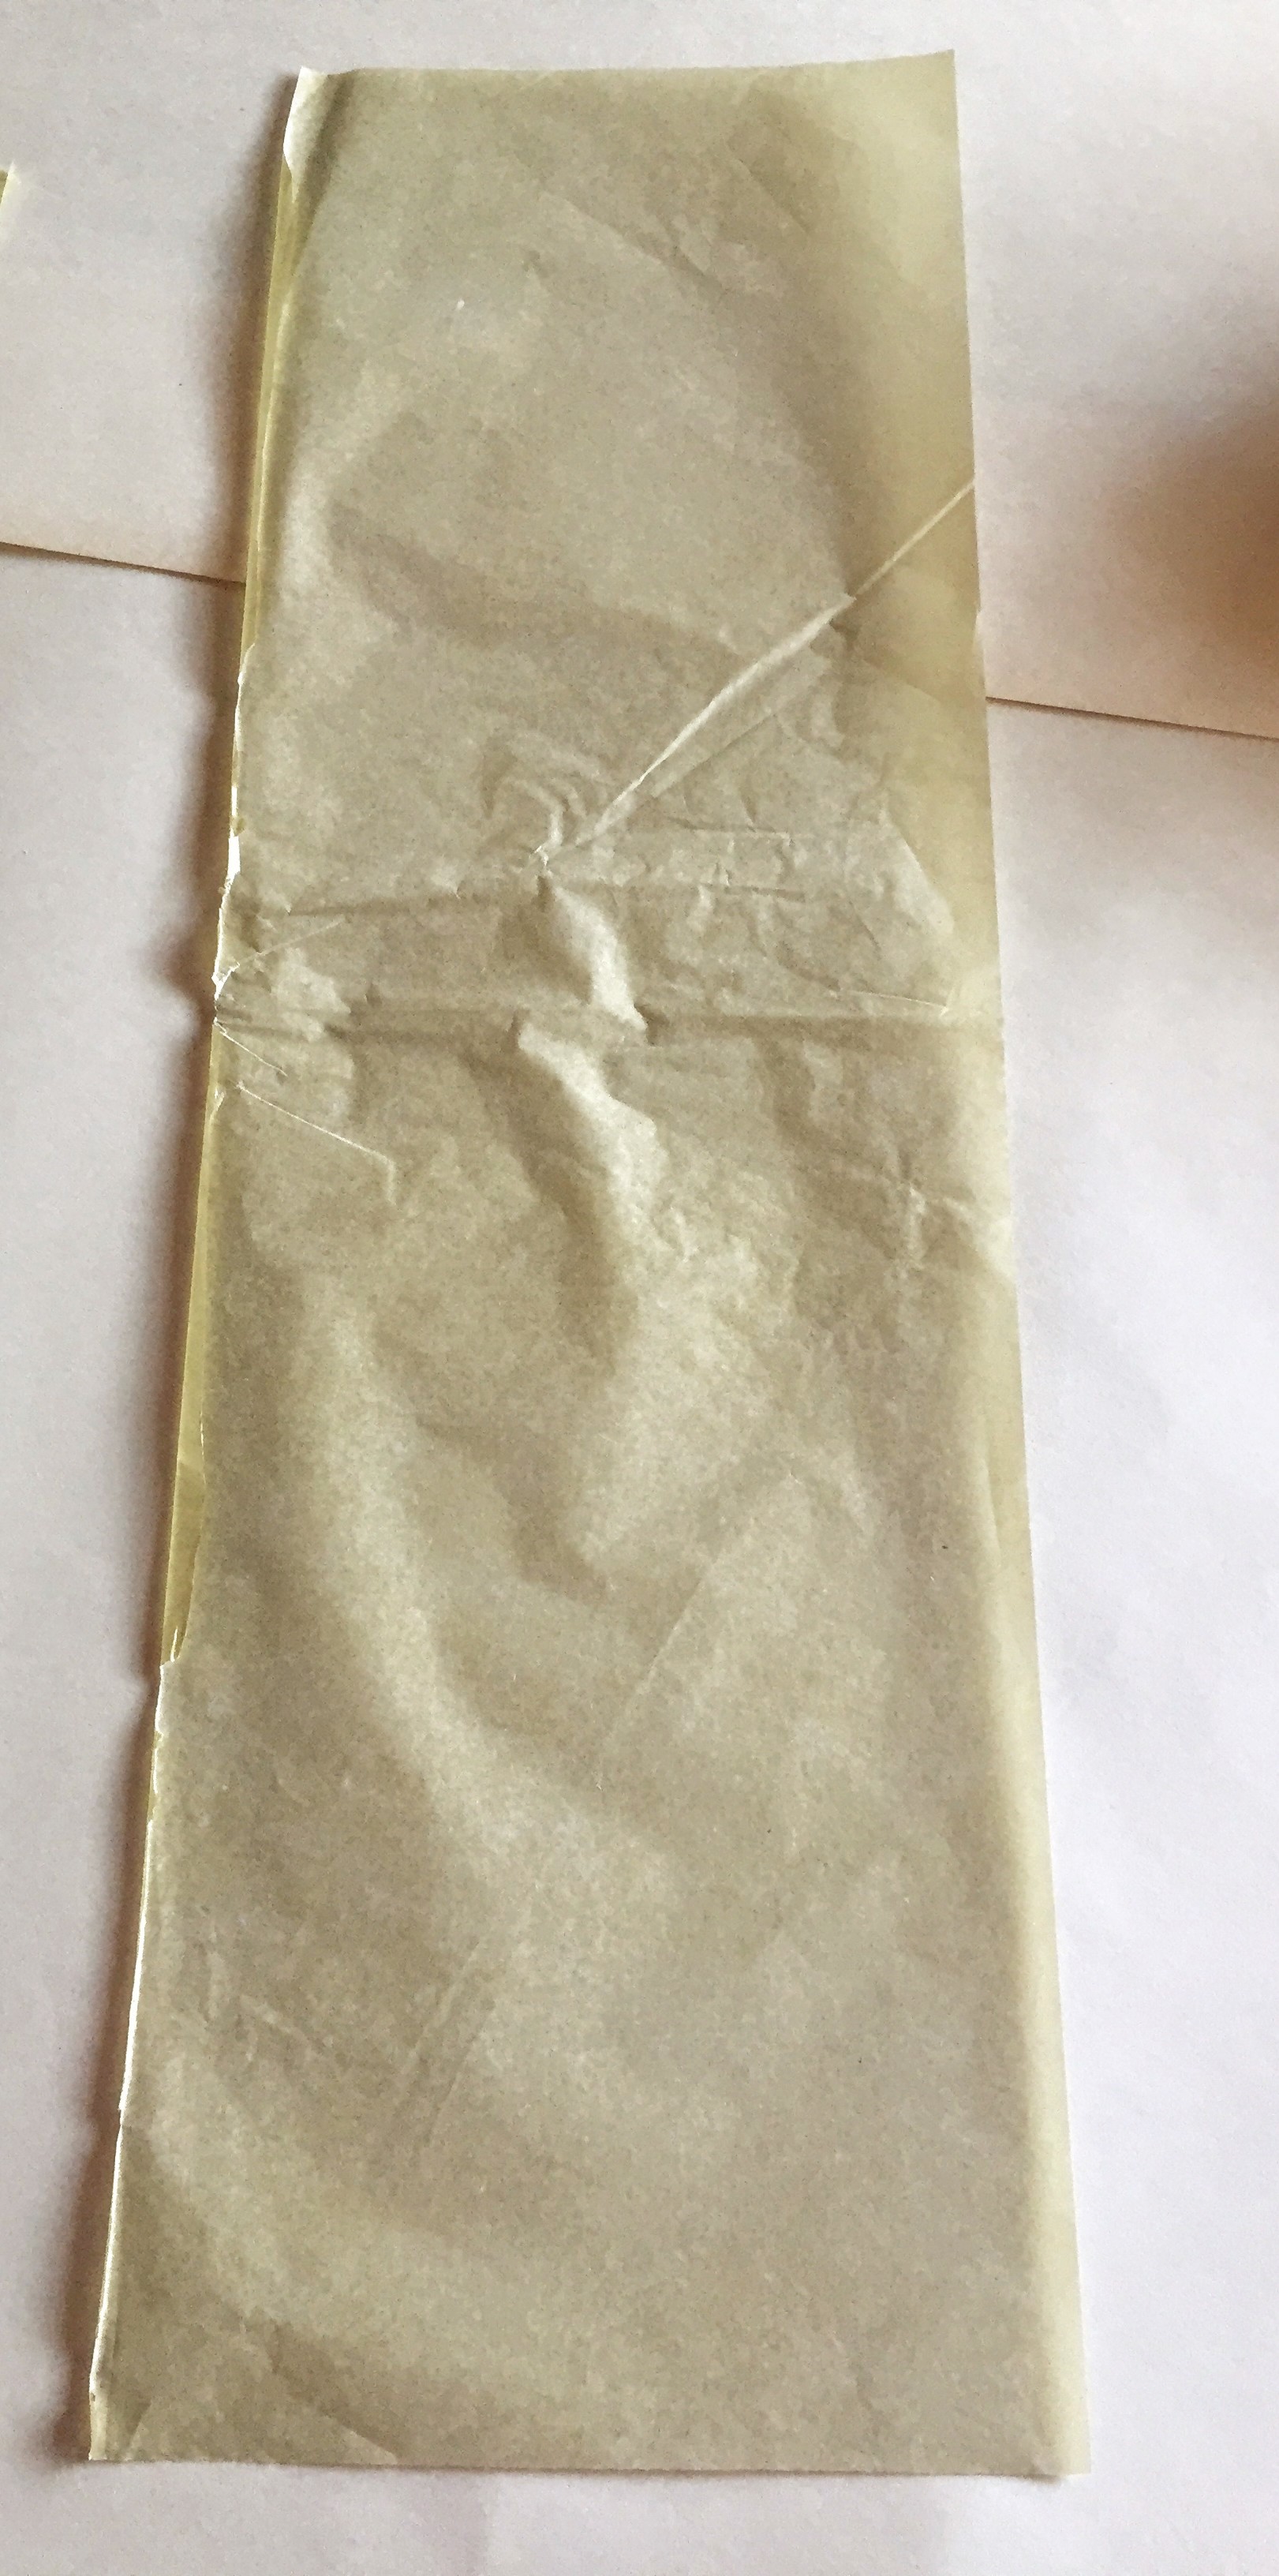
Once you’ve done that, fold the paper inward on itself, length wise, 2 times on each side, until it meets in the middle:
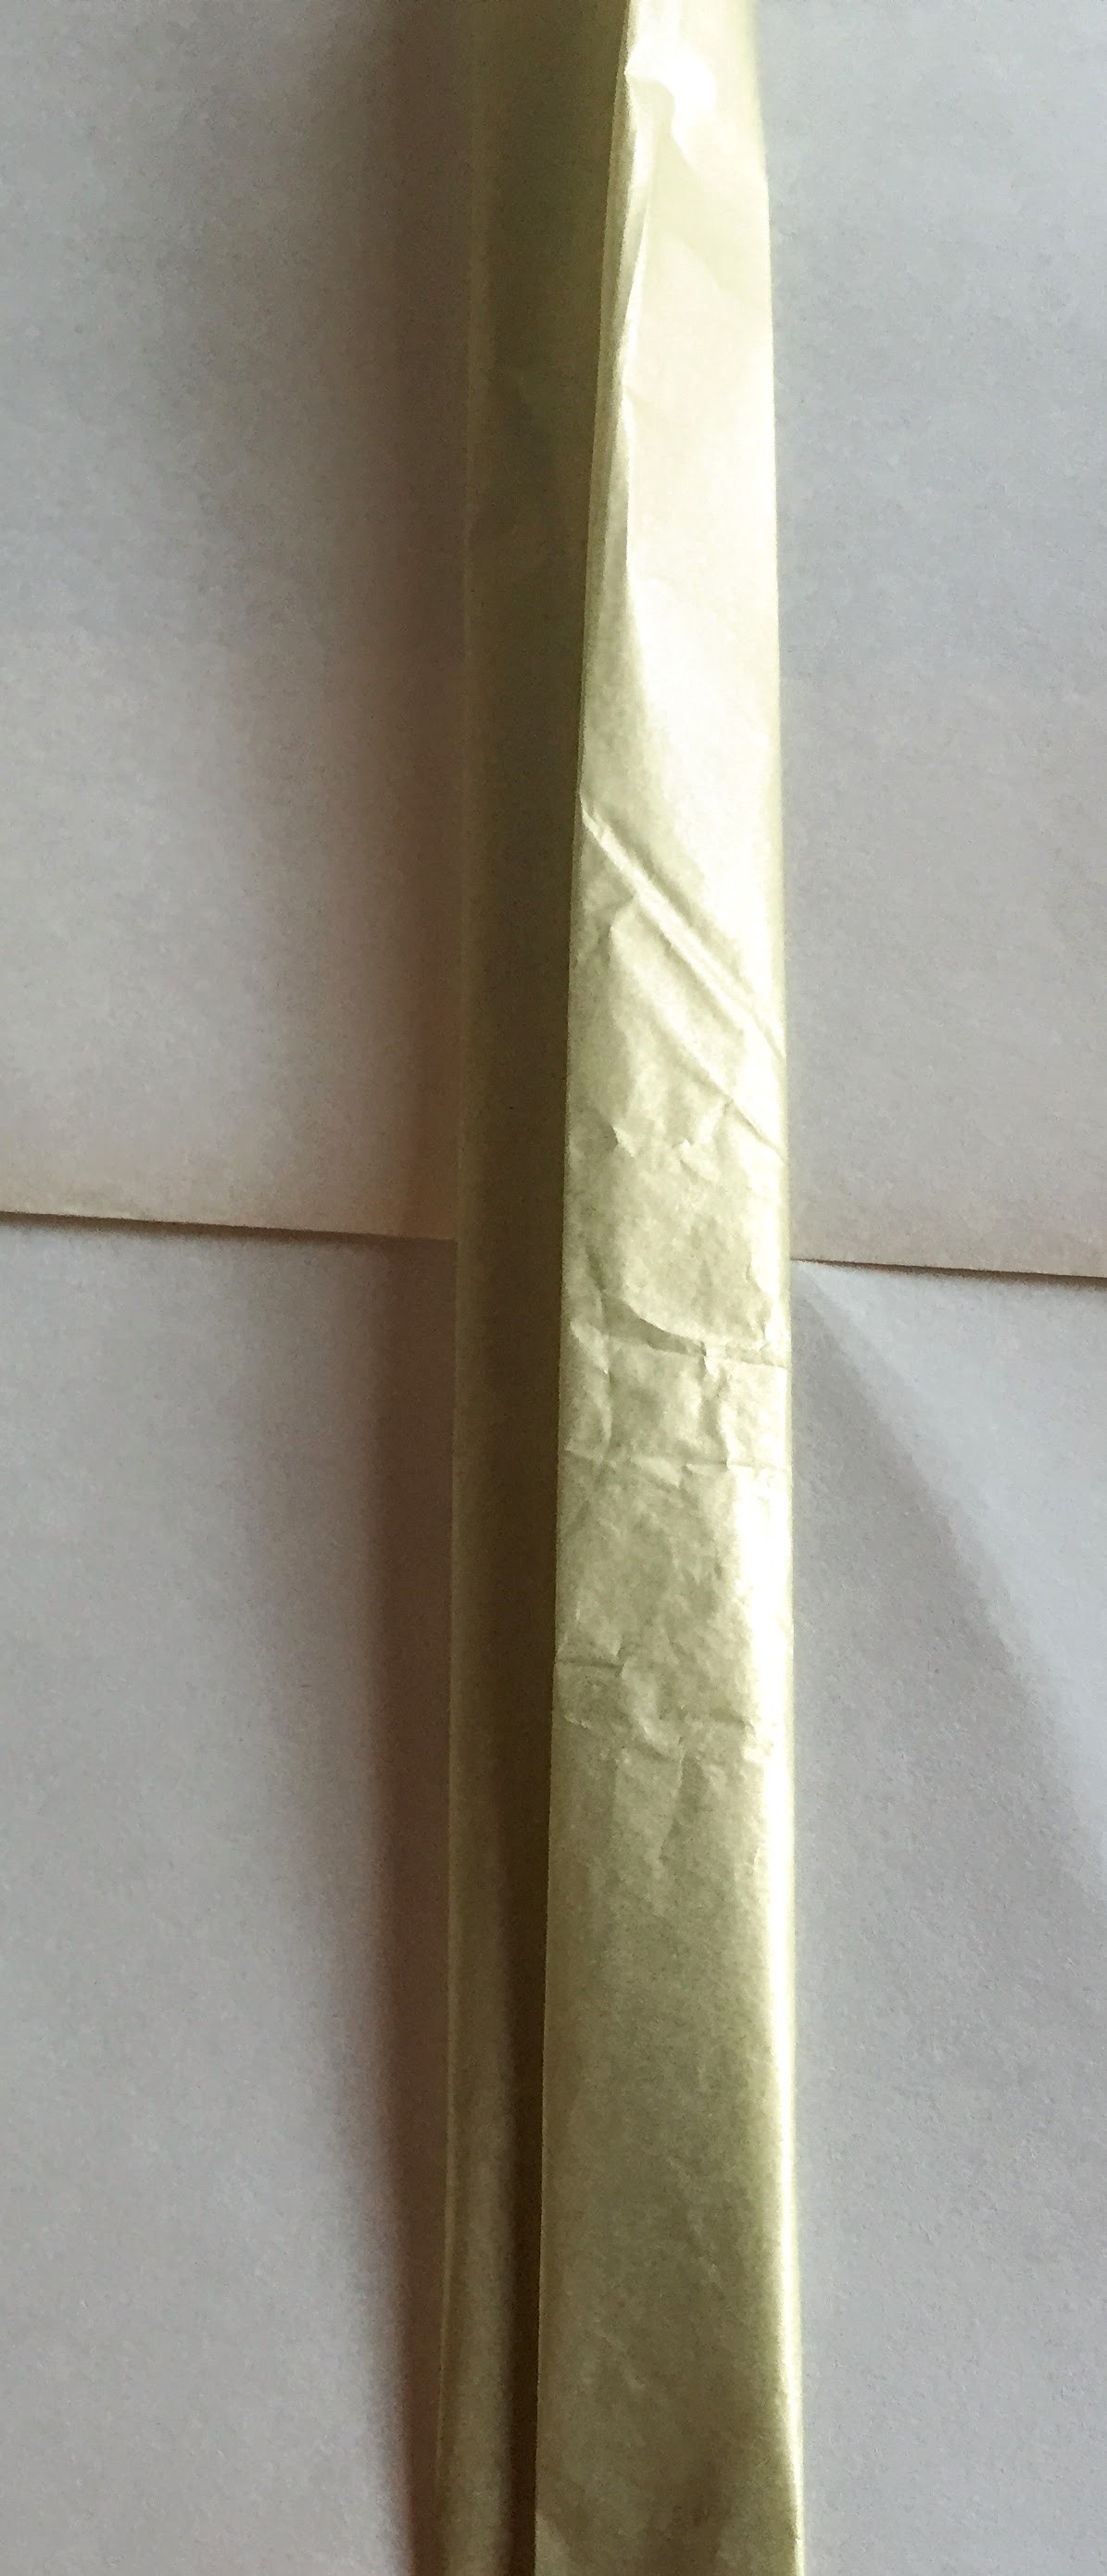
Flip it over to its smooth side and place your wood grain ribbon on top of it. A little bit of tissue should be seen on either side:
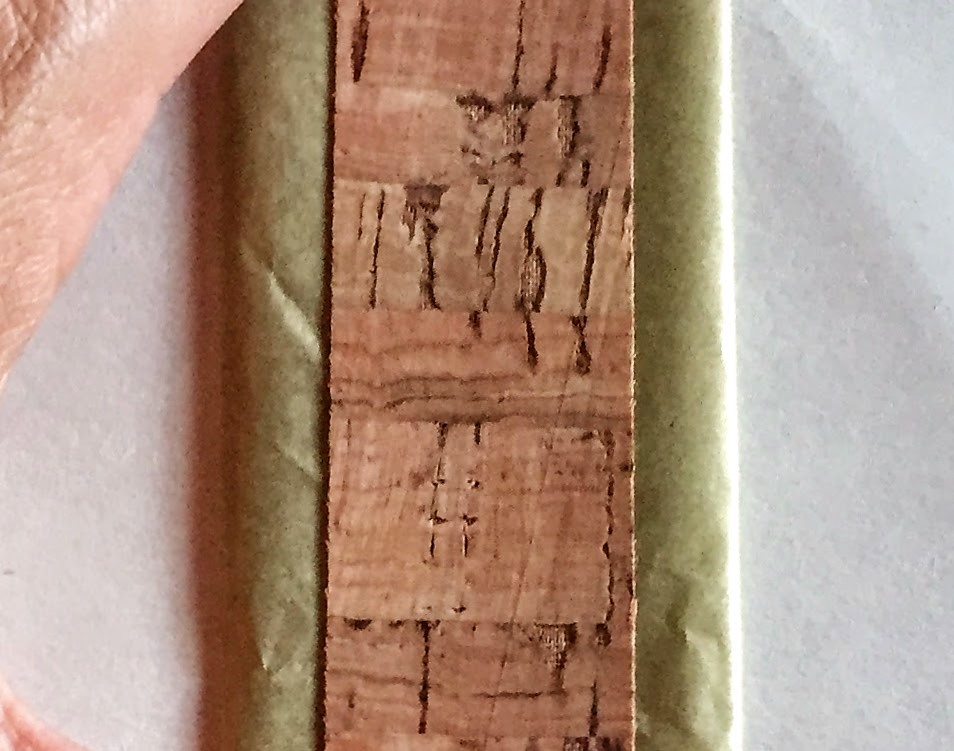
Glue the Tissue to the wrapped package. You may need to place a few dabs of hot glue inside the tissue strip to keep it from pulling up, before gluing the whole thing onto the present. Wrap it around the backside and and hot glue the ends, so they are very secure and tight. Hot glue the wood grain ribbon to the tissue strip making sure it’s straight. Again, hot glue the ends in the back and make sure they’re nice and tight.
Now, take a plant clipping and place it underneath the twine you’ll be tying horizontally, around the package. Next, please follow the directions seen above in #2 The Seagull Wrap post, for tying the twine with hot glue, and for applying the beads to the end of your twine. And last but not least, take 2 different sized beads and hot glue them onto the top of the twine where you’ve already tied it tightly in the middle and secured it with hot glue.
*Just a quick note to say that if you are using a fresh clipping, you should probably be wrapping your gift and taking it directly to its recipient, so that the plant doesn’t wilt. Other options would be to use something like rosemary that looks good for a long time and is sturdy, or you could use a plant that dries well. The last option would be to spray the clipping with spray paint. Metallics would work nicely or for this gift, I would consider a mossy green or creamy white.
There she is! Simple and pretty, down-to-earth beauty!
Moving along to the beautiful and feminine…
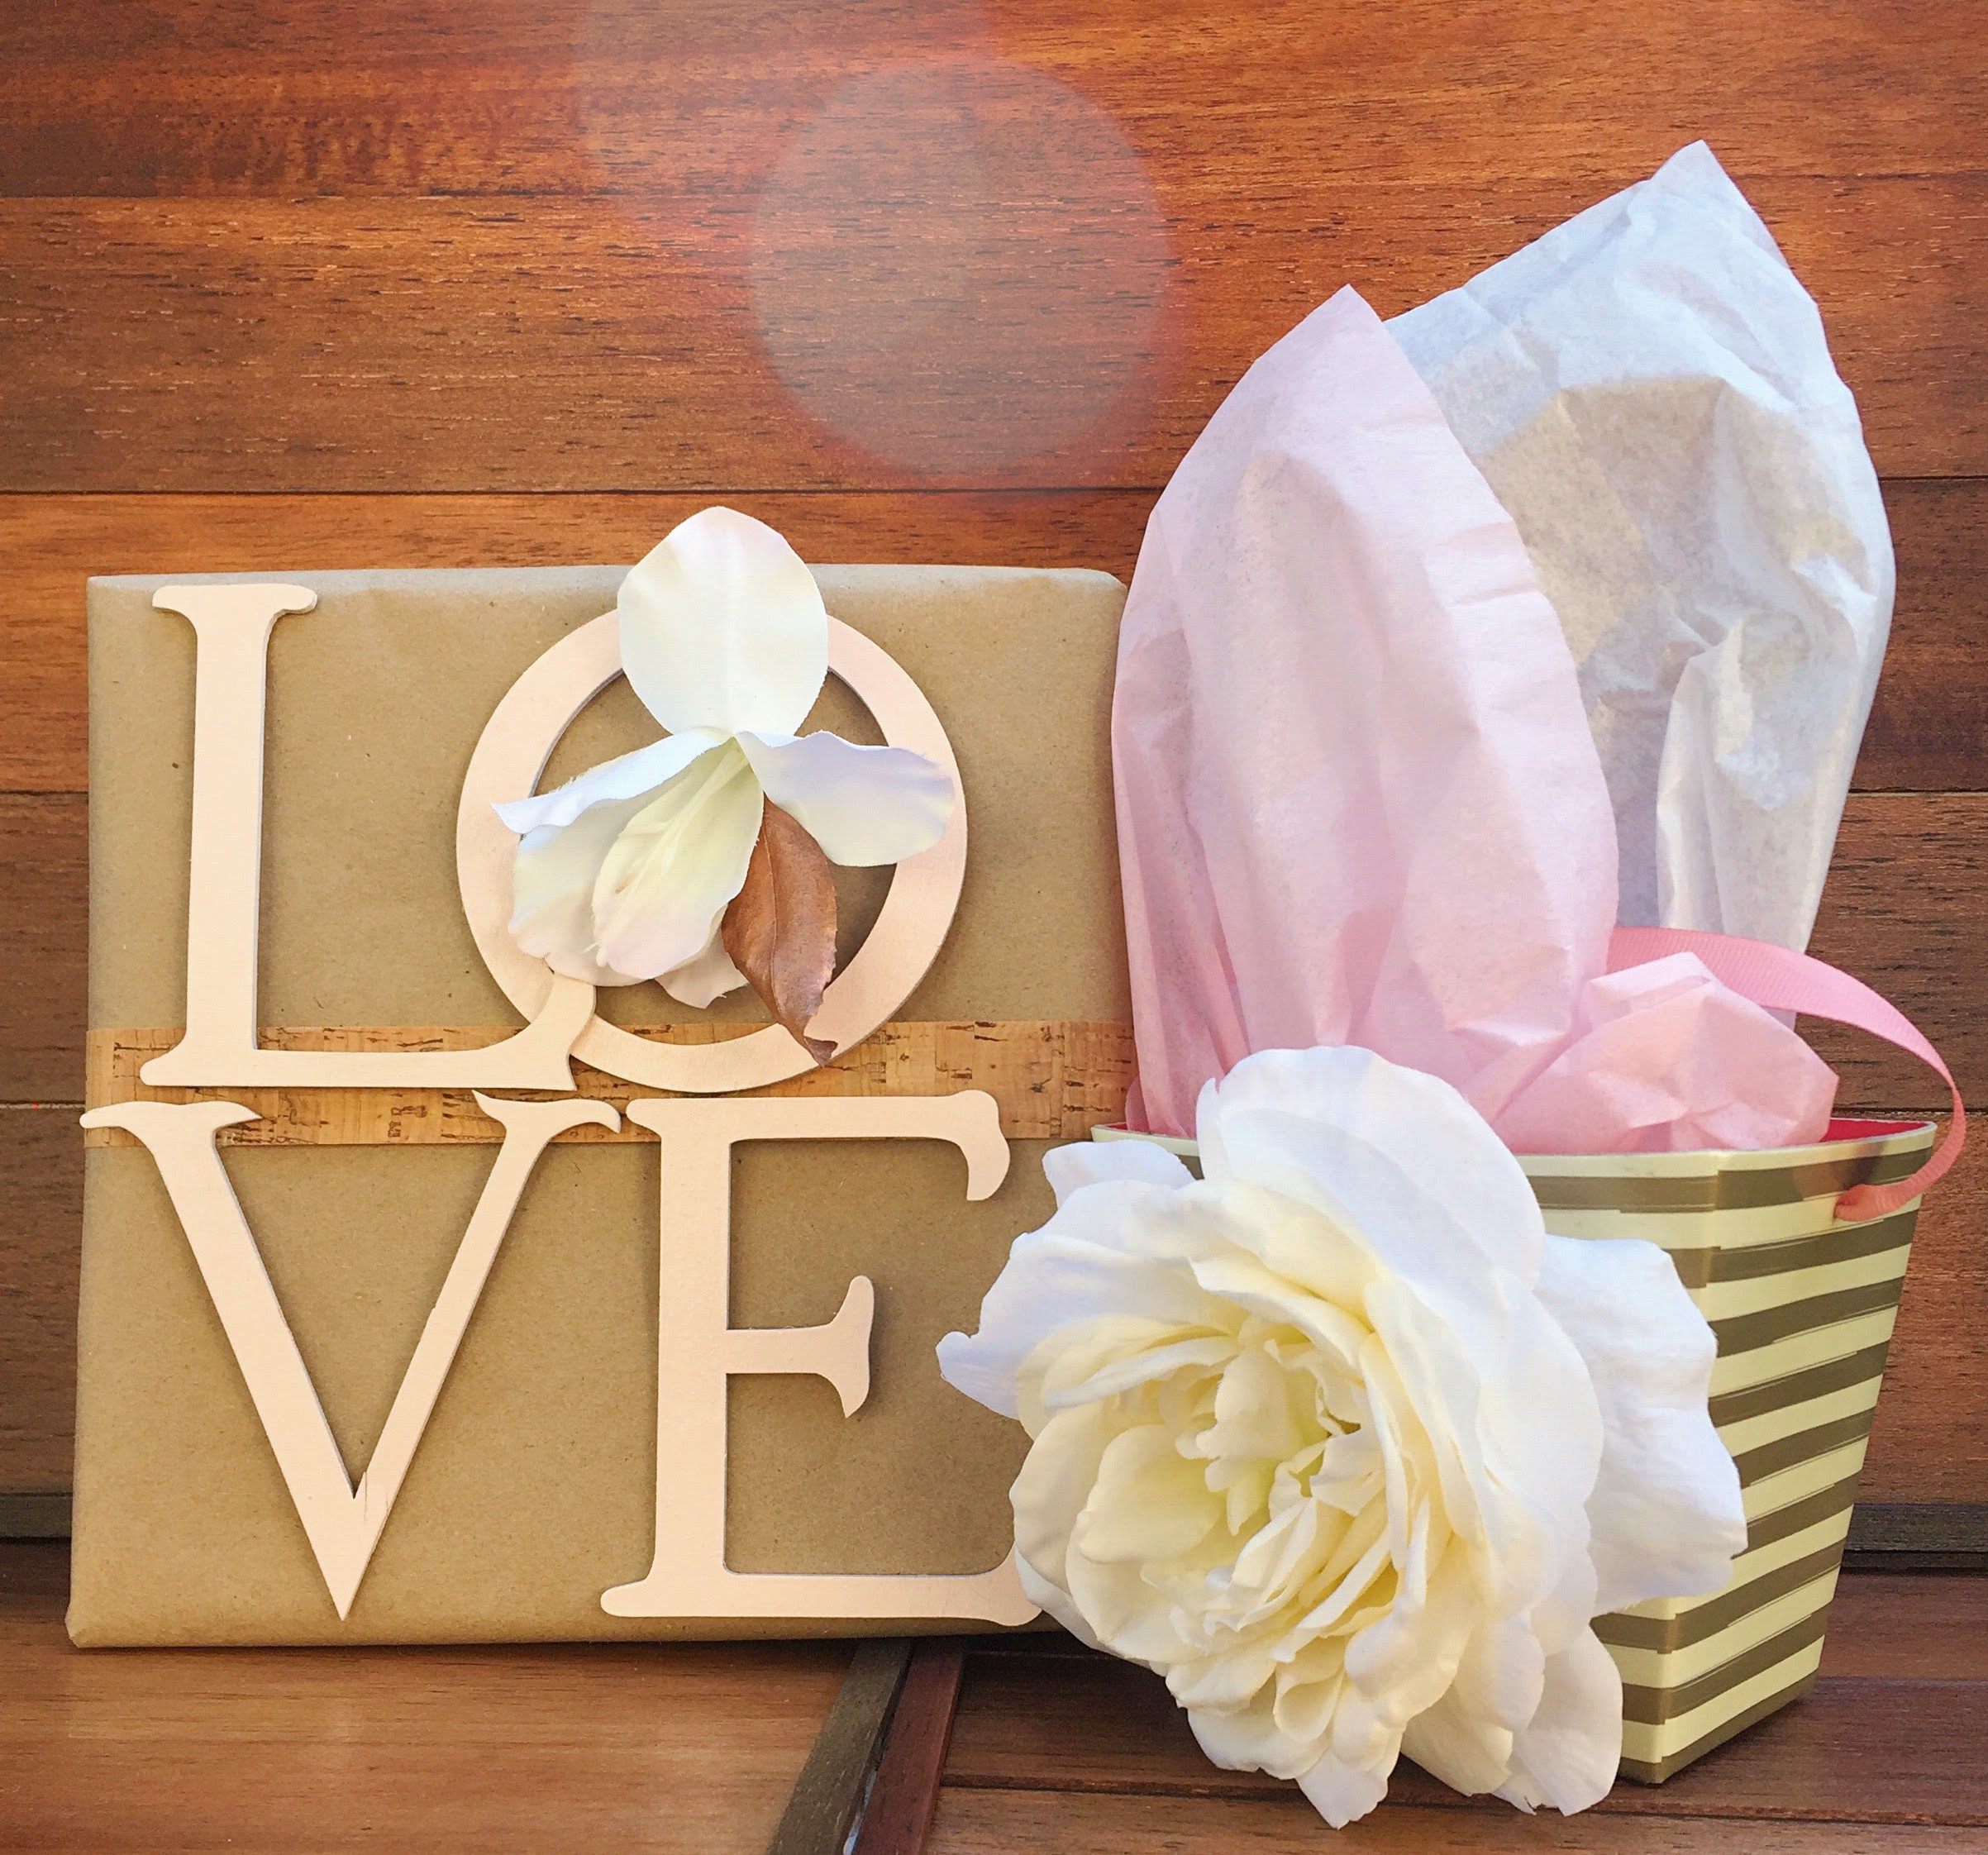
#4 The White Rose And Stripe Box

This one is much more traditional, but so pretty! It would be perfect for a little wedding gift or bridesmaids’ gifts… and it’s SO easy to make!
You’ll need to find a similar box. I got this one in the Dollar Bin at Target a few years ago, but you can probably find something online, if you search around a bit. I found this one on Amazon. It’s a little different, but I think it could work. You would lose the soft, misty effect of the tissue, but it might be a more modern take on this idea. This one from Target may also work if it could withstand the weight of the flower.
The first step is to make a small hole in your box, where you want the flower stem to go. I used an awl. The important thing here, is to not make the hole too big, because then the flower will be hard to keep in there, tightly. Now, push the stem through. Keep the flower loose, so that you can put a little hot glue under the base of the flower on the exterior of the box. Once you’ve got the flower securely glued to the front of your box, you’re small bit of stem (you may need to cut it down before you start) will be popping through to the interior of your box. Take a small circle of felt and hot glue it so that it lies right on top of the stem on the interior of the box. Hold it on until it all feels very tight. This will also prevent the stem from catching on the tissue or the gift inside:
Throw in your gift, add some soft, pretty tissue paper, and you’re all set! Beautiful, feminine, and dreamy. For the romantic girlie girl in your life. And since we’re talking about romantic flowery packages, this is the perfect time to introduce…
#5 The “LOVE” Wrap
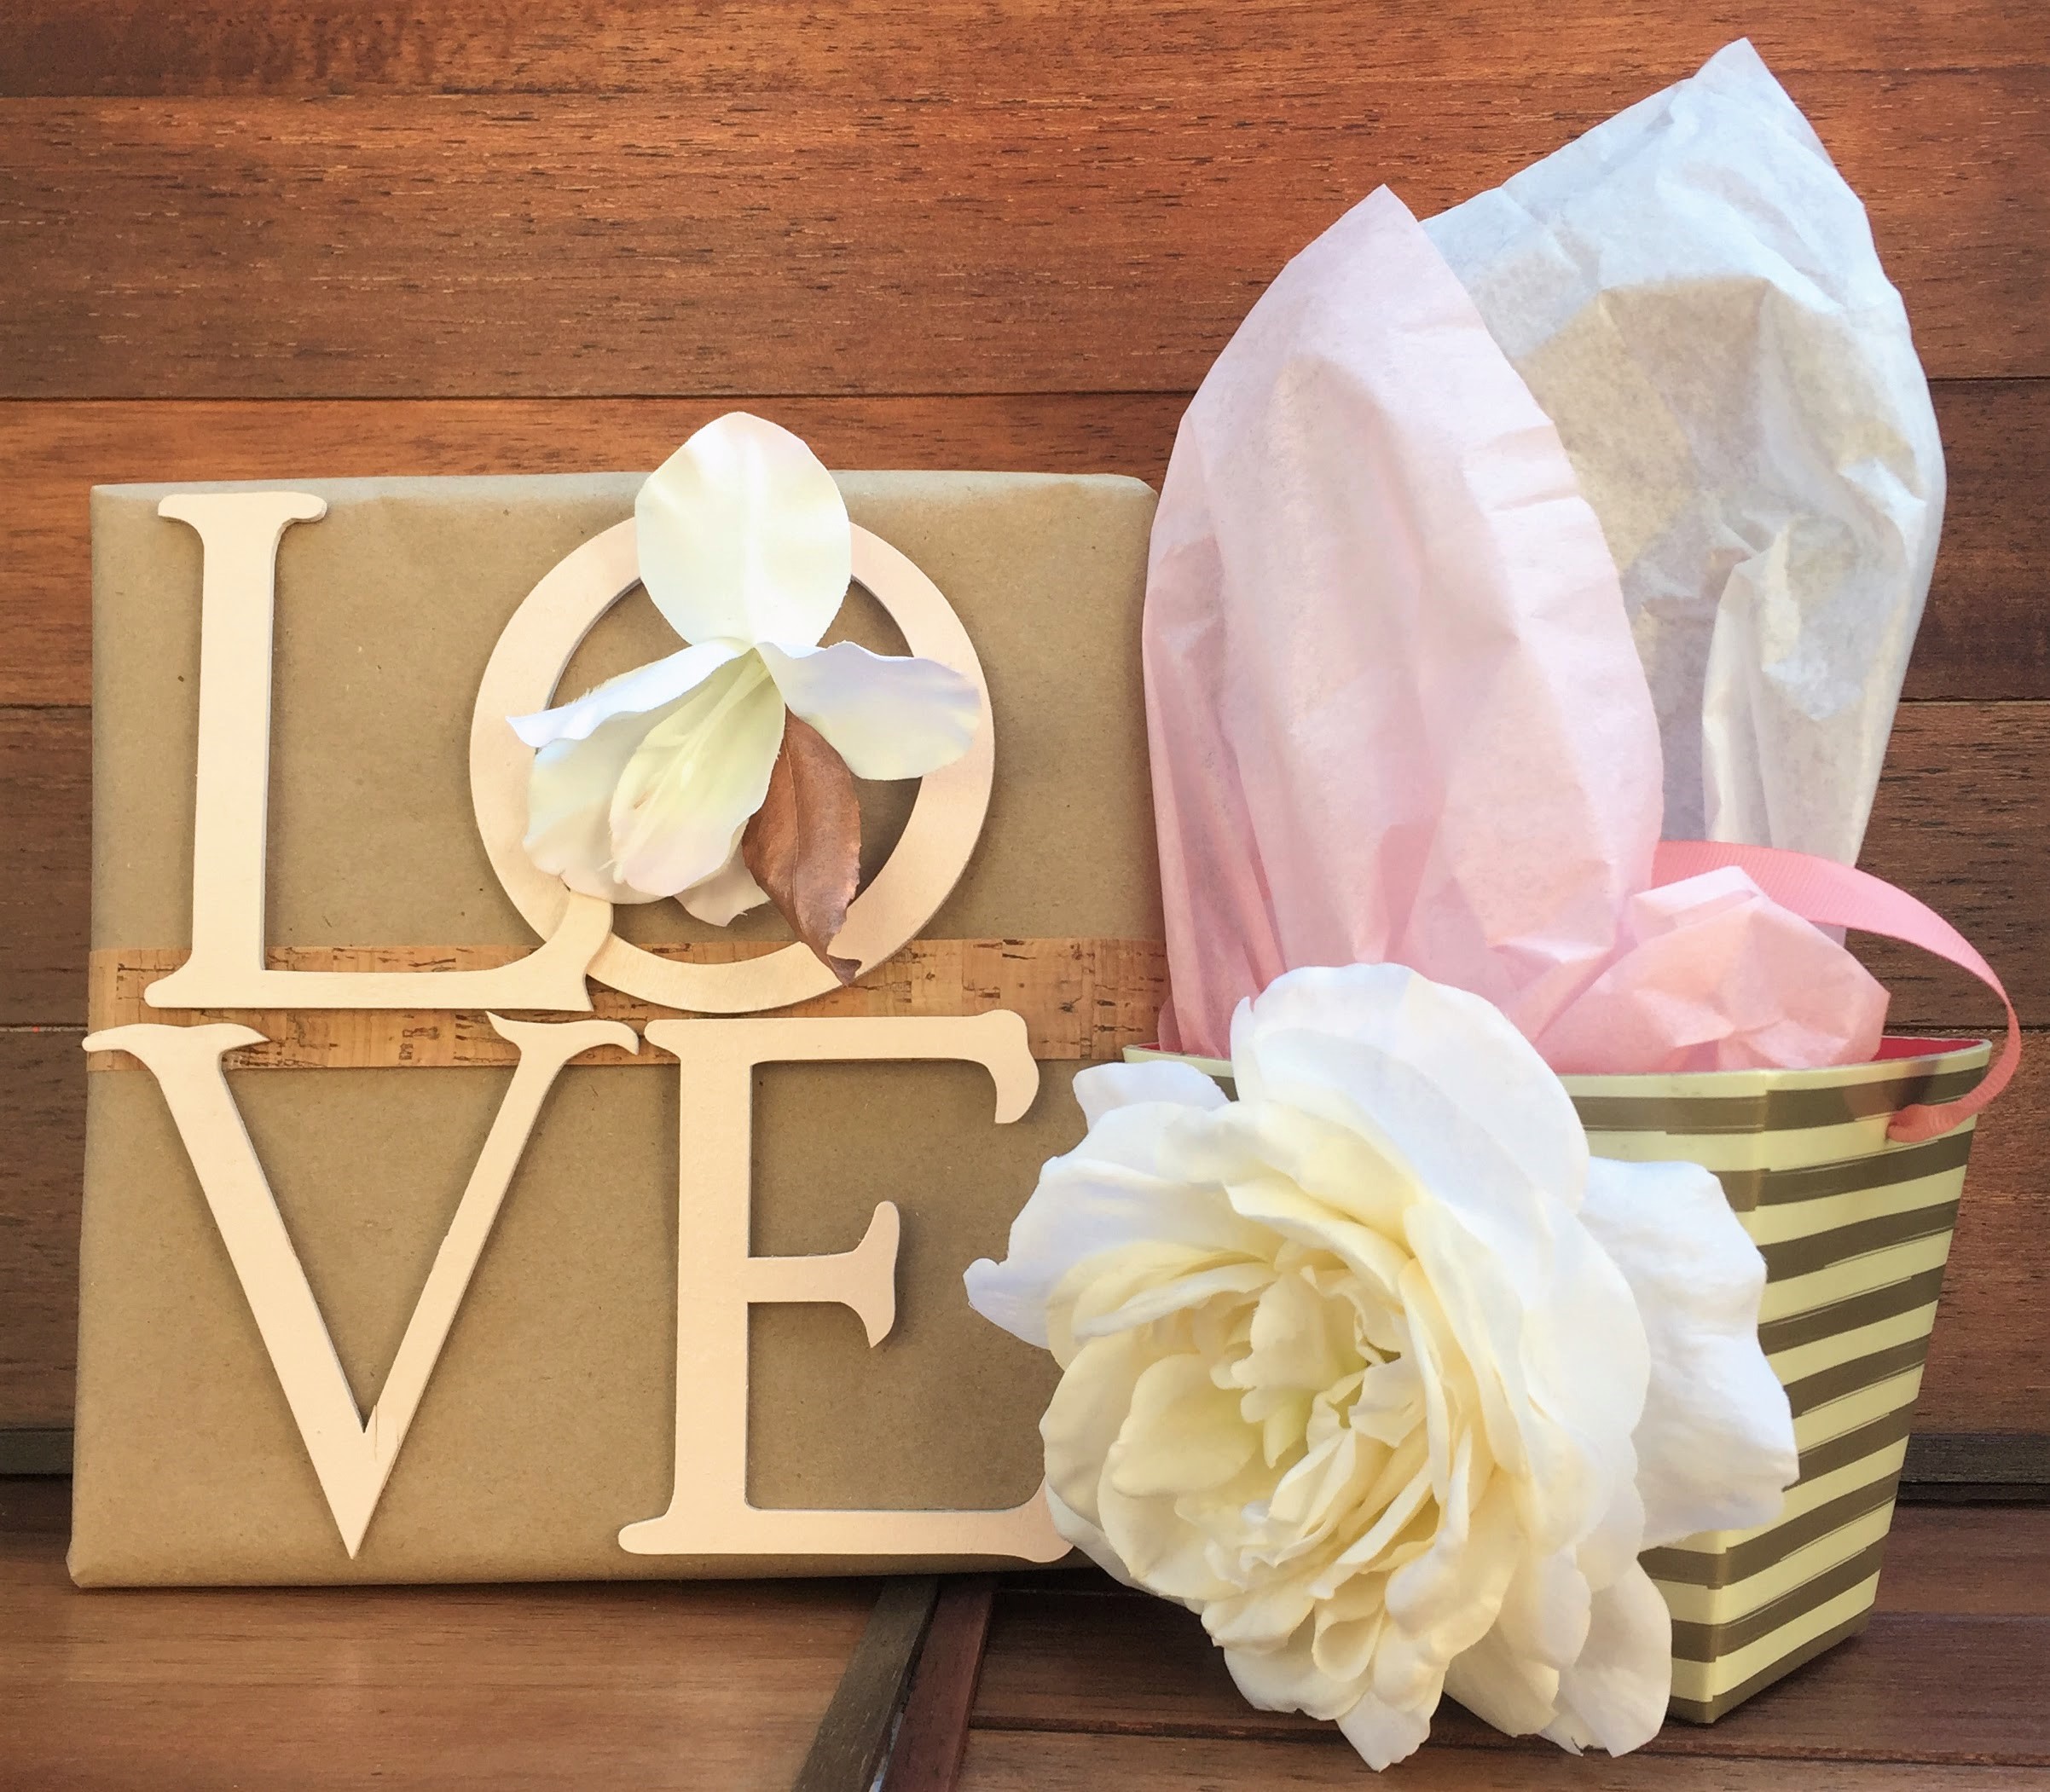
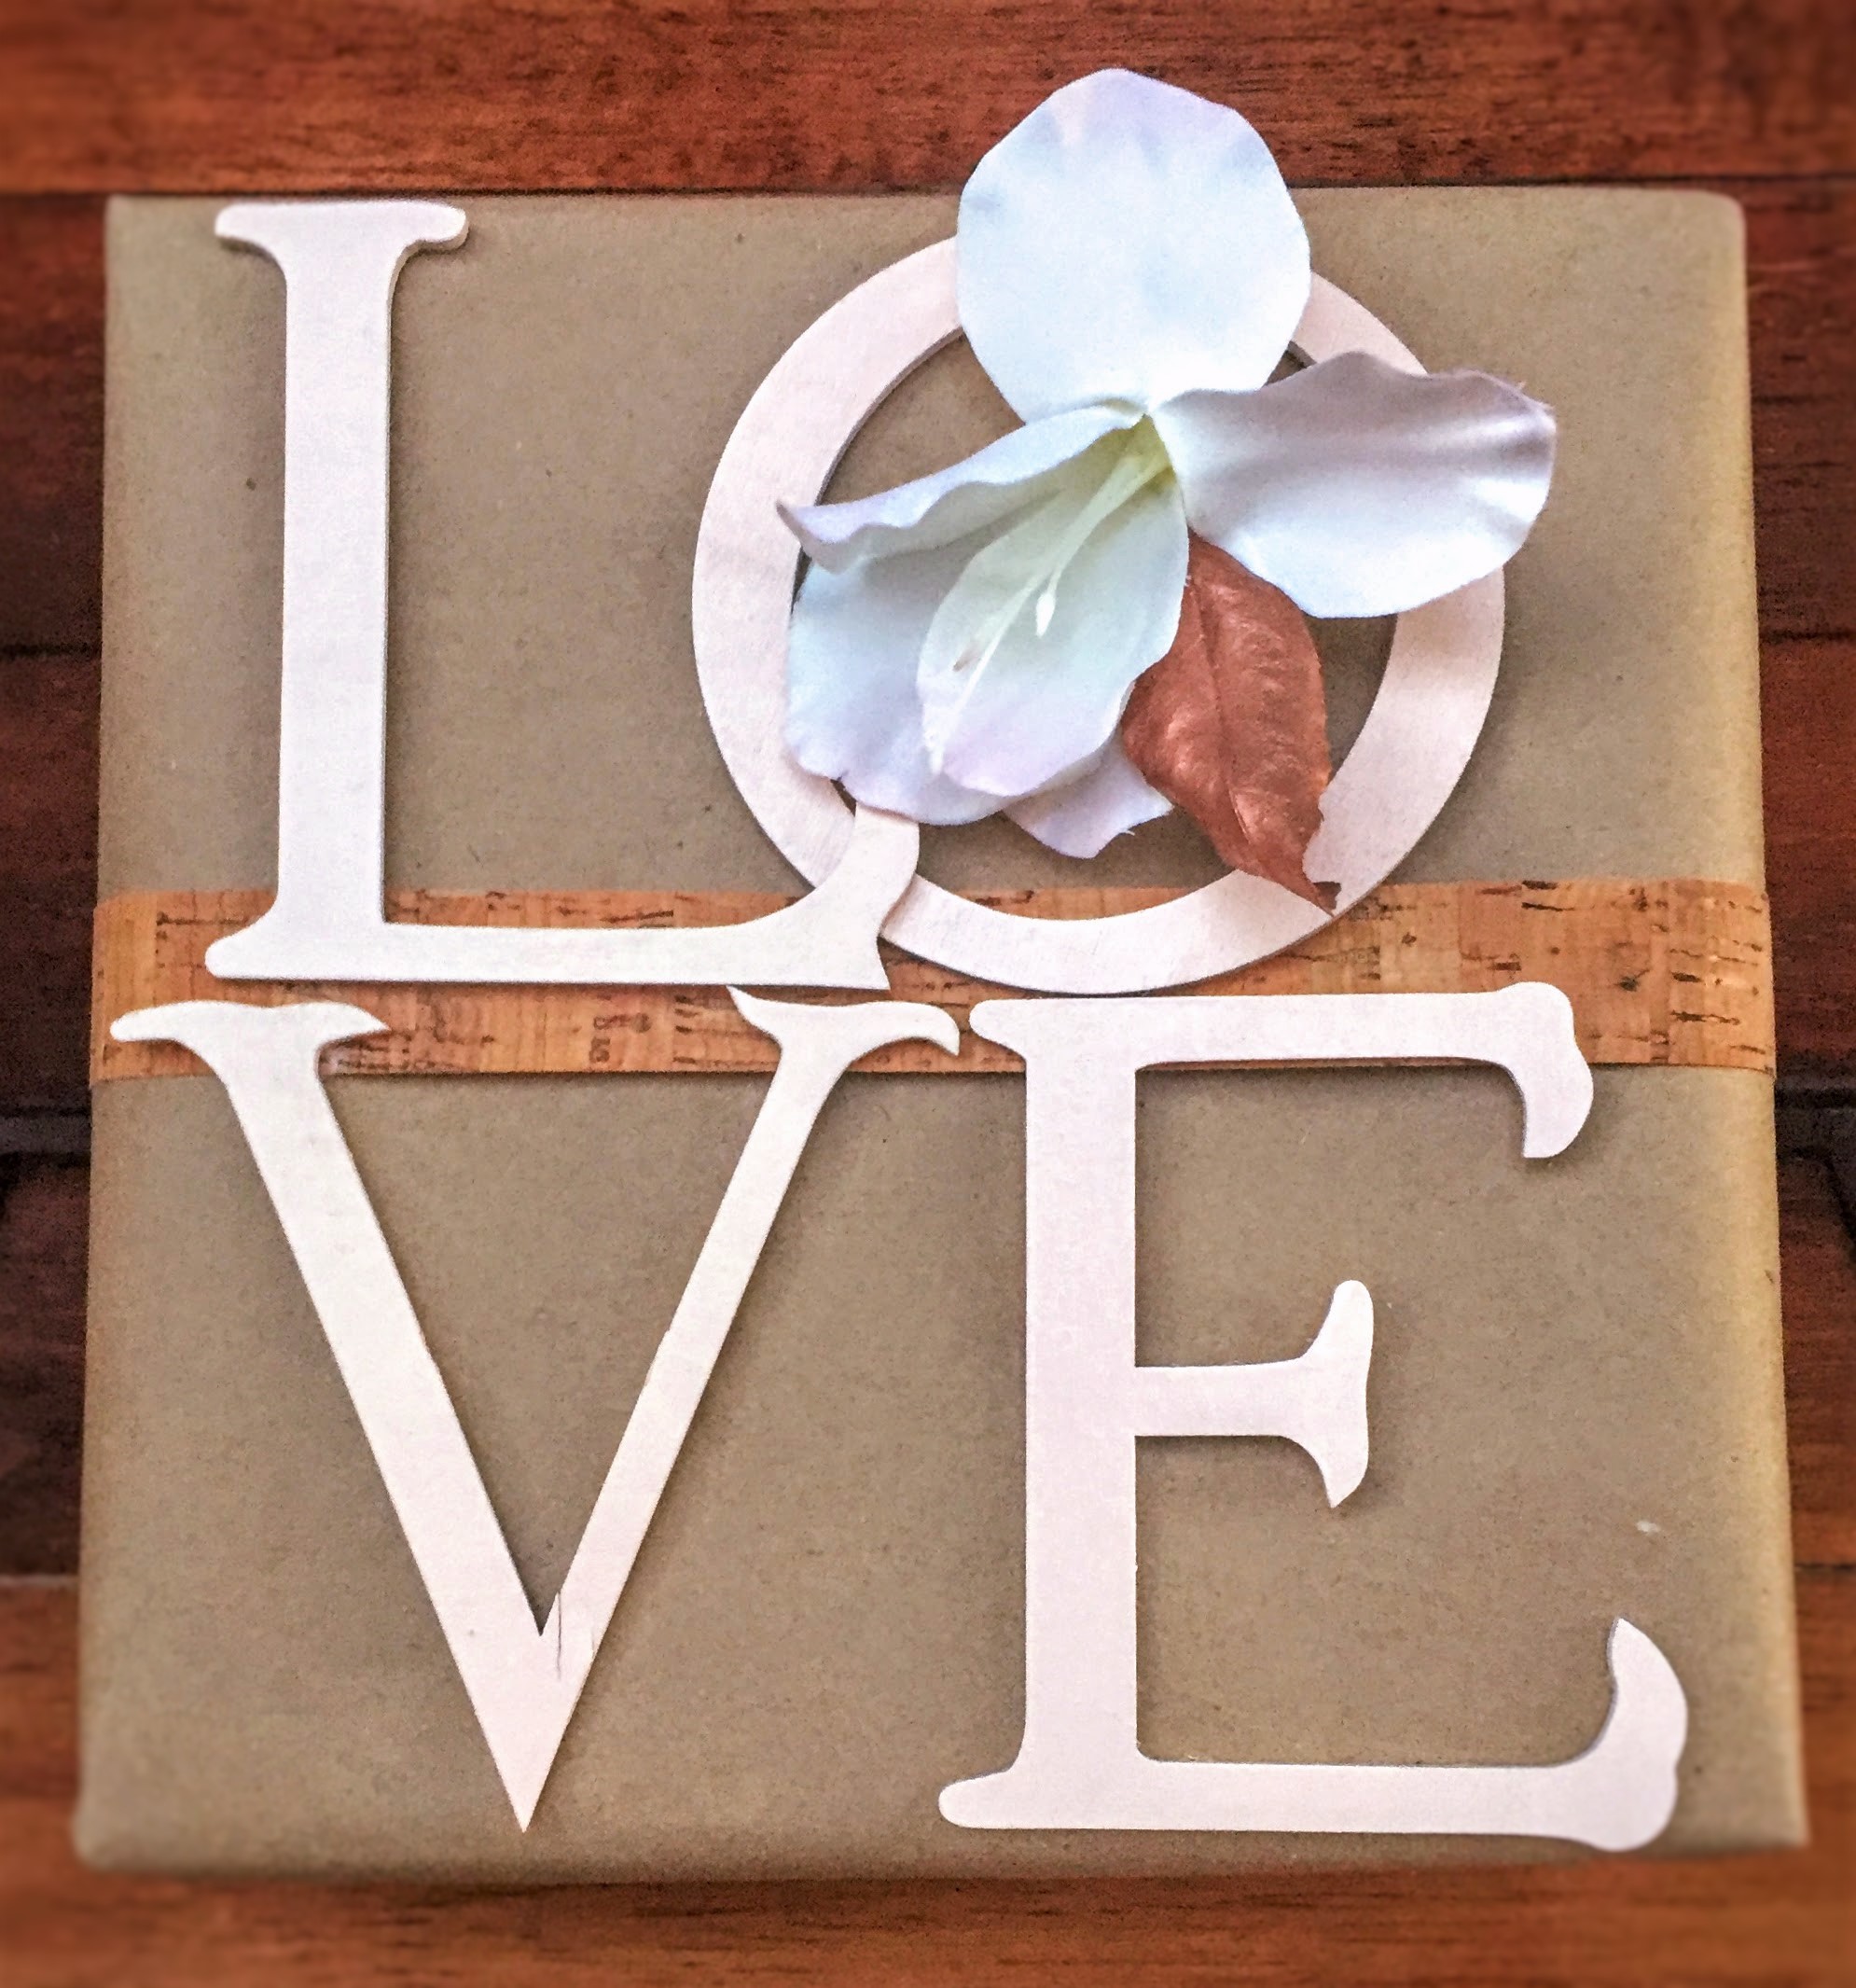
The “LOVE” wrap starts with brown parcel paper. I kept it simple and plain, but you could probably paint something subtle on the paper, if you want a bit more oomph. After you’ve wrapped it, take the wood grain ribbon and wrap it horizontally around the package. Apply hot glue to the length of the ribbon that will lie on the top of the gift, making sure it’s very straight. Hot glue the ends that meet in the back, making sure it’s nice and tight. Next take you’re letters, that you’ve already painted (front and back) and use hot glue to apply. I used Ballet Slipper Pink for mine. I laid them out in different ways until I found the look I liked. I got these at Michael’s- they have so many variations on a theme in this area, that you could do tiny little letters on a small gift up to huge letters on a great big one. You could do names, initials, one word, like I did- it’s totally up to you! Next, I took this stem of flowers that I bought at Michael’s and pulled one of the blossoms off of it. I pulled the green leaf base off and sort of manipulated the flower until I liked the look. Then I took a real leaf that I got in my backyard, and sprayed it front and back with this Copper Metallic Paint. I placed it in the flower where I thought it looked pretty and hot glued the stem inside.
And there you have the “LOVE” Wrap! Perfect for Valentine’s Day, an Anniversary, or just to tell someone special that you love them! Simply Beautiful.
And just one more variation on a theme, because I can’t leave well enough alone!
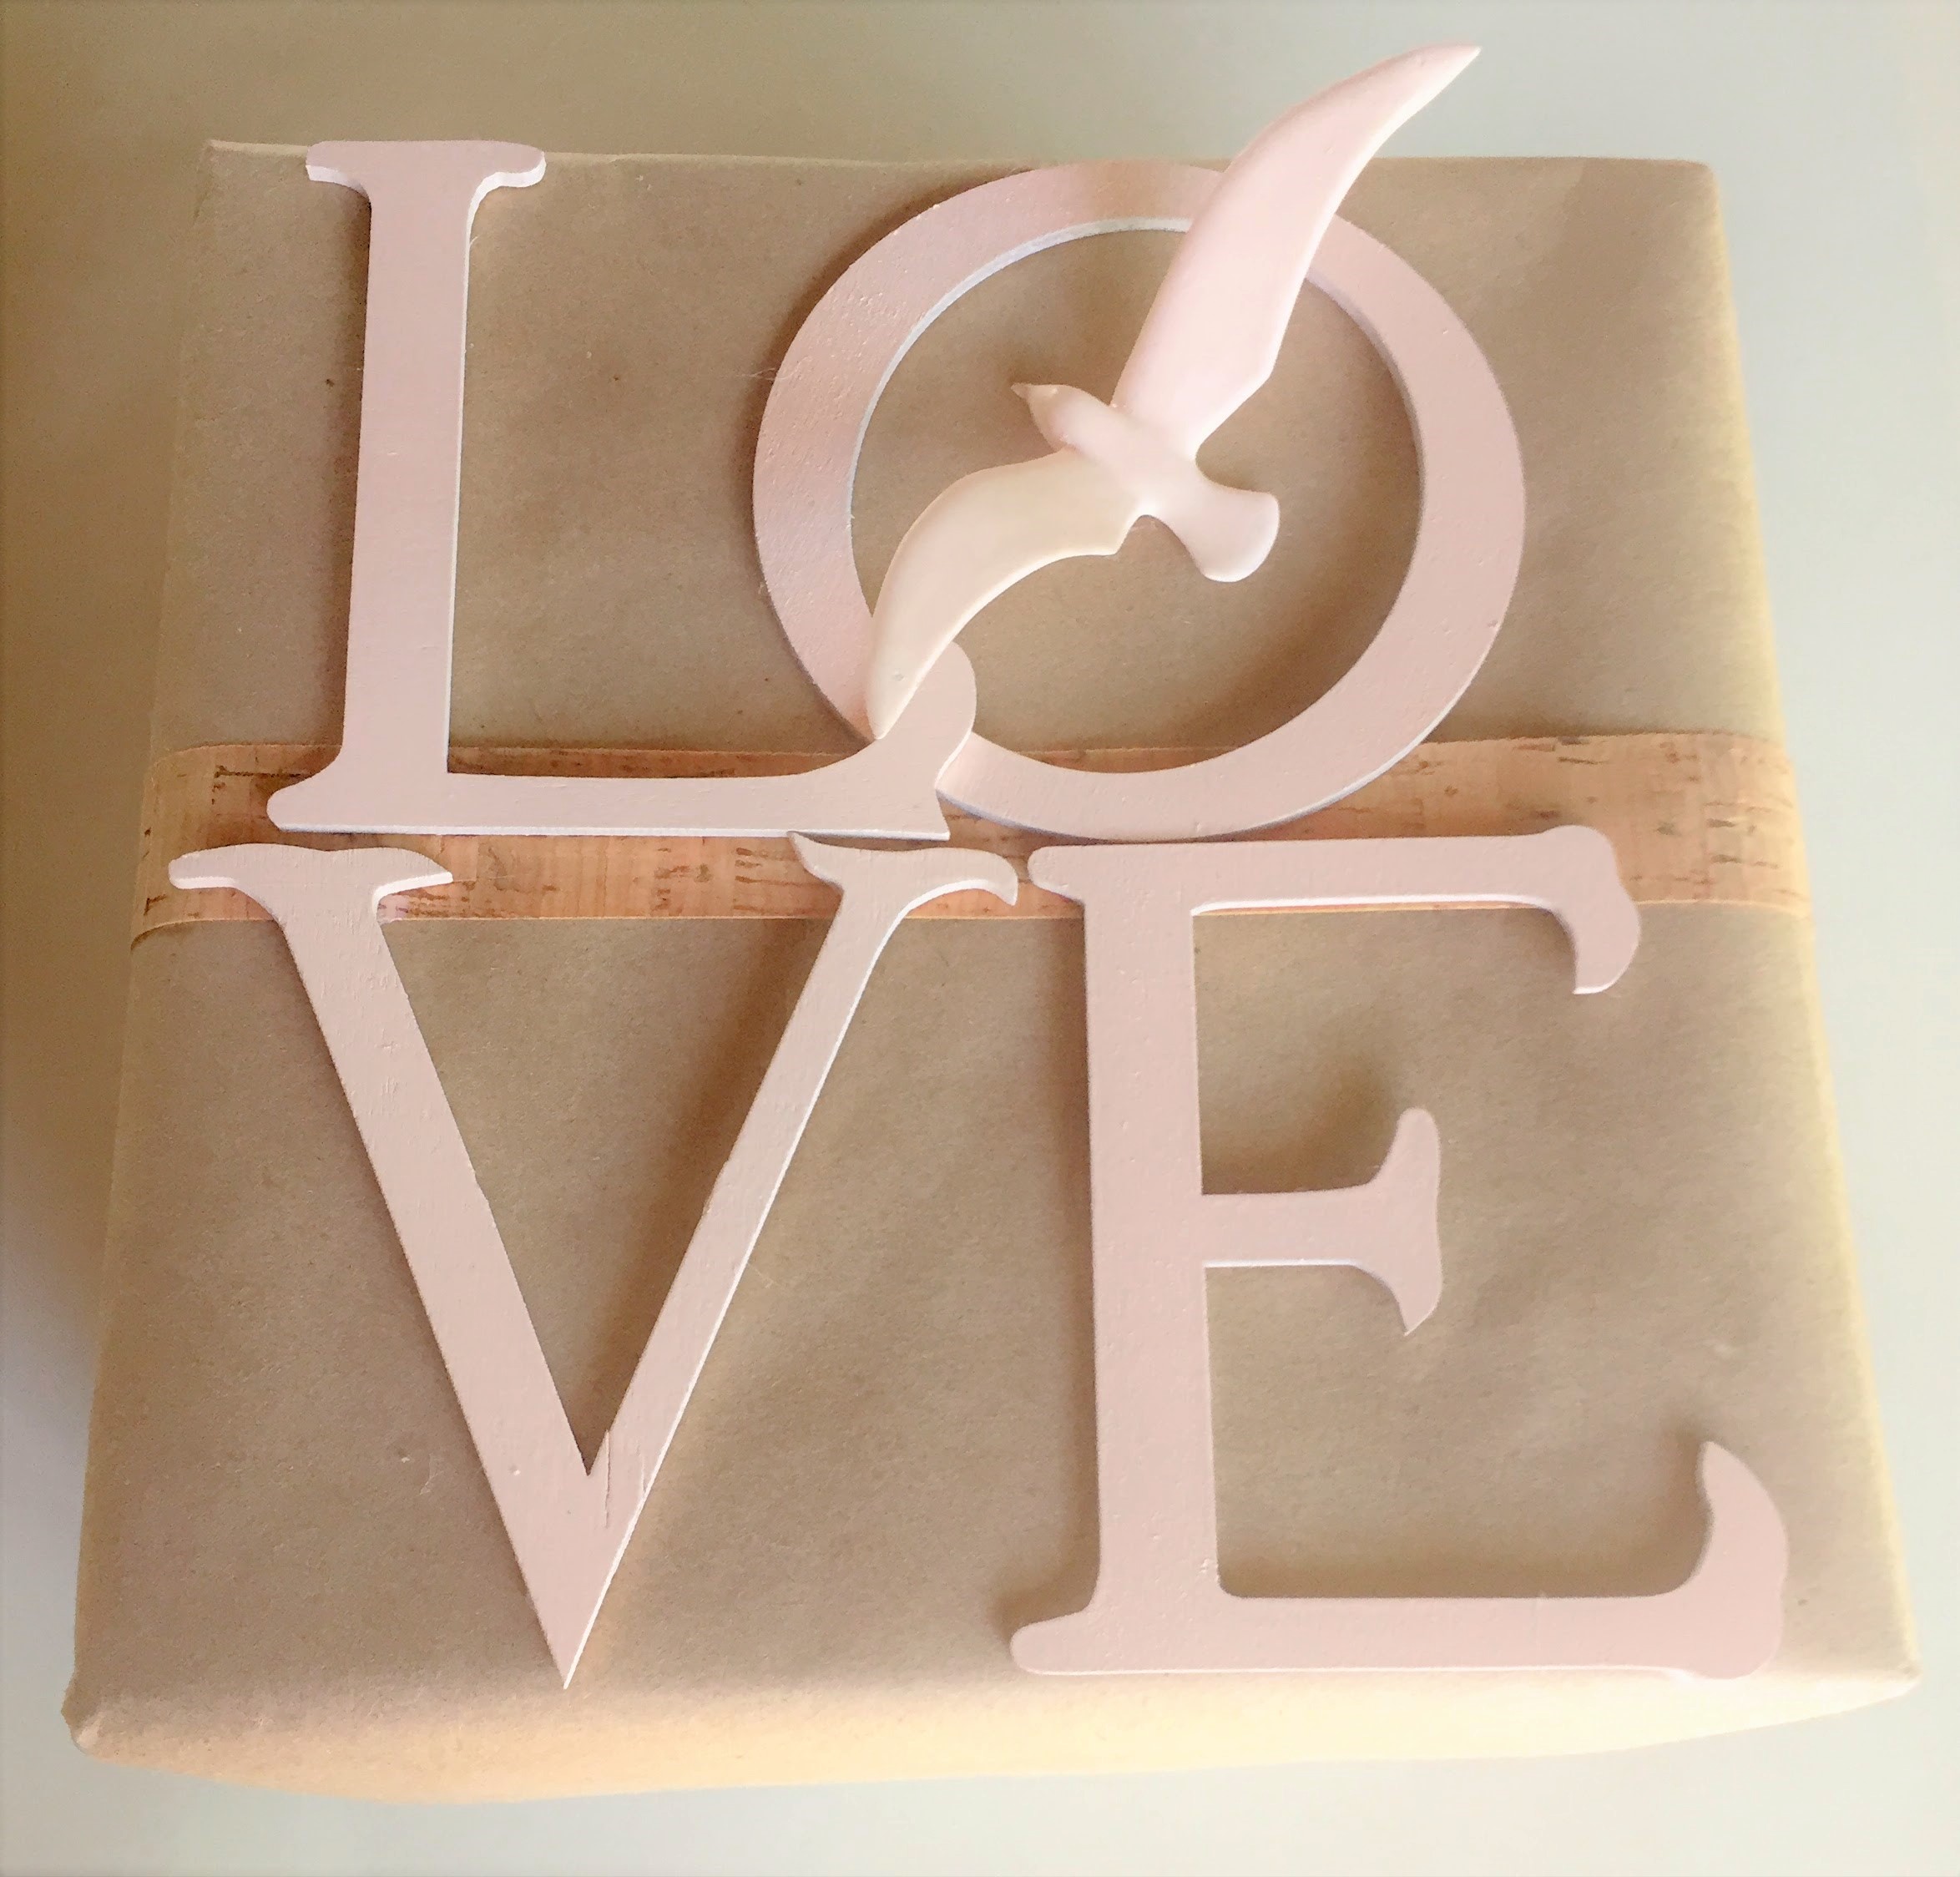
You could definitely paint the background or add a copper leaf, or whatever else you think might give it a little oomph! Or leave it as is, for a simple, clean, and beautiful package!
And now for…
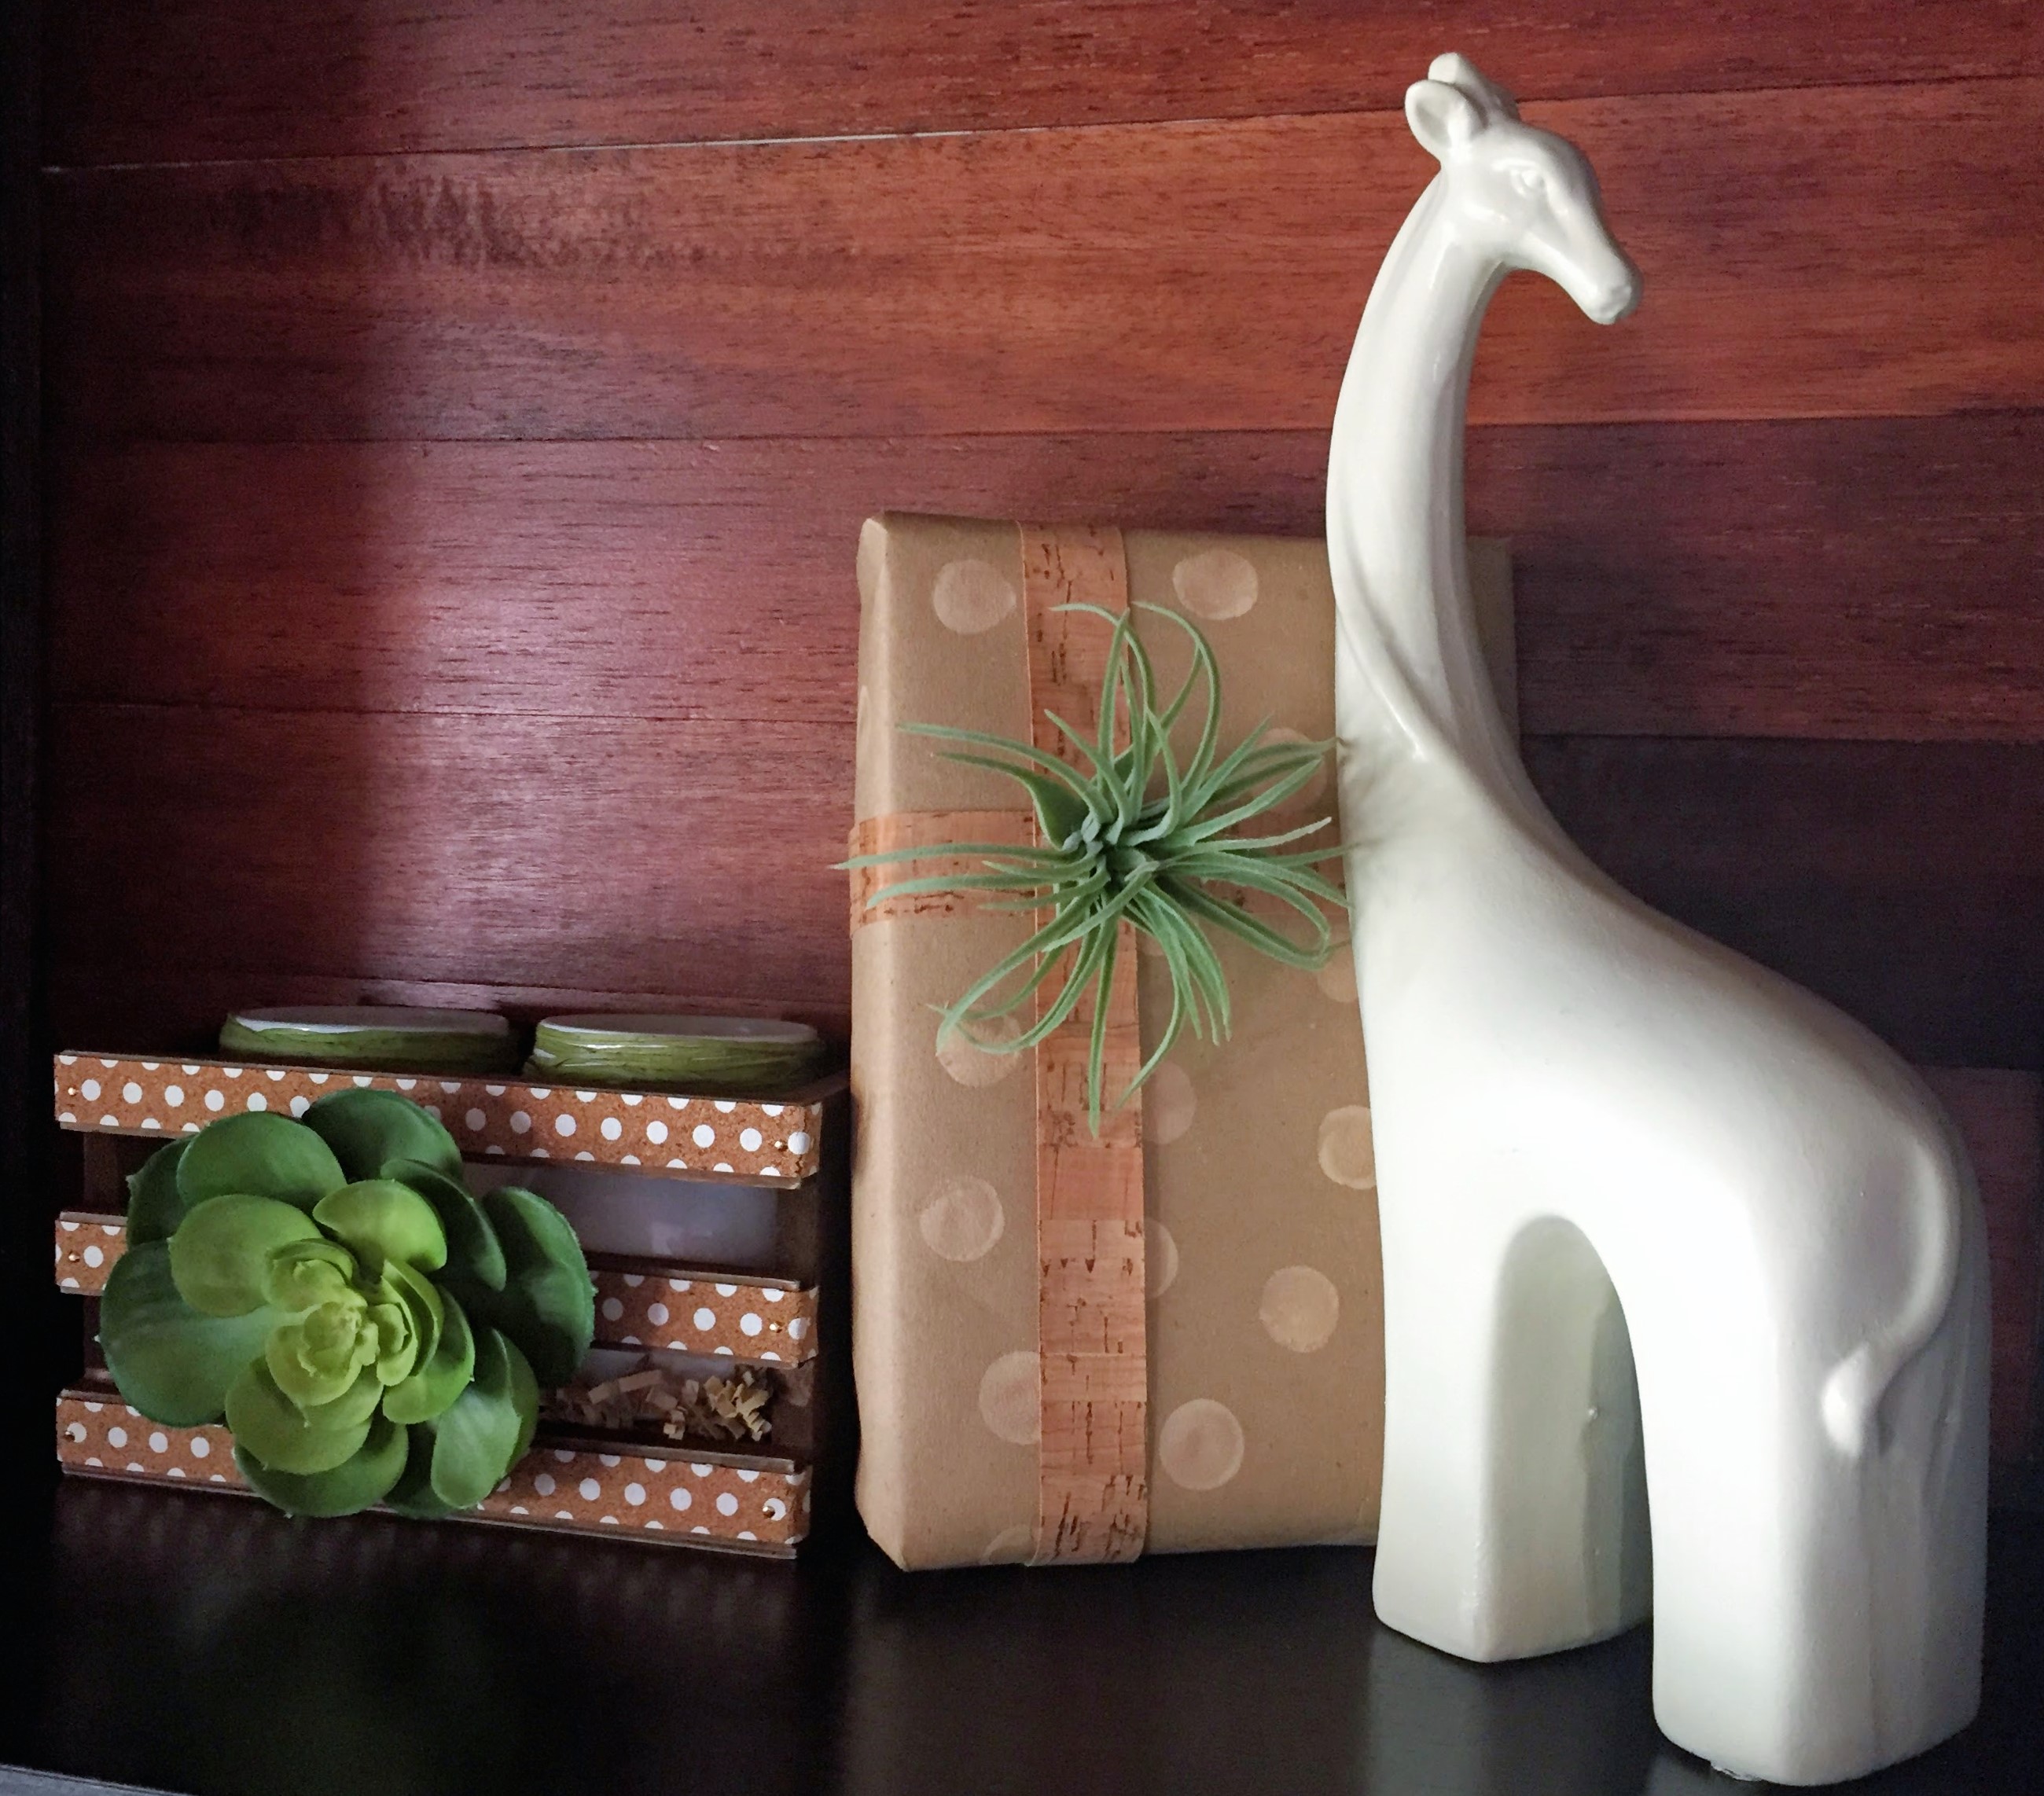
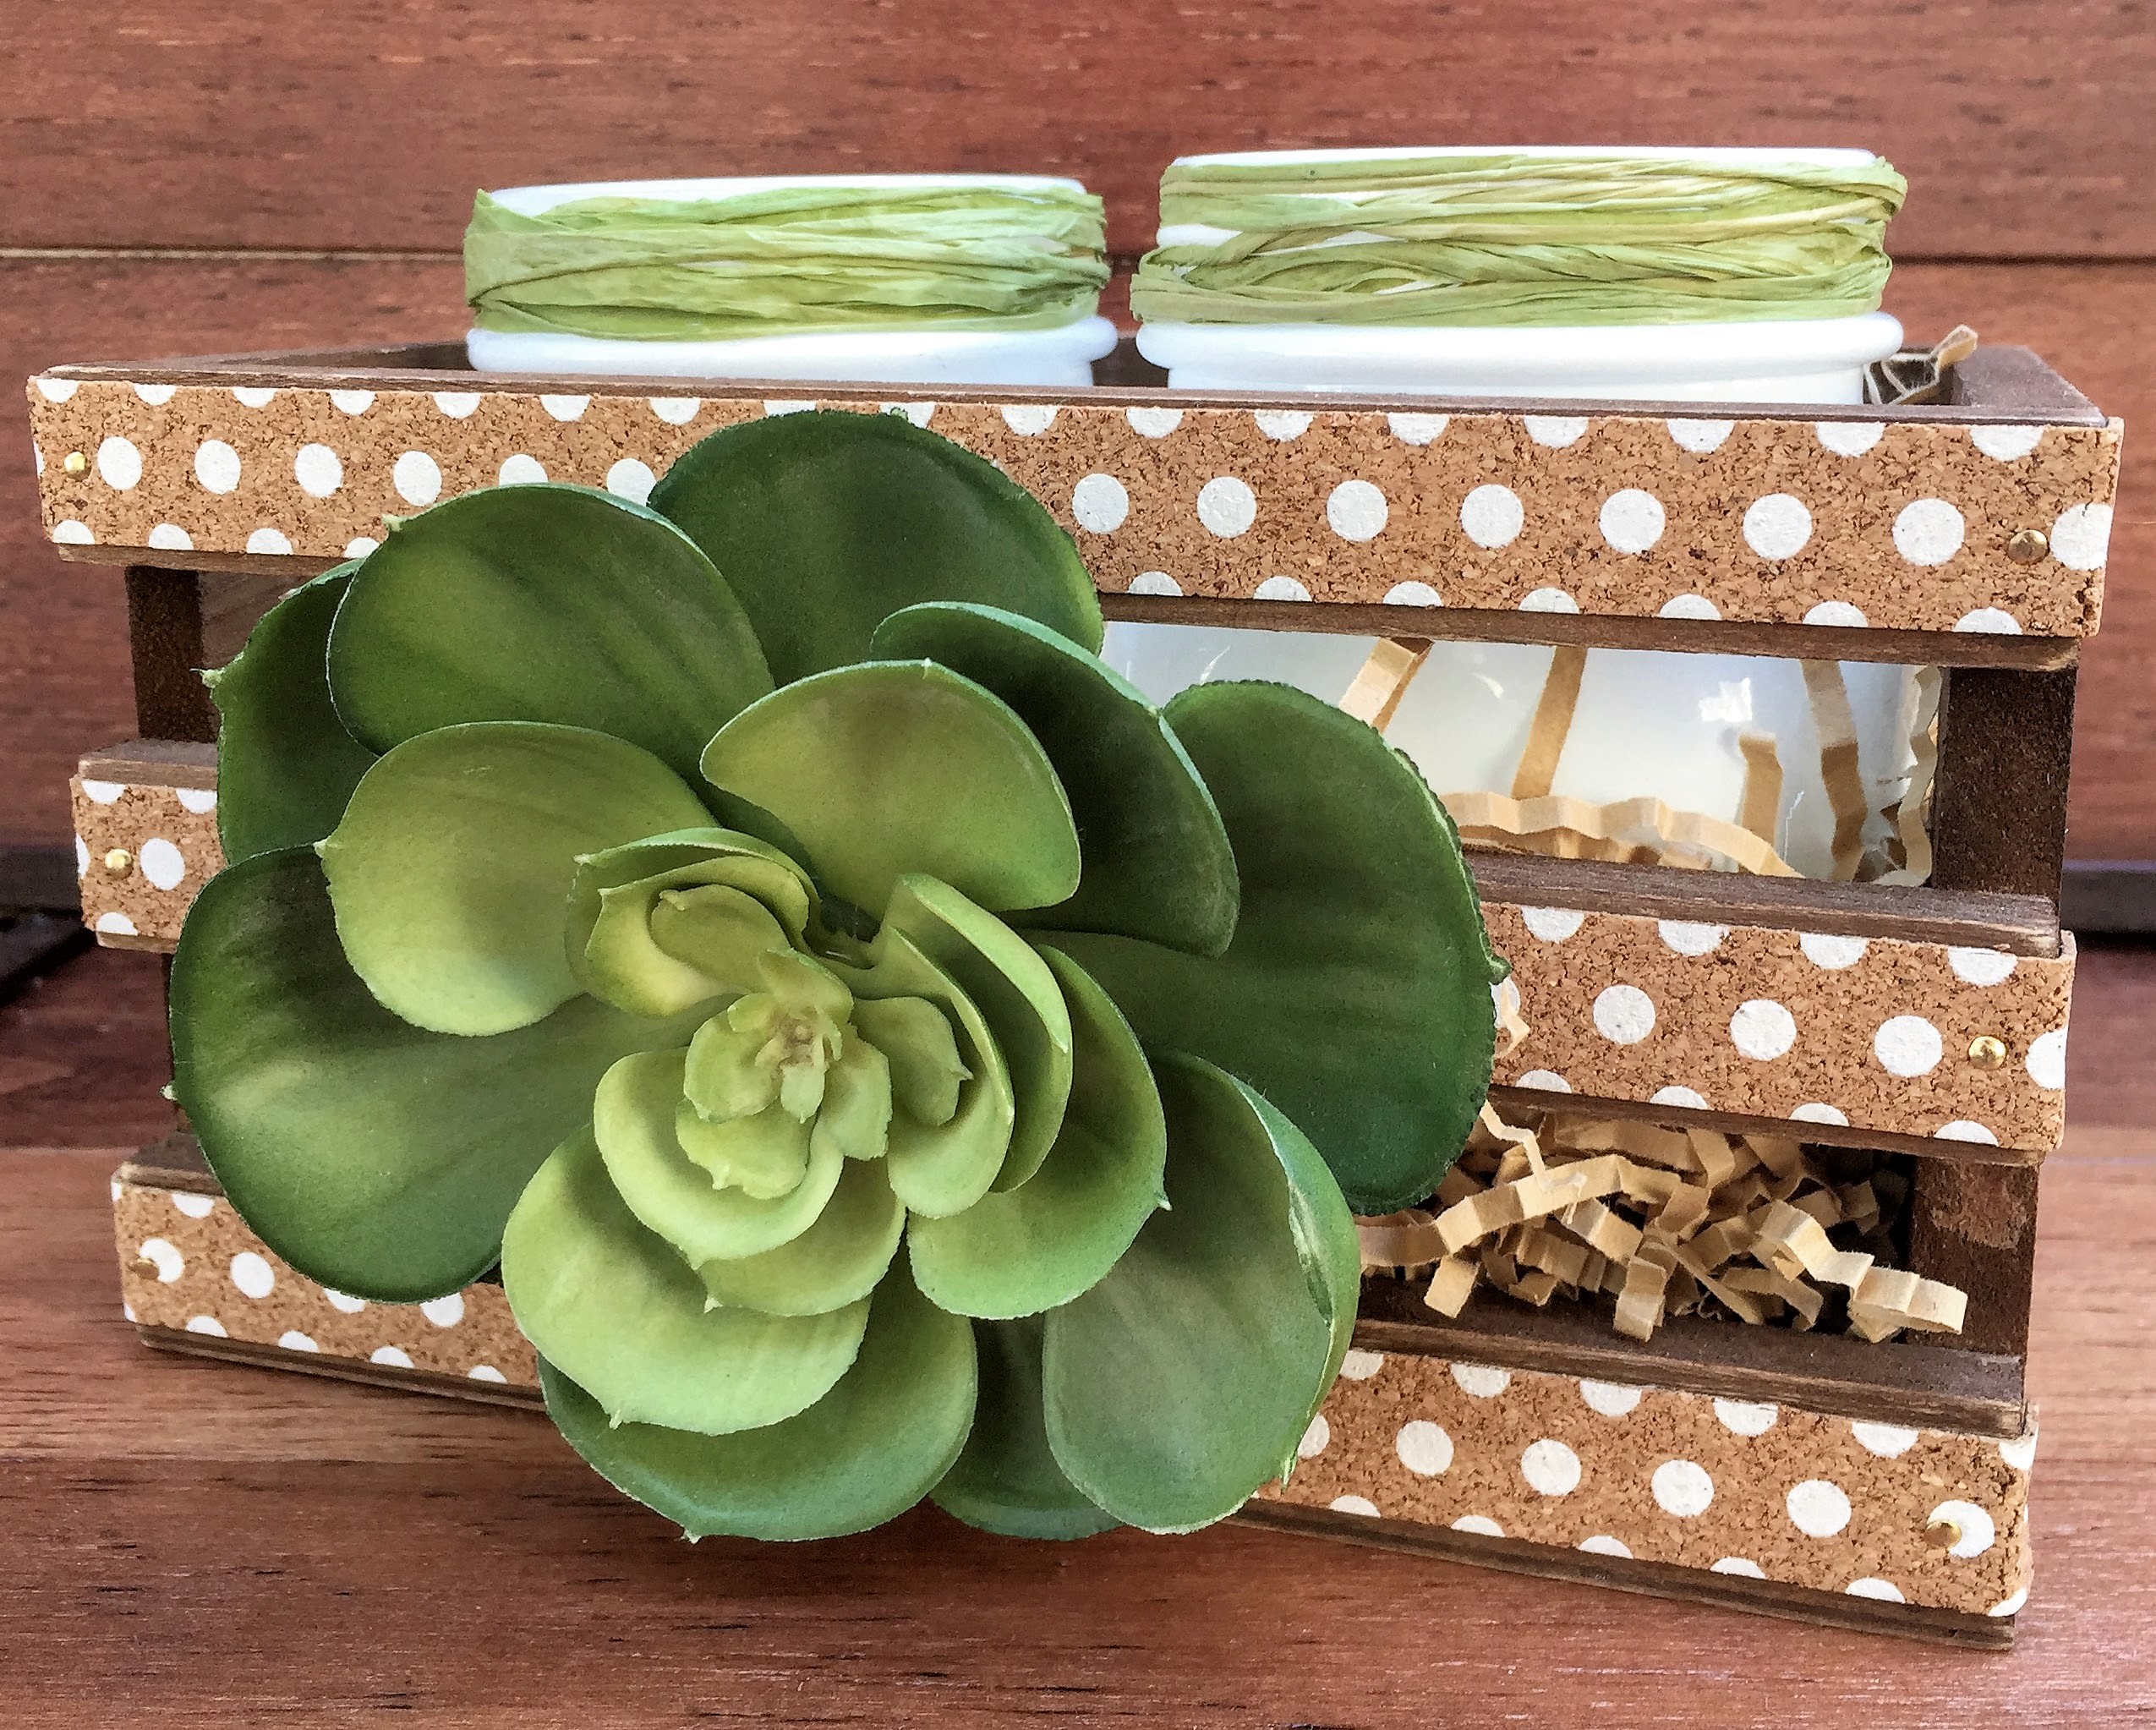
#6 The Succulent Cork Polka Dot Mini Crate
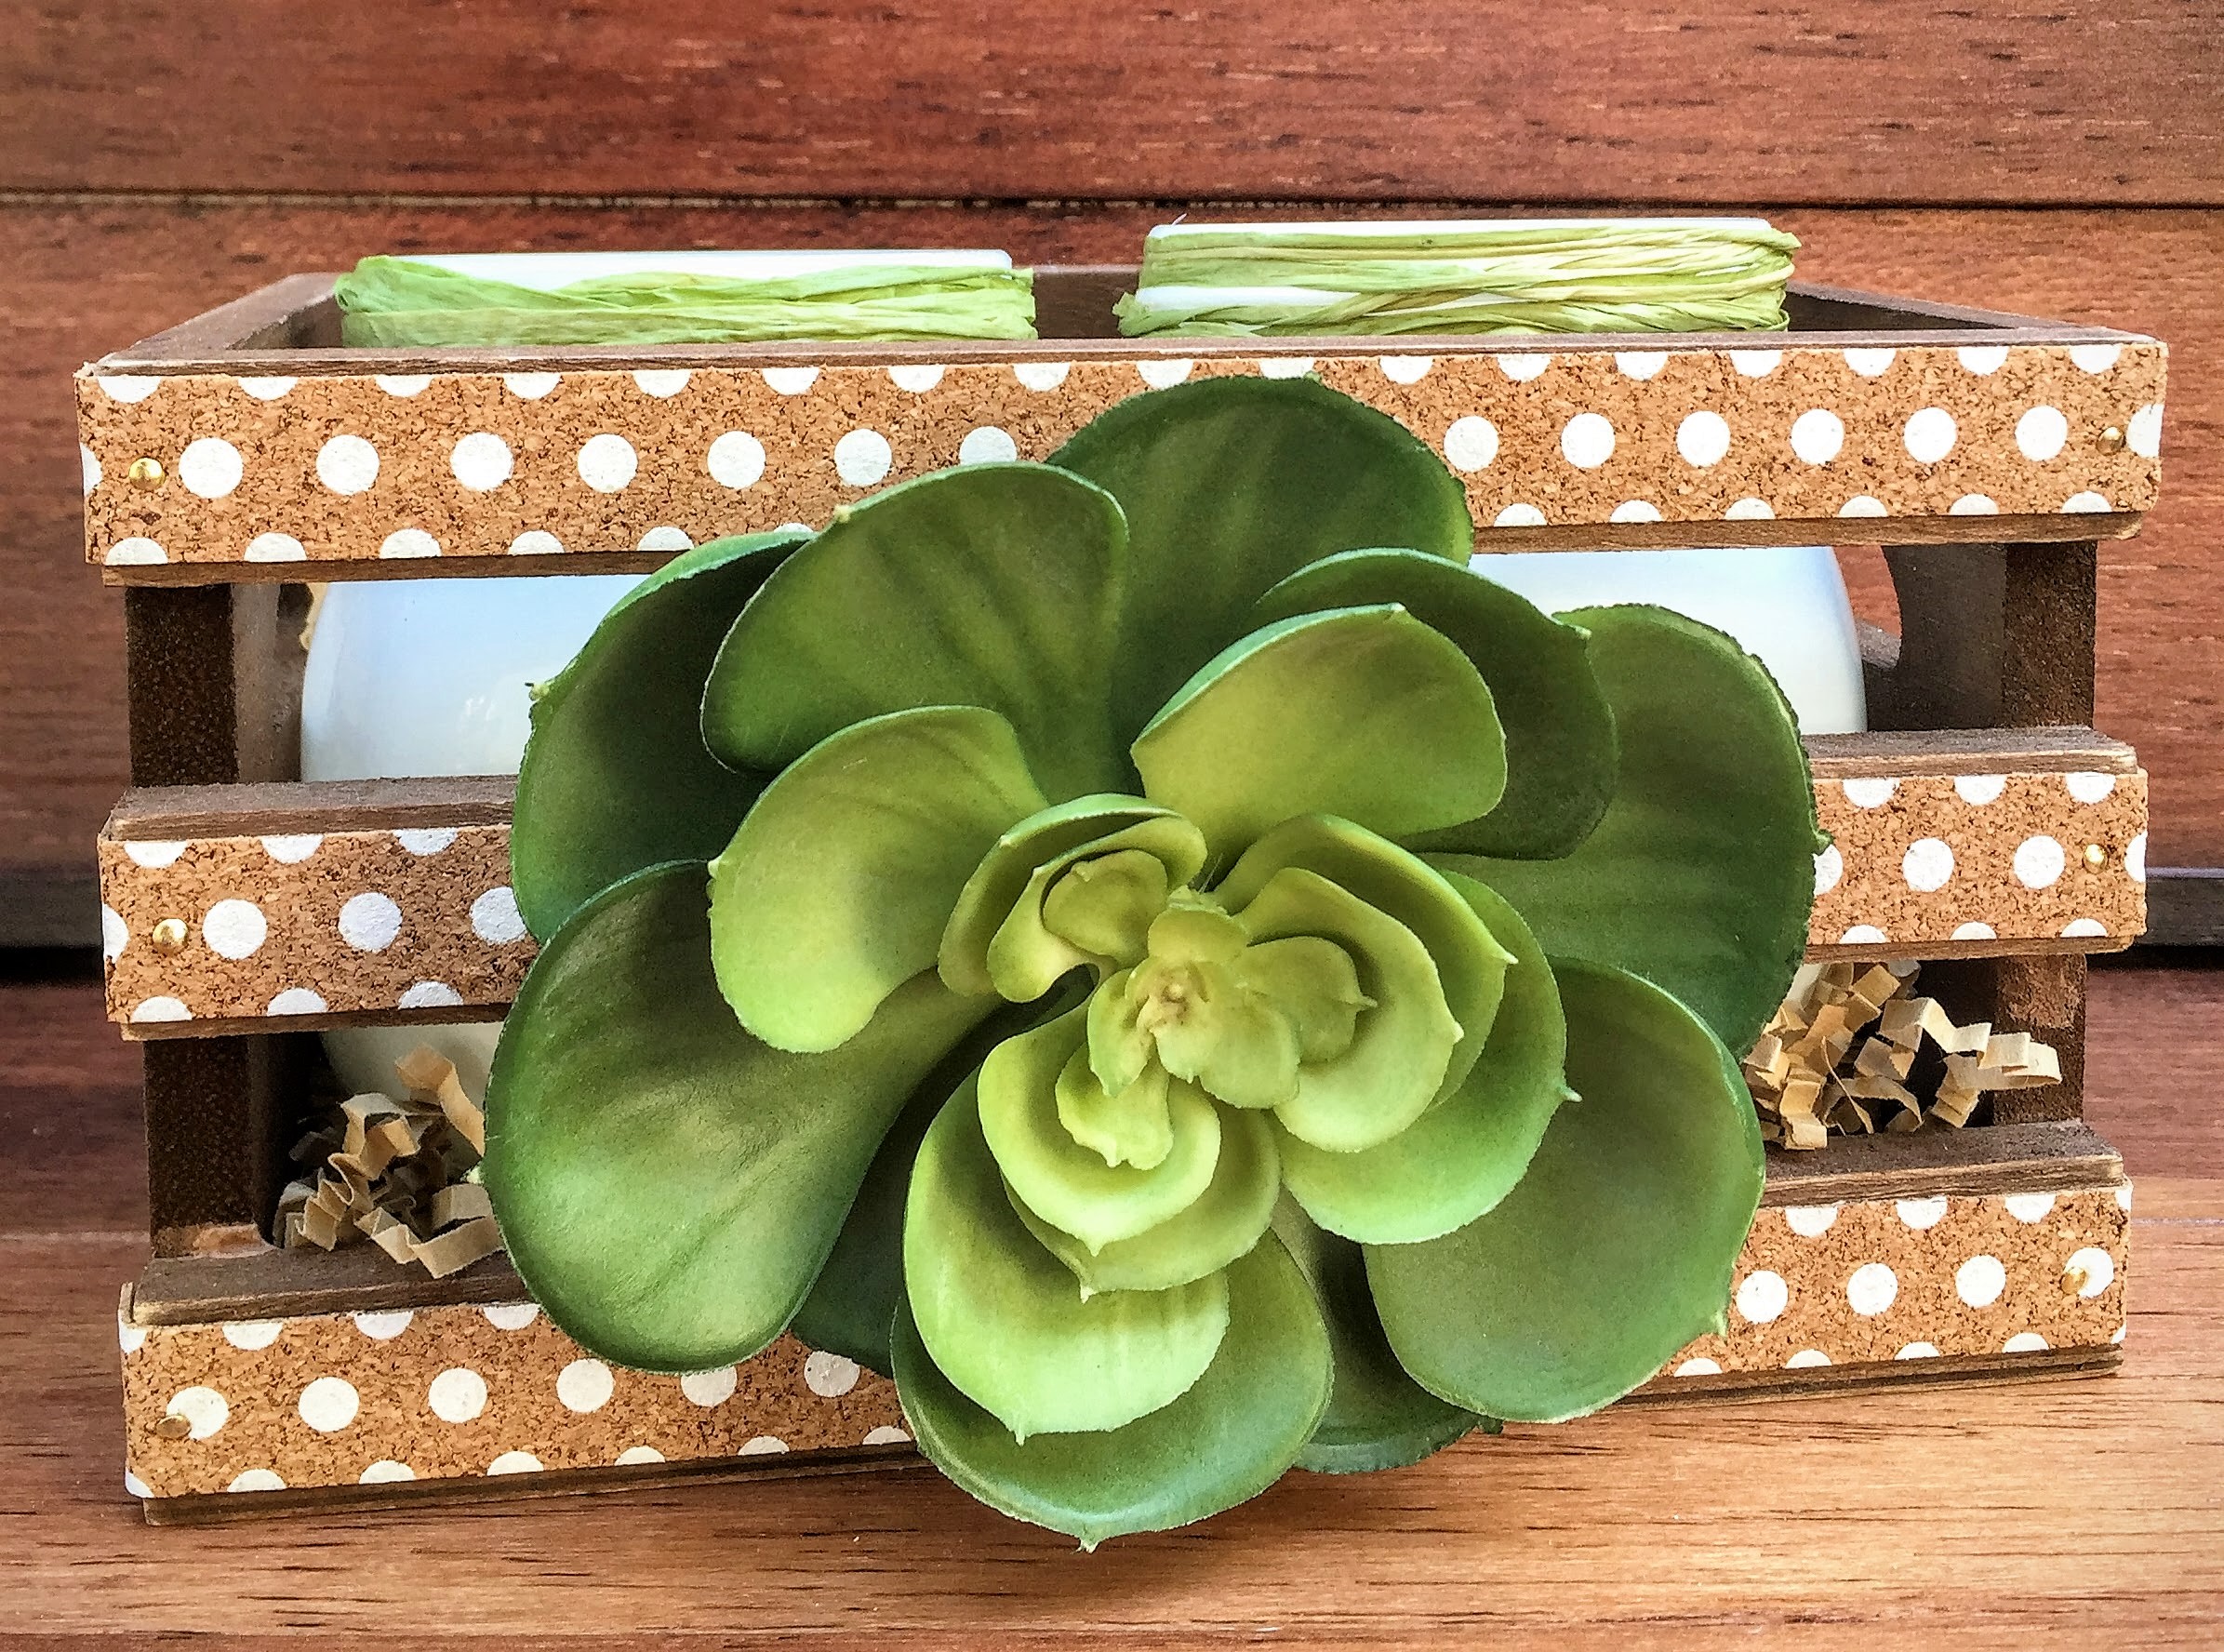
This one is great for candles, plants, or as a small gift basket filled with chocolate, coffee, small bottles of wine, etc.
I bought this crate at Michaels a while back, but you can find these mini-type crates in a lot of different places- Target, Hobby Lobby, maybe Home Depot… the first thing you’ll want to do is to make a hole in the middle of the front middle slat of the crate, so that you can push the stem of your succulent through. I used a small screw and electric screwdriver to carefully drill a hole. Then I took my cork washi tape and placed it along each slate (yes, the cork tape will cover up the hole, momentarily), taking it over the edge on either side, to give it a finished look:
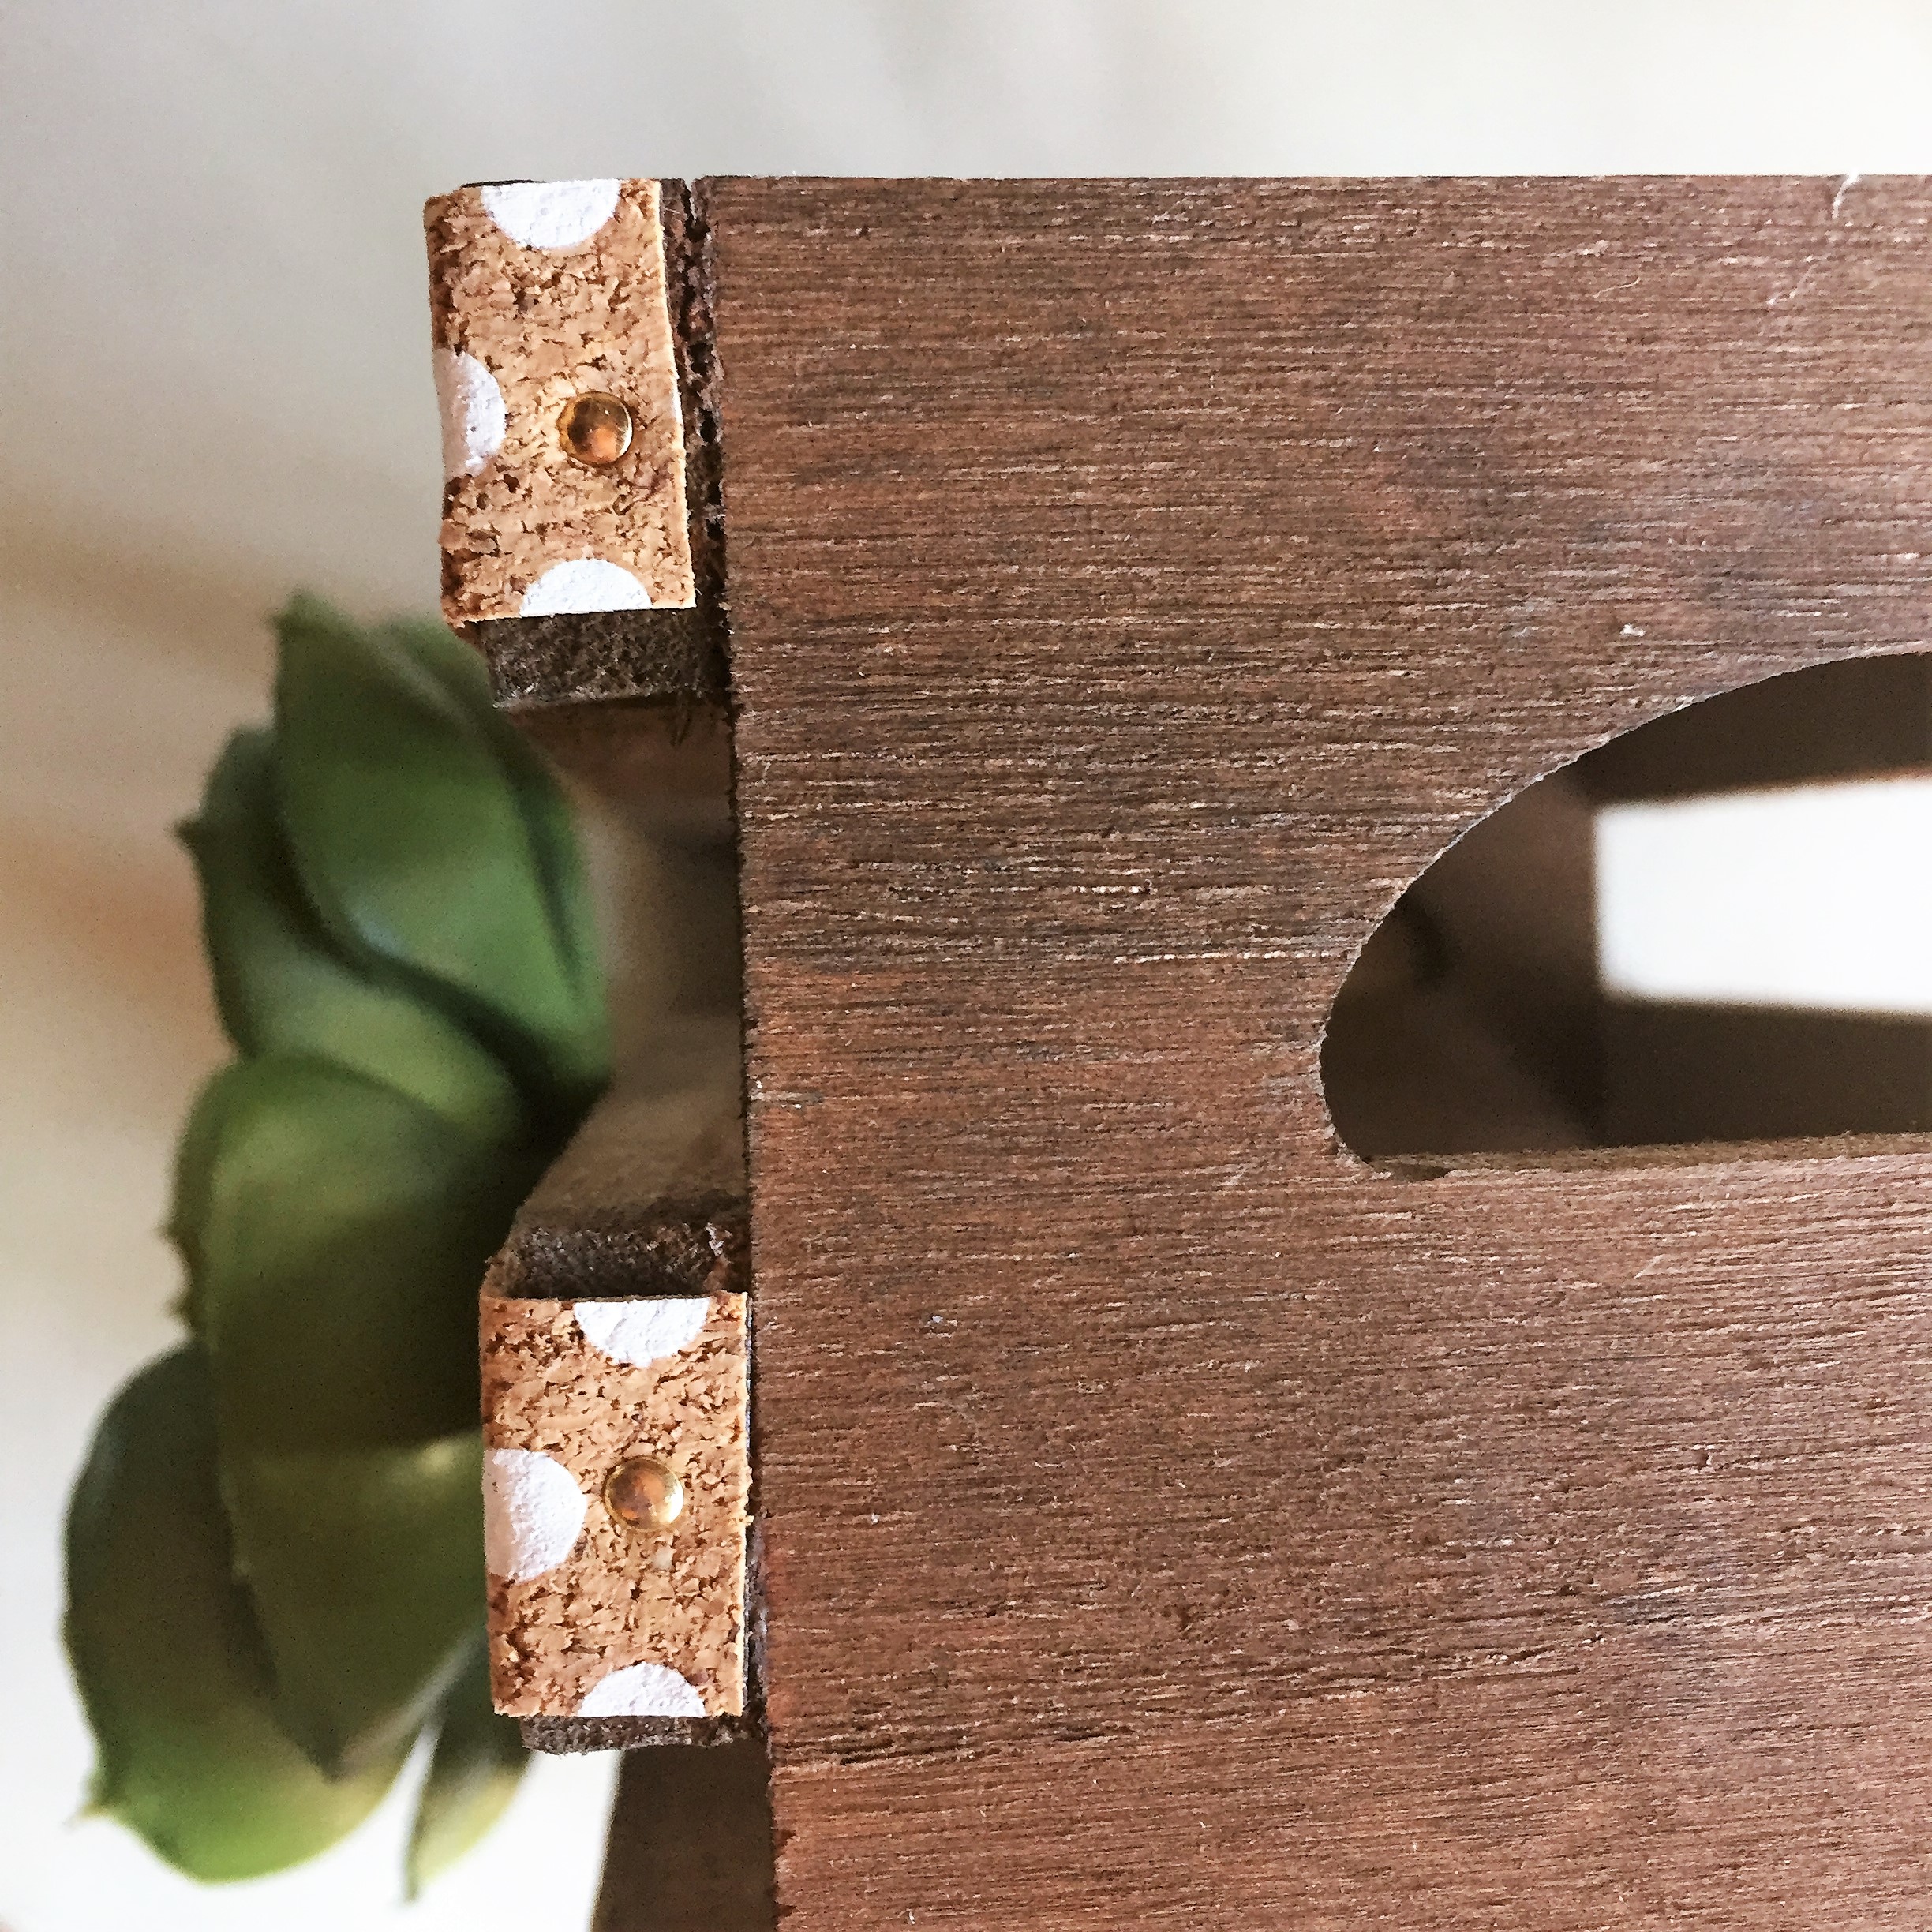
Once the washi tape has been applied, you can start to hammer in your little nails. This keeps the washi tape from “unsticking” over time, while giving the whole thing a more finished look.
I do 3 little nails (you’ll want 1/4″ nails if you can find them, and preferably something metallic) across the front and then 1 over the edge of each side (as seen in the picture, just above):

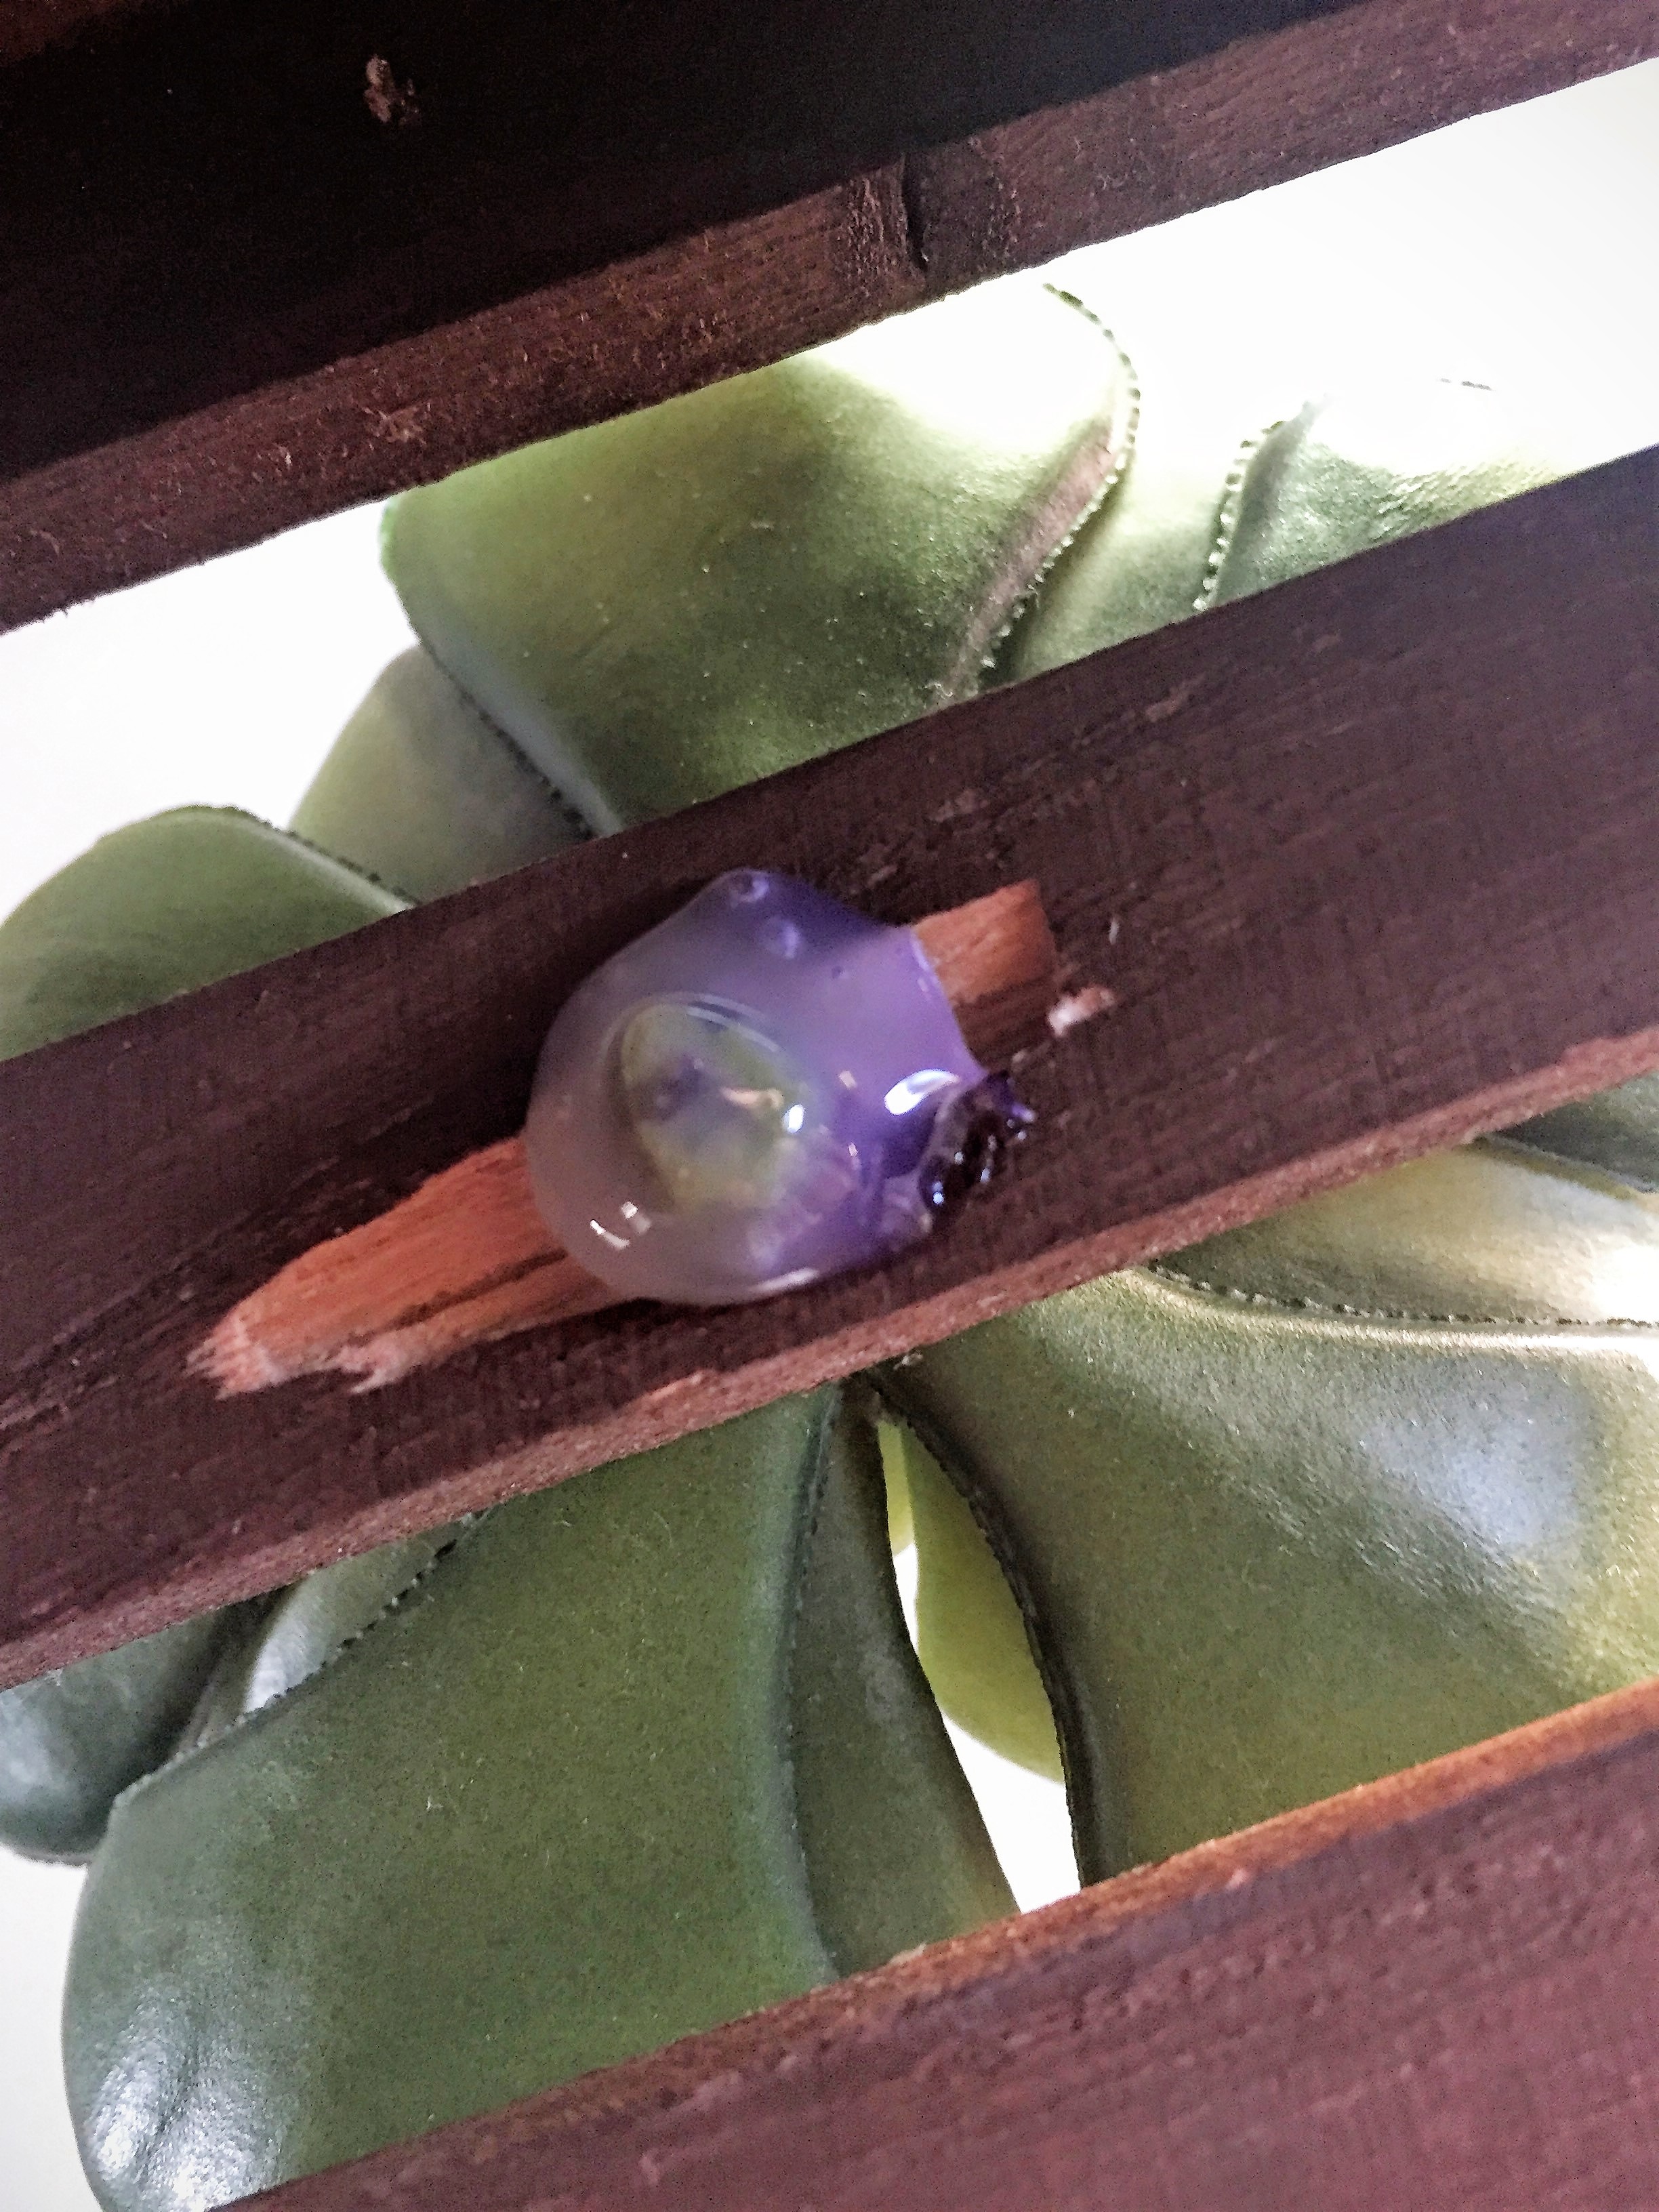
You can repeat on the backside with the cork tape if you want to (minus drilling the hole or putting in the succulent). The last step is to take your succulent (I bought this one at Target, but there is another source in the list of things to buy, above) and carefully push the stem through the washi tape and into the hole that you previously drilled. Mine was really tight, but you may need to add hot glue to the exterior, if it’s not quite stable. If the stem is very long once it’s in, cut down as much as you can of the part that is sticking out, into the inside of your crate:
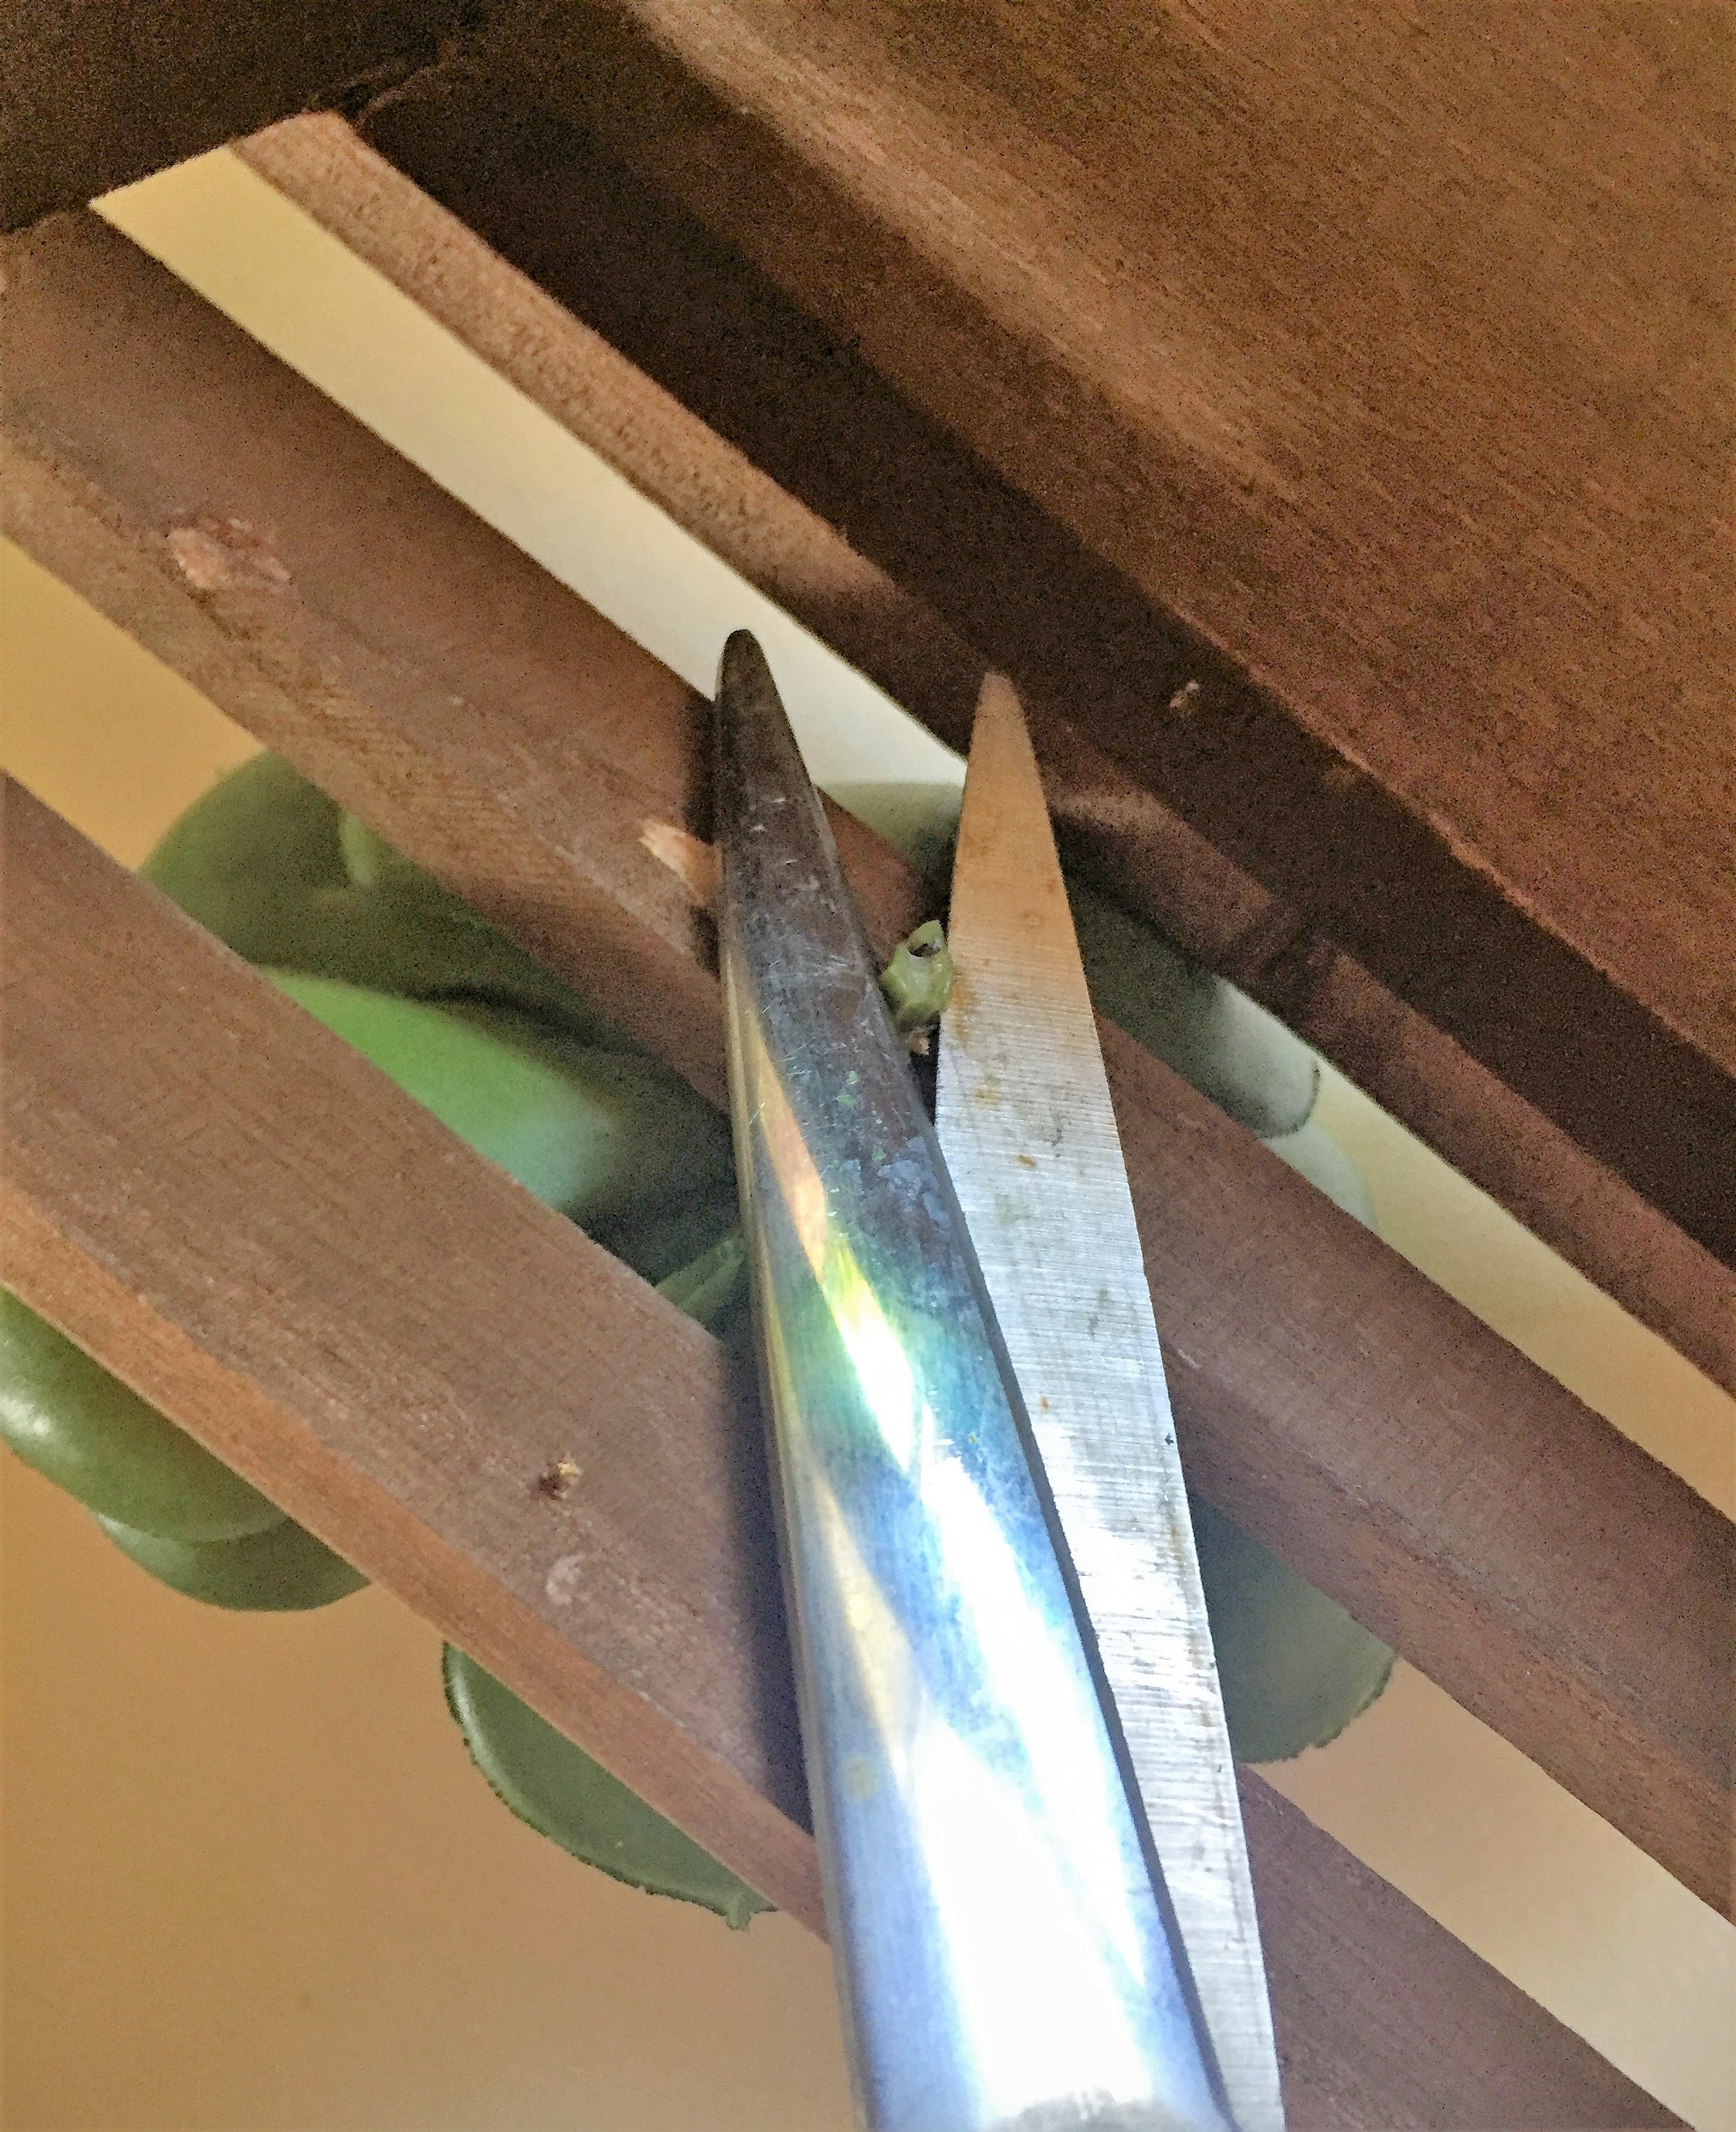
This is how much was left, after I cut it down:
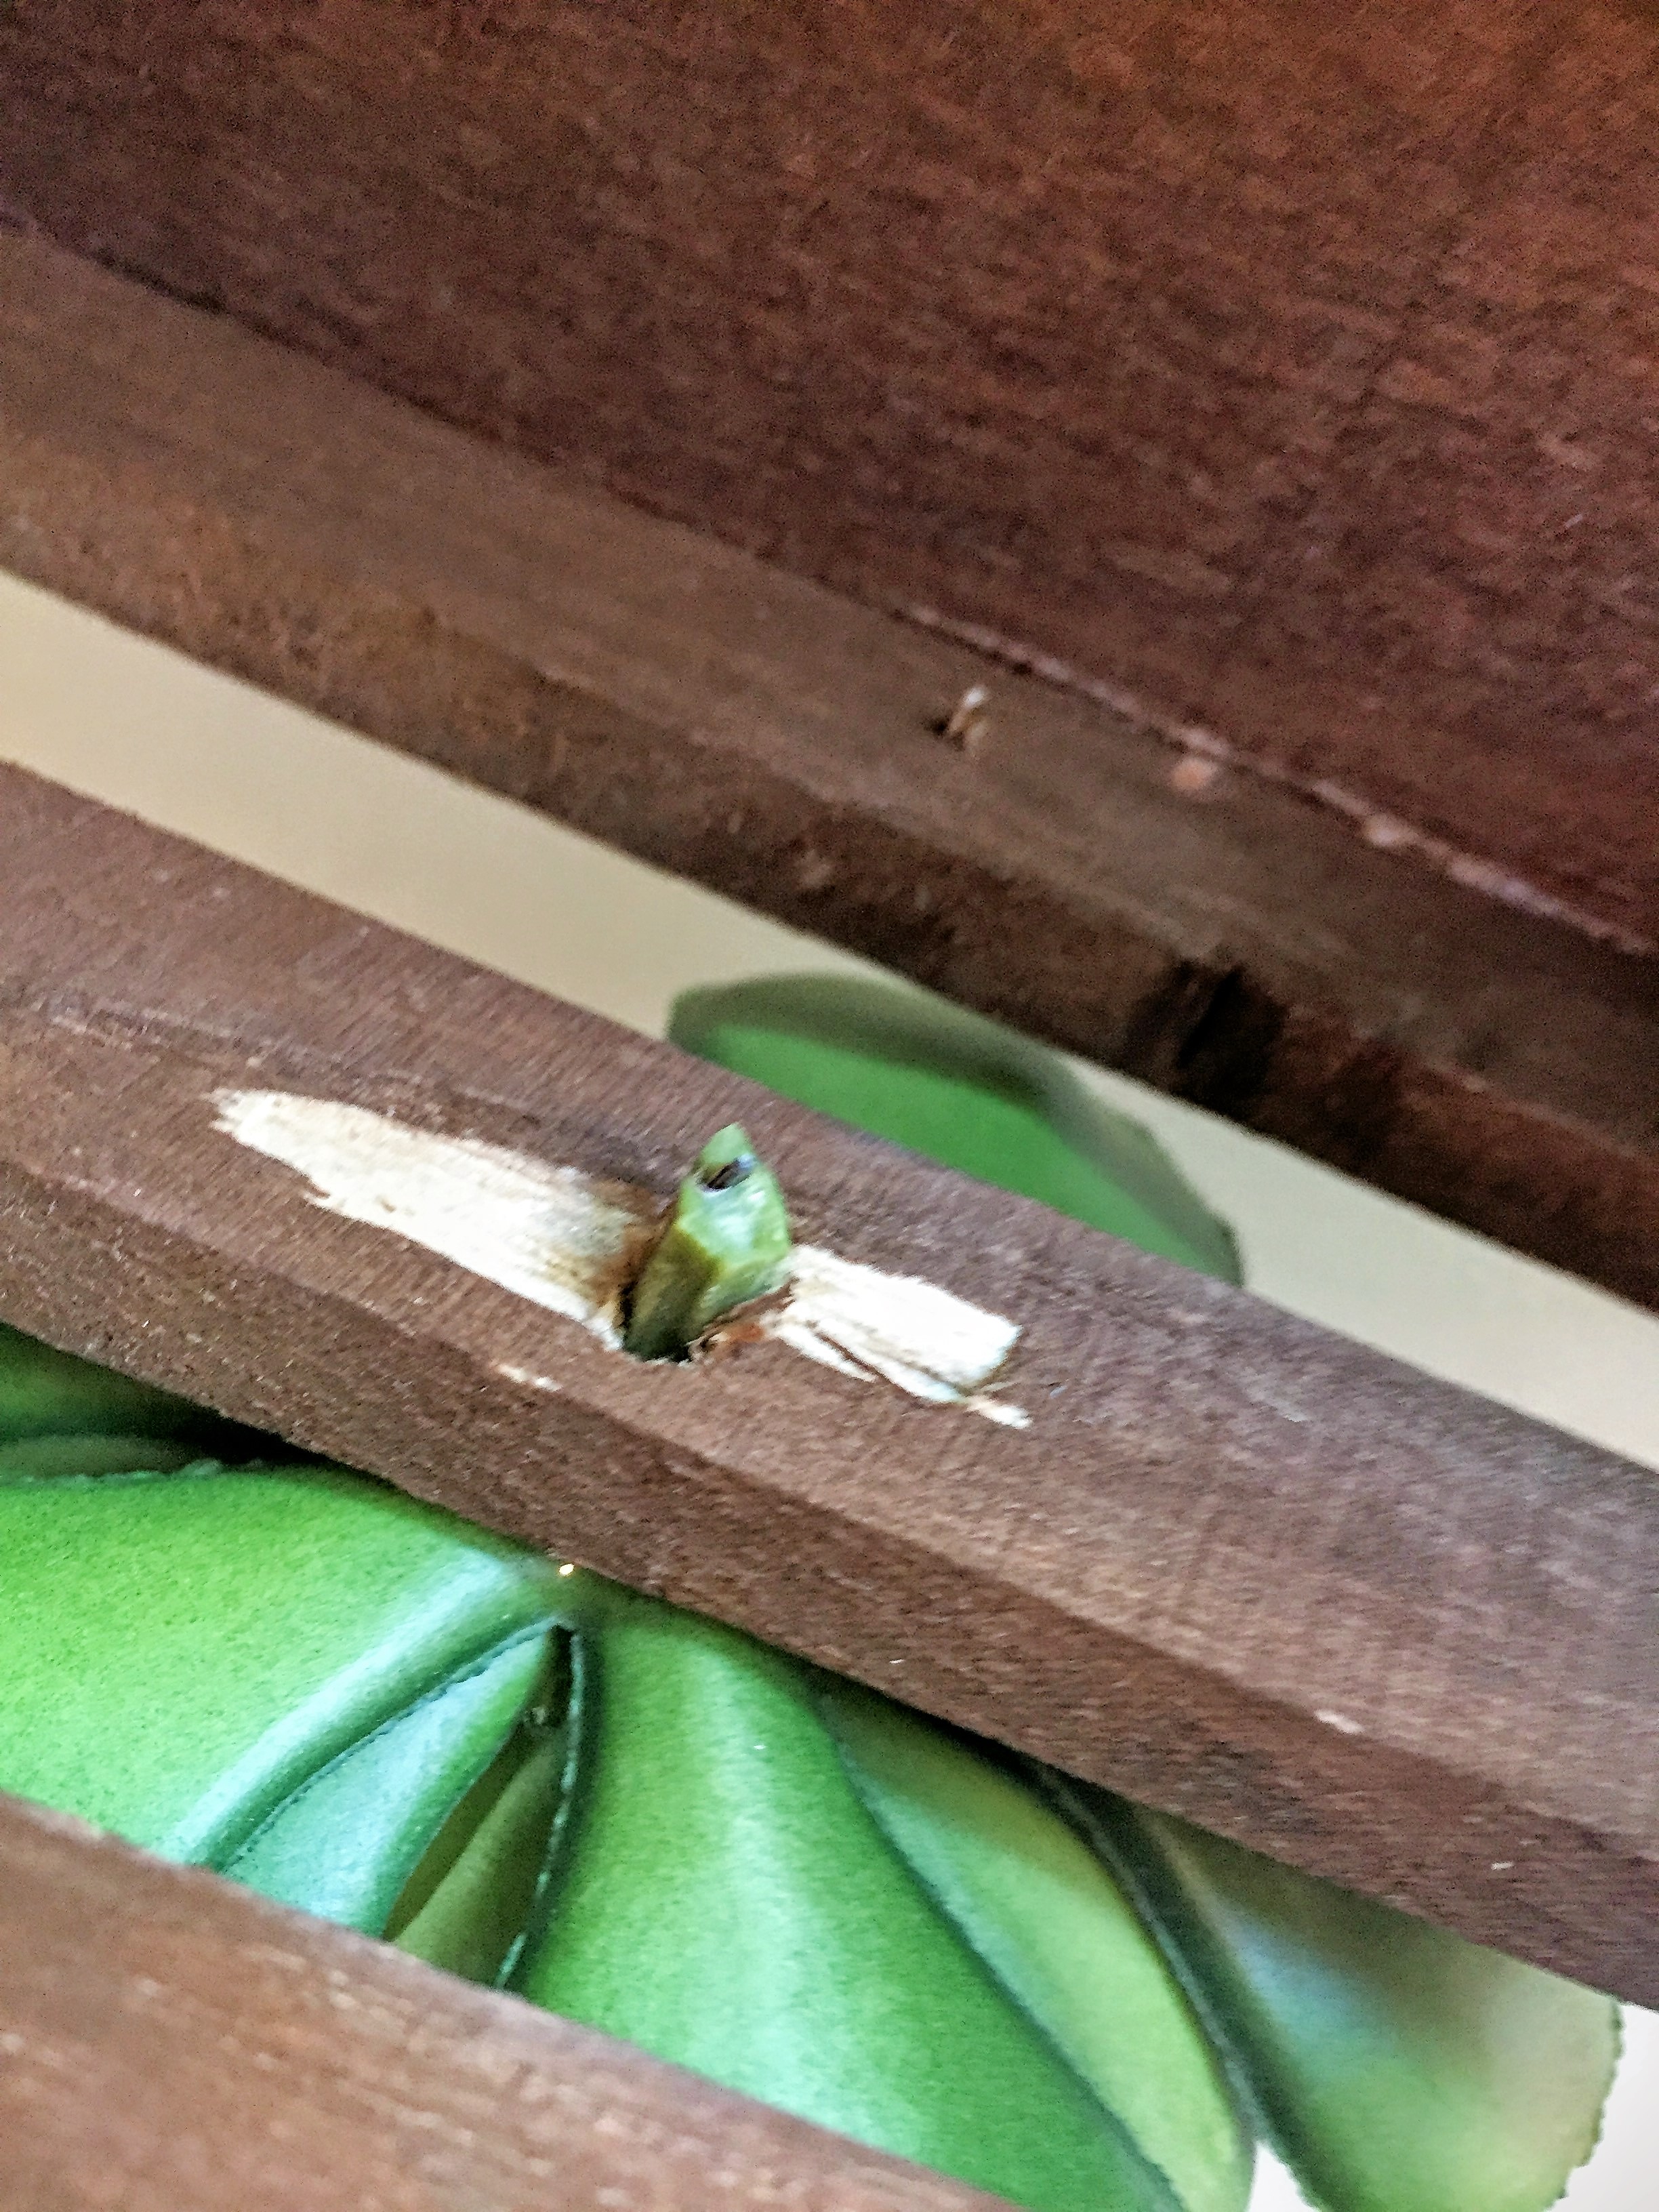
Now, take hot glue and cover the stem that’s sticking out into the interior of the box:
This will create a “protection” against the wiry stem and also ensure that the succulent holds tight over time. If you feel it’s necessary, you could also add a circle of felt as shown in the White Rose and Striped Box above, for added assurance.
The last thing you’ll need to do, is to fill with crinkle paper:
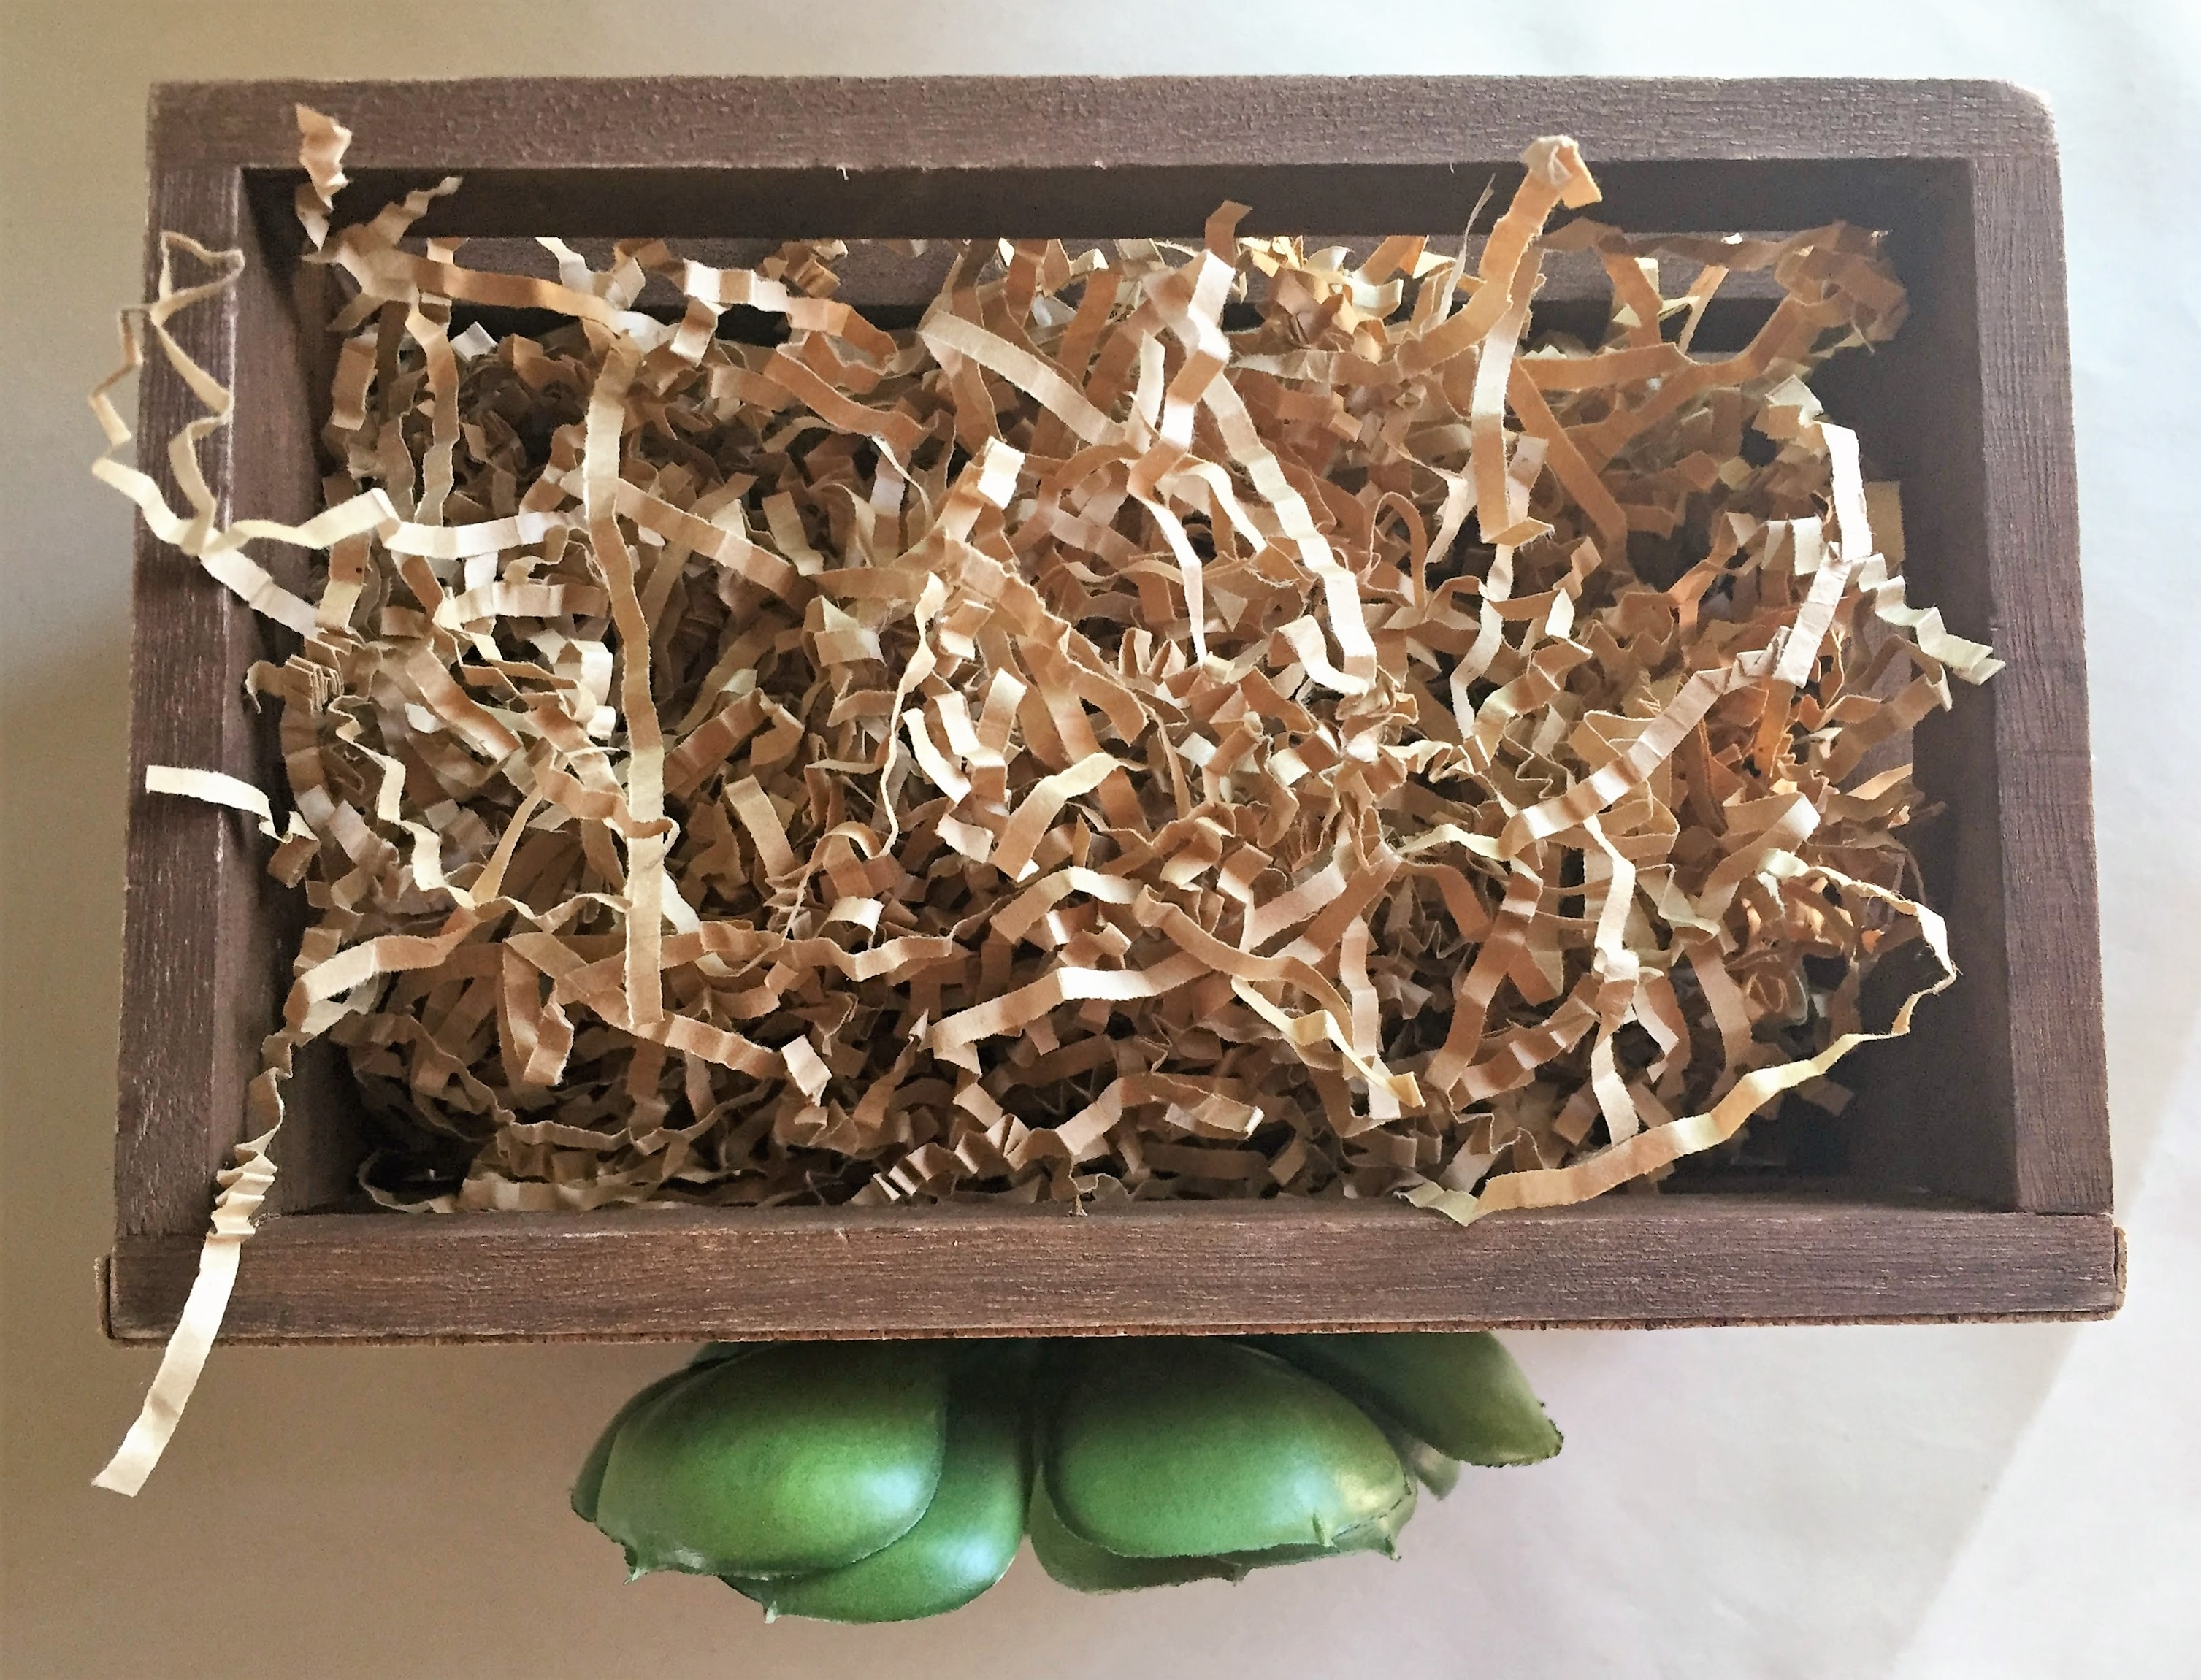
And then place your gift into it’s very pretty package!
Moving on to…
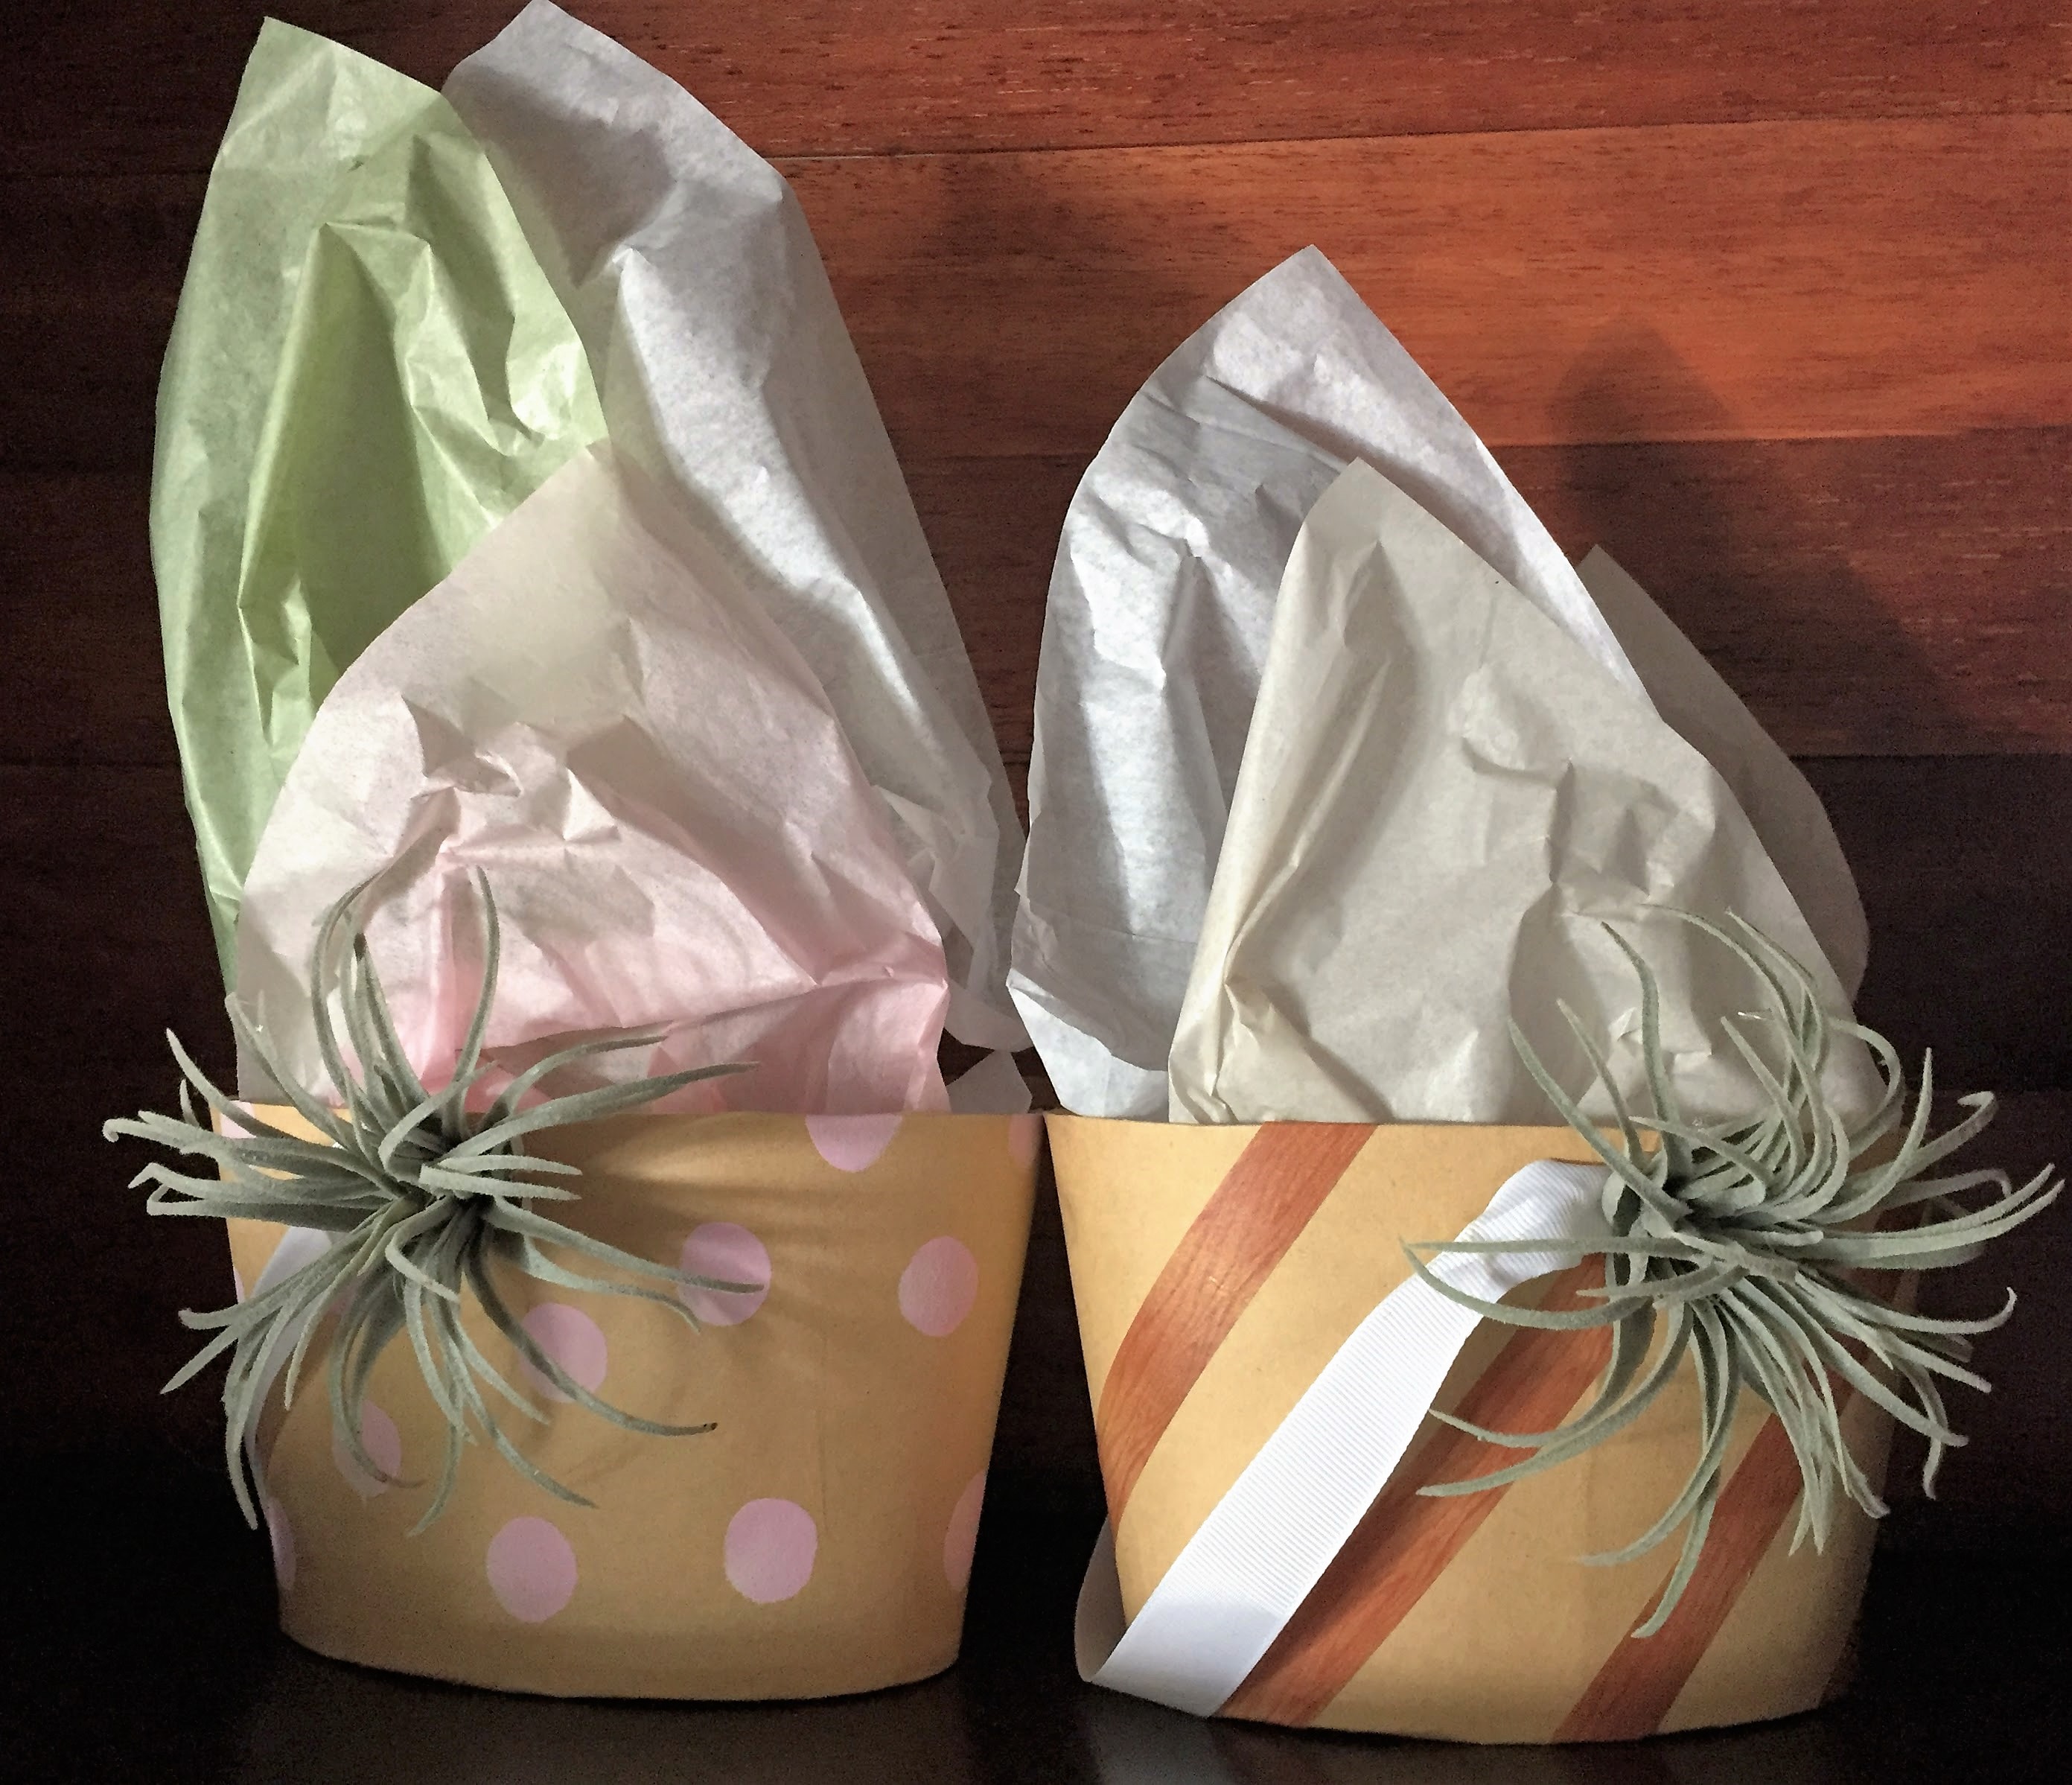
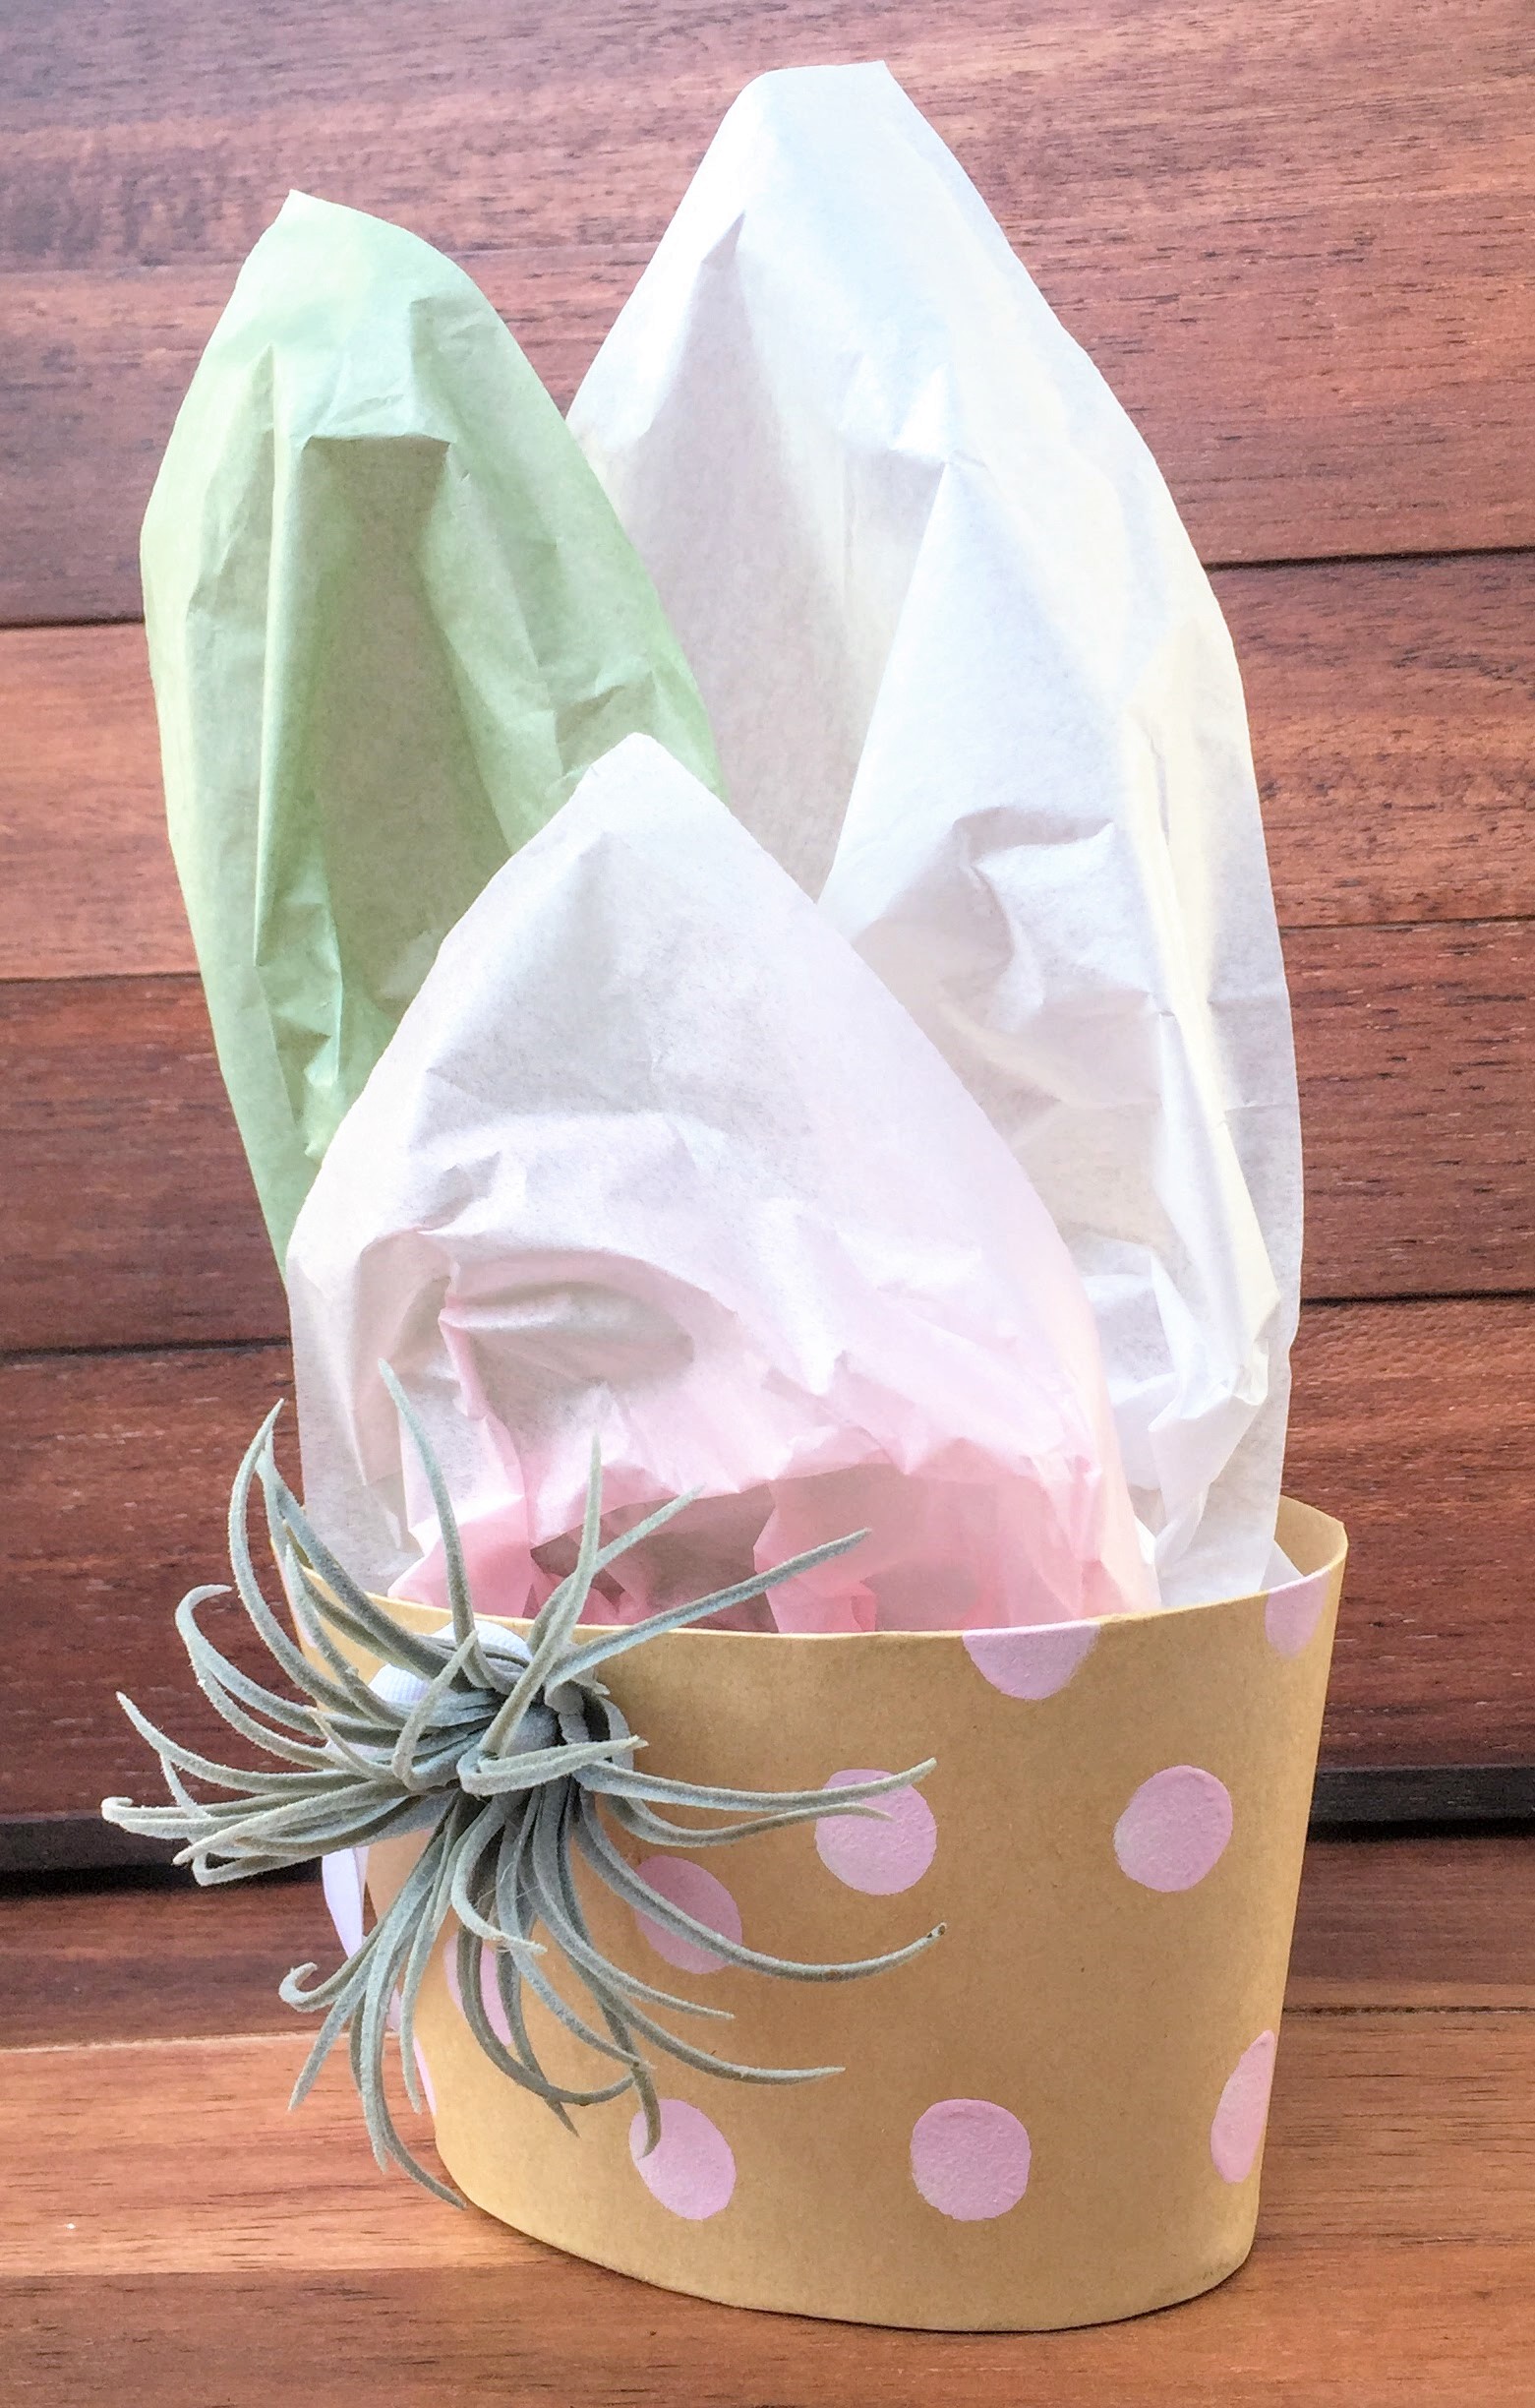
#7 The Oval Airplant Gift Boxes
I got these in the Dollar Bin at Target (once again), a while ago (once again!), so you may have to browse around to find something similar. Keep in mind that you could take the idea and apply it to any container.
The first step with the Pink Polka Dots Oval, will be to paint the dots with your Martha Stuart Round Blotter. Check basic directions for how to do this in #1 The Airplant, Woodgrain, and Polka Dot Wrap. It’s the first demonstration above.
The first step for the Wood Grain Washi Tape Oval, will be to simply add Wood Grain Washi Tape (bought at Michaels in a 3 pack of wood grain tapes) in diagonal lines around the container.
Next, you will stick the stem of your airplant through the hole already provided for the ribbon, and then cut your stem down, so that just a little bit is sticking out. Next I put a dab of hot glue on the stem on the interior and glued a bit of the ribbon up over the stem. This makes it look more finished and nothing will get caught on the wiry stem sticking out:
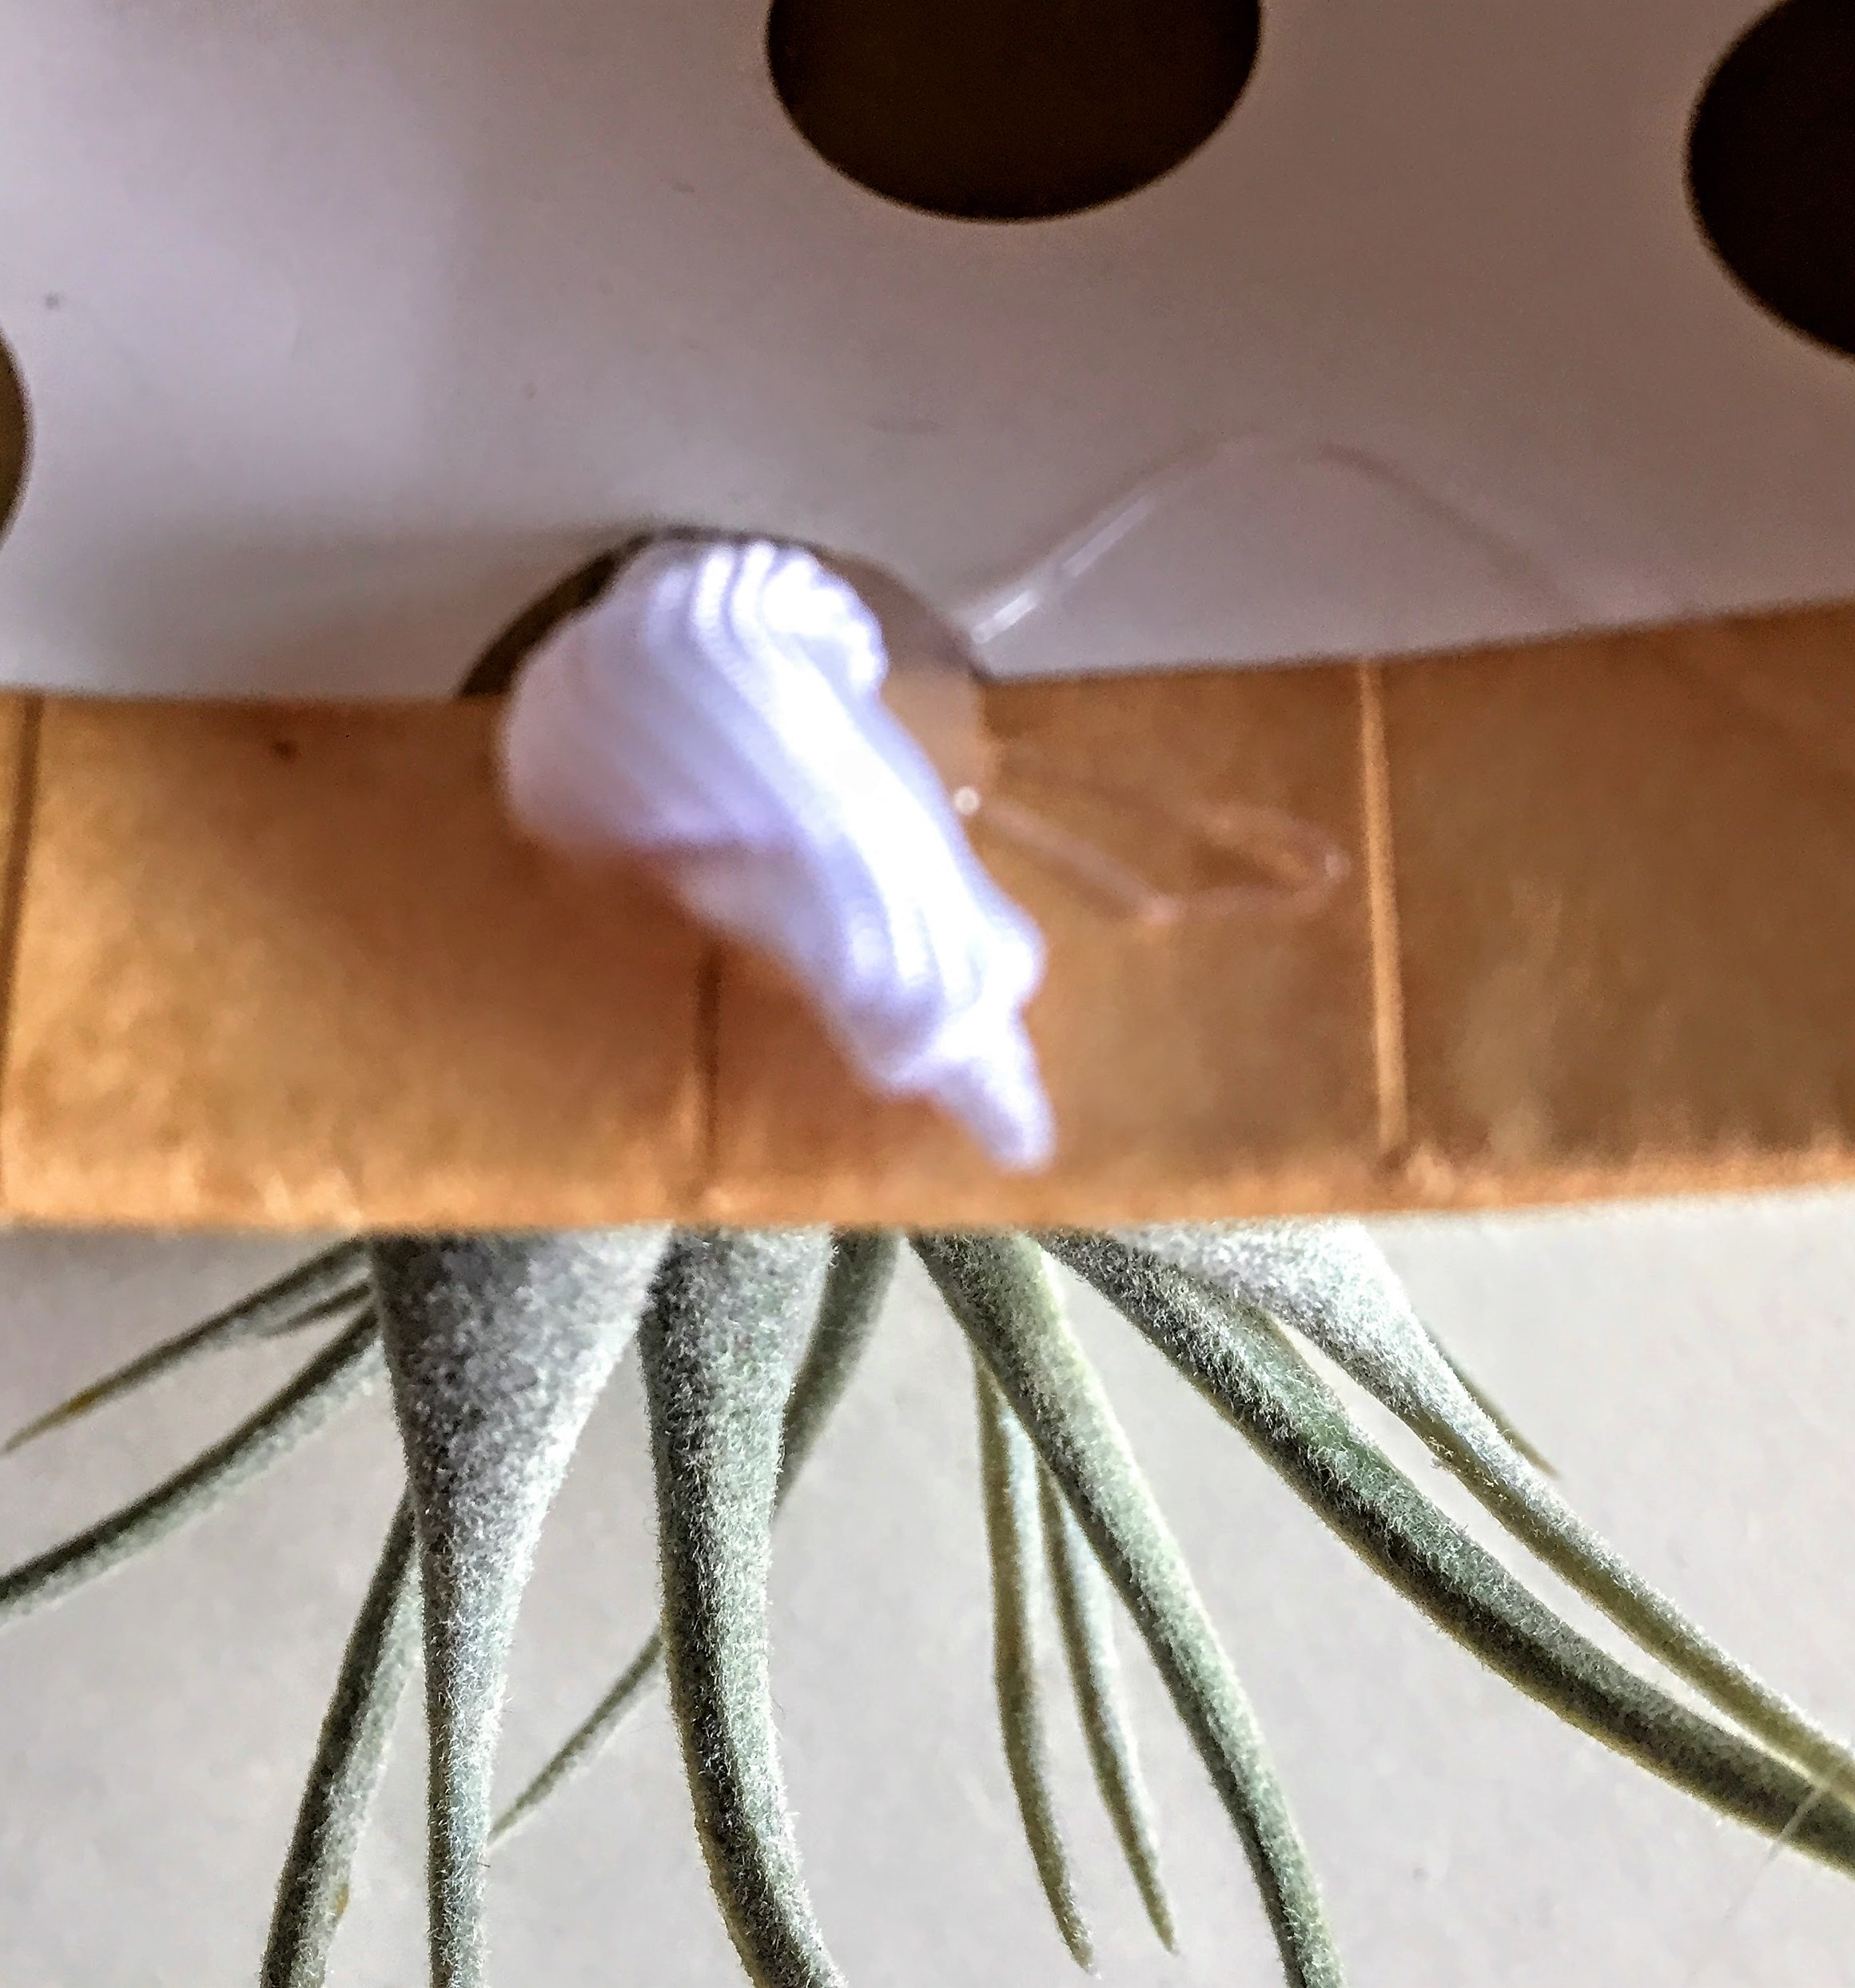
You can peel off excess glue when it has dried. Also if the airplant is a bit loosey goosey on the exterior, you may want to squeeze a little hot glue right under the base and hold it tight until it’s very stable.
Add your tissue, and you’re done! Sweet and lovely.
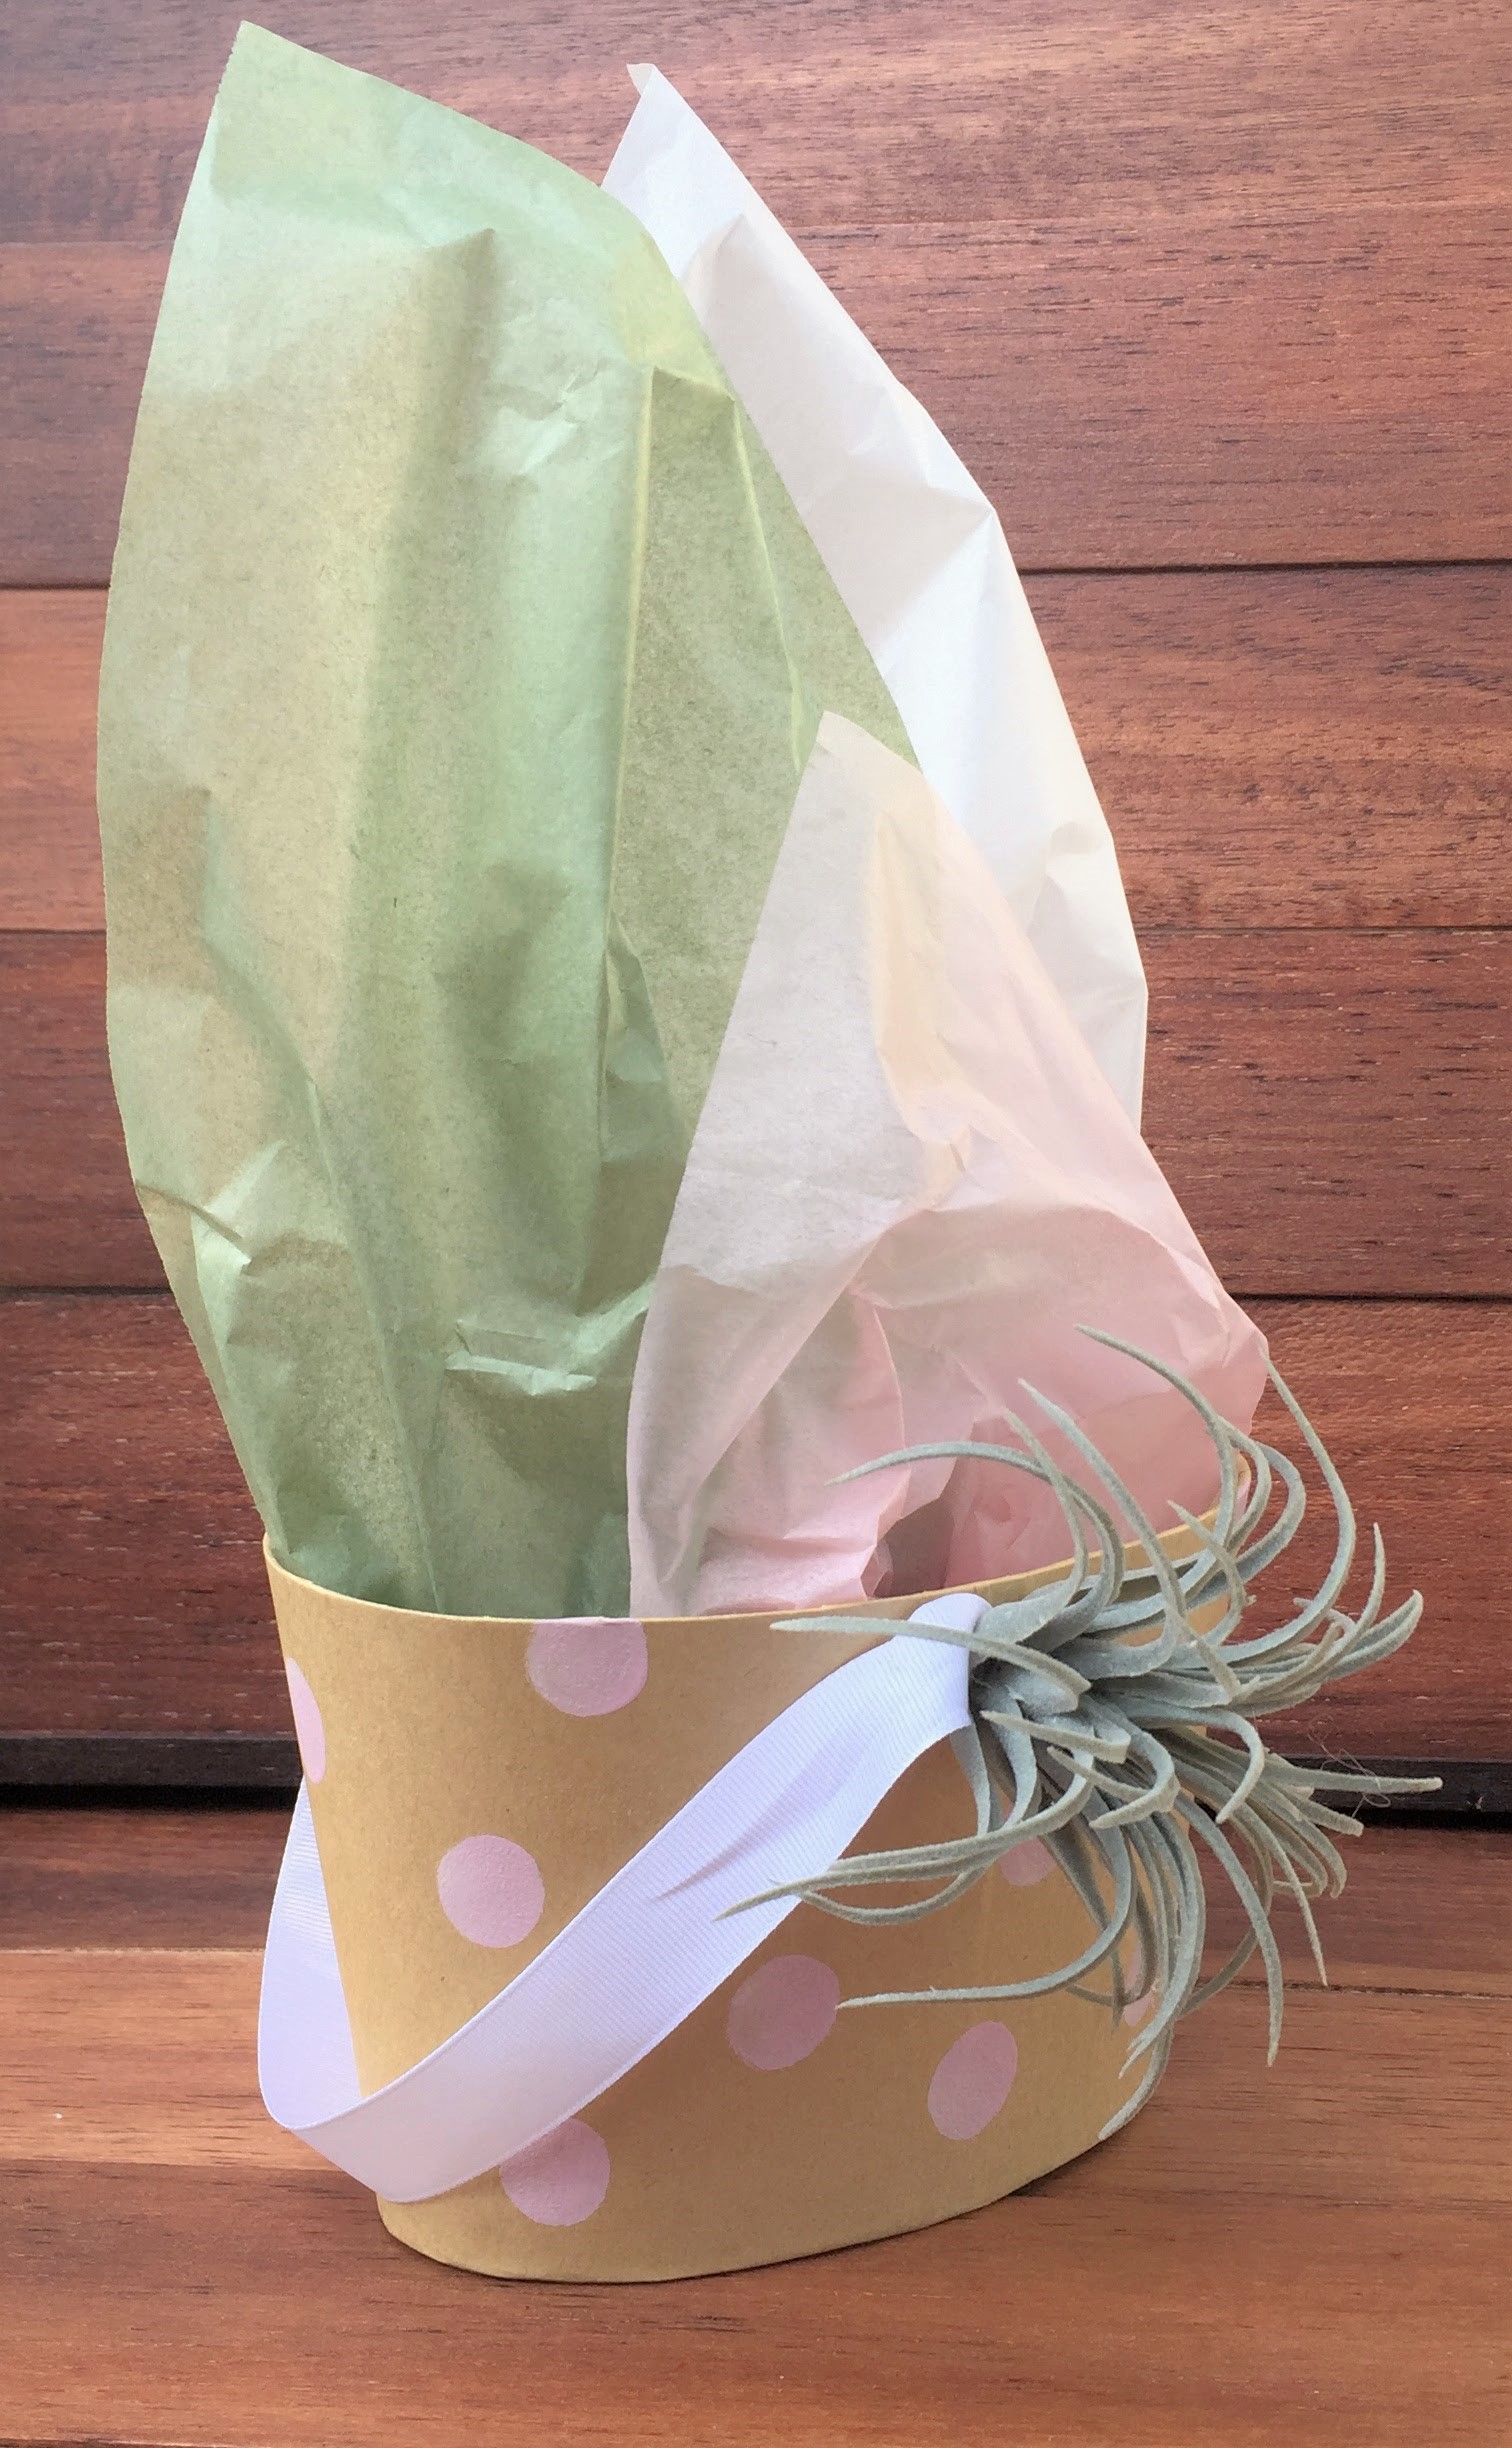
Earthy and masculine.
And last but not least…
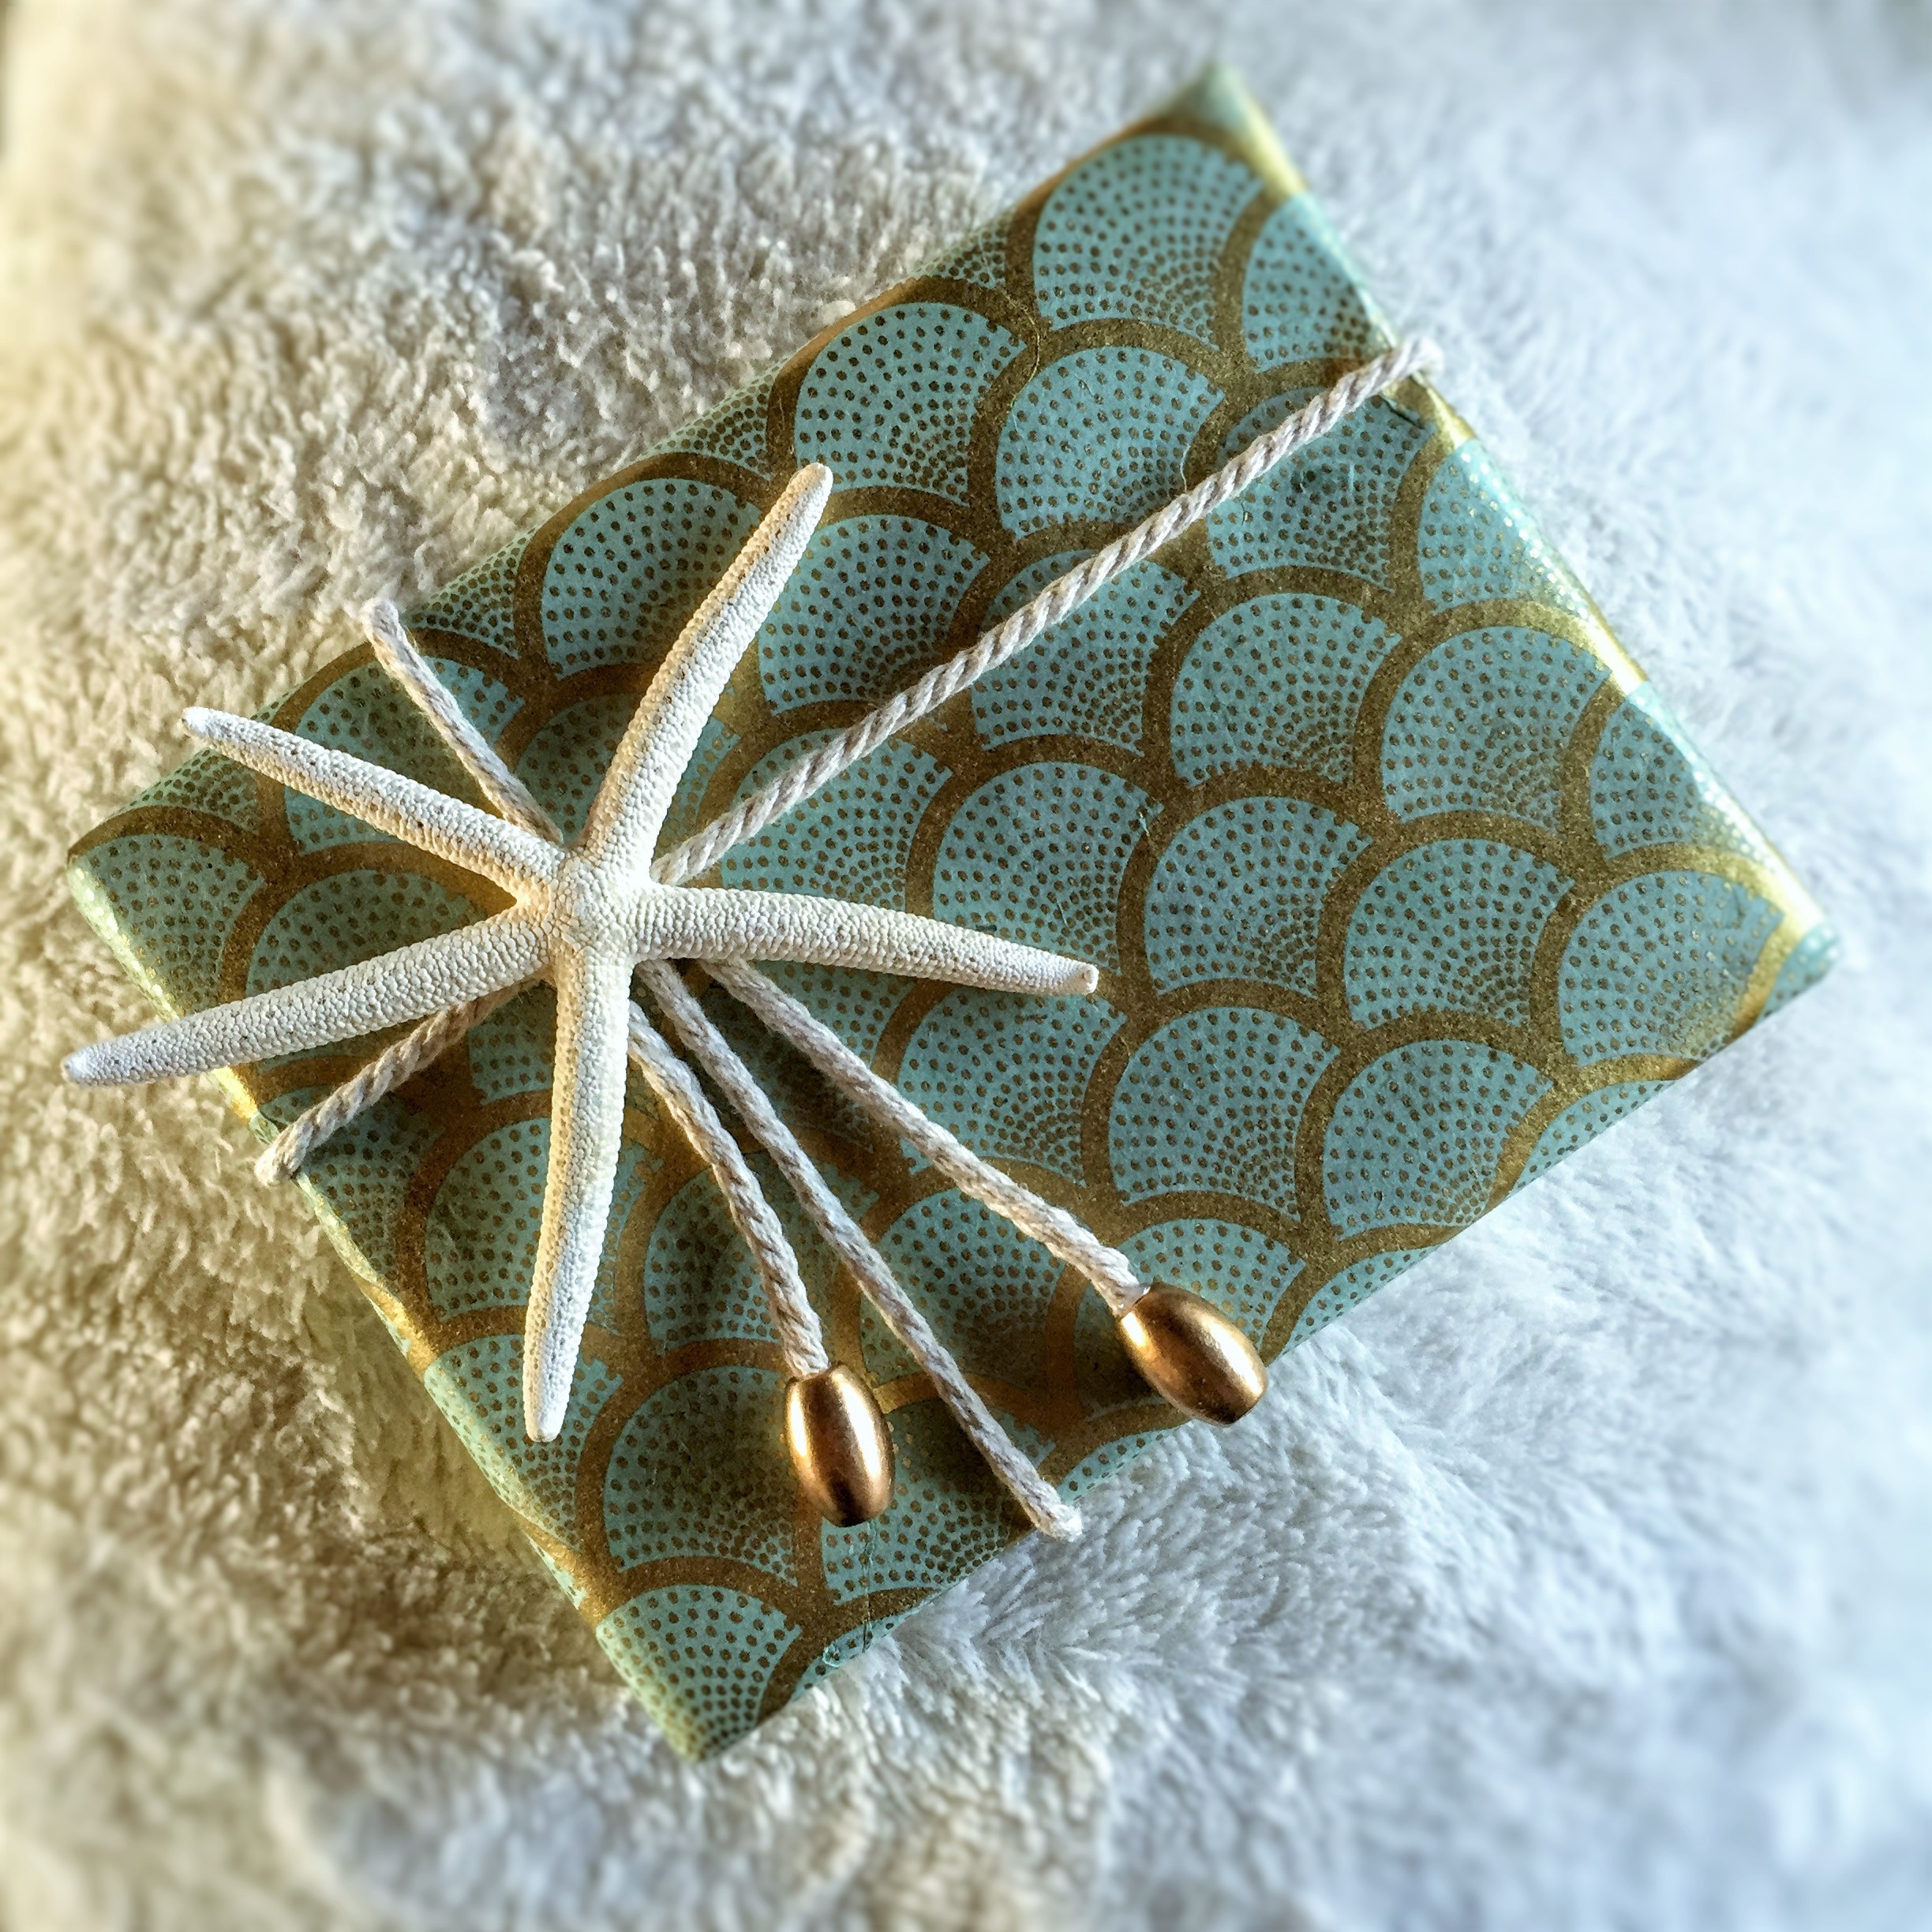
#8 The Starfish and Seashell Wrap

For this “Under the Sea” beauty, you’ll want to start with a very pretty and very beachy Seafoam Shell Paper from World Market. Wrap your gift, and then wind this thin white cording (bought at Michaels) around the gift, like you would a normal ribbon. Tie it in the front, but do NOT make a knot. Decide where you’ll be tying it, and add a dab of hot glue just underneath. Tie it tightly, pushing it down onto the hot glue, and pull down the 2 ends of your cording, so that they are laying where you want them to be. Now, put another dab of hot glue on top of the cording you have just tied, and apply your Starfish (bought in a net bag of starfish, at Michaels). Take these wood beads from JoAnne’s and paint them with this 24K Gold Spray. I put the beads onto the unsharpened end of long wood skewers, stuck the sharpened end into the grass, and sprayed! Now, place a dab of hot glue on one of the ends of your cording, take a small piece of paper or paper towel, and twist the end of the cording with the hot glue. Once it’s cooled enough, twist it again with your fingers and remove any stray strands of glue. This will create a hard end for your bead to go onto. Place another small dab of glue onto the hard end, and push it inside your bead. Repeat on the 2nd end of cording… and Voila! A gorgeous, beachy gift for any occasion!
Well! That was A LOT of gift wrapping!!! Hopefully, you got some ideas and your creative juices are flowing. Anything will work on these gifts. Look around and get creative. And if you do, please send me your ideas. I would love to see your renditions!
Until next time…
Happy Nesting.
Kirstie xo