
Welcome to the Craine’s Nest!
Lately, I’ve been dreaming about Summer. Mostly the cooler, younger summers of my teen years spent on the Central Coast of California. I filled many an afternoon hanging out with friends, getting beautifully bronzed via baby oil (it was the 80’s, what can I say?!!!), and swimming in the salty ocean water. Not a care in the world… it was REALLY fun and sort of heavenly. Free as a bird and completely oblivious- you really don’t realize that kind of freedom ’til it’s gone, do you?!!! Soft warm sand, gentle ocean waves, seagulls flying free… I have sweet and happy memories of those sun-kissed days!
Well… life has forged ahead, and we have all of the normal distractions: kids, a dog, baseball and soccer games, mouths to feed, and bills to pay! Daily life is great and it’s fun, but sometimes the hustle leaves me feeling a little numb and uninspired. That’s when I find that long lost inspiration through creativity. I also find it in nature, books and reading, and sometimes, memories. It motivates me to look back on exciting times in my life when I was feeling my strongest and most beautiful. Times when change was in full swing and things were happening. Learning to ride horses when I was 8, the time right before I moved to Argentina (and then , actually being there) when my every moment was to eat, sleep, and breathe Tango (I was 29 at the time), getting married and giving birth to my kids, to name a few. This year, I’ve been contemplating different phases of my life in some depth, and every time I get through one of these periods, I’m inspired to make something else with these beautiful Seagulls. Maybe they’re my Spirit Animal… or maybe just looking at them helps me dream about all the things that I’ve yet to accomplish and all the places I’ve still to go. Not sure why they keep showing up, but they are, without a doubt, my current source of beautiful inspiration!
For me, seagulls embody the past, present, and future, all in one easy breezy free-flying creature. I watch them and I see life: nostalgia, a healthy dose of happiness and satisfaction, lots of hope and opportunity. They motivate me to embrace my surroundings and create. Being able to make something beautiful out of a few simple items, or changing the feeling in my home, by “creating an environment”, has brought me satisfaction my whole life. As an added benefit, getting creative is relaxing and stress relieving. Like exercise, it’s a great way to unwind, and as I get older and more busy, it’s become something that I rely on. It makes my life happier, healthier, and more satisfying. It adds texture. Working on projects helps me to unravel both mentally and physically, and allows me to see more clearly into the nooks and corners. I understand what’s bothering me, what’s motivating me, what I need to hold on to, and what needs to be released. Everything opens up, untying knots that have tangled, and energy is free to expand. It feels good and I want to share it! I encourage you to let go of the stresses of your day and create something… maybe these beautiful birds! Or anything else that makes your heart feel free and open.
They’re obviously not going to cure your every symptom, but I swear, just looking at these little guys makes me breathe more deeply. Growing up, my parents had a lot of small seagull sculptures on desktops and dressers around our house. This one, this one, and especially this one, give me the feeling that I remember. They also had pieces similar to this abstract Mid-Century Sculpture, and I think this Horse Wall Sculpture by Curtis Jere, is something they would’ve liked. They had a giant cabinet/ sideboard that housed all their records and record player, much like this piece. It’s not that our house was filled with art, or that it was museum-like, in any way. My parents had great taste for sure, but 3 little girls, a dog, and a couple of cats later, made it mostly a home full of kids and animals. It was a down-to-earth environment with evidence scattered here and there, of the tastes they held before all the chaos. Even though these sculptures may have been buried beneath piles of toys or clothes, they definitely made an impression on me. I remember sitting and staring at them and wondering what they were. I’m not sure that I thought they were beautiful at the time, but they definitely planted seeds that grew into much of what I love today, in art and home decor. My dad also had a copy of Jonathan Livingston Seagull lying around that always intrigued me. There was definitely a Seagull thing going on in our house, that made its way into my heart and soul.
While looking back with nostalgia and joy on all that I’ve experienced, I’m also finally learning slowly but surely, to be more grounded in the present. So much has been lost, so much has been gained. I’m realizing more than ever, that I need to take hold of life and run with it, because seriously… there’s no time like right now! Shed the past. Do what YOU want and don’t let anyone tell you you can’t. Stop listening to the people that tell you you’re in the wrong place at the wrong time- you are right where you’re meant to be. Period. Now that we’ve left that nonsense behind… are you ready? Let’s fly!
…Soft warm sand, gentle ocean waves, birds flying free… are you with me? I’m feeling more relaxed already.

Ok! Enough with all the chitter chatter! Let’s get to work. Here is what you will need:
- These Seagulls that you can buy on Etsy.
- Big Sharp Scissors. Fiskars Razor Edged are awesome. Joanne’s.
- Little Fine-tuning Scissors. Fiskars orange handles. Joanne’s.
- Sand Paper.
- These Bottle Corks from Michael’s or any cork/corks you want to use. I like this bag because it has a variety of sizes for different bottles.
- A wire hanger. Your closet.
- Wire cutters. Any wire cutters will do. Michaels.
- Sand Paper. I use 3M P320 Grit. Very fine and definitely the best for getting those little flaws off the seagull with no scratch marks. You can find it anywhere from Michael’s to Home Depot to Lowe’s.
- A lighter or gas stove- sounds dangerous!
- A hammer.
- A nail.
- Spackle (just in case!).
- E6000 Glue. Michael’s.
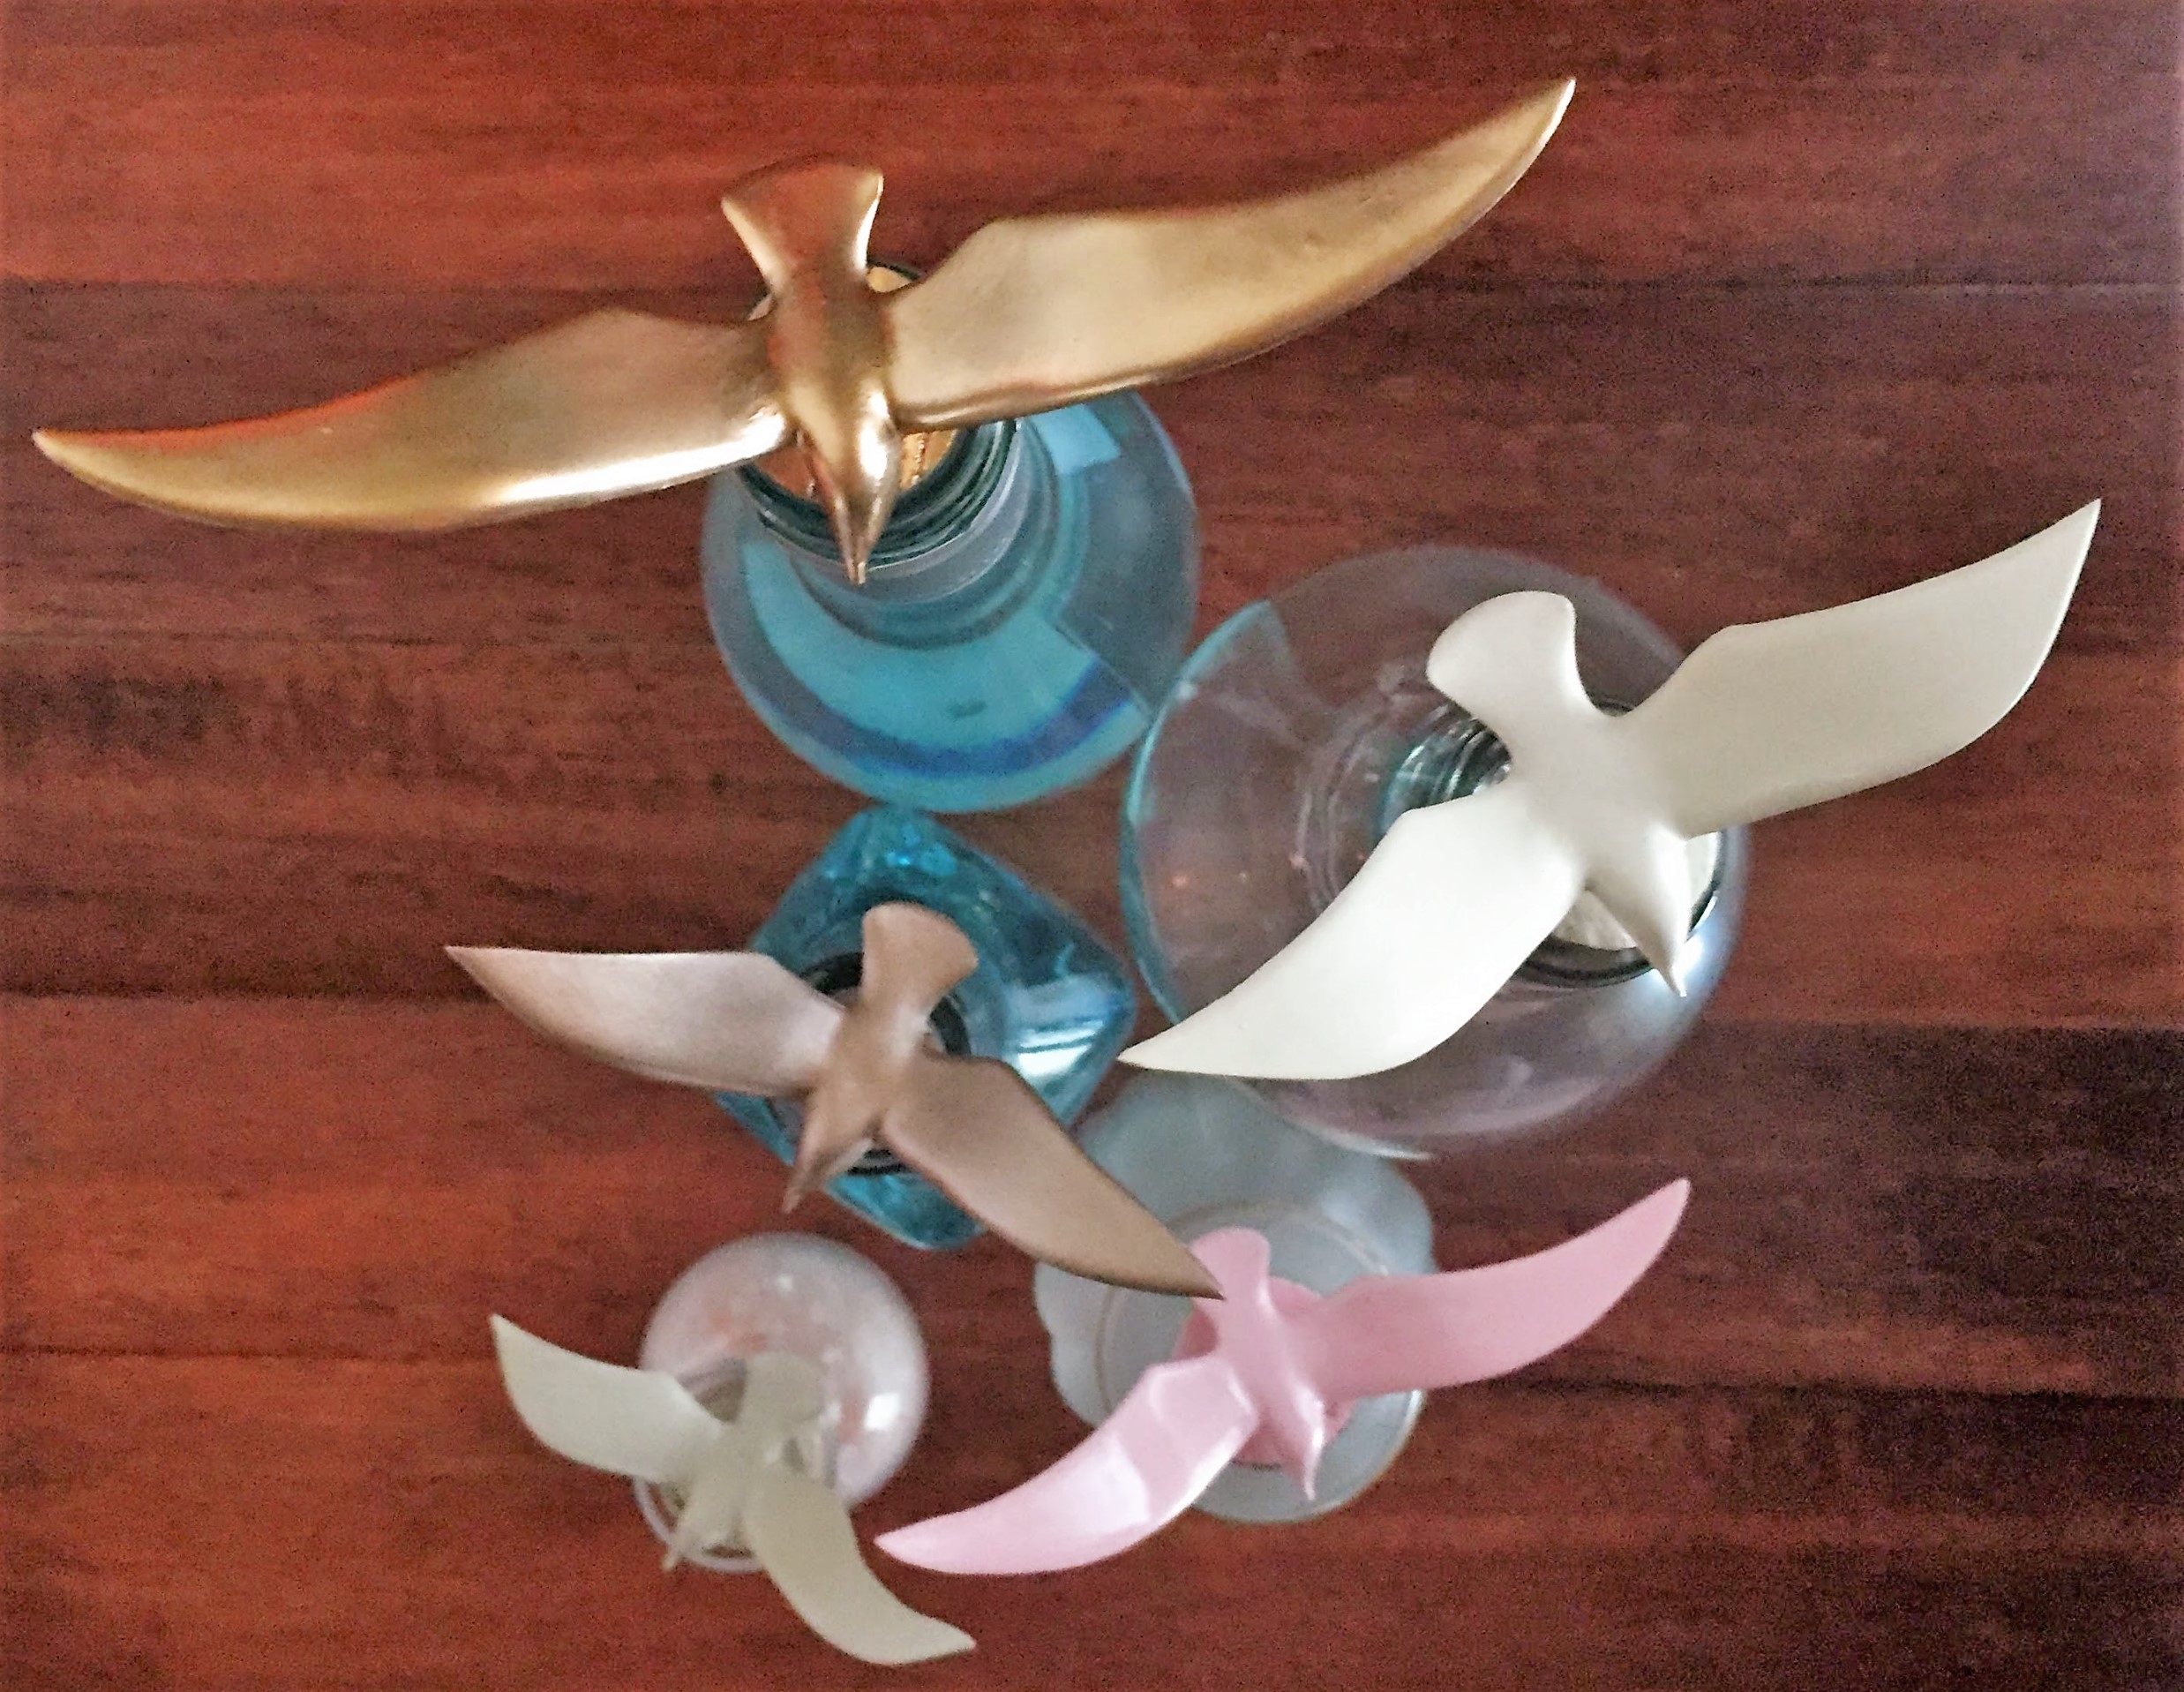
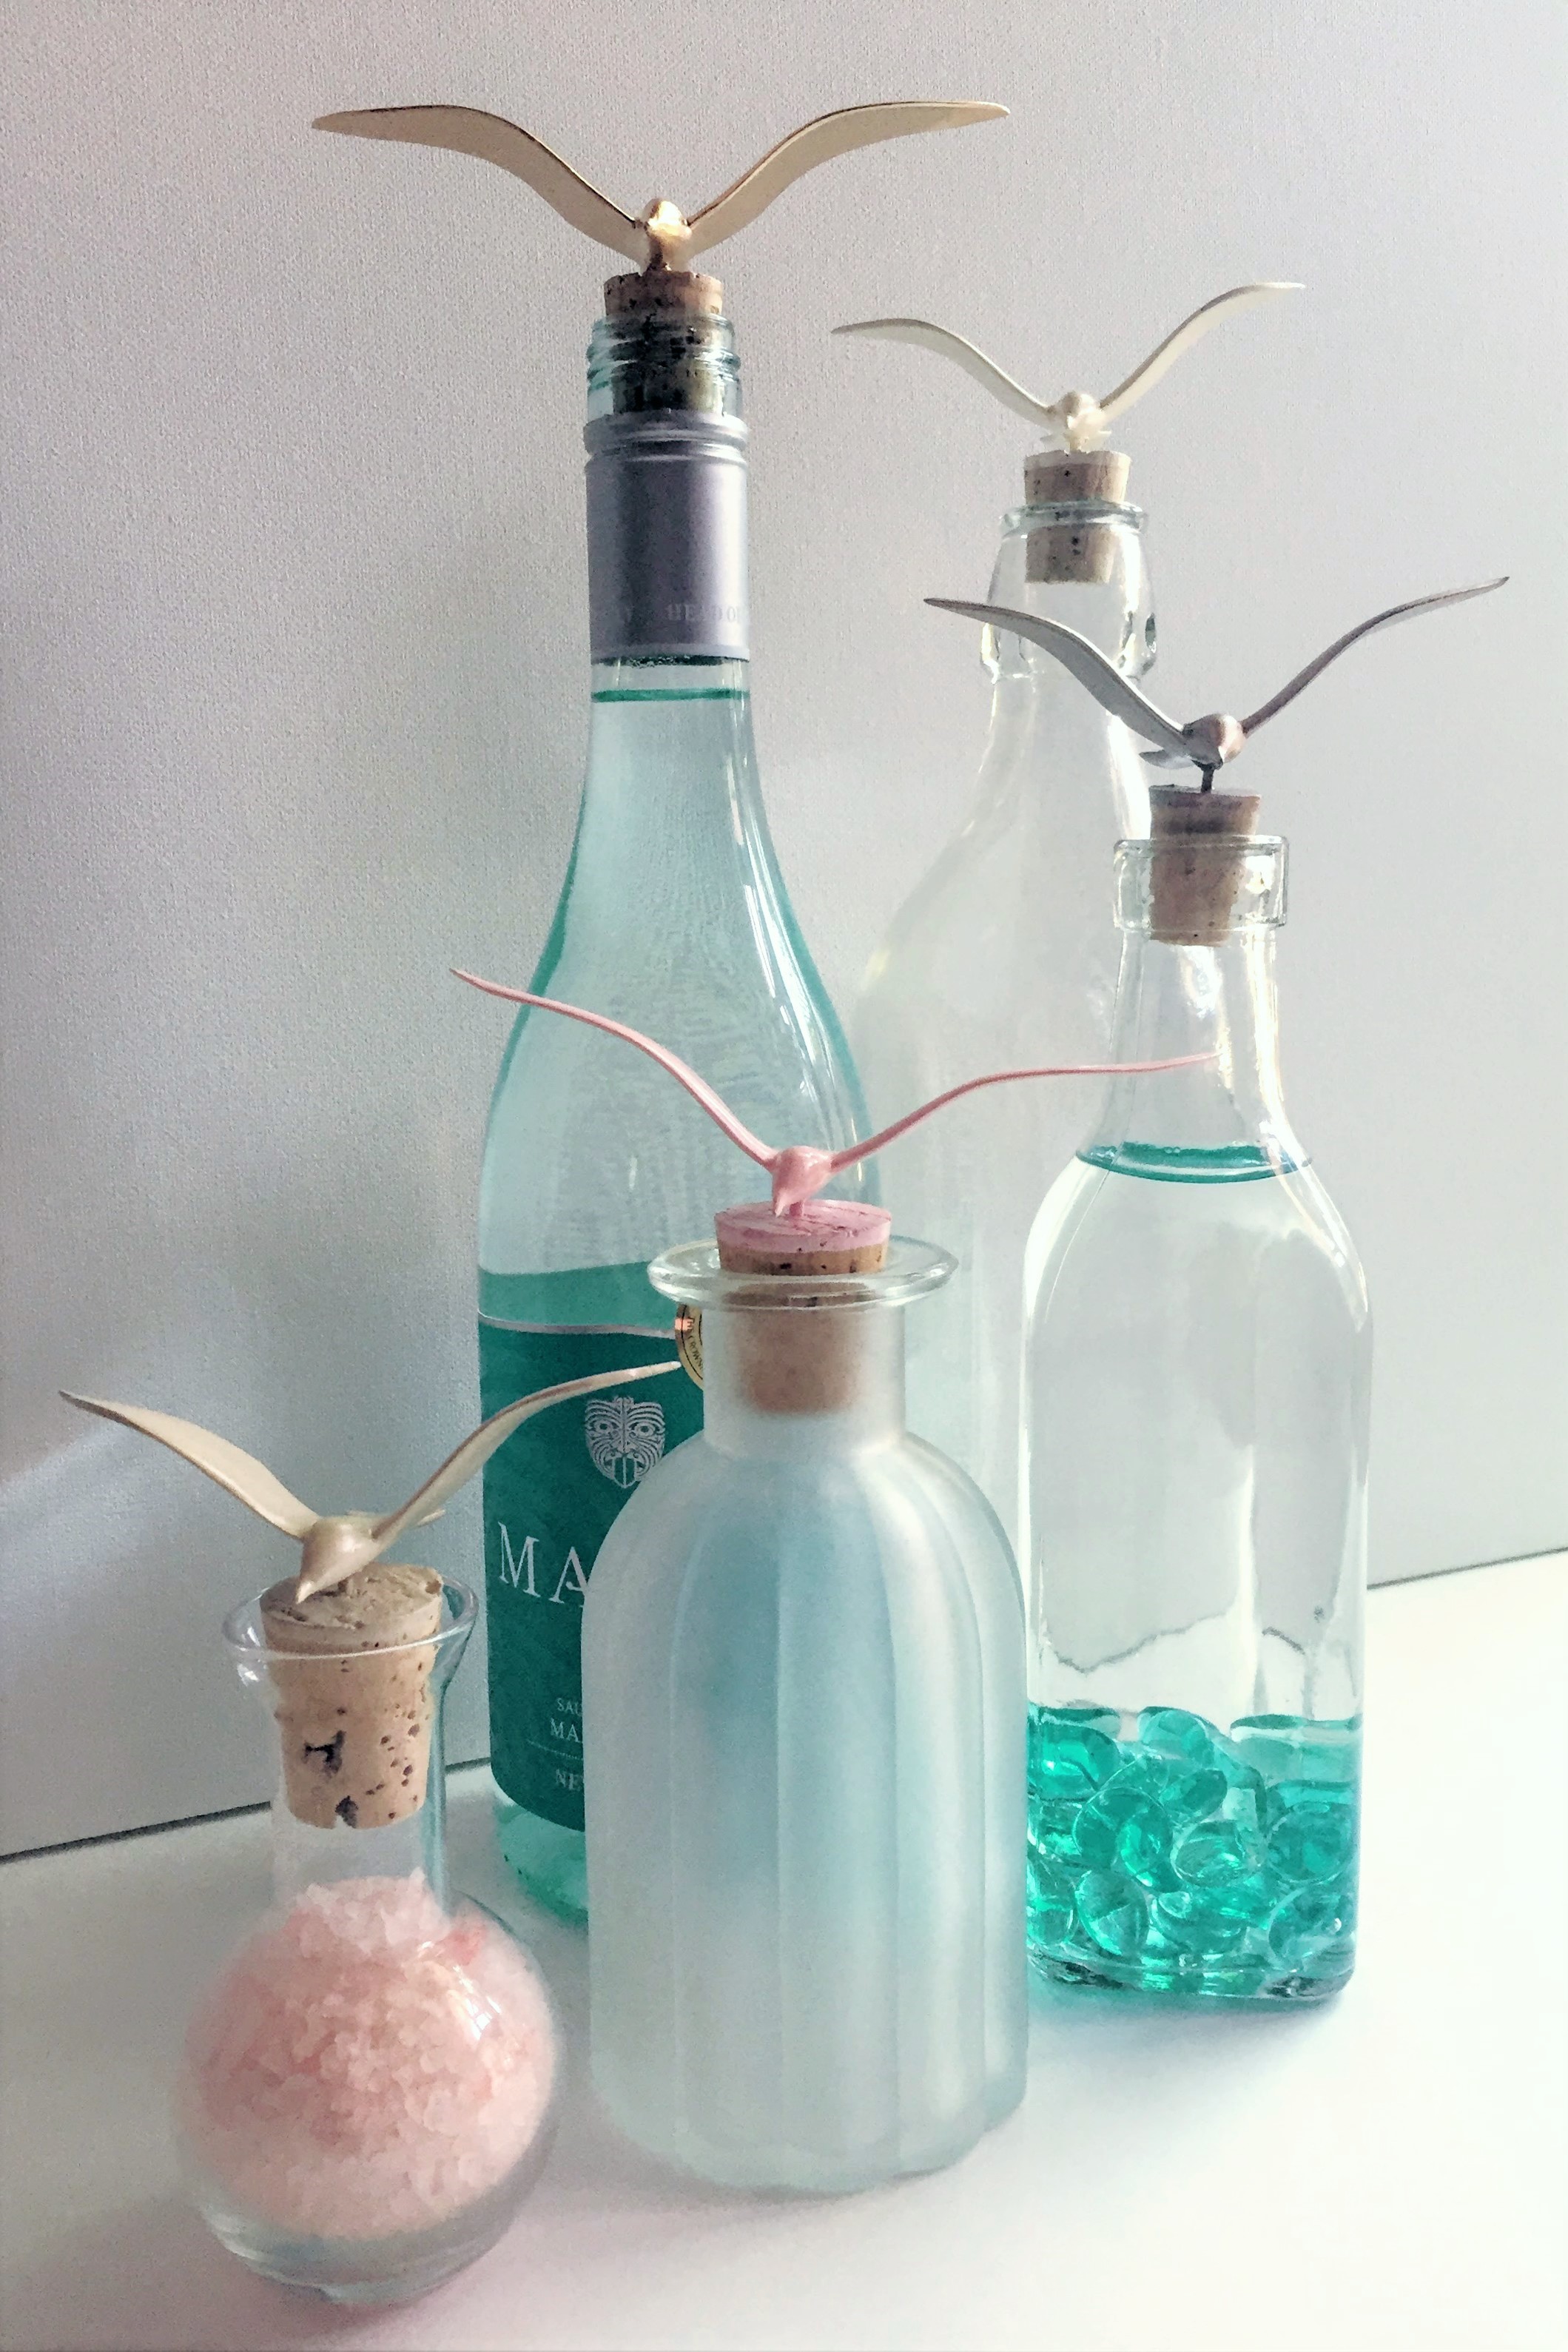
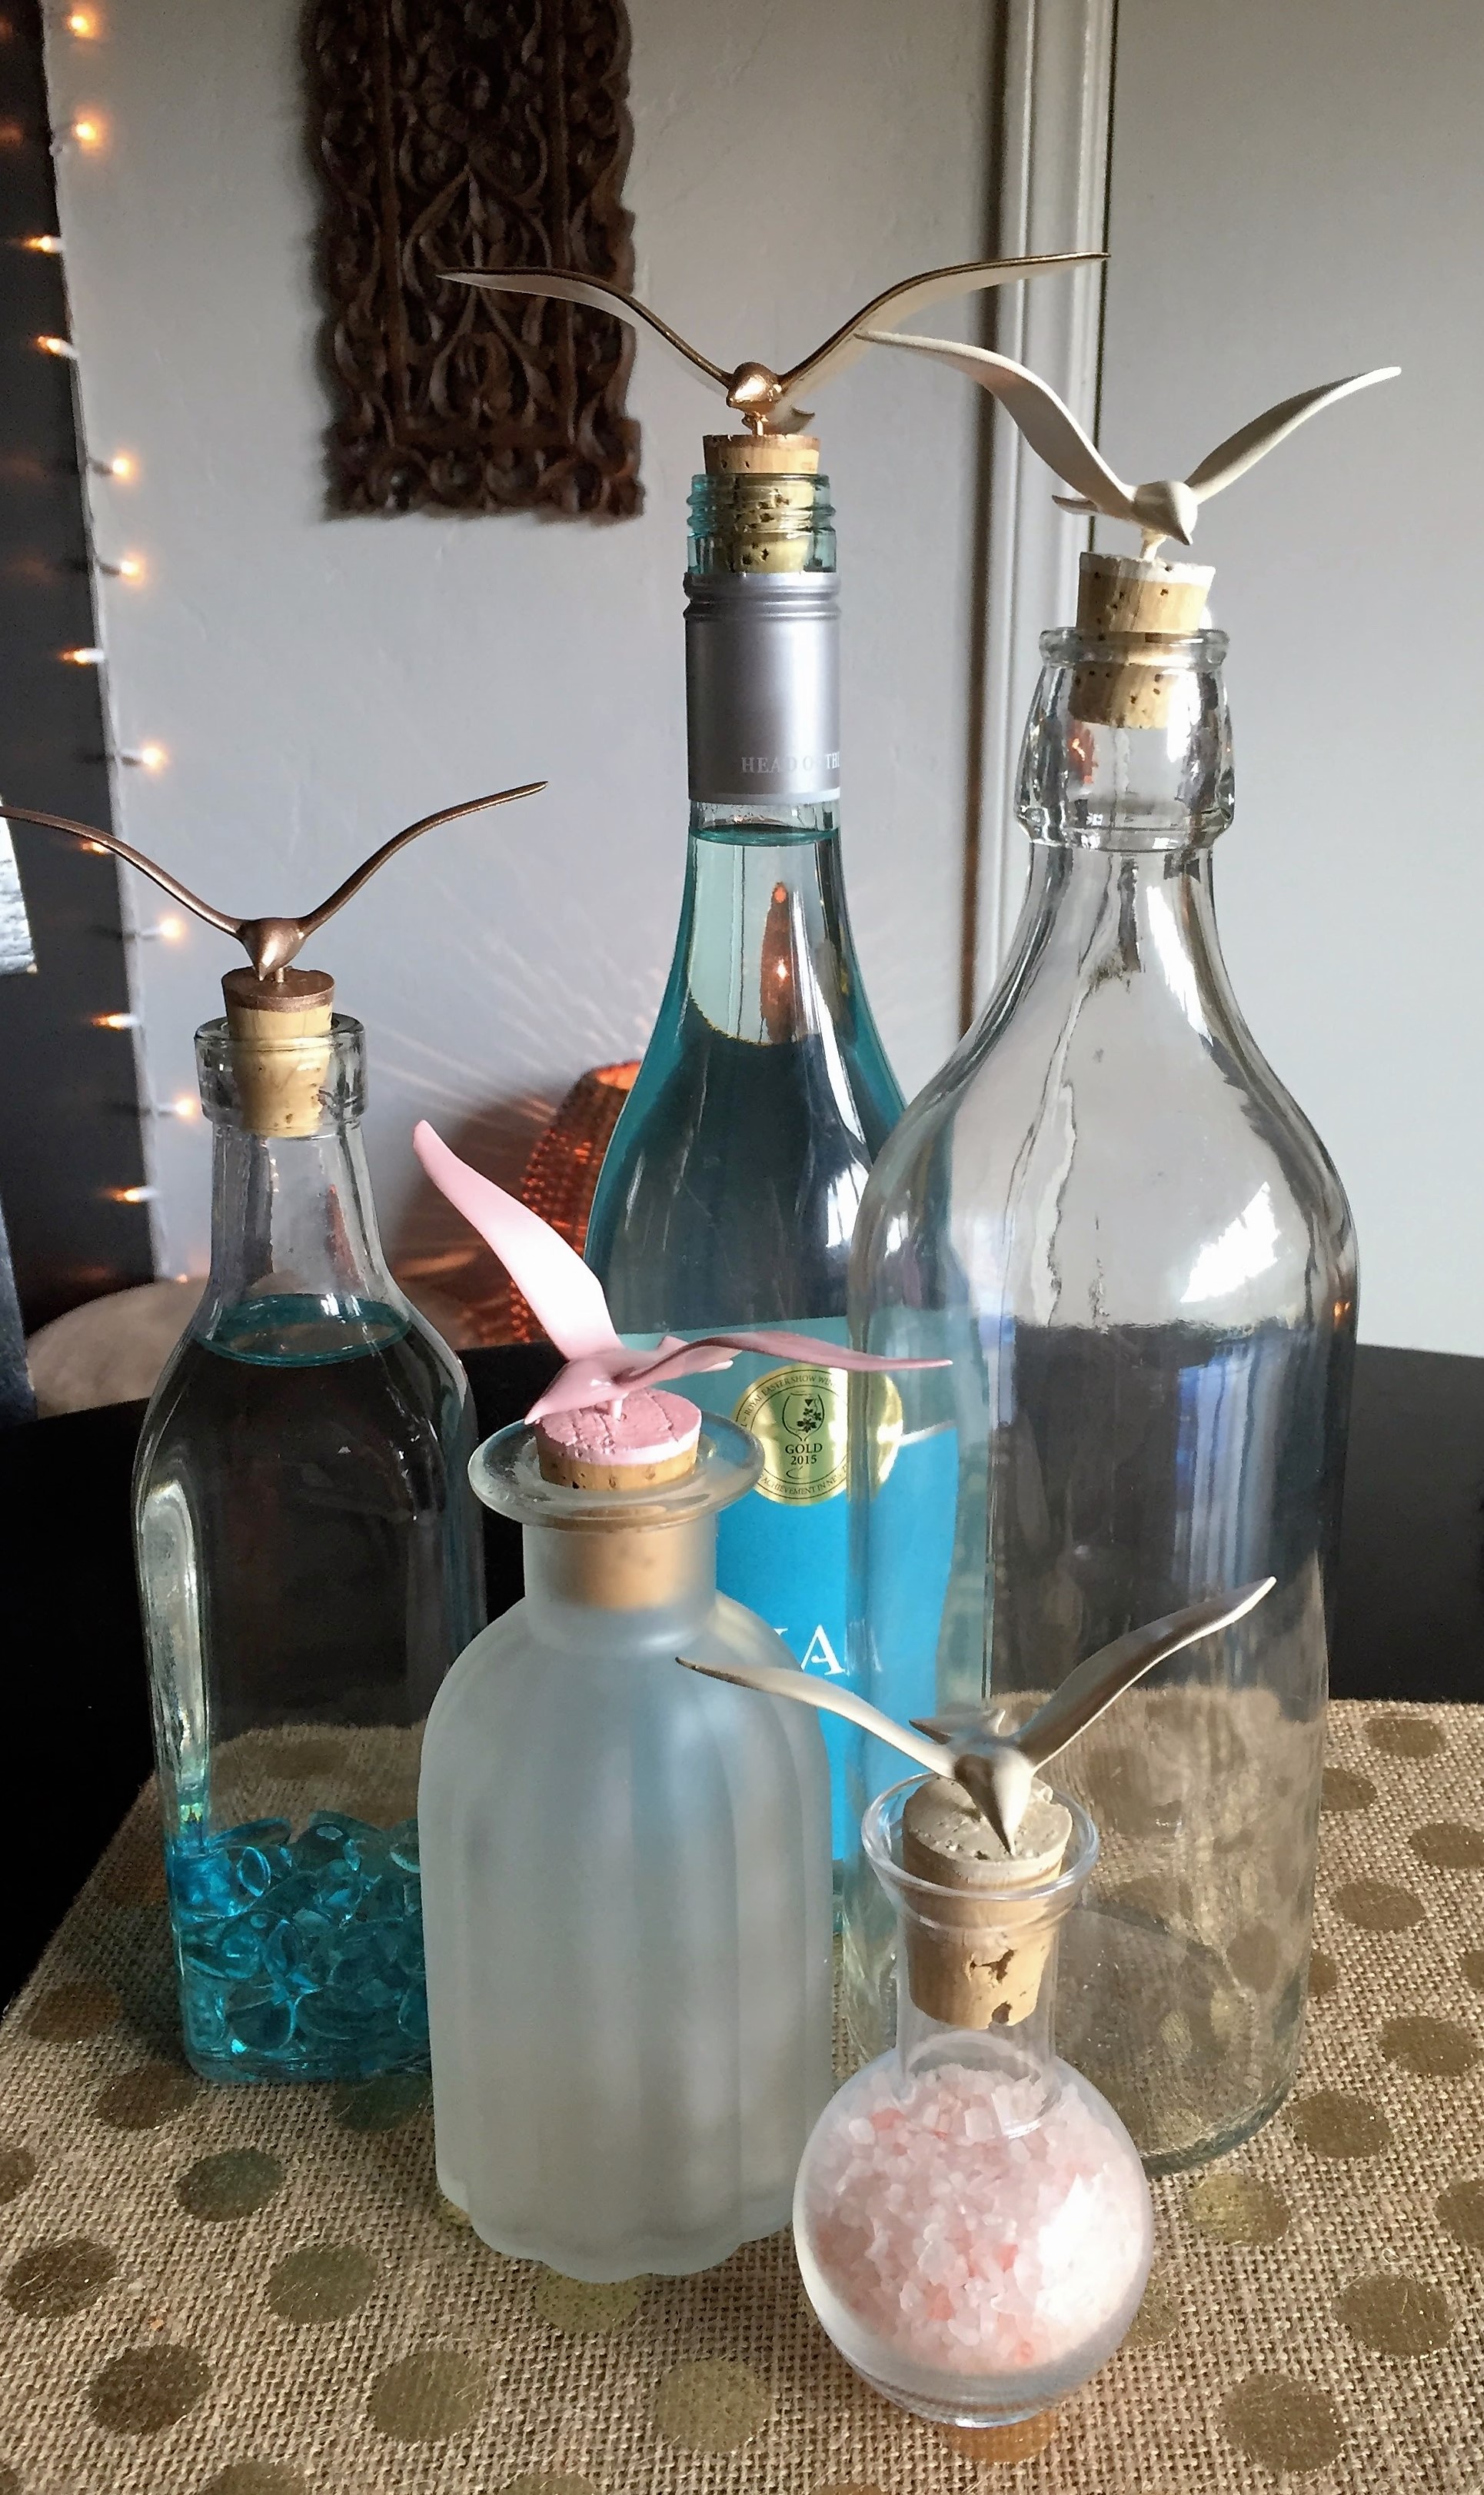
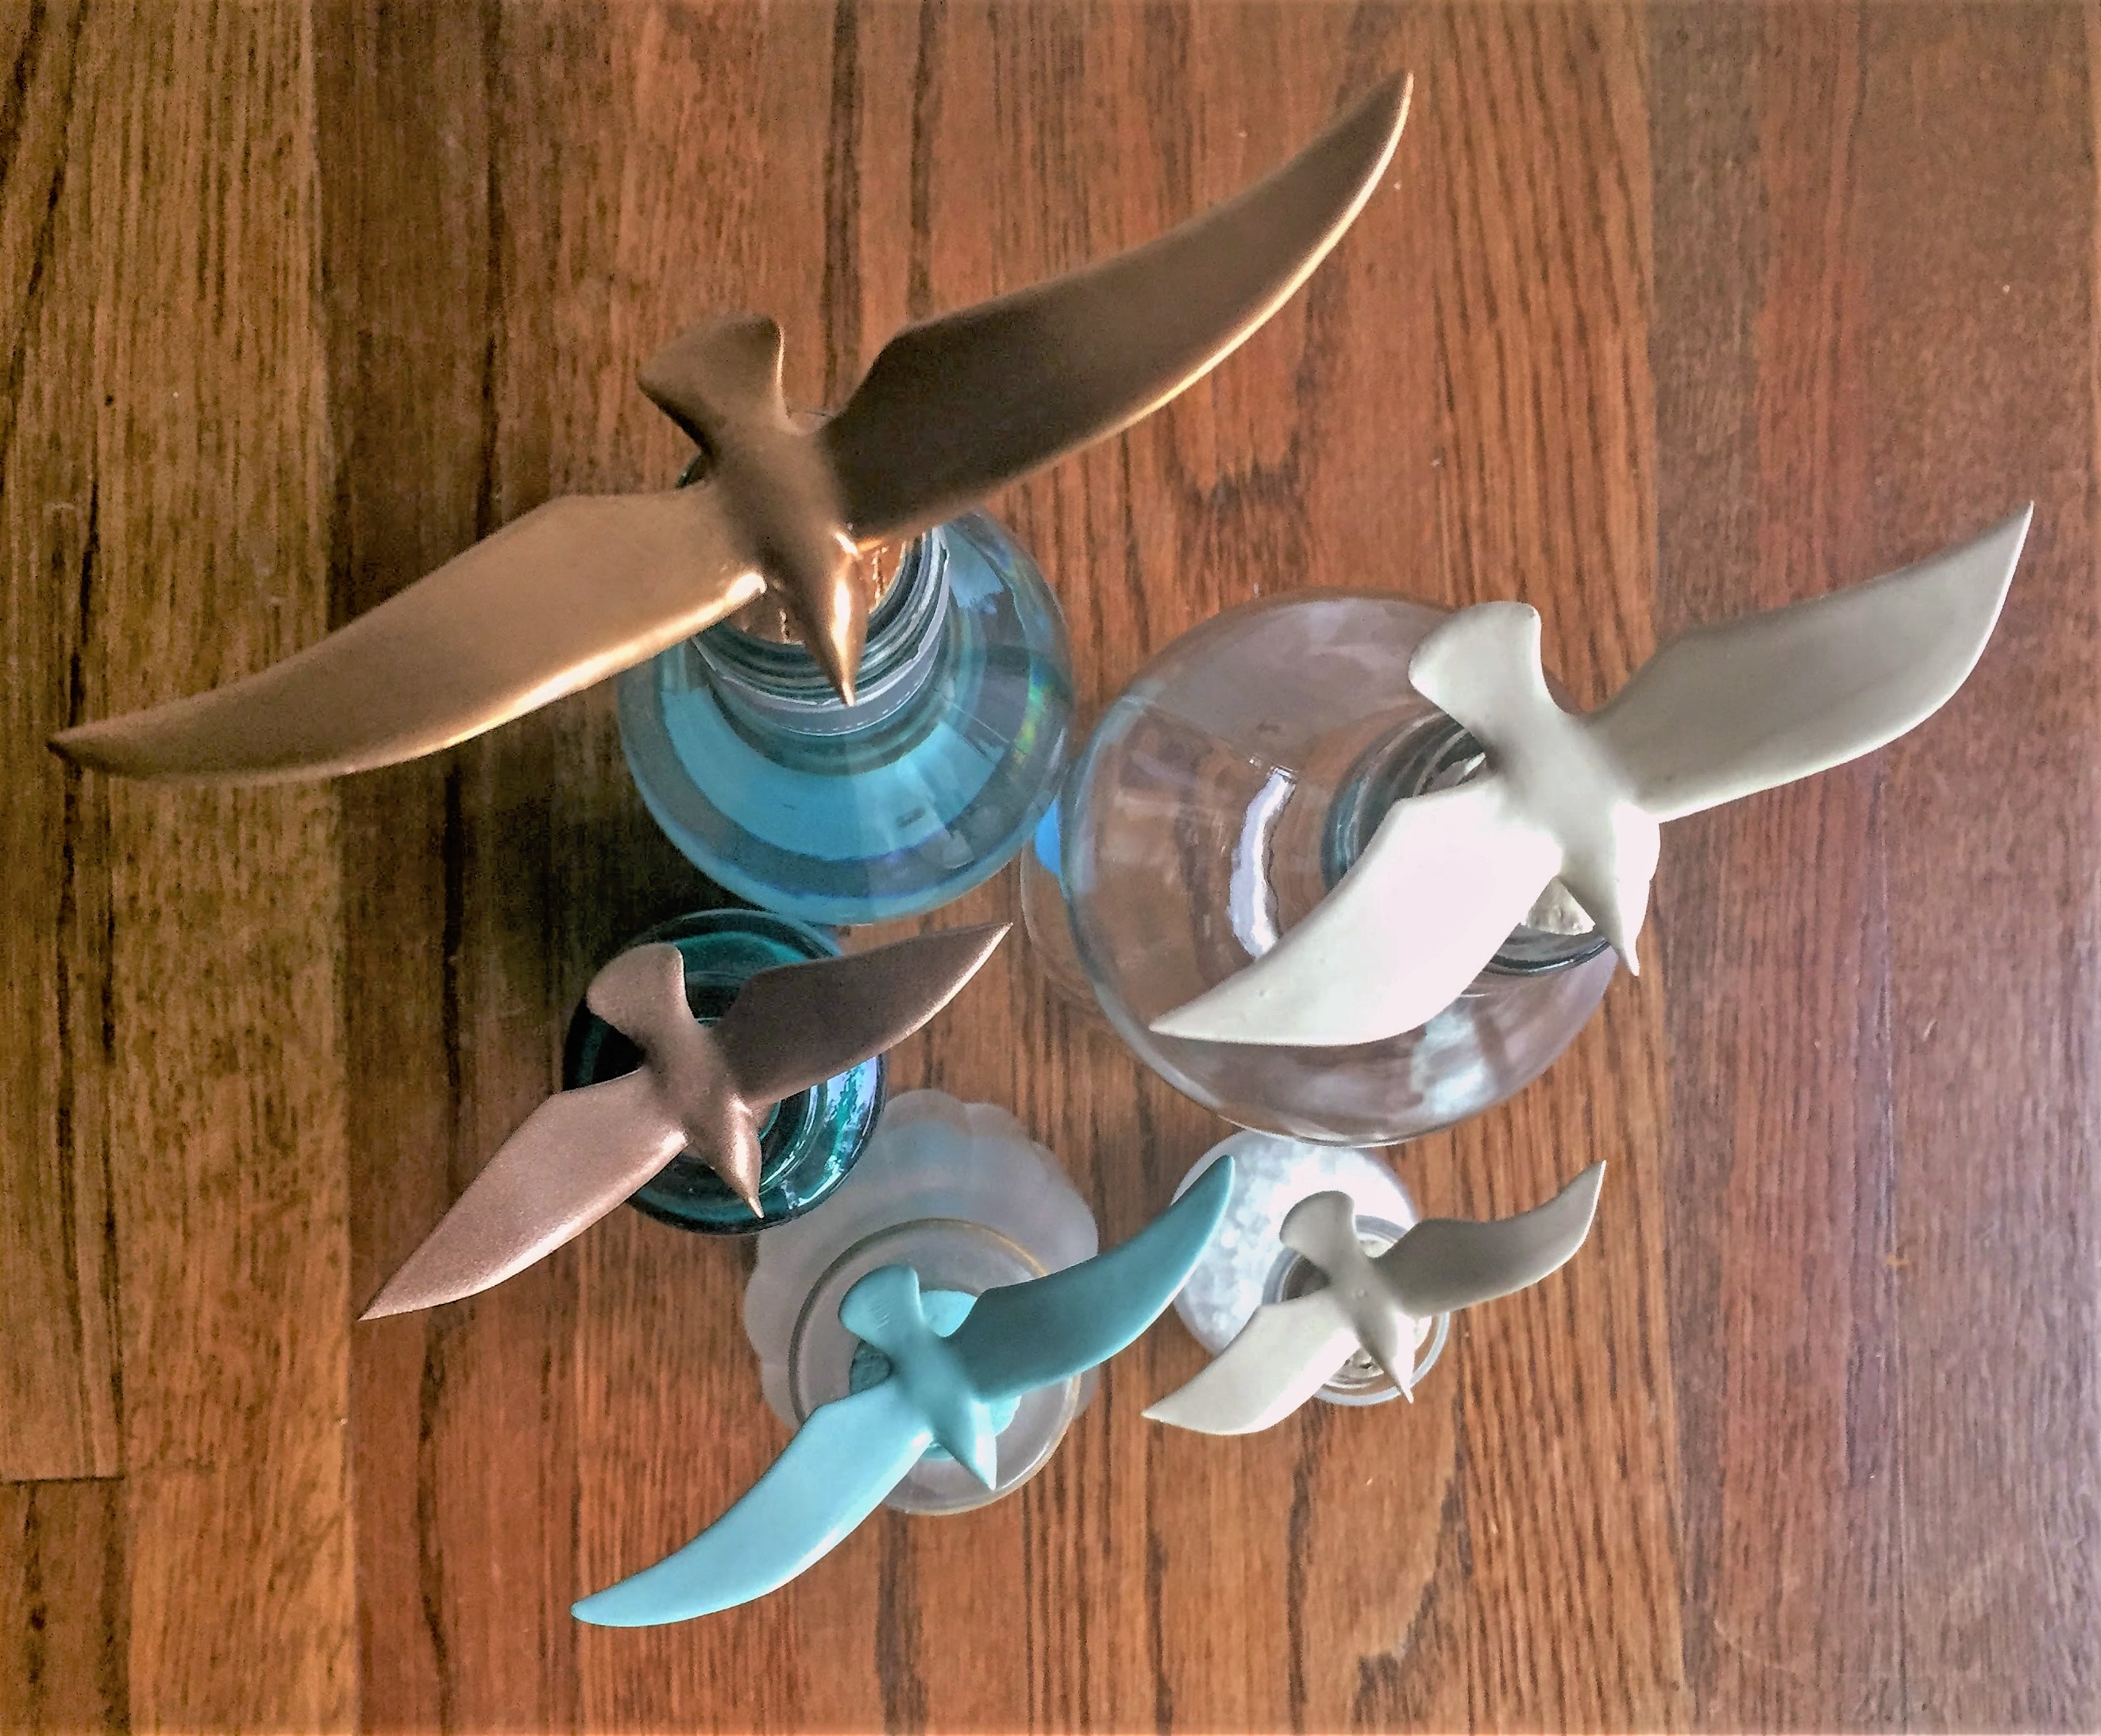
- Spray Paint in whatever color/colors you choose. For my “Pink Sands Collection”, I used 24K Gold, Rustoleum Metallic, Krylon Ballet Slipper Pink in Satin, Krylon Almond in Satin, Krylon Ivory in Satin
- A small tupperware container for paint.
- A small paint brush. Michaels.
- Vinyl Gloves. Target.
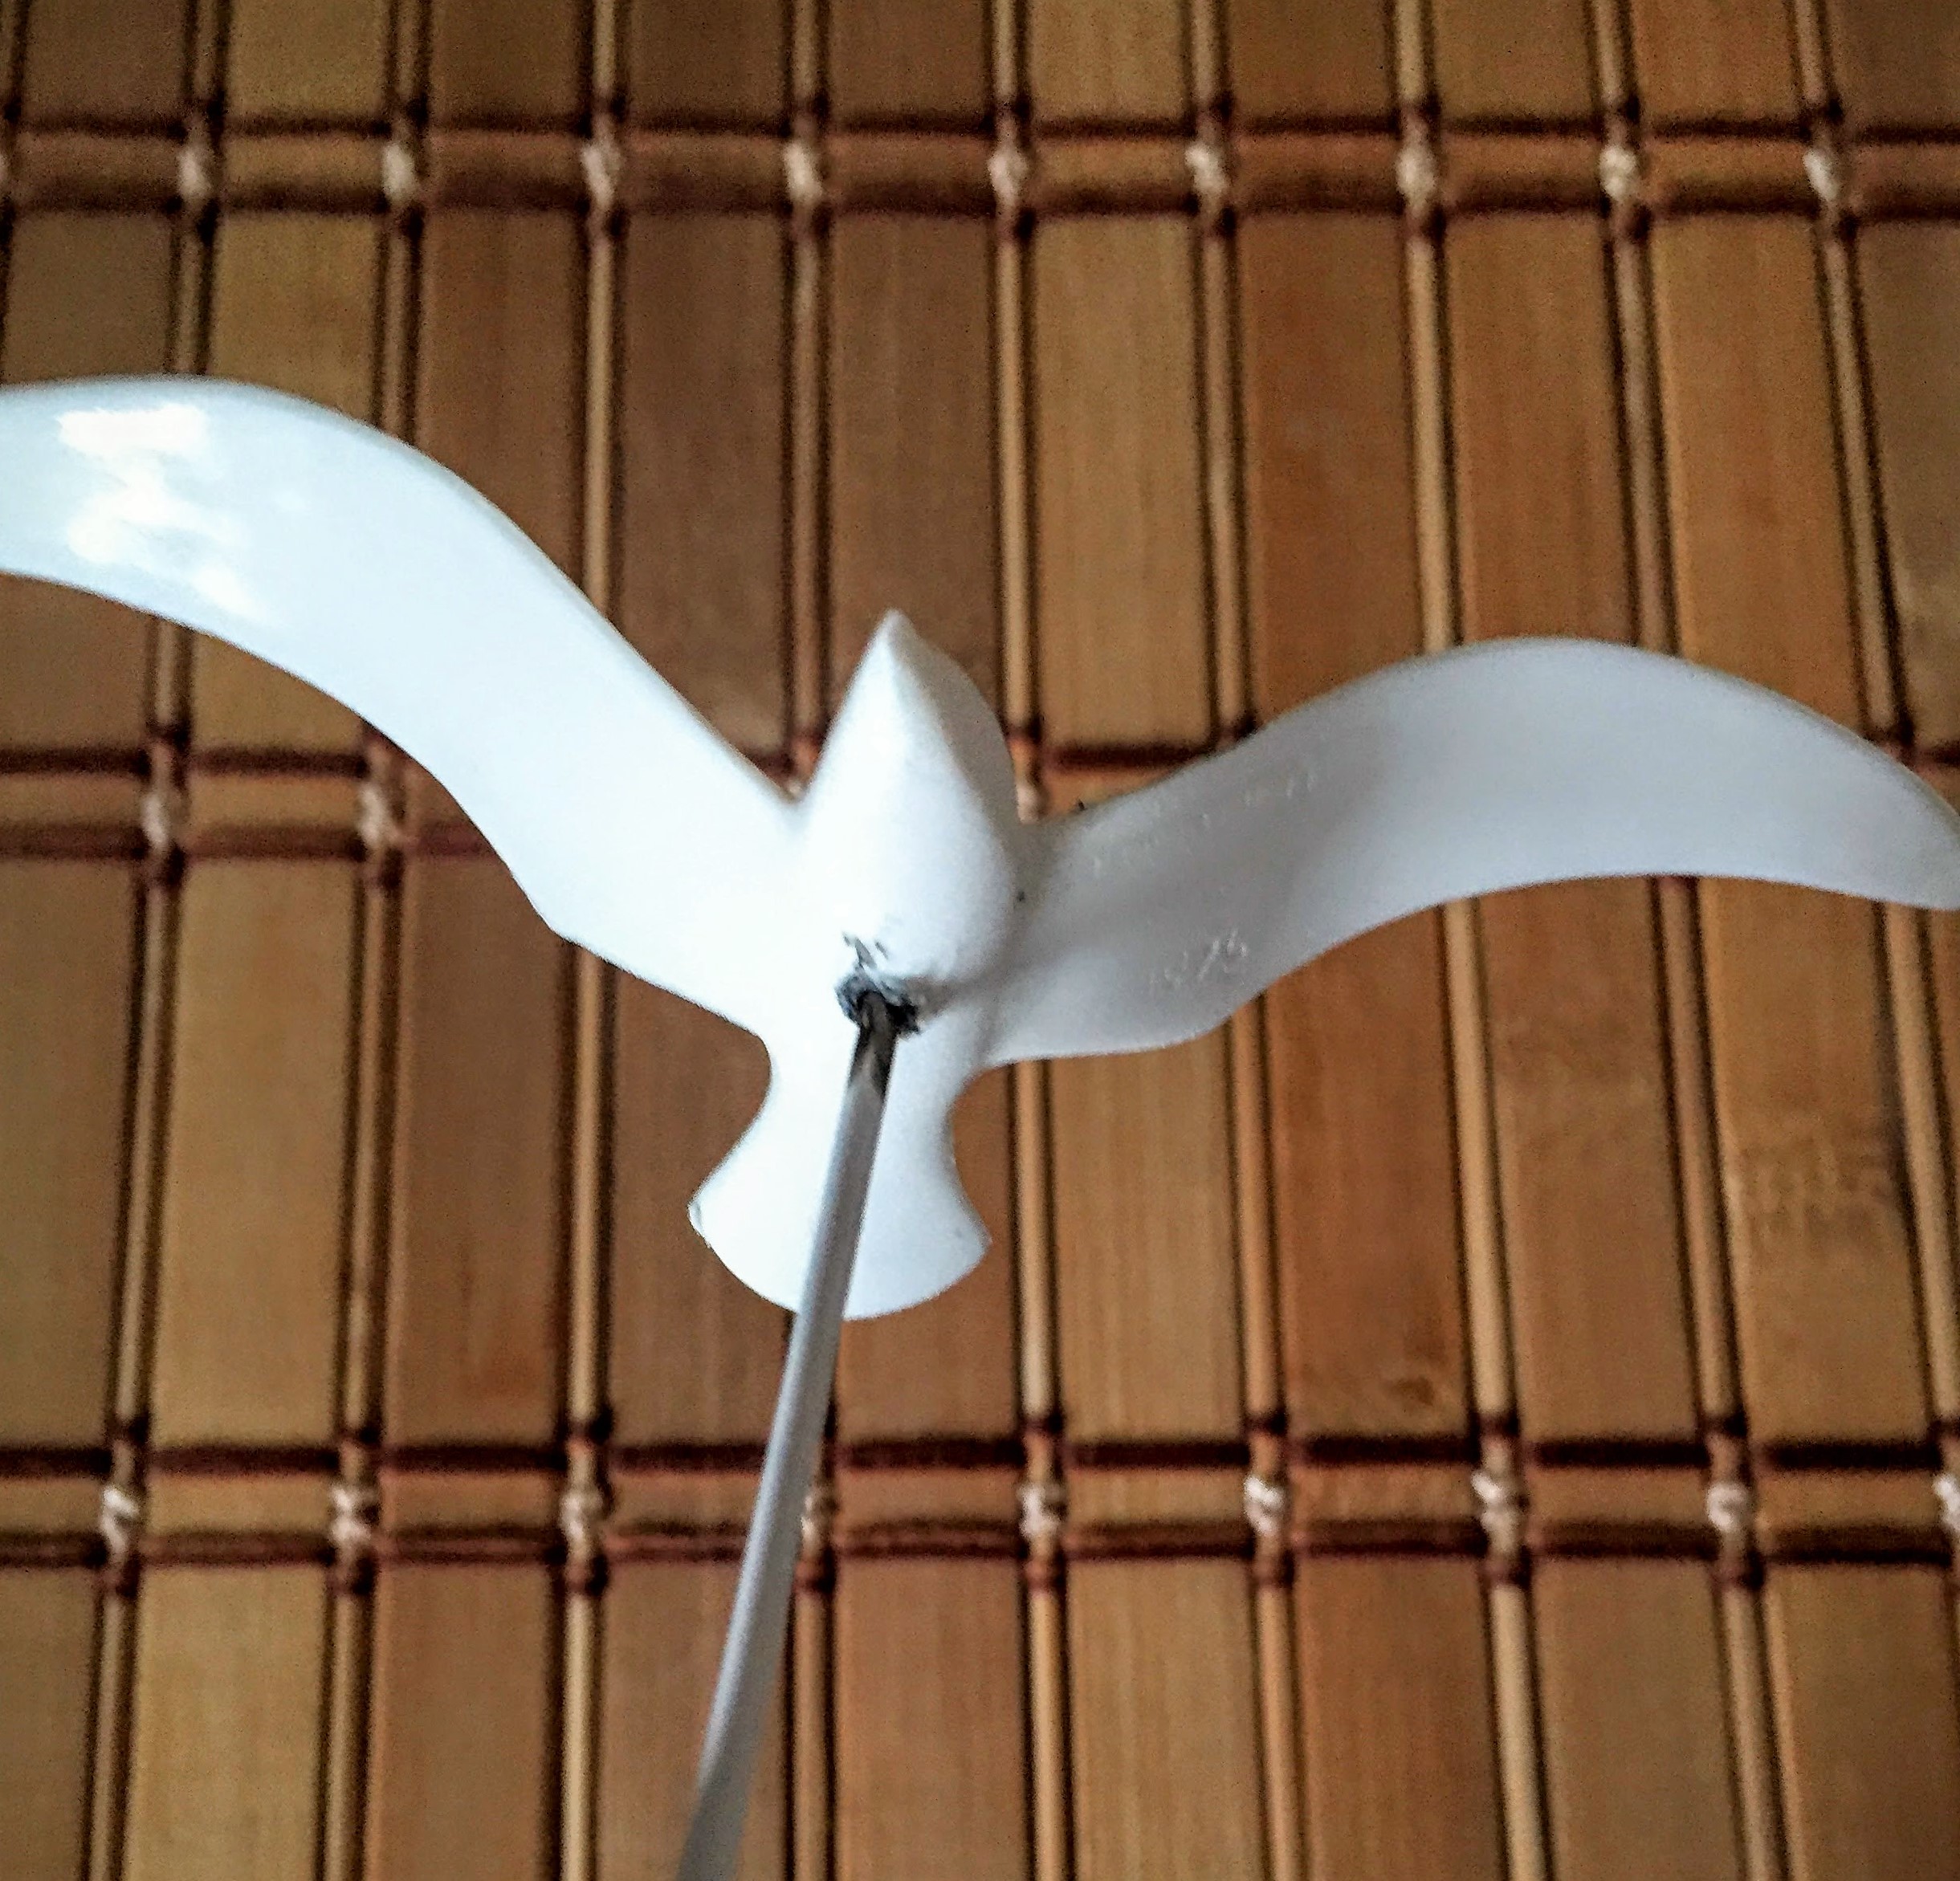
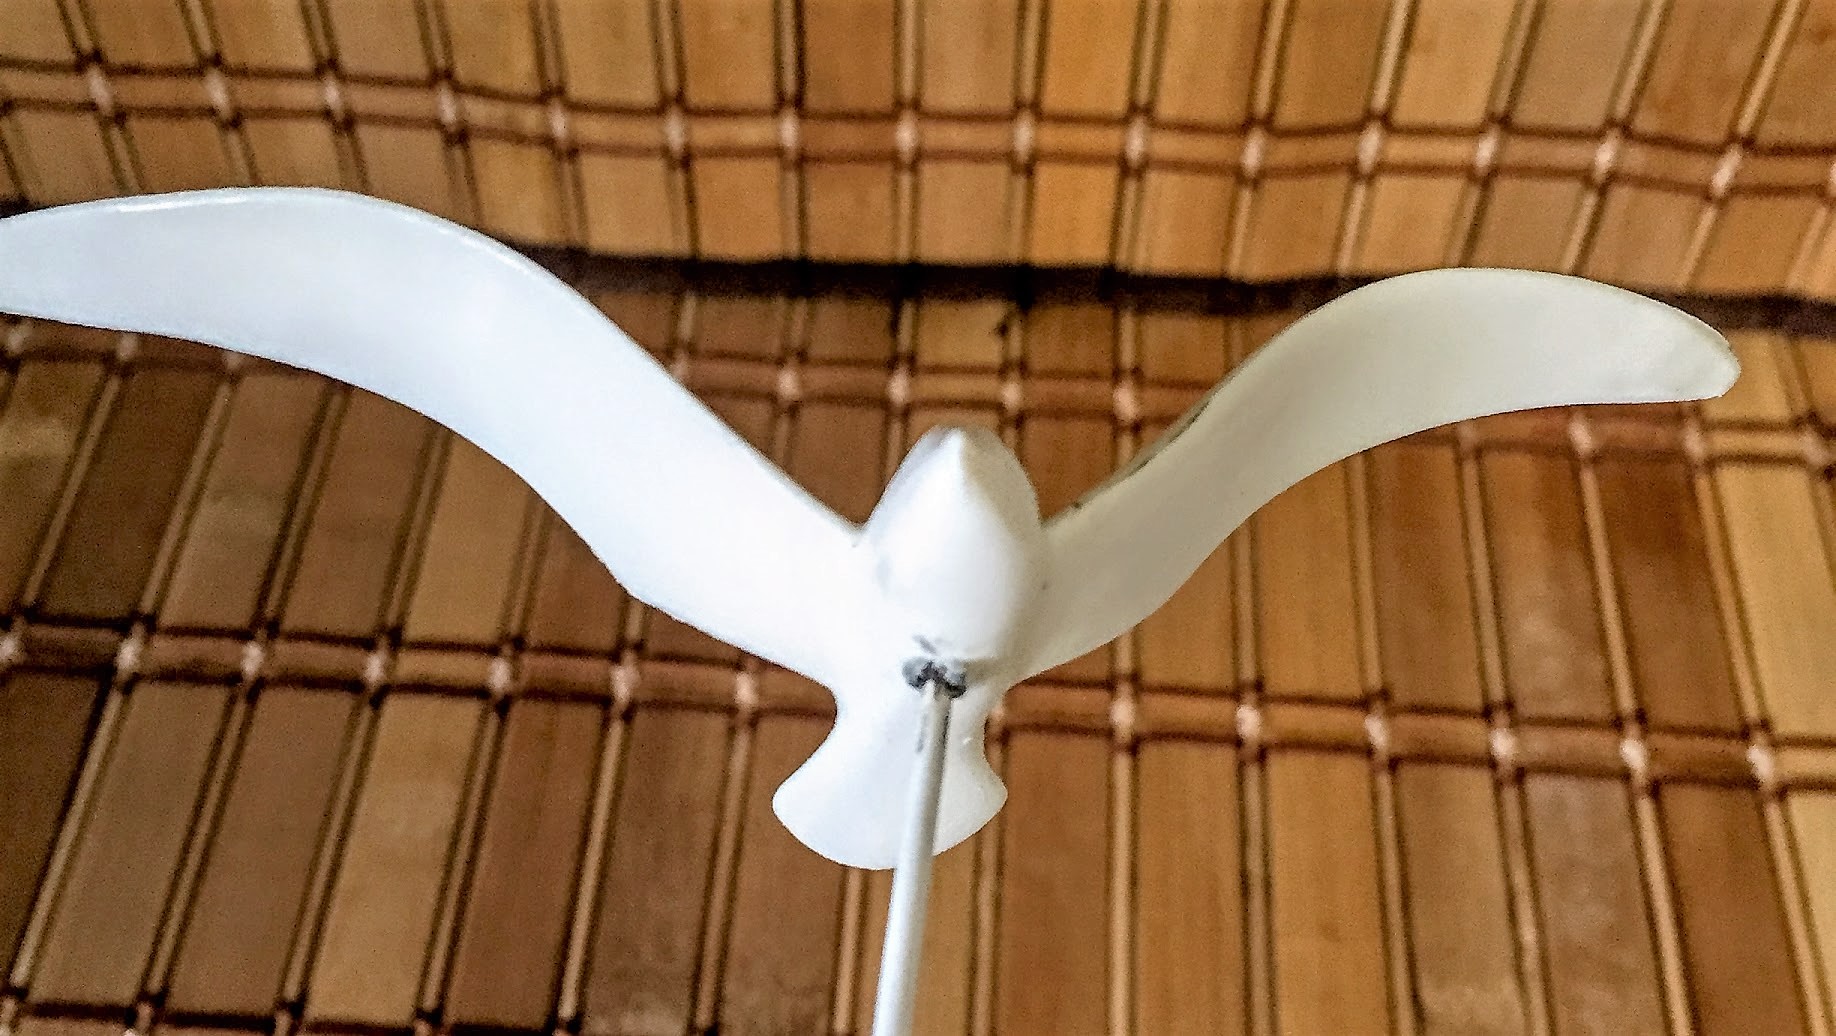
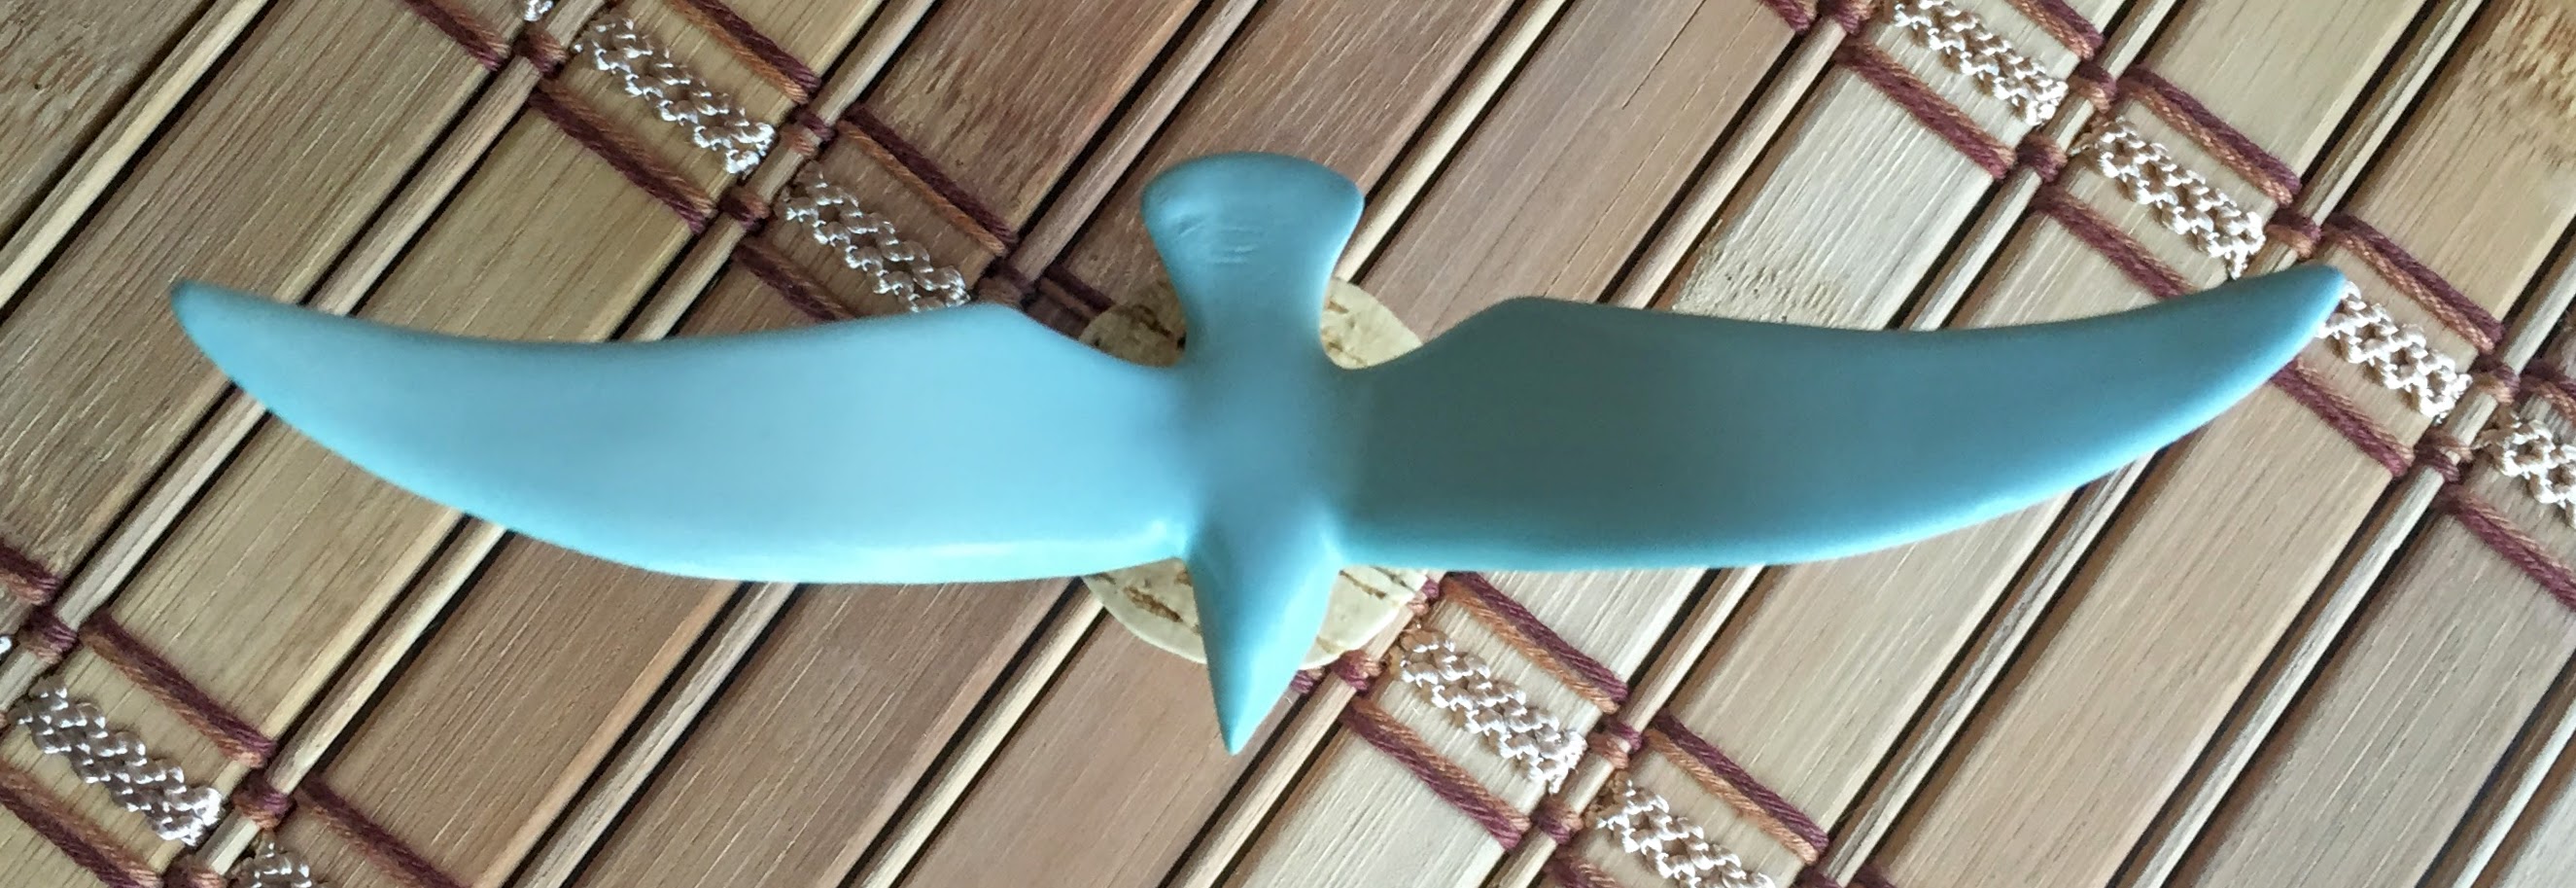
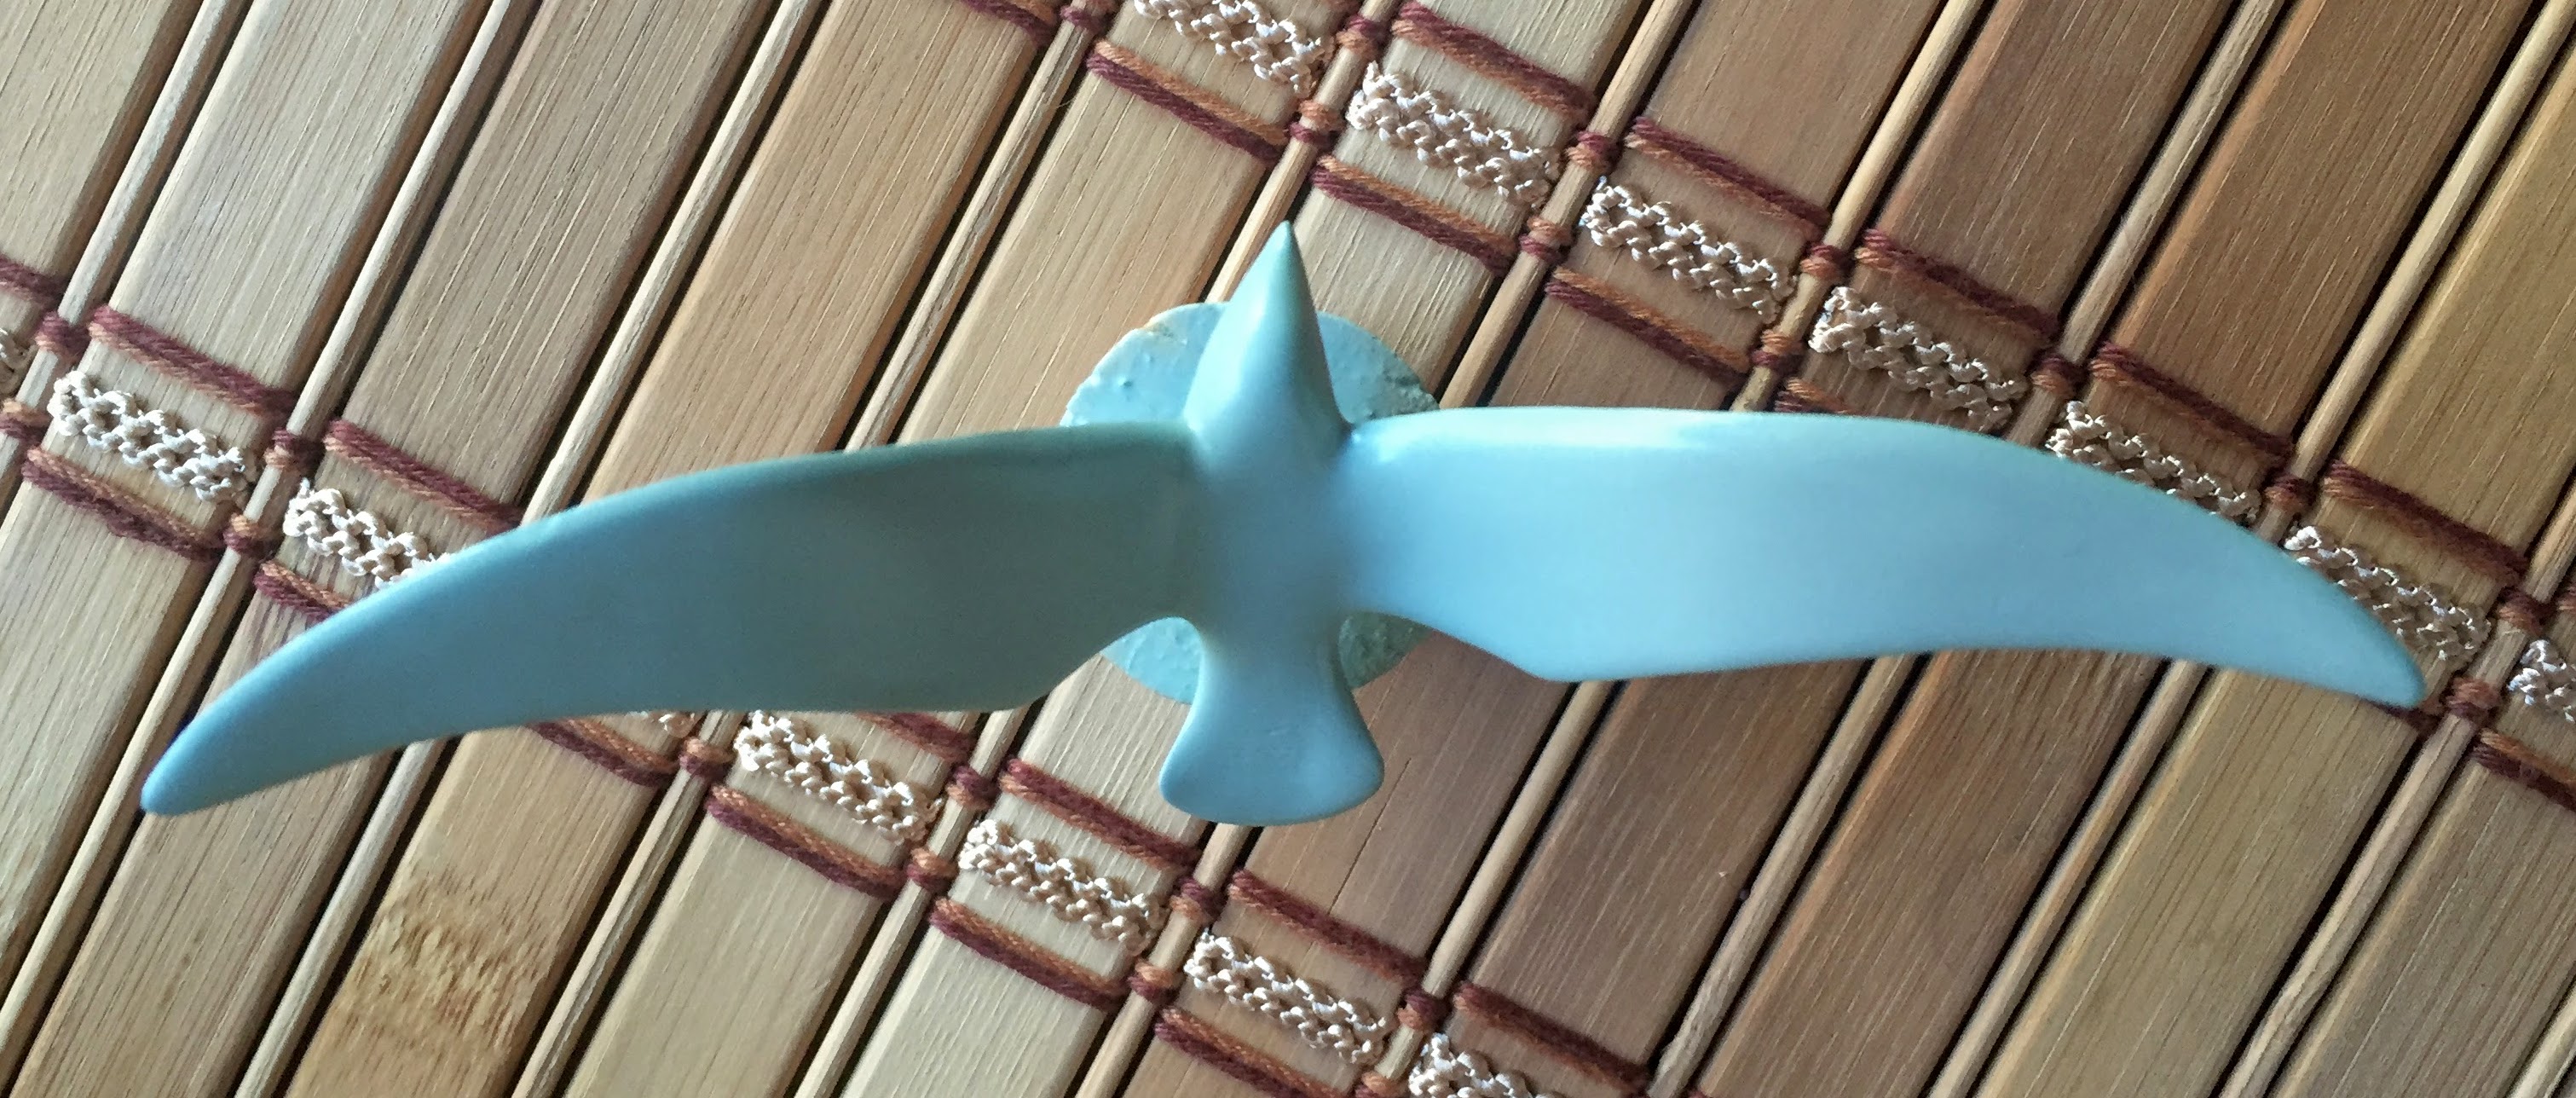
Let’s get started on the seagulls. The seagulls are hard plastic and they’re all the same size, so if you’ll be doing a variety of bottles, like I did, you may want to make them different sizes. It adds creative interest, for sure. You simply cut the tips of their wings down to the size you would like. Try to follow the curve of the wing. It’s best to cut on the backside curve of the wing, but if you find it difficult, you can do the front side. You’ll just need to make sure that you sand very thoroughly, so there are no rough edges (because it’s much more apparent, in the front). I usually start with the big scissors (Fiskars Razor Edged Large Scissors bought at JoAnne’s) and then fine tune with the little orange ones (Fiskars Fine Tip Little Orange Handle Scissors bought at JoAnne’s). Then, I take my sandpaper and sand down the edges I have cut. Here is a picture, after I have finished one of the wings:
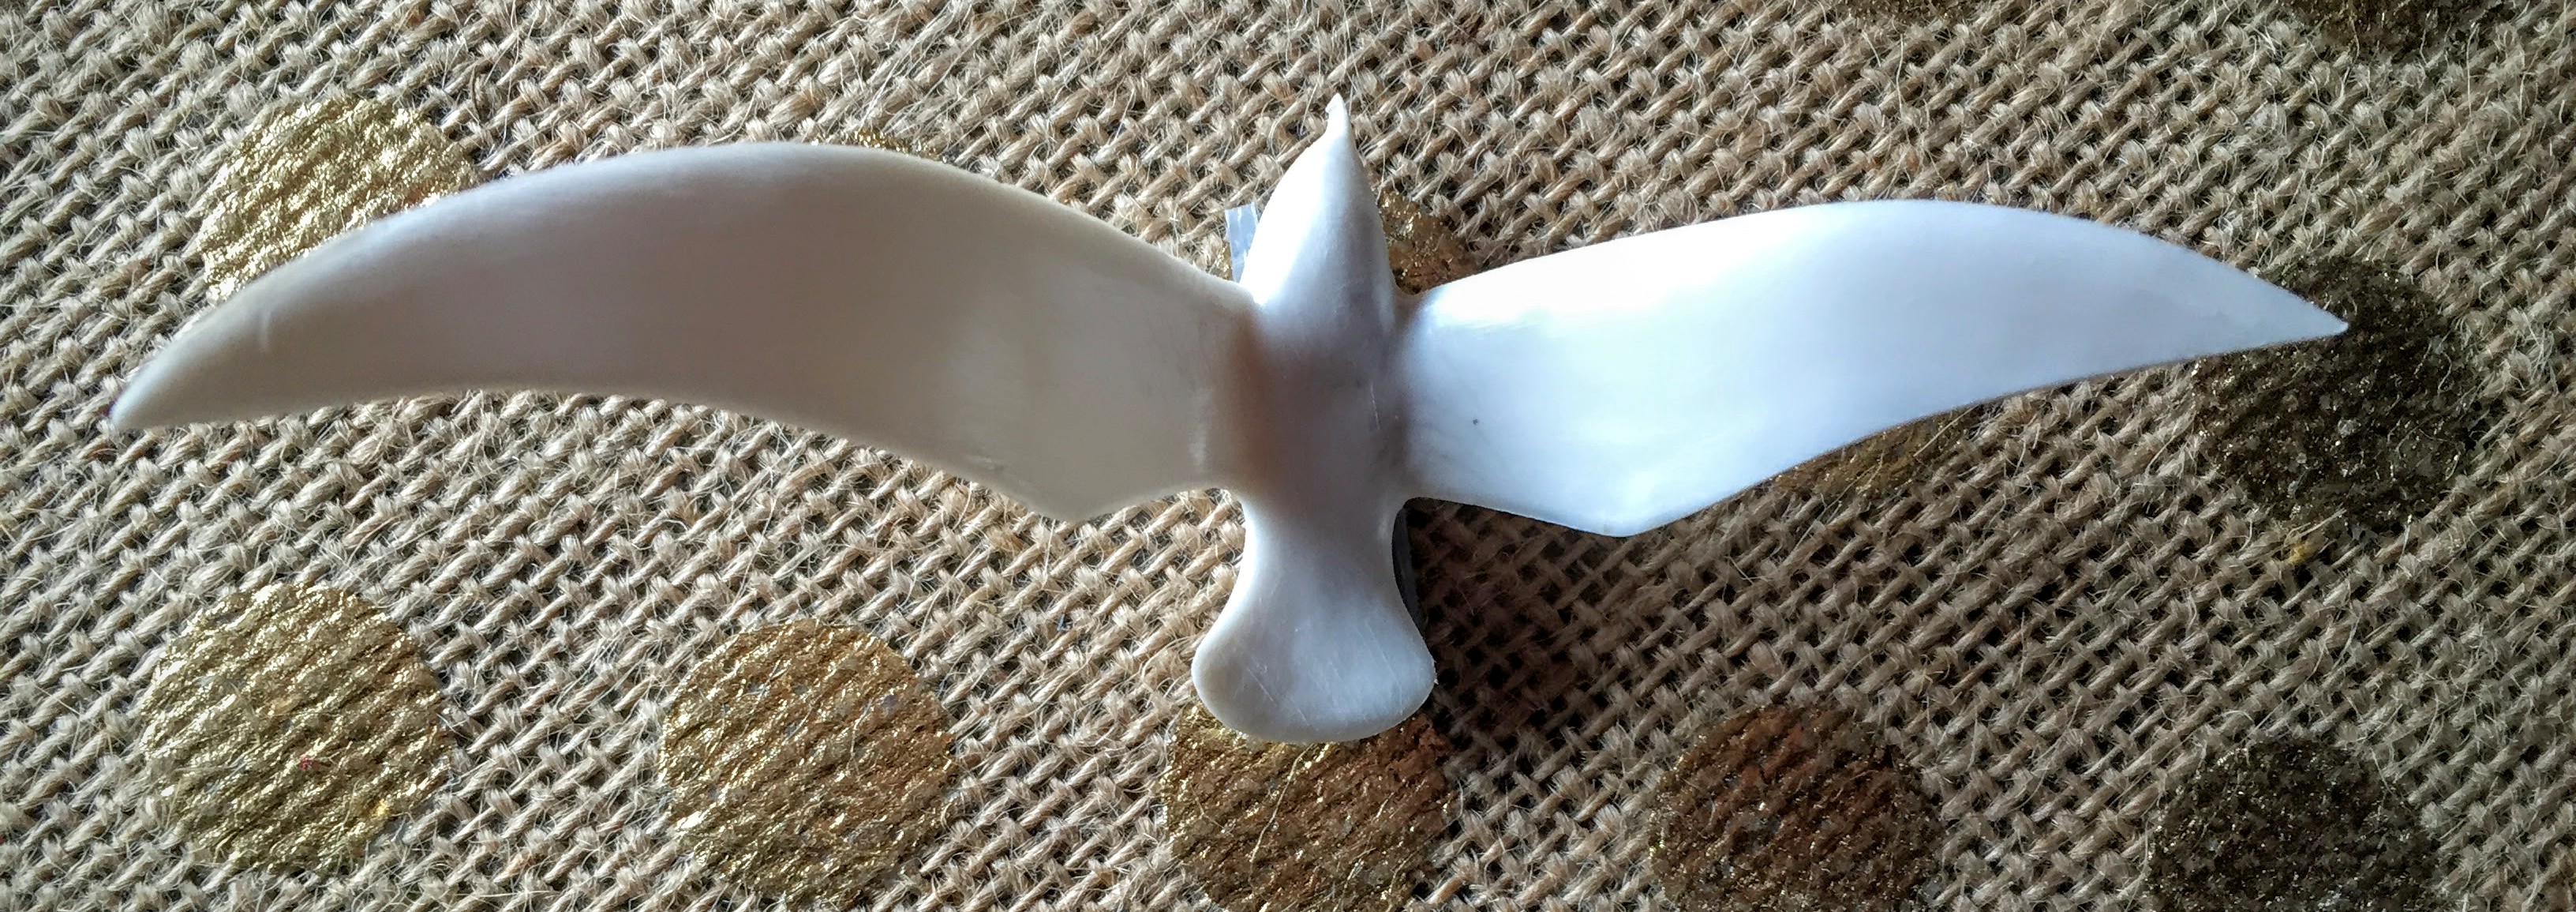
It’s pretty subtle, but I think you can see that the right wing is quite a bit shorter than the left. Go ahead and make both wings about the same size (in the collection you see here, I leave a couple of the seagulls their original size, and simply sand them down). After that, I go in around the face and beak, where there is a plastic line from the mold. I sand the line off and then, sand the underbelly where a manufacturer name has been stamped. I sand the name off as well as I can, then sand the wings, on top and underneath, and all of the edges, and presto! You’re ready for your next step!
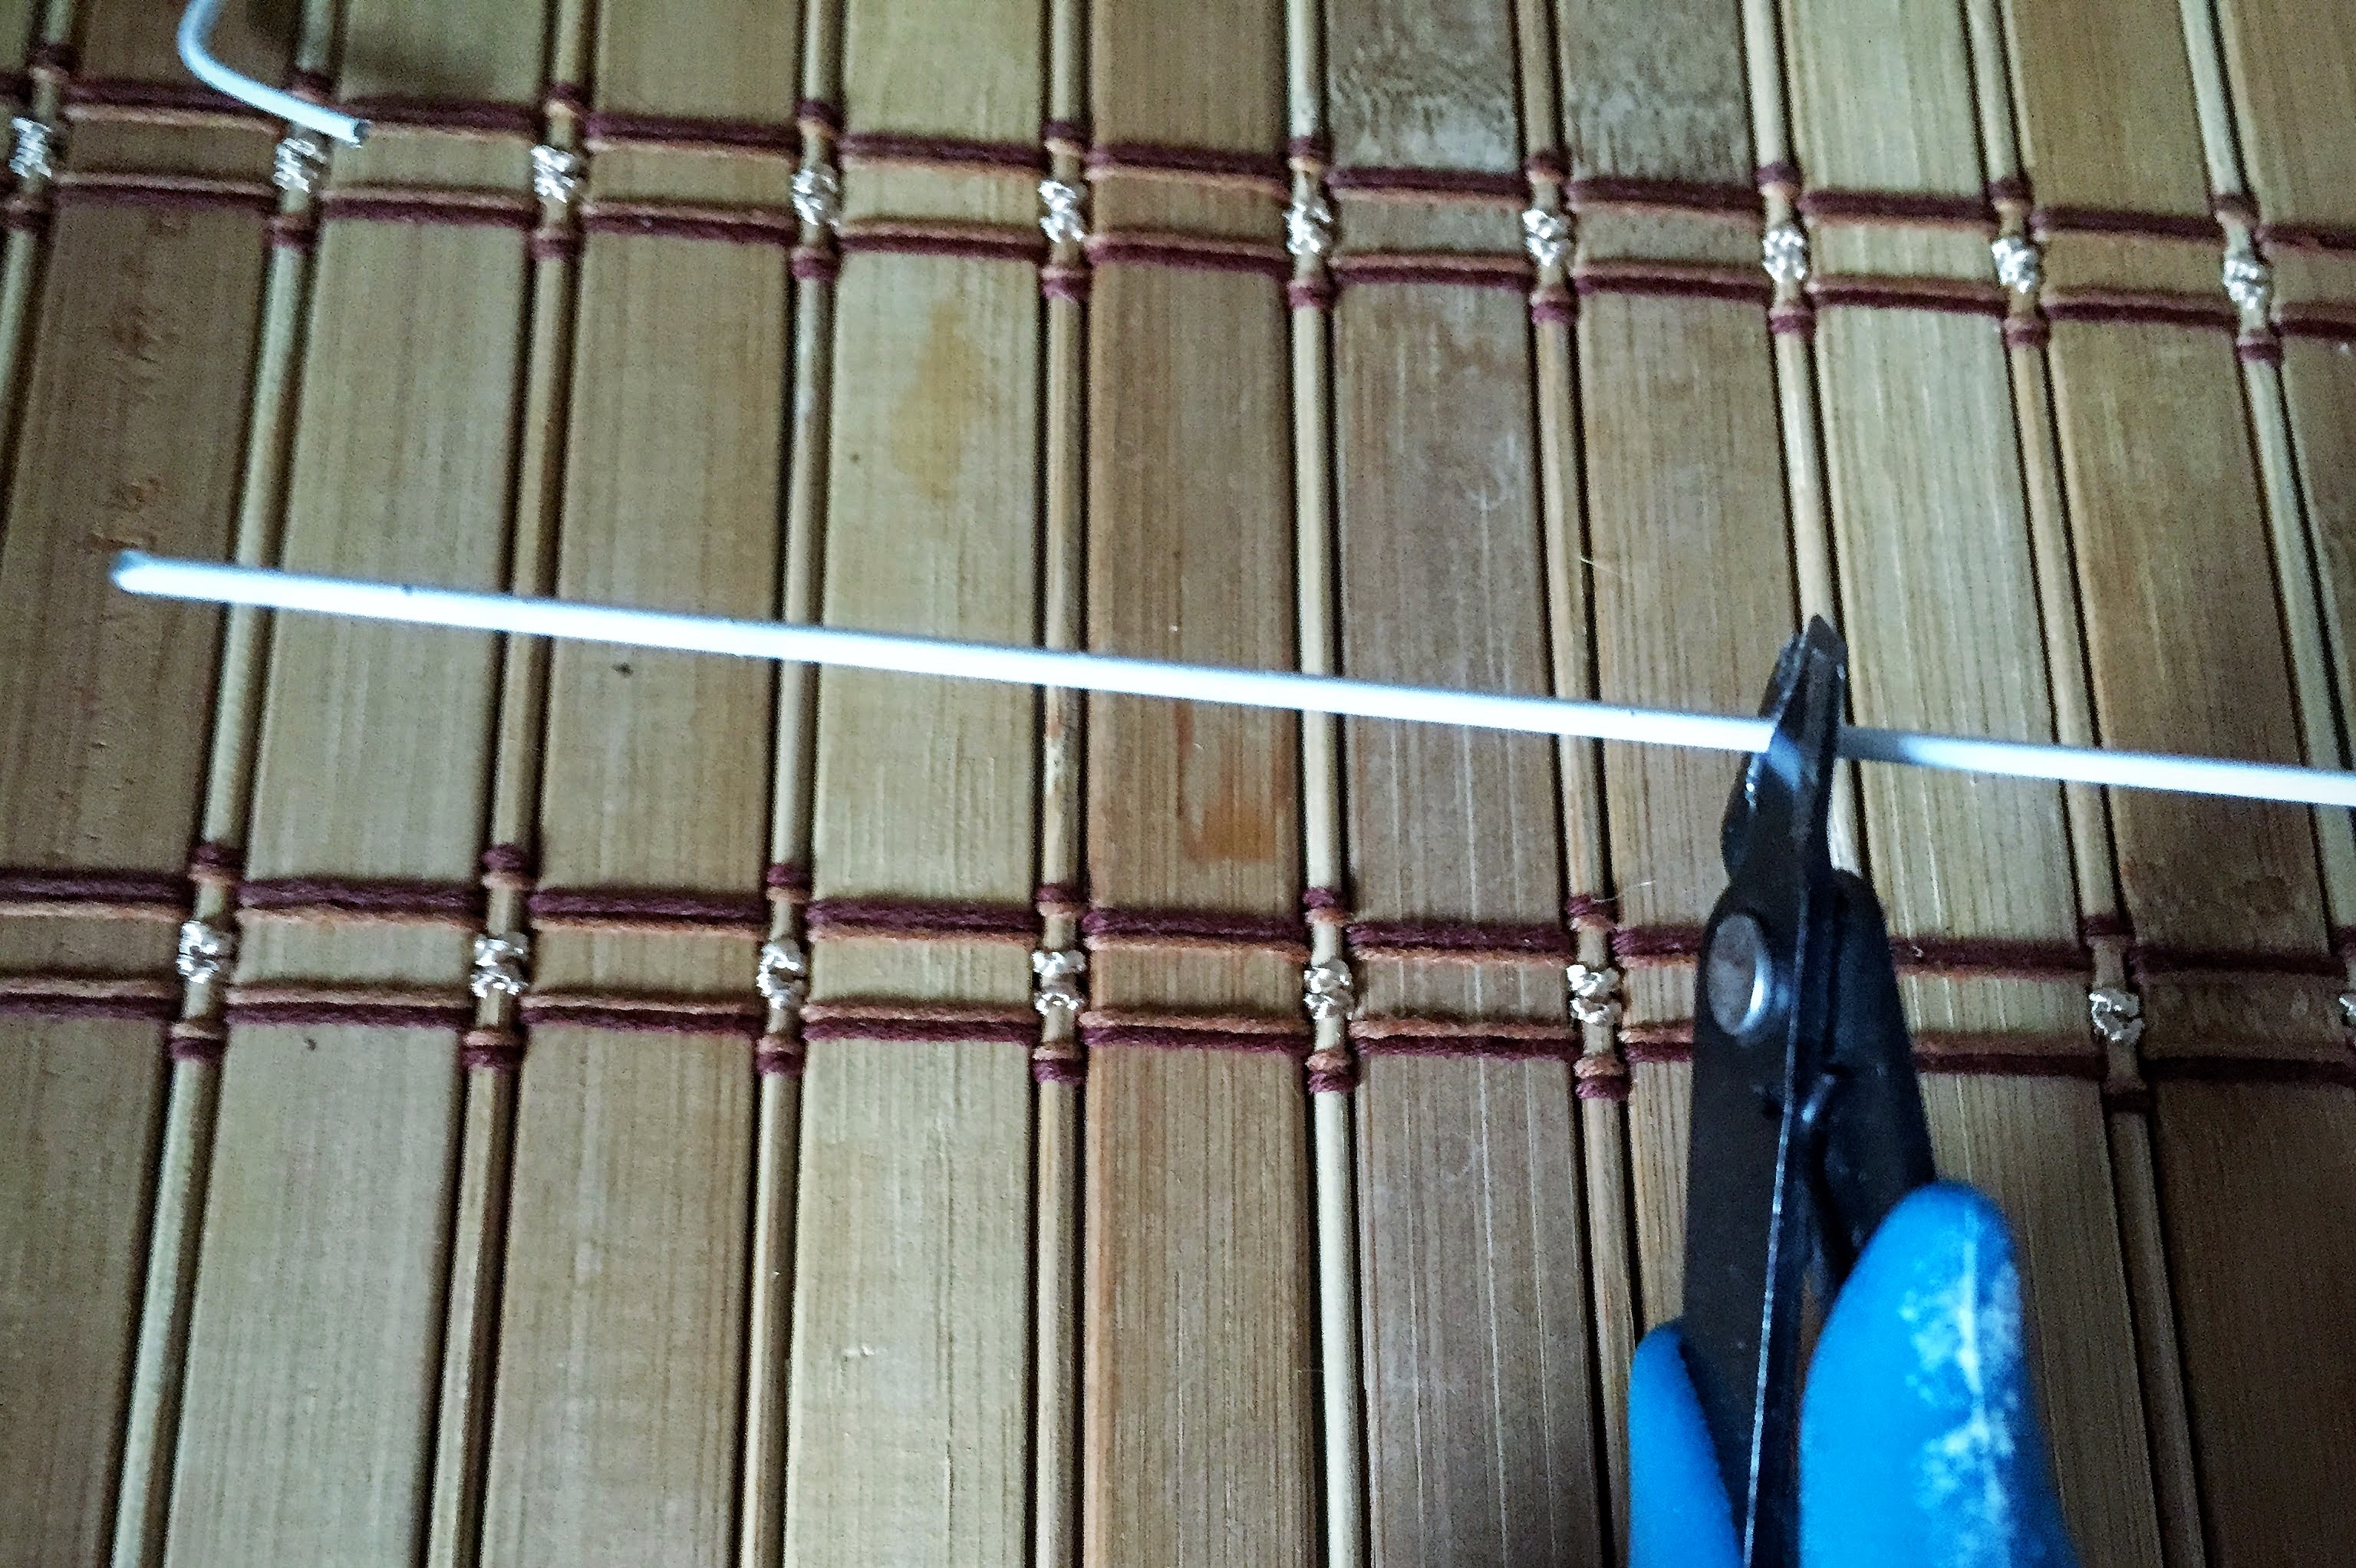
The next thing you are going to do, is to cut a piece of your wire hanger with your wire cutters. Make sure no little people or animals are in the area, because sometimes the wire goes flying. You may want to wear protective eye gear. I usually cut a piece that’s about 3″ long, to start. Make sure it’s nice and straight:
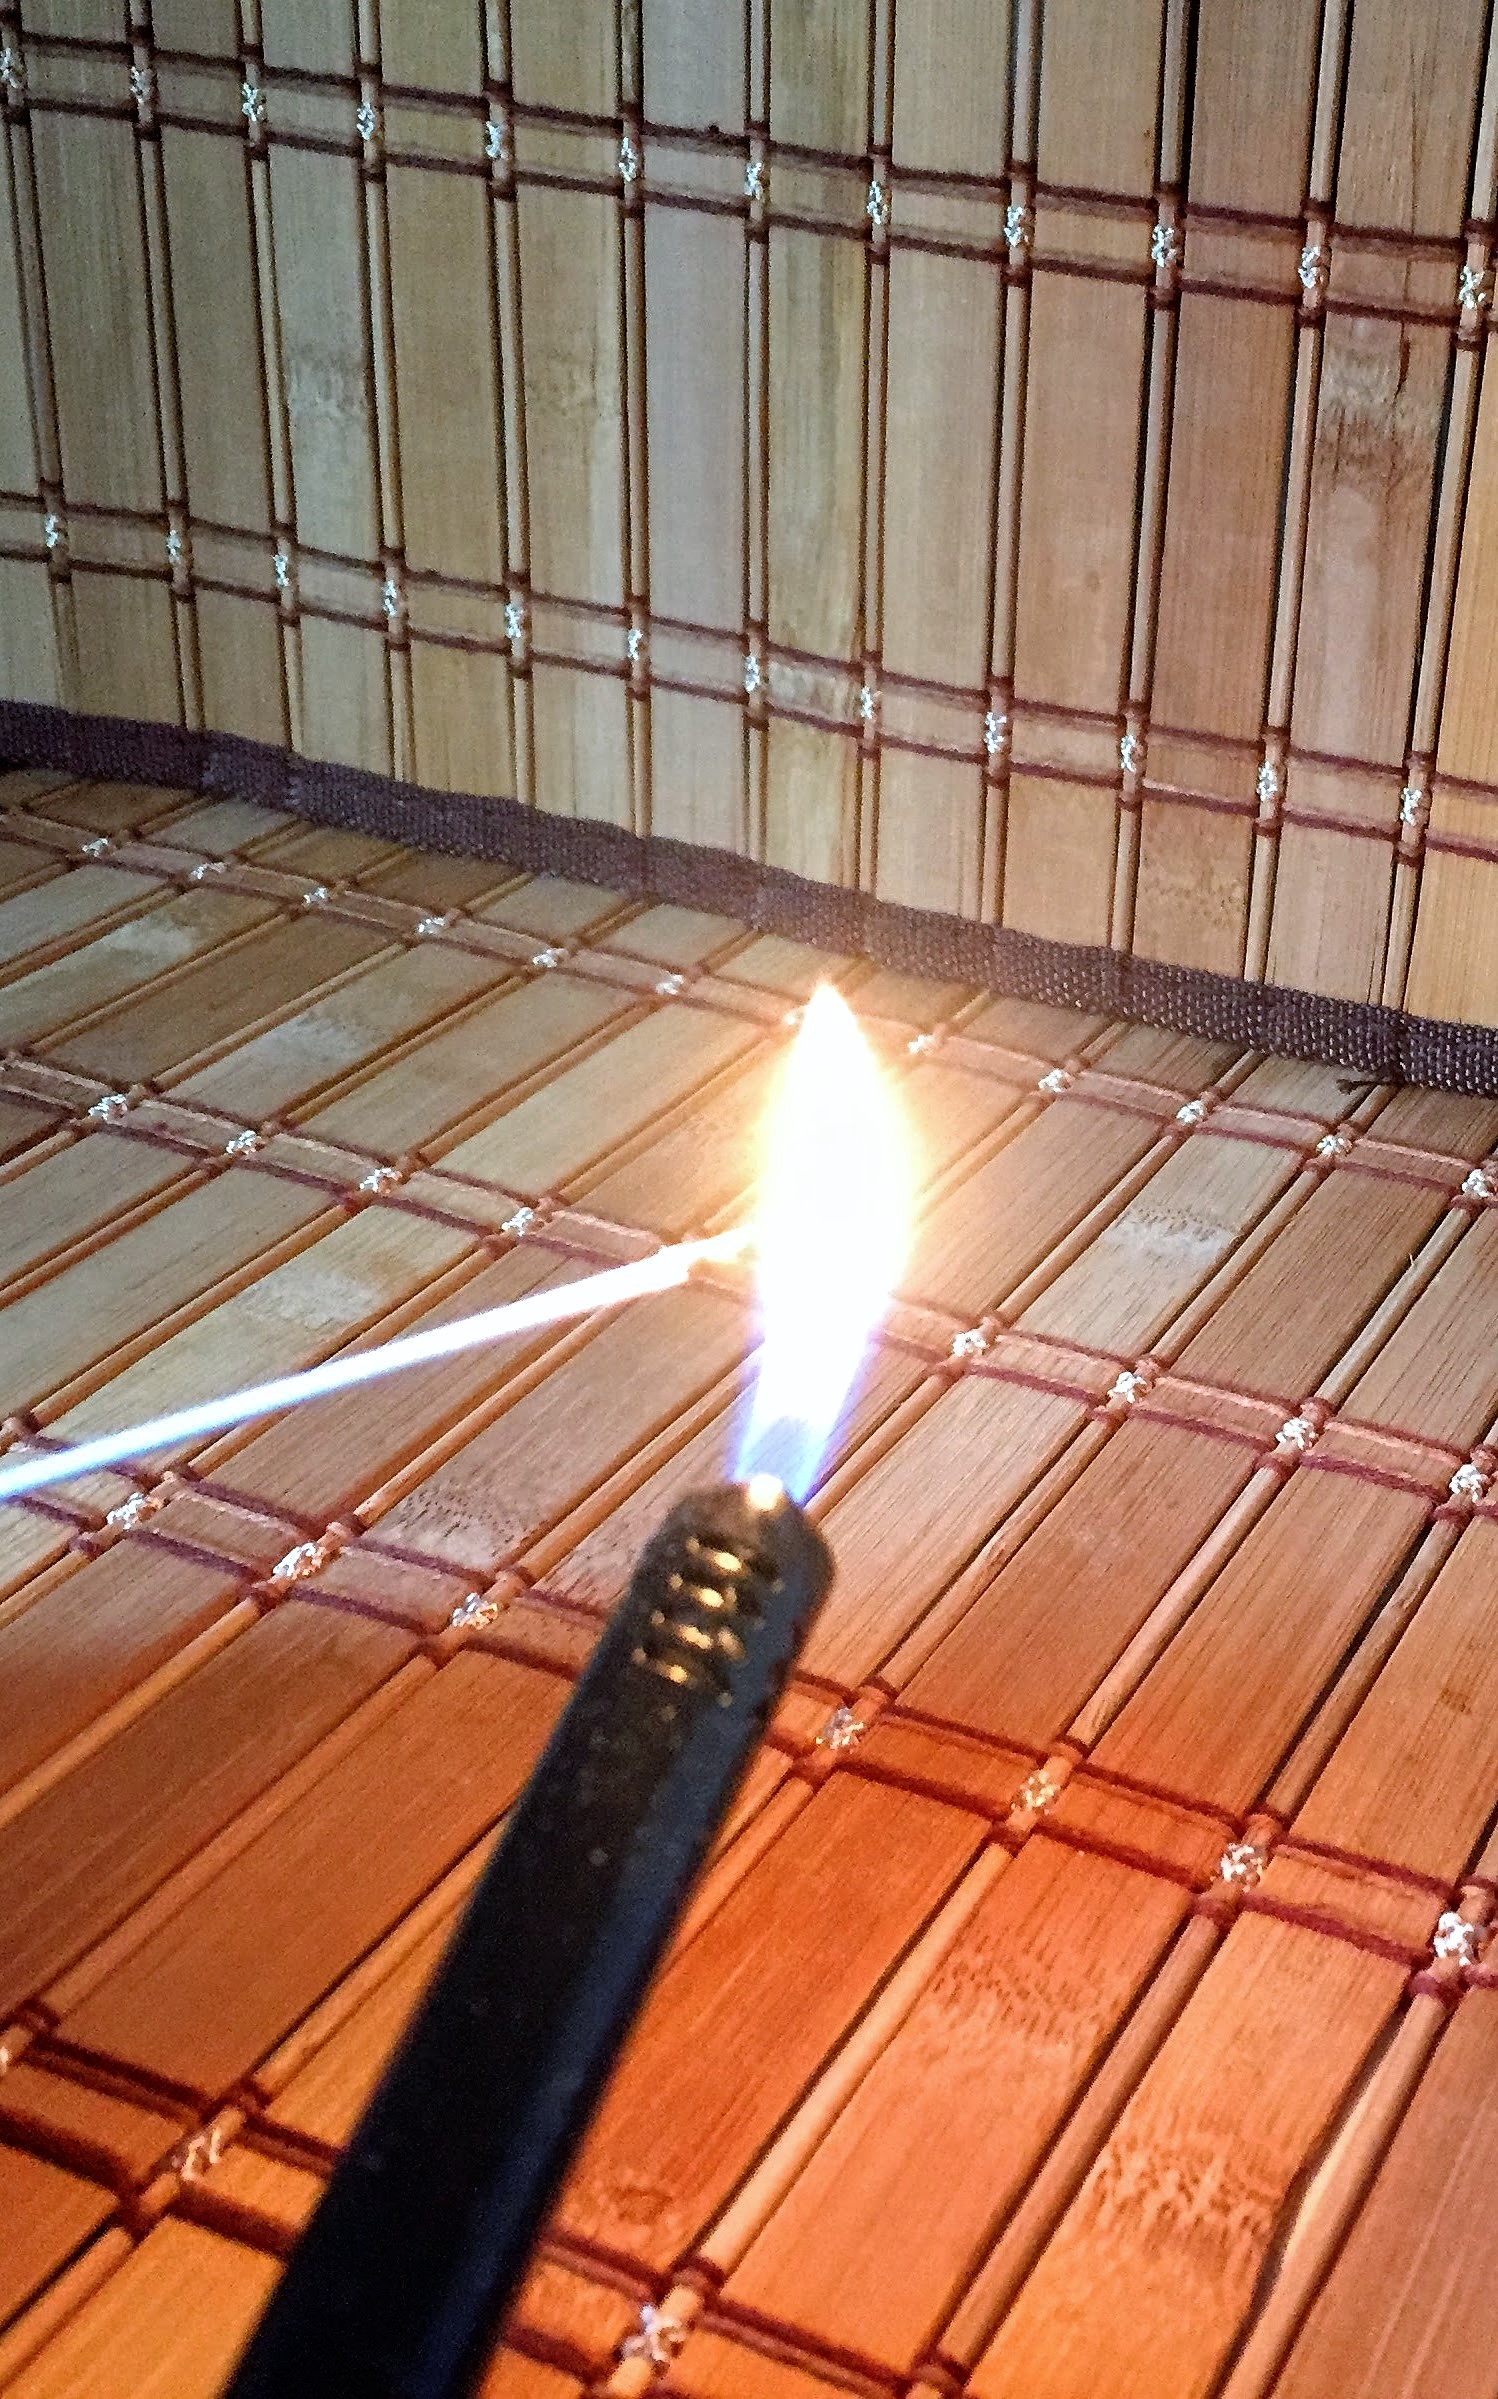
Next, take your seagull and your wire, and head to the stove or get your lighter. Burn one end of the wire so that it’s very hot. Please be careful! The heat definitely travels down the wire:
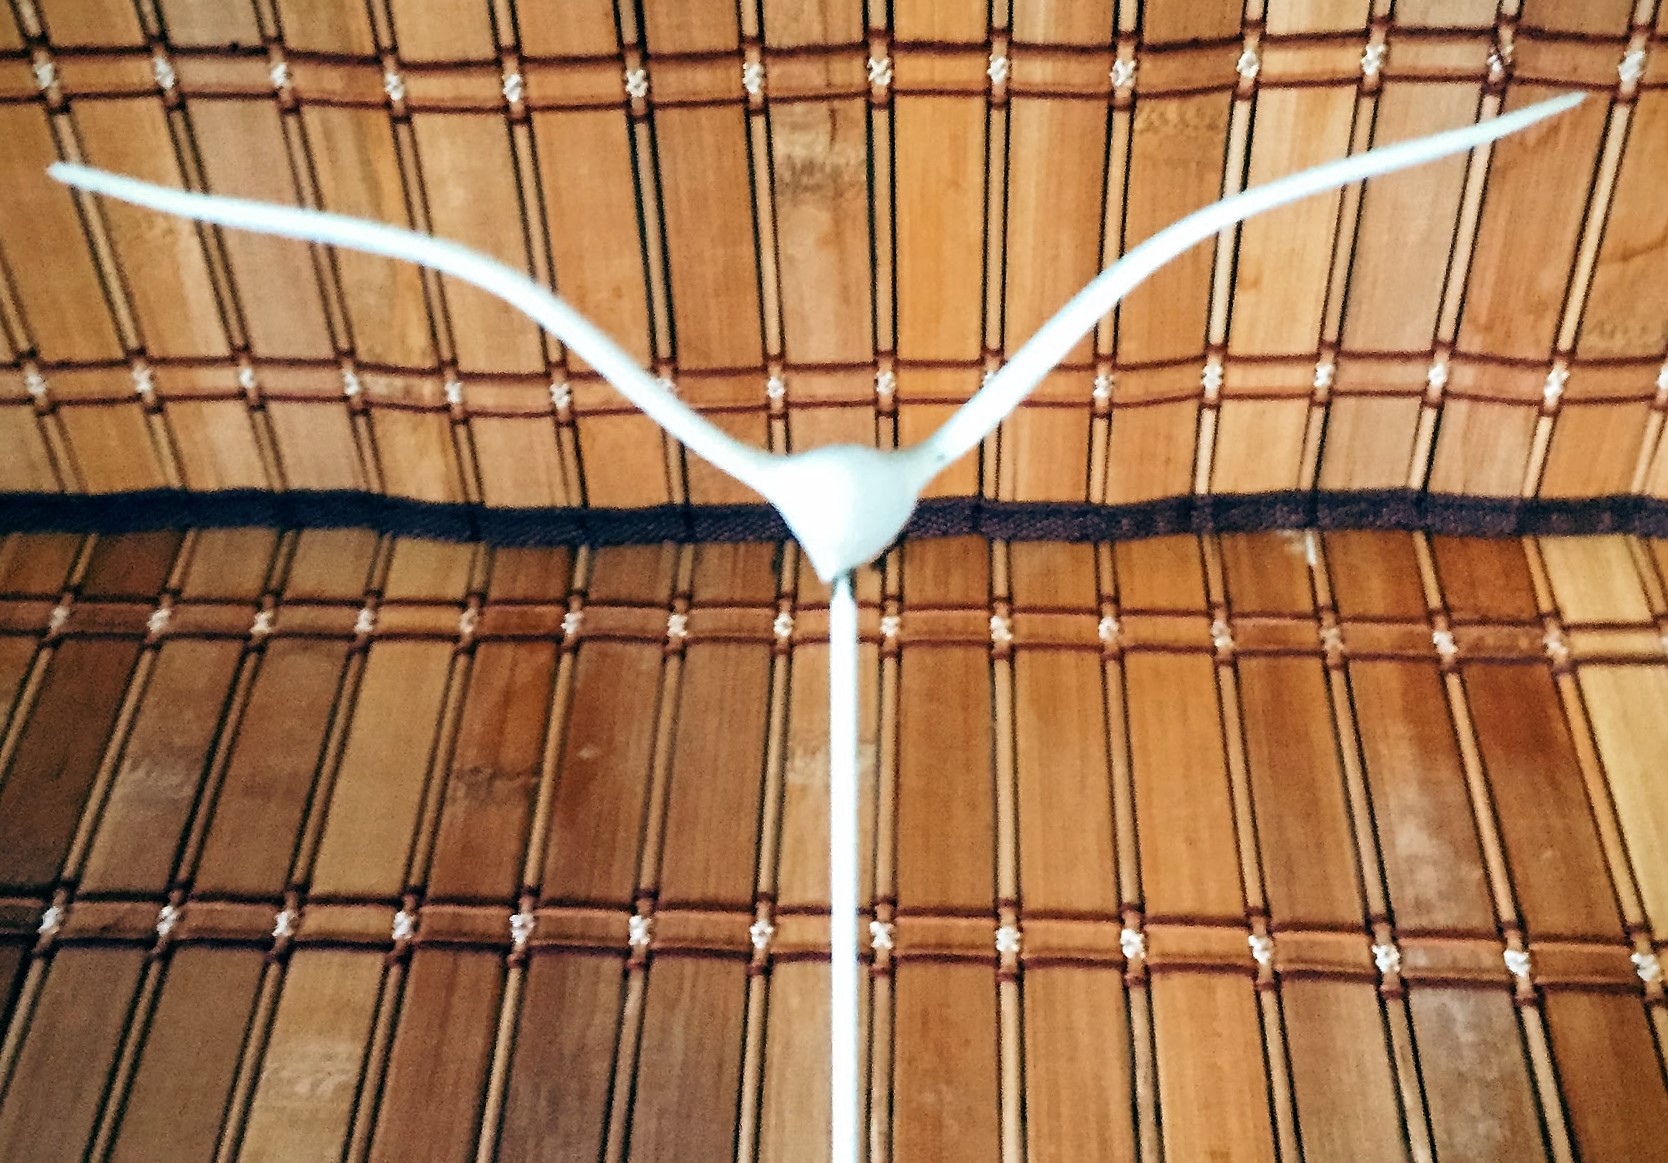
Find a place right in the center of the belly of the bird, and start to push in the hot wire. The plastic of the seagull will begin to melt. I usually have to repeat this process 2-3 times to get the wire inserted and melted into the underside of the seagull. Sometimes, it’s in, but sort of loosey goosey, and I have to really yank, to get it to come out. Just reheat it again, and the next time, it should be tight. Also, it will get tighter as it cools:
You’ll need to make sure that it’s as far in, as you can get it, it’s nice and straight (there’s usually a little time to move the seagull into a straight position while it’s still hot), and not loose at all:
After your wire is inserted firmly and it has cooled, take your sandpaper and sand around the point where you’ve inserted the wire and get it as smooth as possible. Sanding will also get rid of some of the black from the burning:
*Note: Every now and then, when I’ve finished this step, and everything has cooled, I realize, the wire is not in tightly enough. You just have to repeat the process, AGAIN, and 9 times out of 10, it will really stick. I had one experience where the wire would just not melt into the seagull. I ended up having to start over with another seagull, but that’s the only time that happened, and I’ve made a lot of these little guys. Most of the time, it works for me, after burning the wire just 2 or 3 times.
Once you’re done with that , throw on your vinyl gloves, grab whatever spray you’ve chosen, and go outside to spray your seagull and wire. Hold your seagull by the wire, and begin to spray with very light even coats. I usually just hold the seagull and let it air dry for a few minutes, and then add another coat.
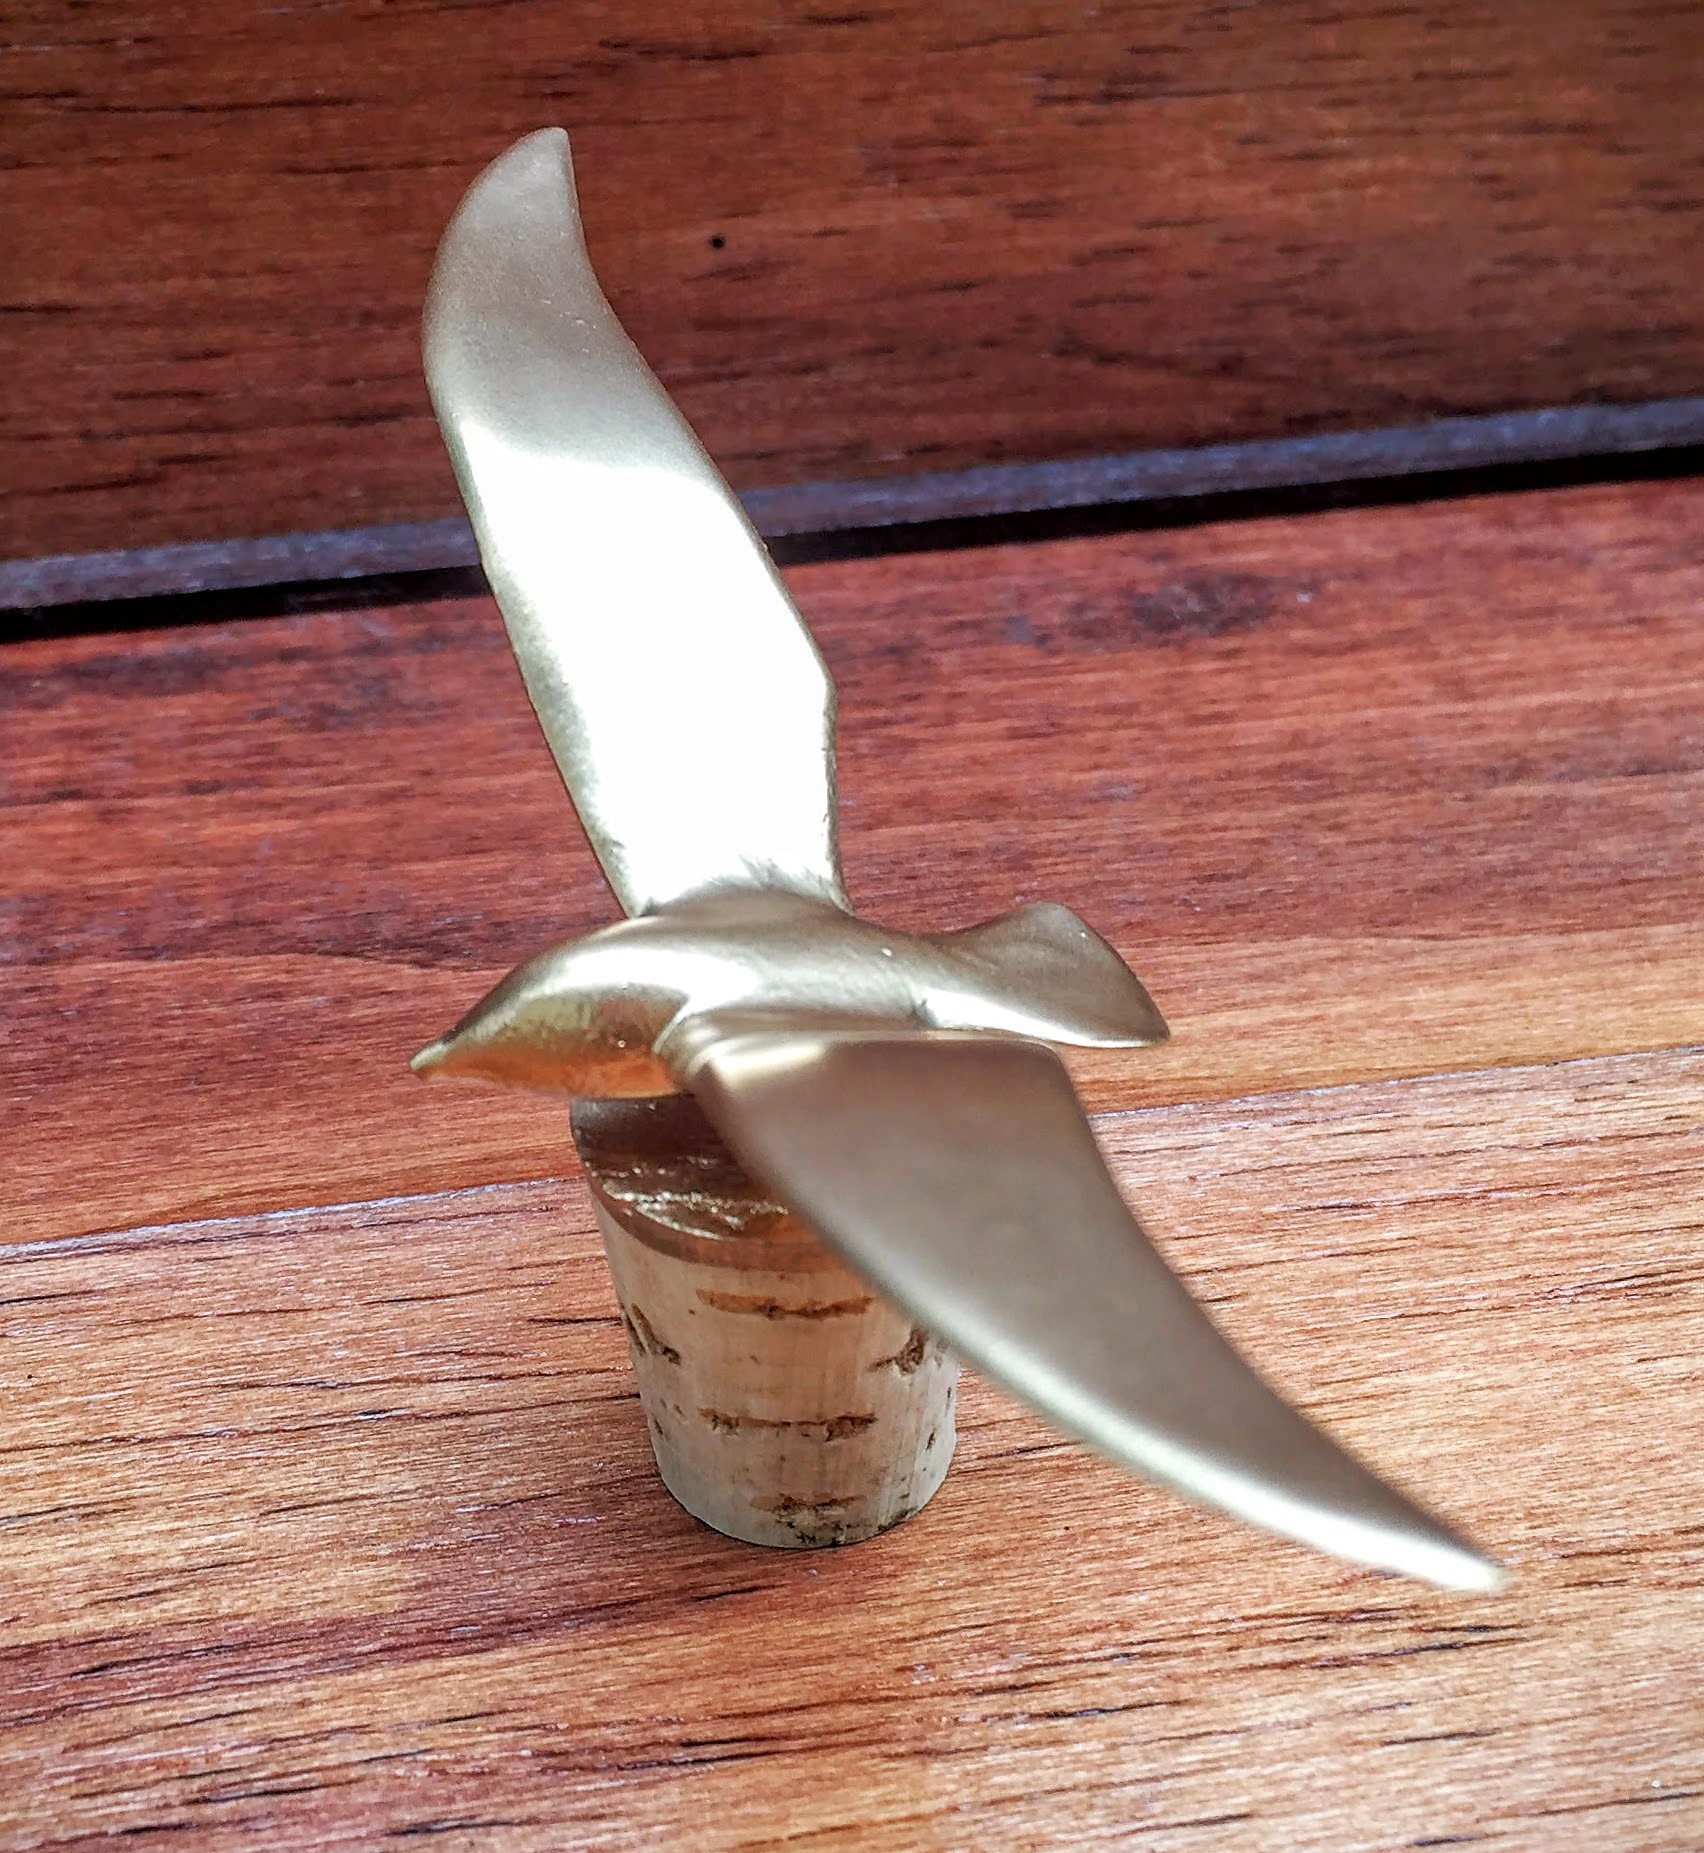
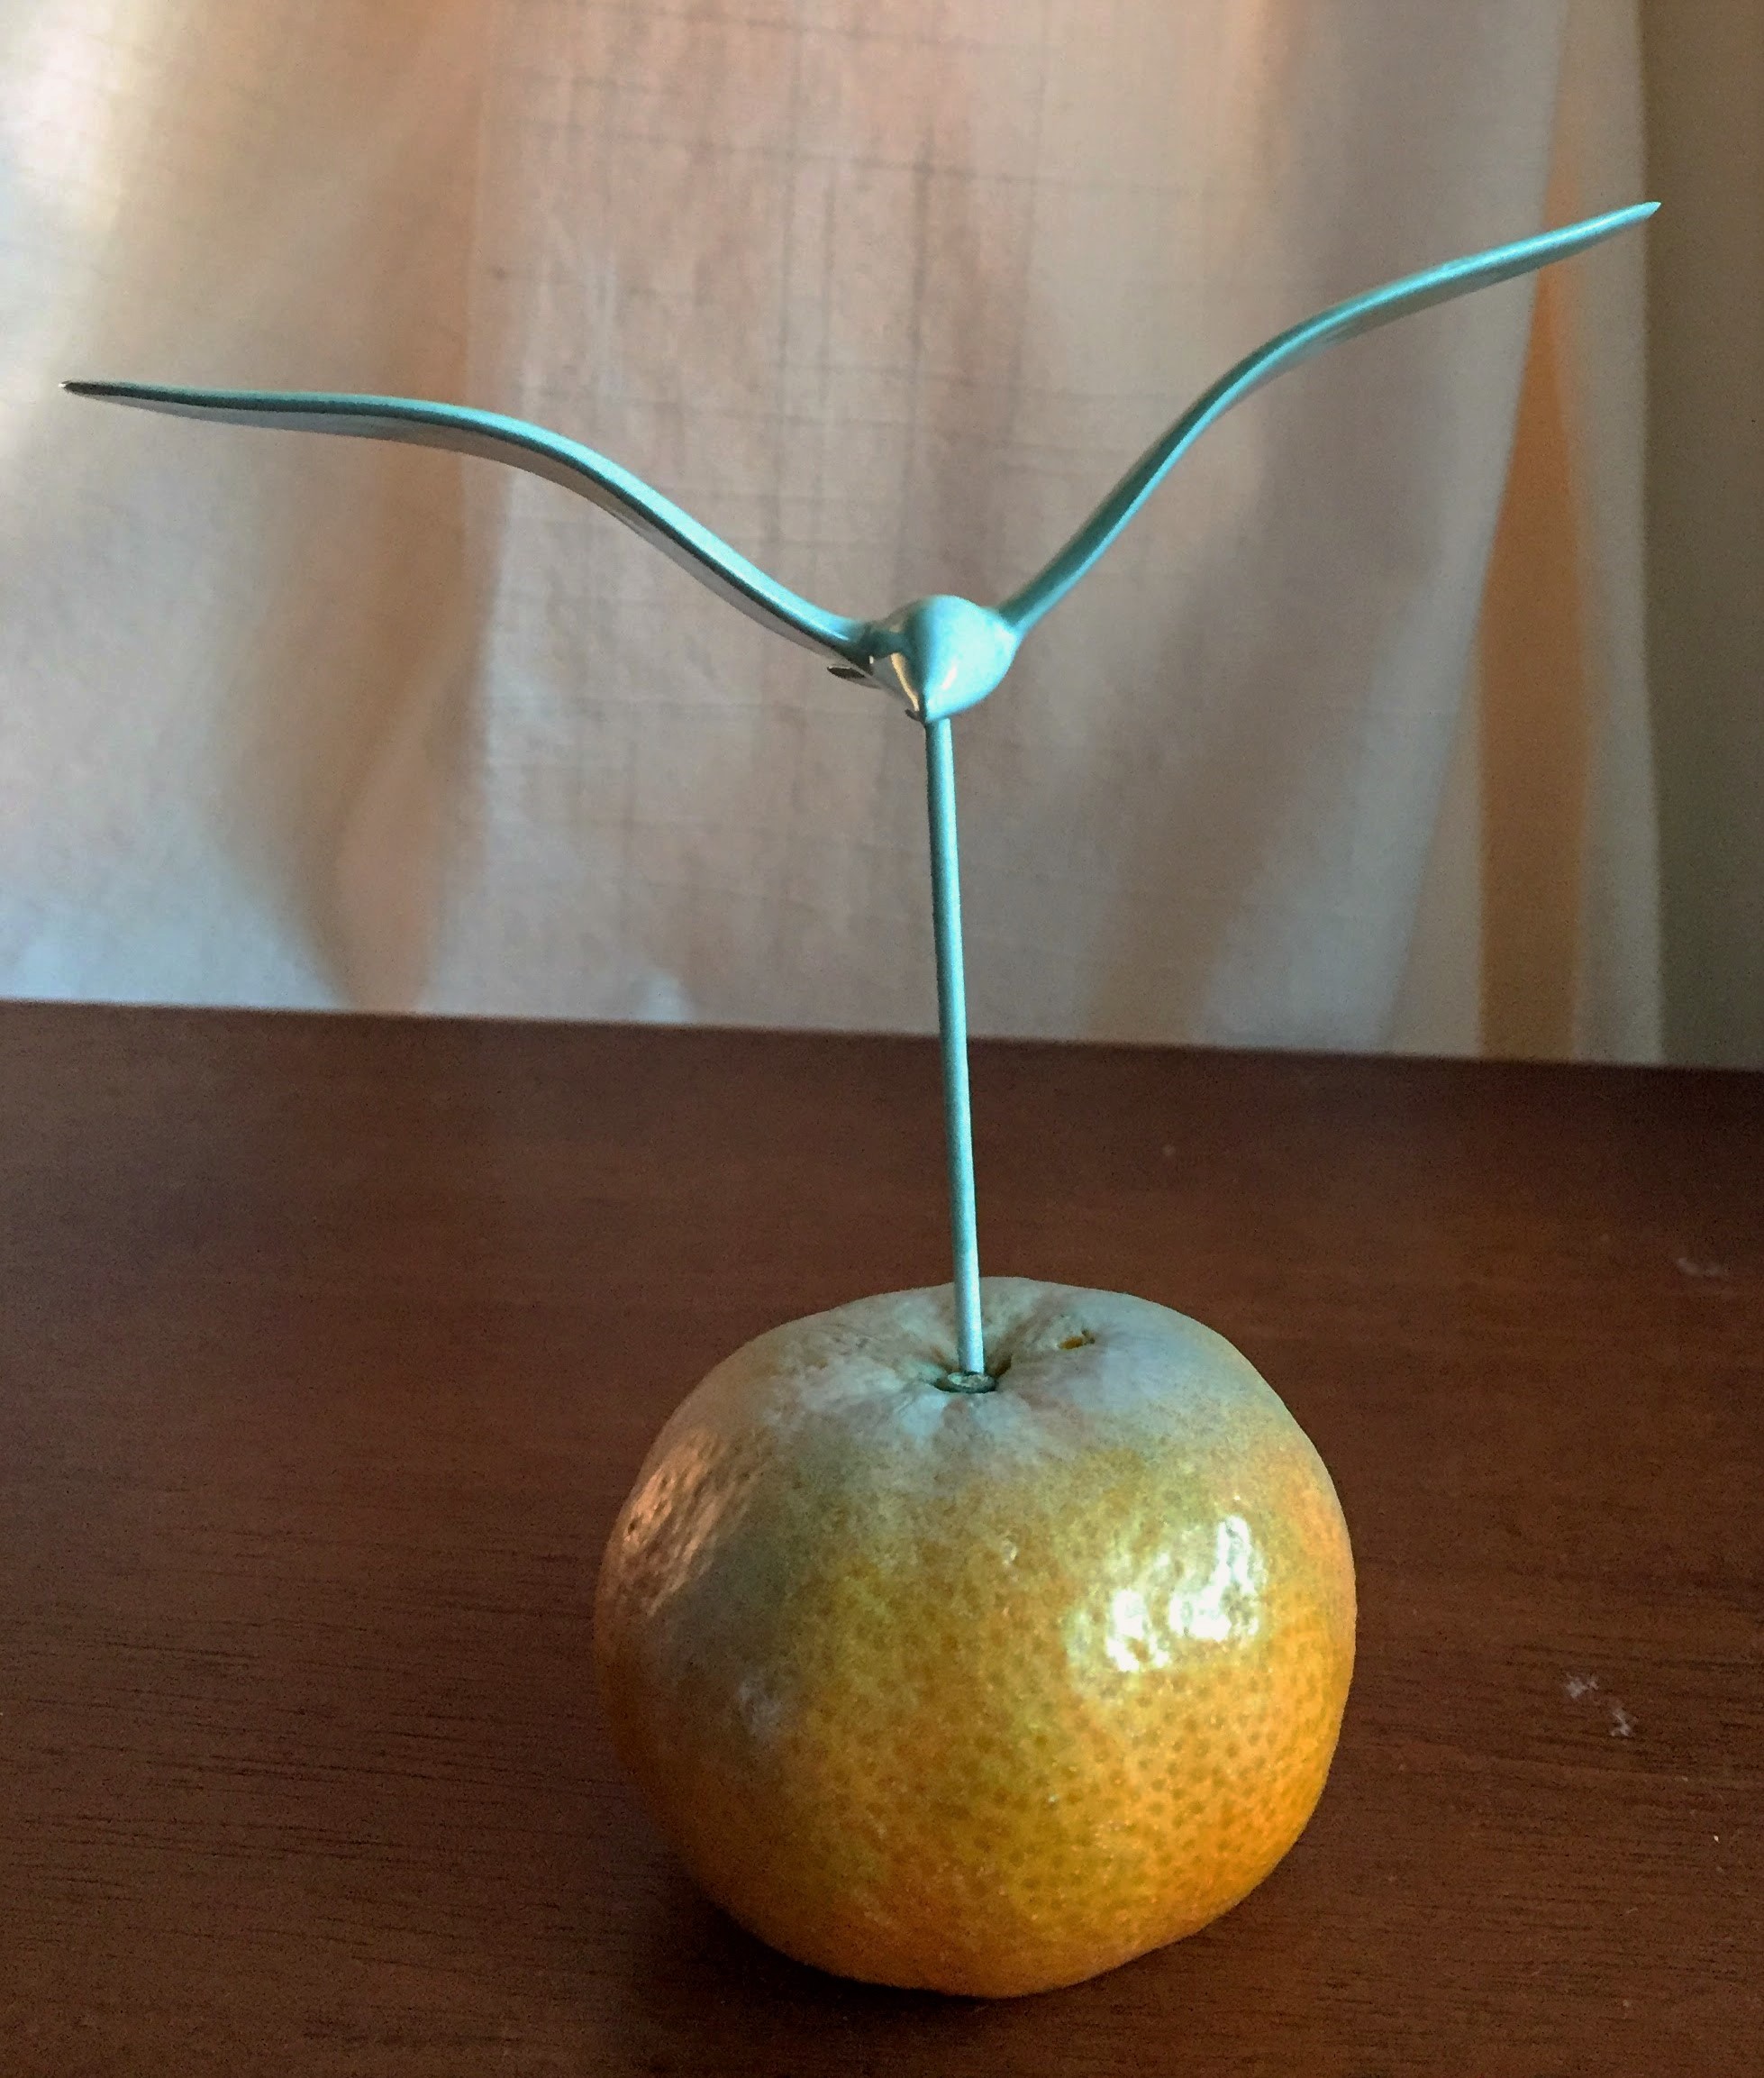
*A note on painting these seagulls. It can be somewhat challenging depending on your color choice. Some of the spray paints stick really well, while others just seem to drip off. If you’re using a color like the Ballet Slipper Pink, for example, your best bet is to go with a satin. Doing very light coats and using a primer before applying the paint, would probably remedy the problem. Now that I’ve mentioned it, It’s a good idea to use primer with any color because over time the metallics get blotchy, and I’m pretty sure a primer would fix that. Metallic colors definitely stick the best. The 24K Gold is really easy. A couple good coats and you’re done. When I’m done painting and waiting for the seagull to dry, I use a clementine orange as a resting spot. It holds it perfectly:

Once you’re satisfied with the way your paint looks, and your seagull is completely dry (you may want to wait 24 hours, because you have to push the seagull into the cork, and it can leave fingerprints on wet paint), you can get the corkscrew that you will be using, and start working. First, you will take a hammer and a thin nail, and hammer the nail into the corkscrew, where you want the seagull to go:
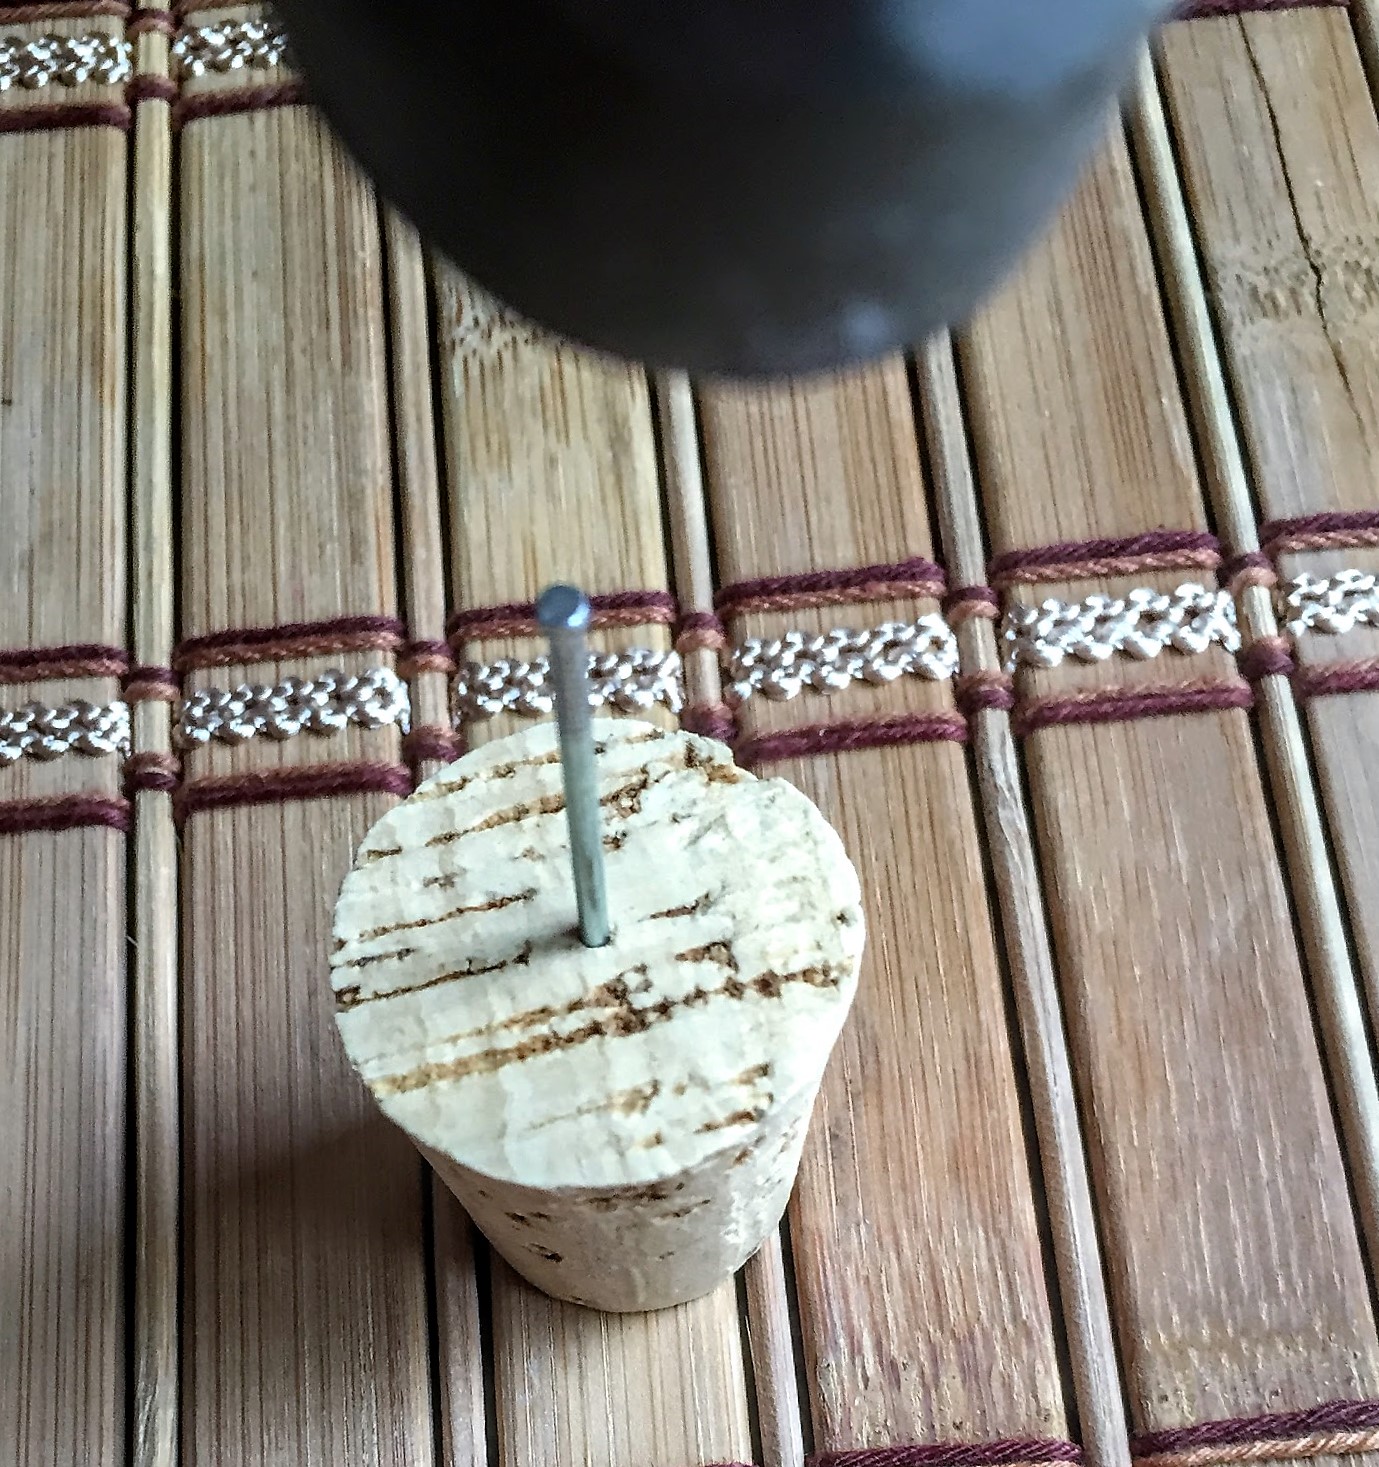
Make sure it’s very straight because sometimes the cork sort of grabs the nail about halfway down, and takes it in a different direction. If that happens, your seagull will look very crooked when it goes in. Once you’ve got your nail about 3/4 of the way through your corkscrew, pull it back out. The purpose of this step is to make it a little bit easier to get your seagull and wire into the corkscrew. Next, you’ll want to put your seagull and wire up to your corkscrew and decide how you’d like it to sit, and how much of th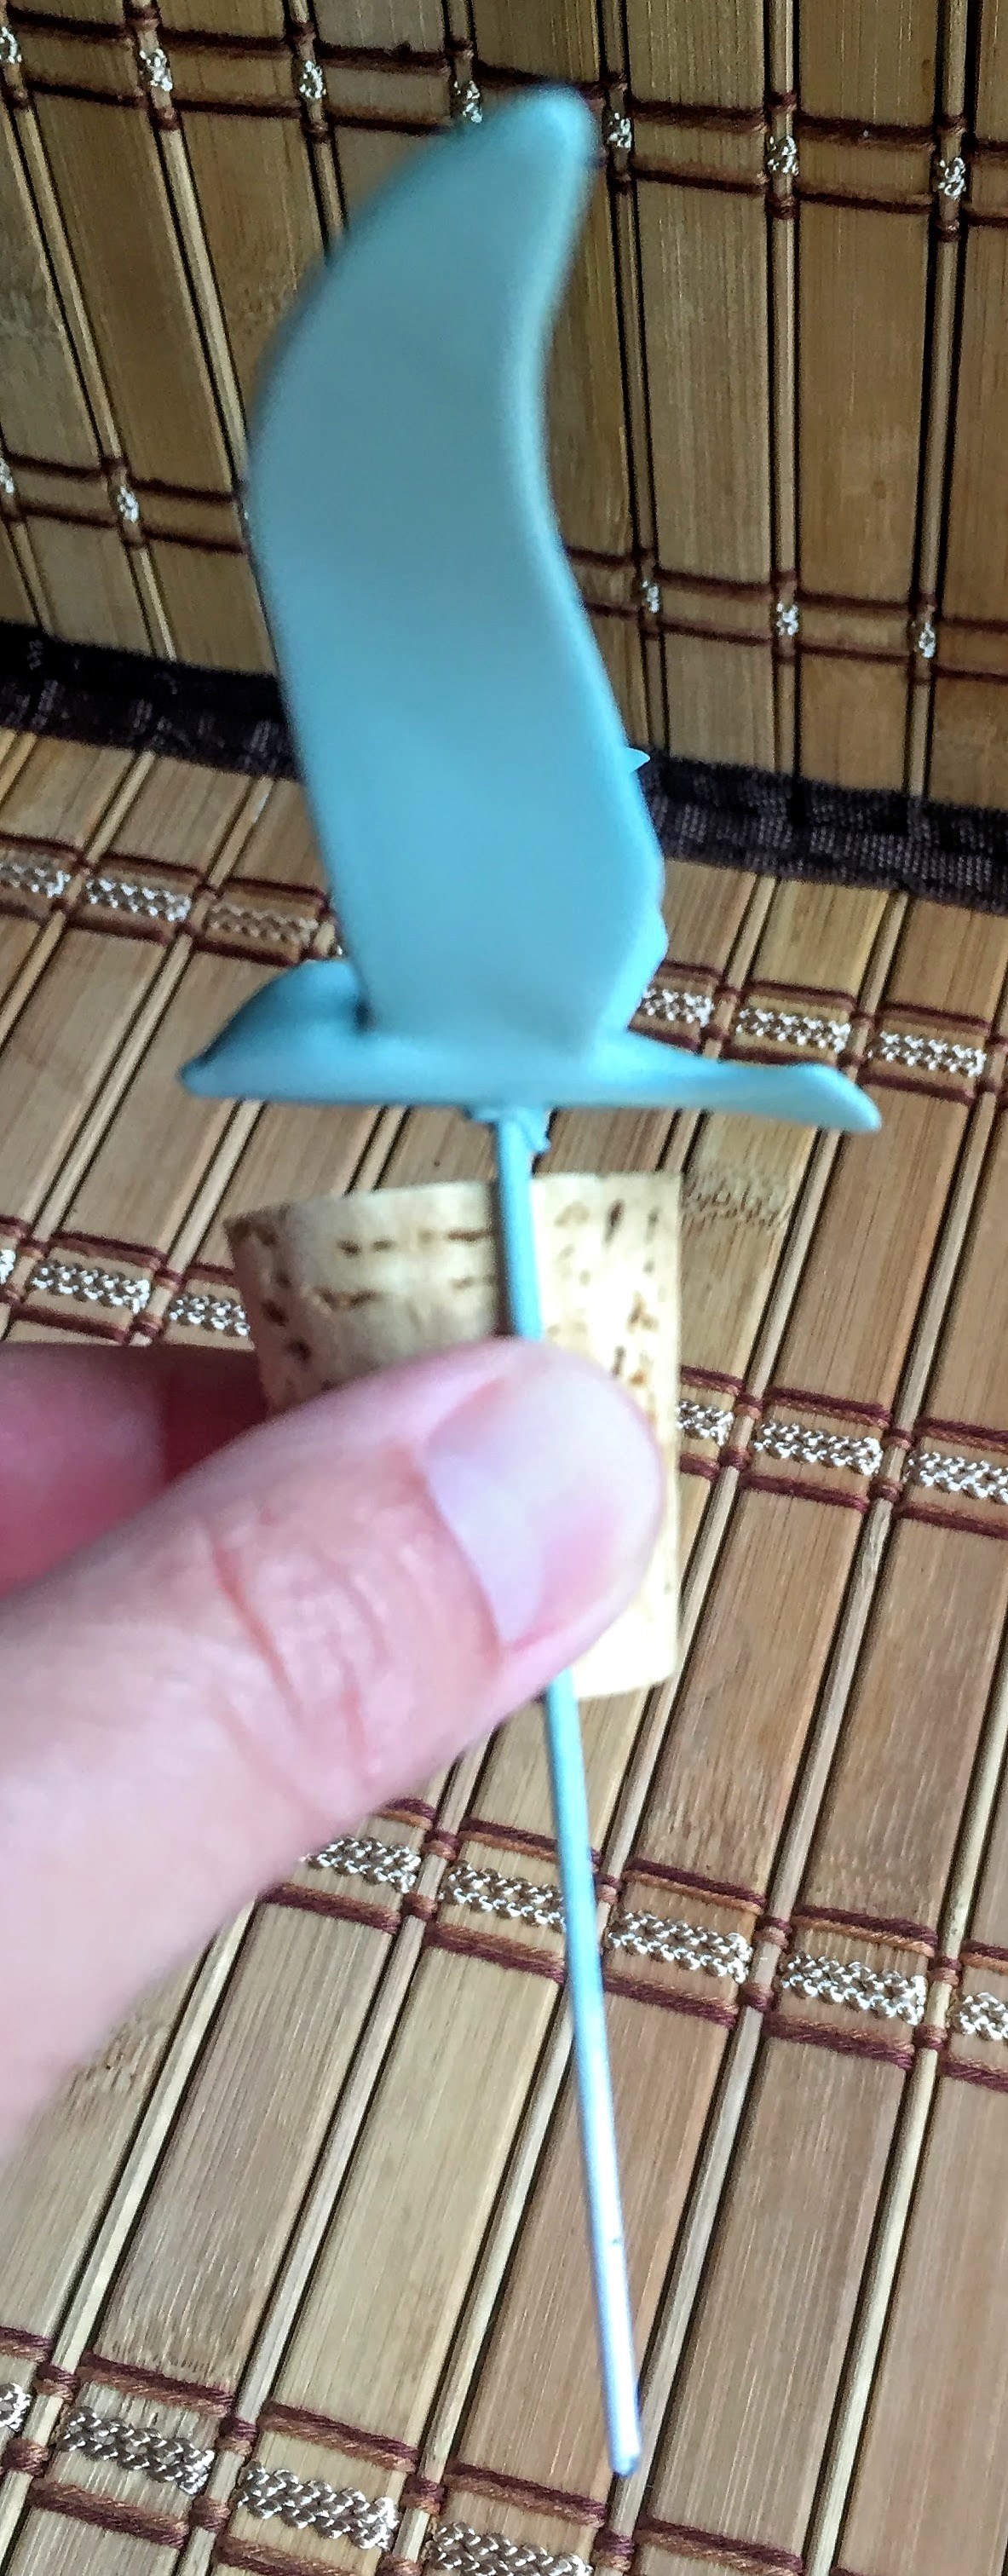 e wire you’ll cut off:
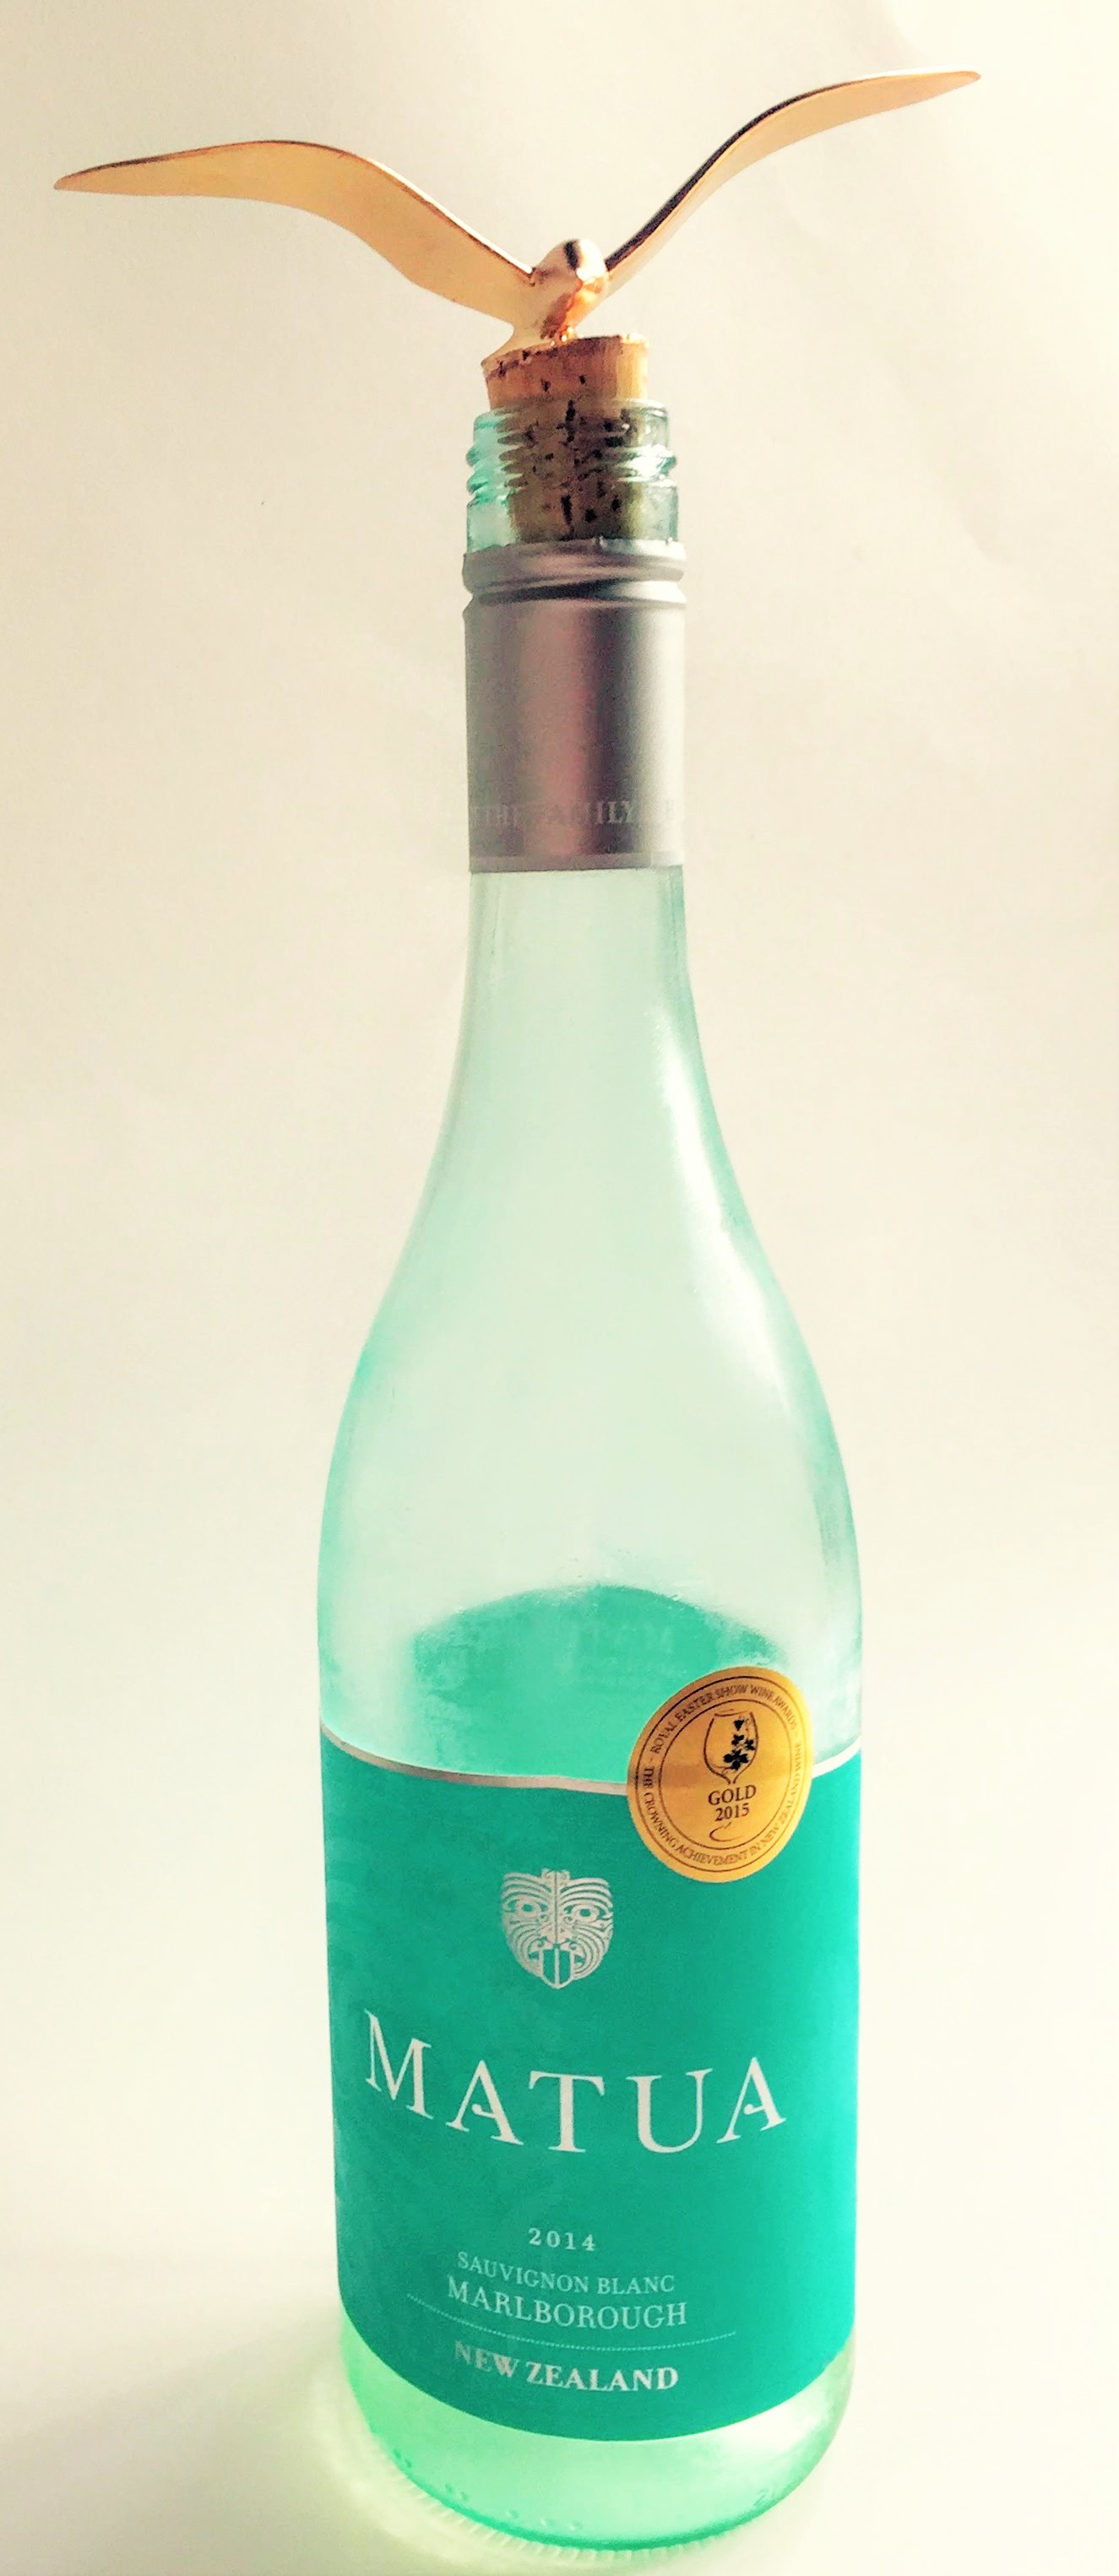
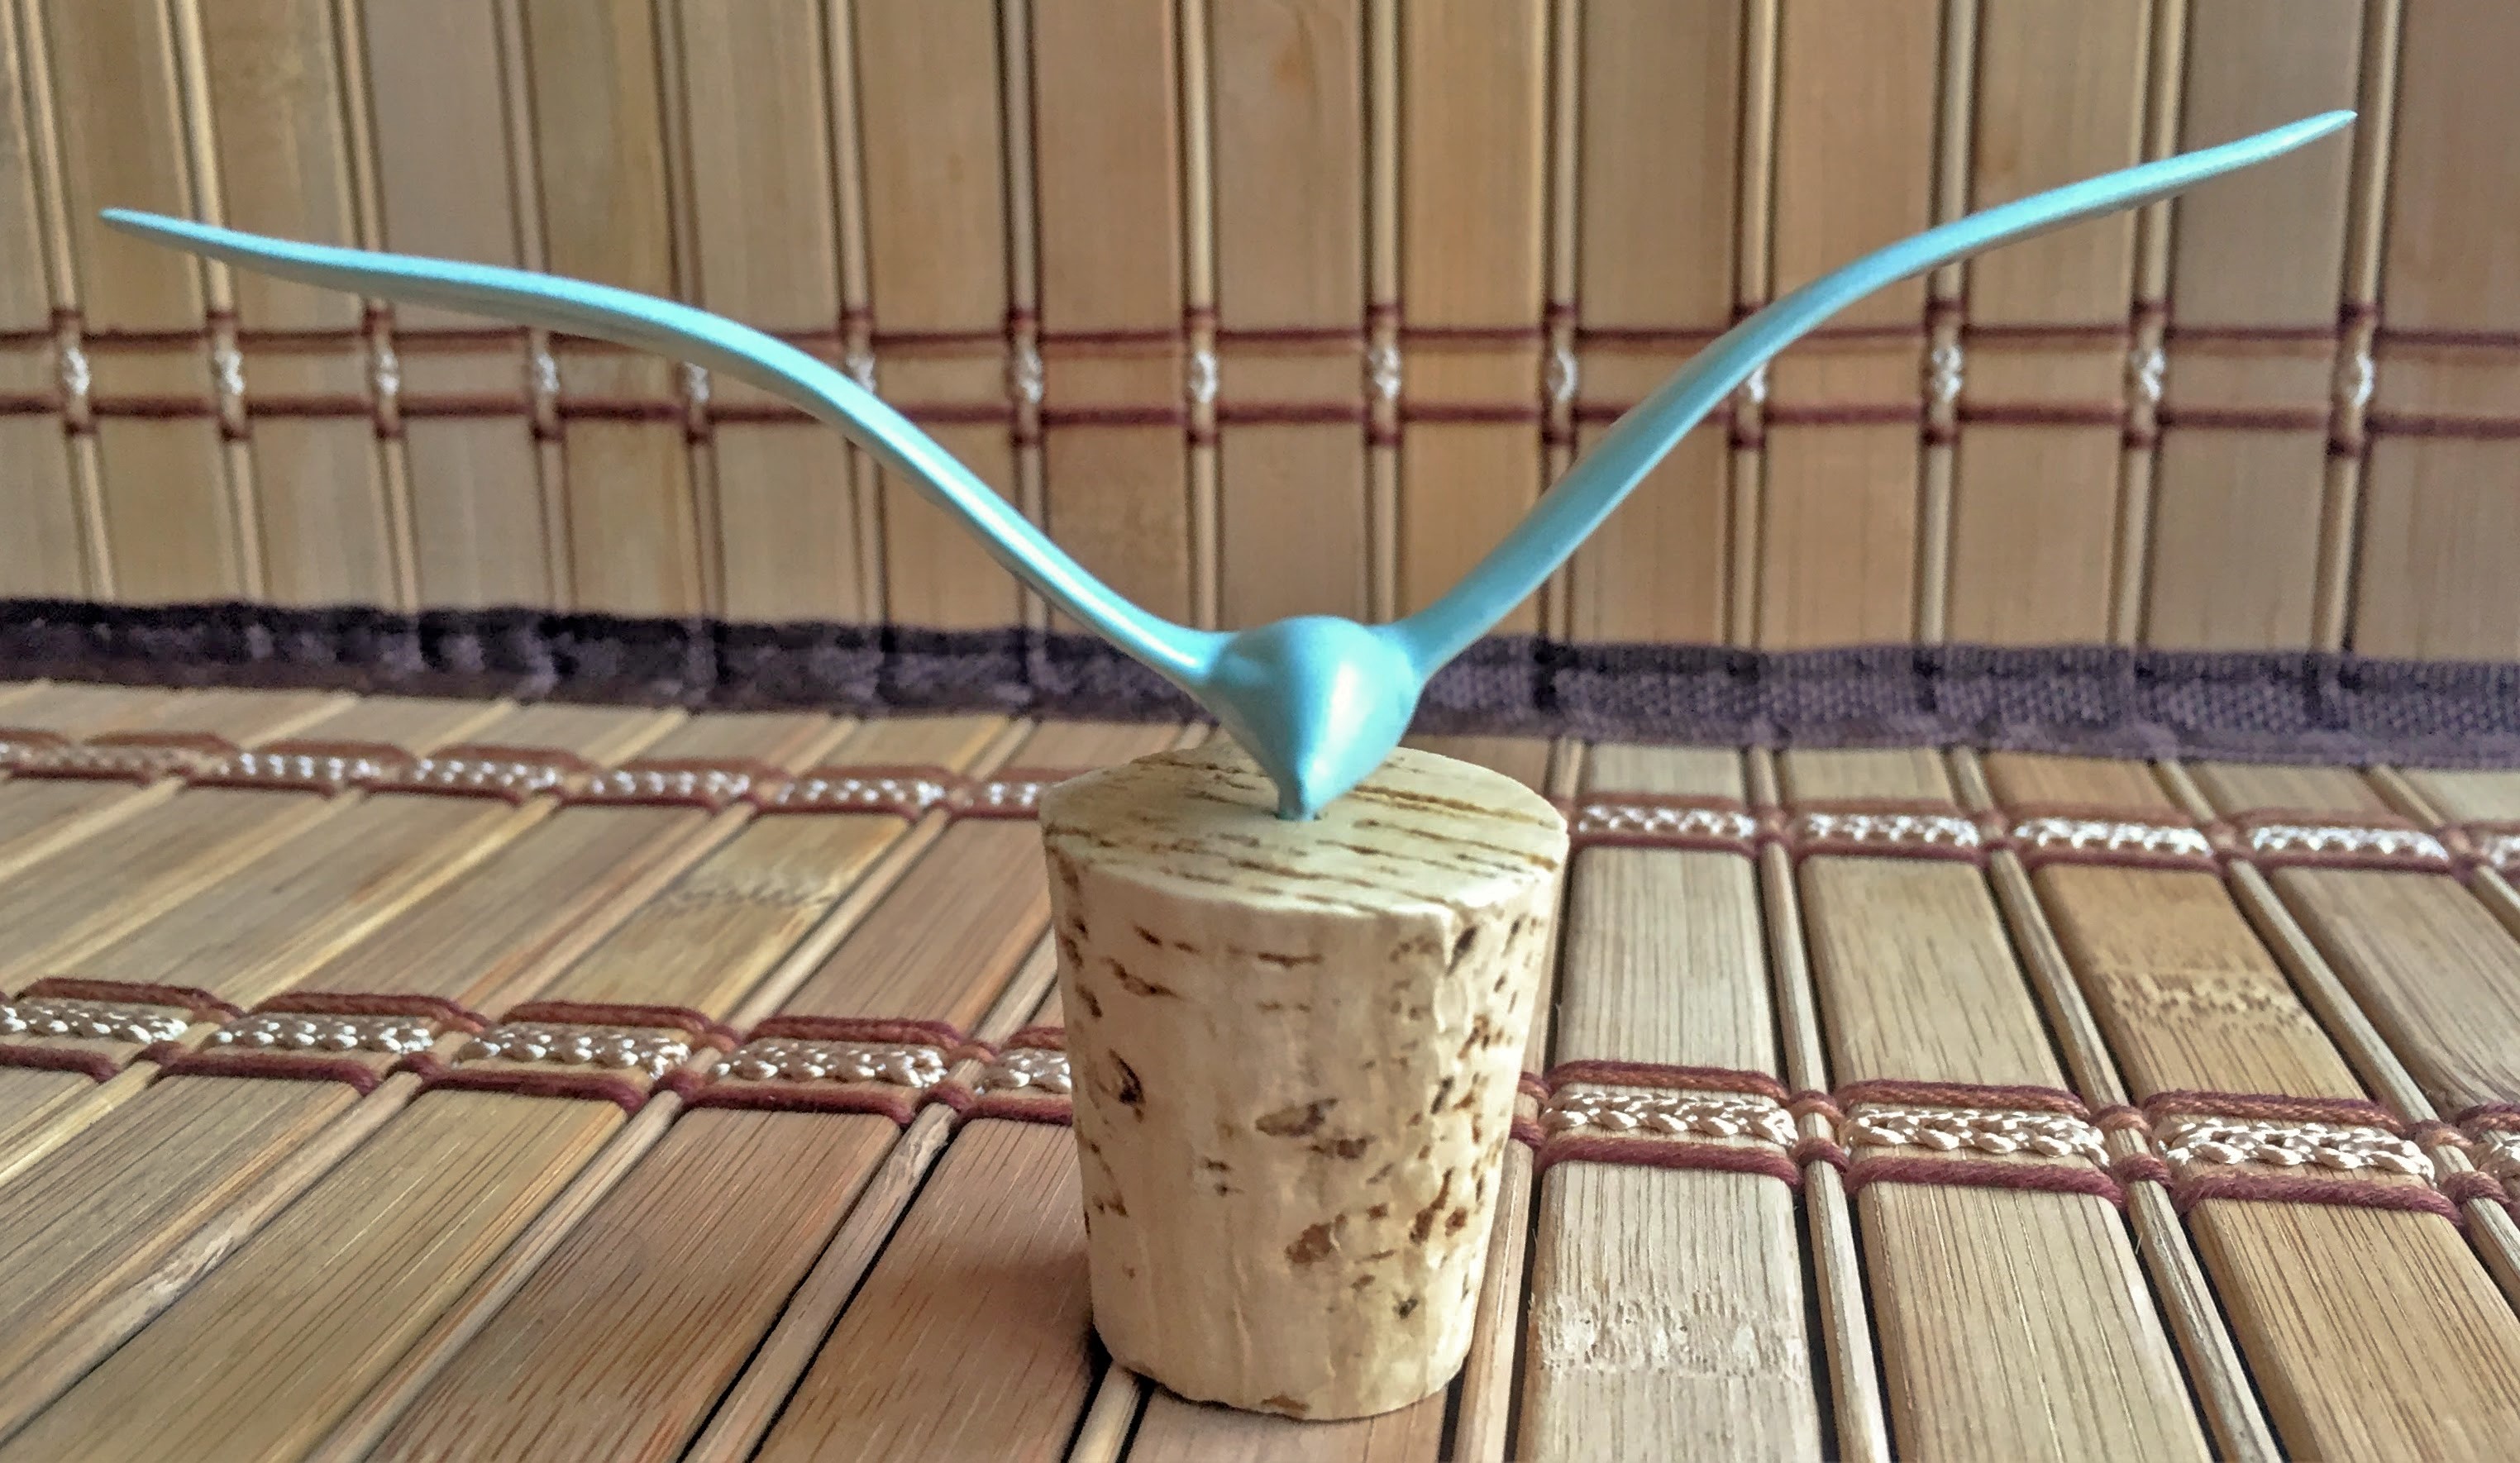
I usually leave just a tiny bit of the wire out, above the corkscrew, to give the seagull the appearance that it’s flying. If you put the belly of the seagull right down to the cork, it looks a little funny. *Note: When you cut this wire it will go flying even more than when you cut your original section from the wire hanger. So, make sure your room is kid and animal free, and perhaps, wear something to protect your eyes.
Next, you’ll want to cut your wire so that it’ll go through about 3/4 of your corkscrew. That way, it’ll be nice and sturdy in there (you might want to go a tad longer than what you see below):
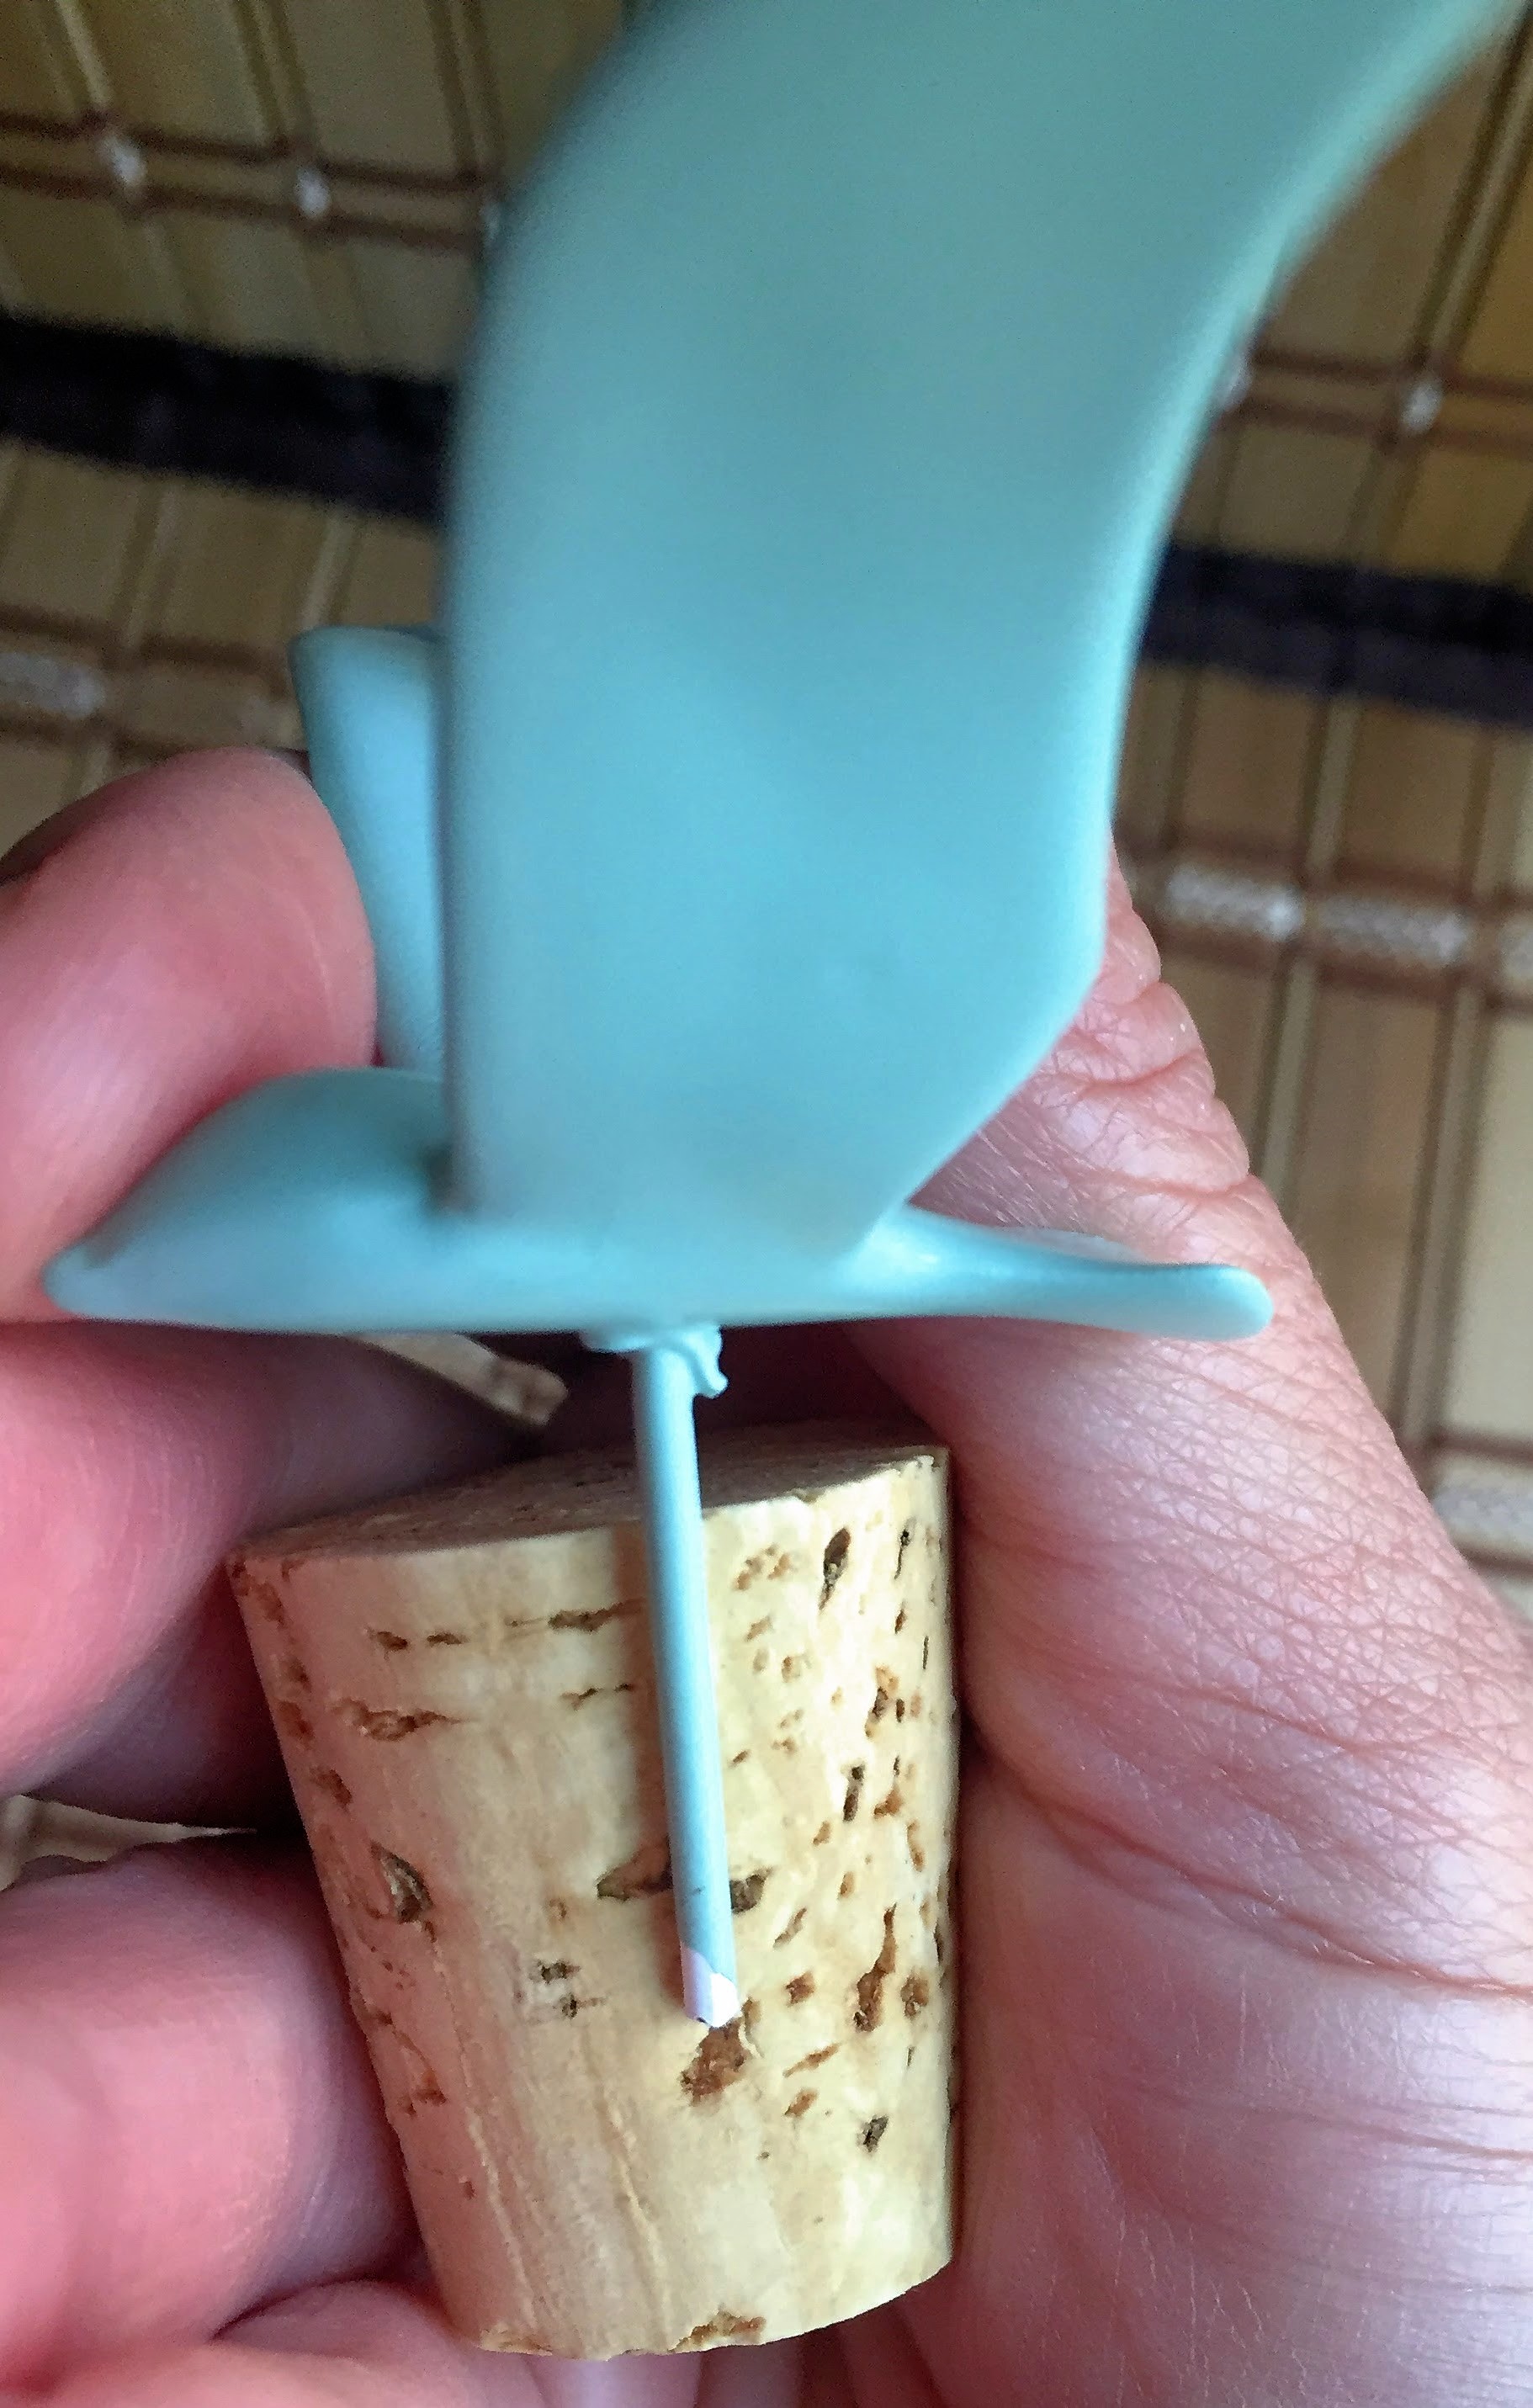
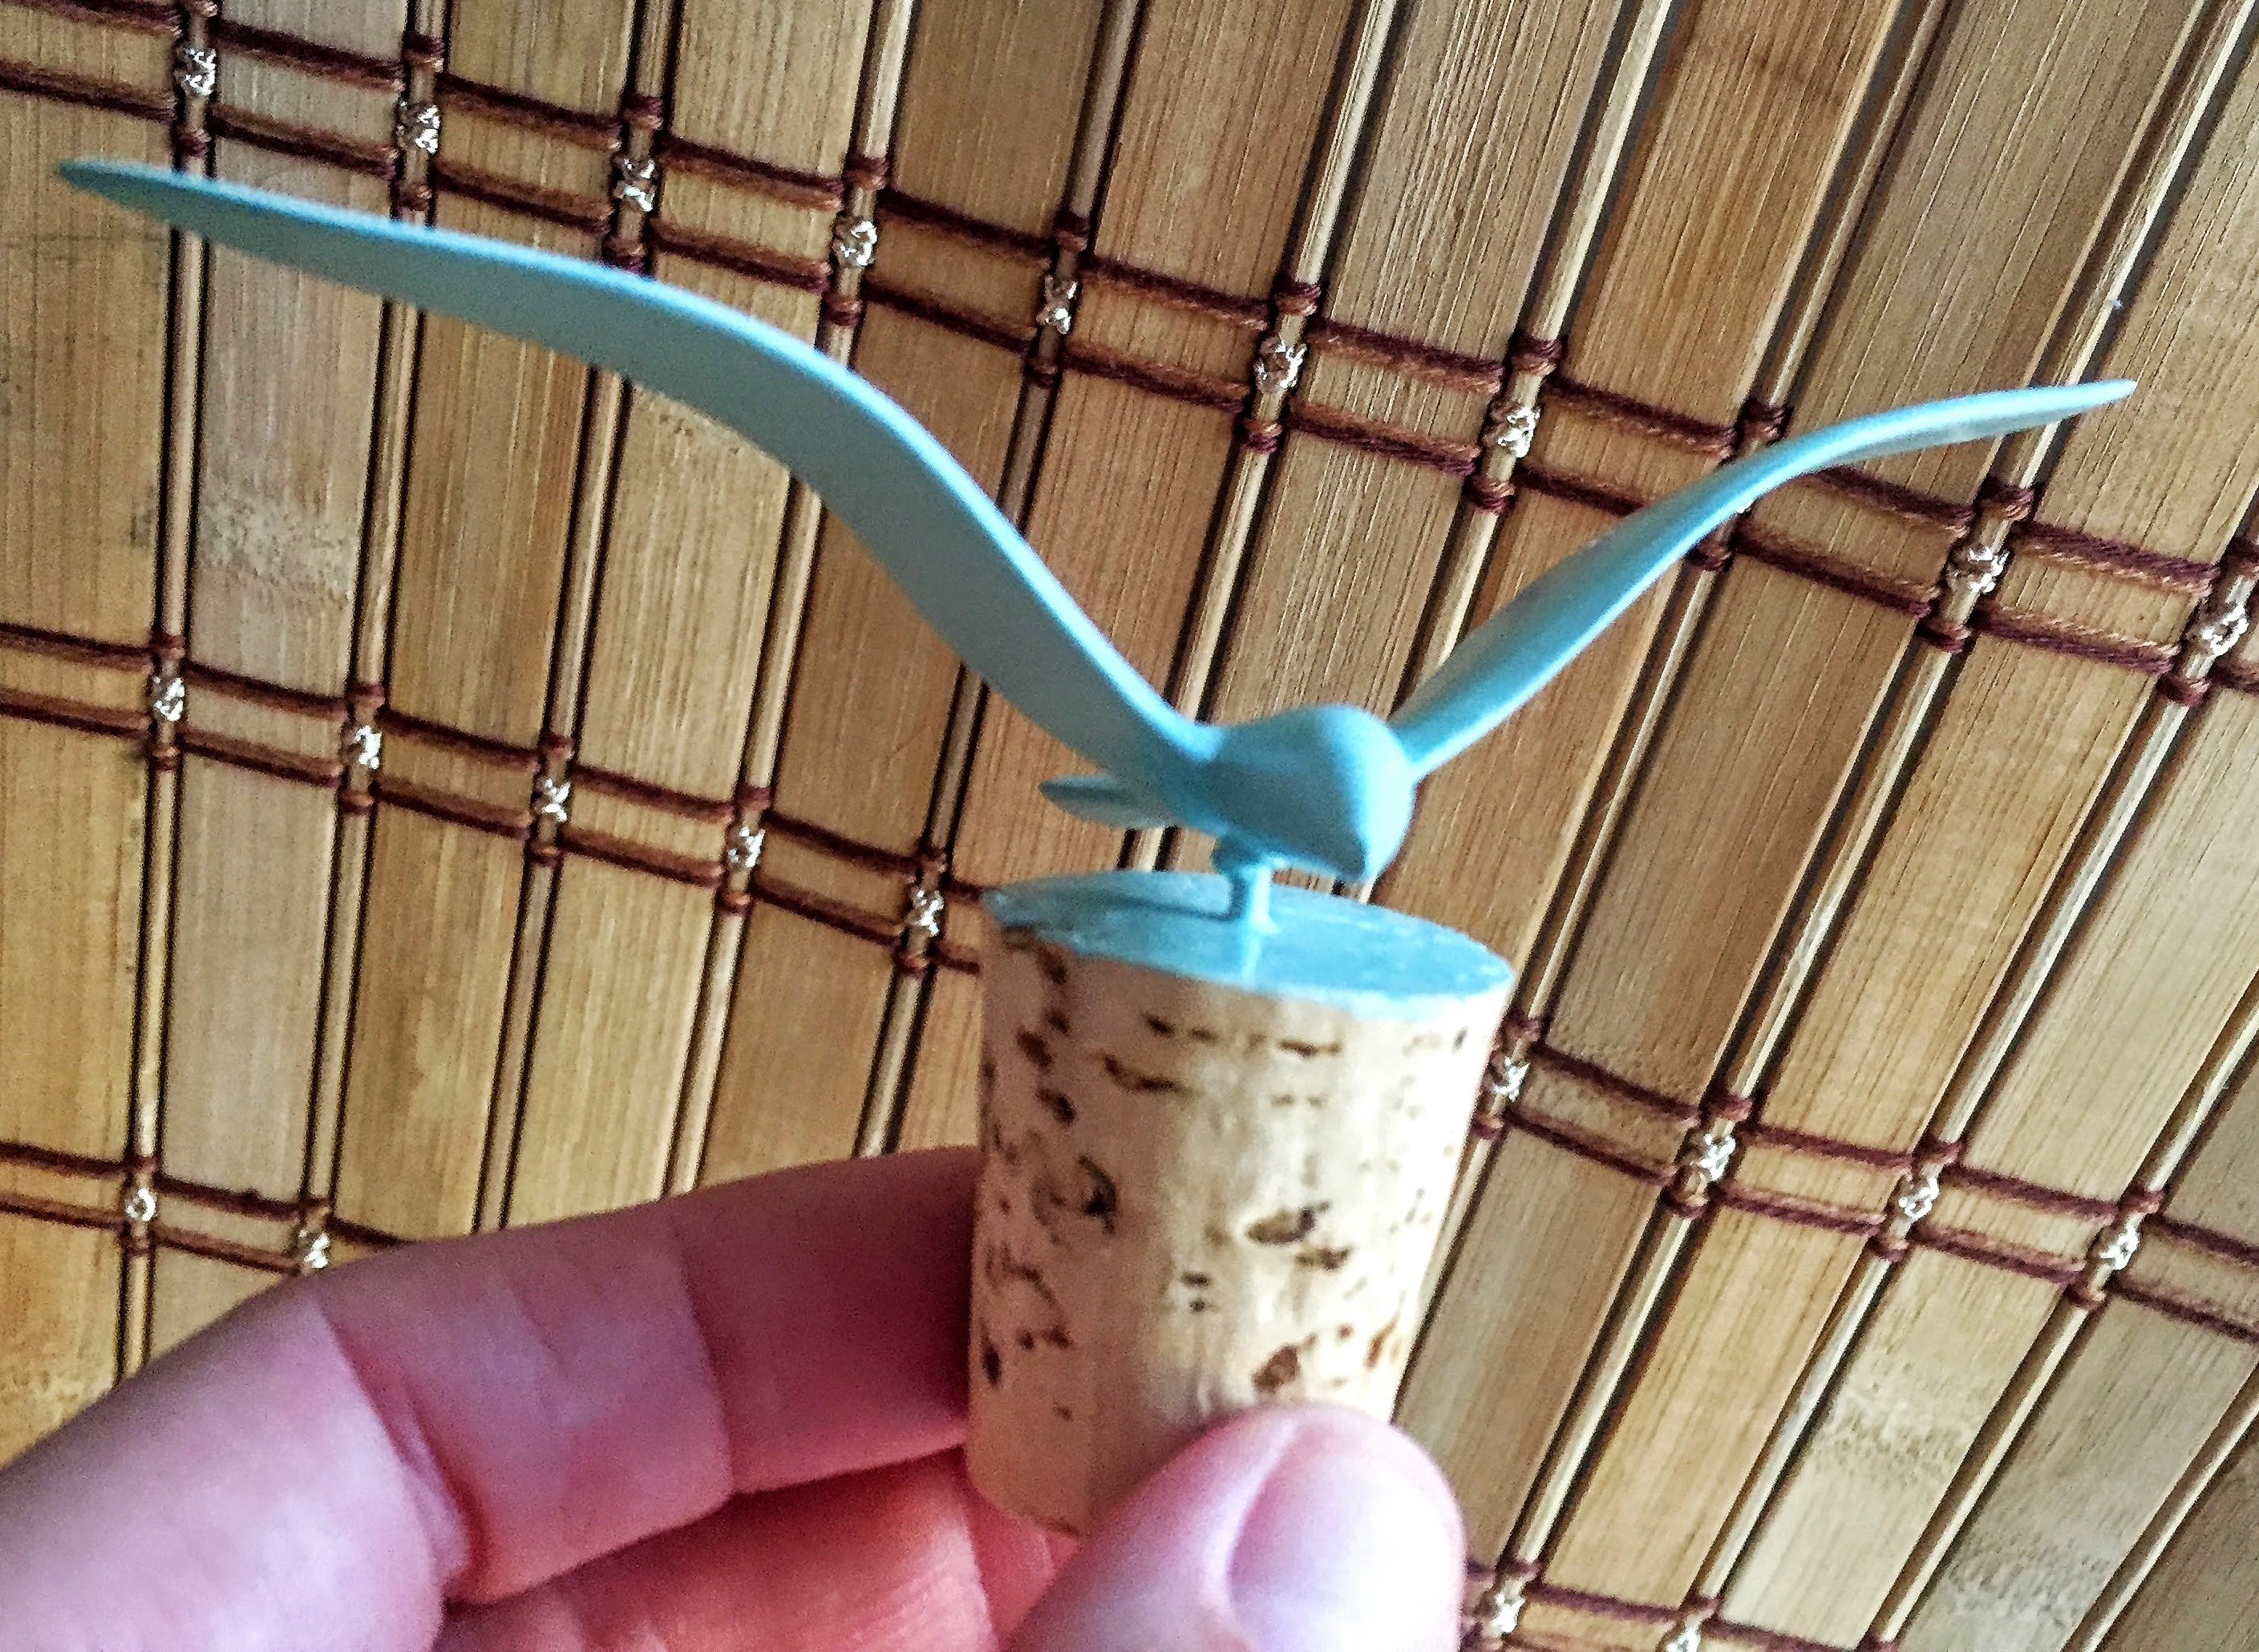
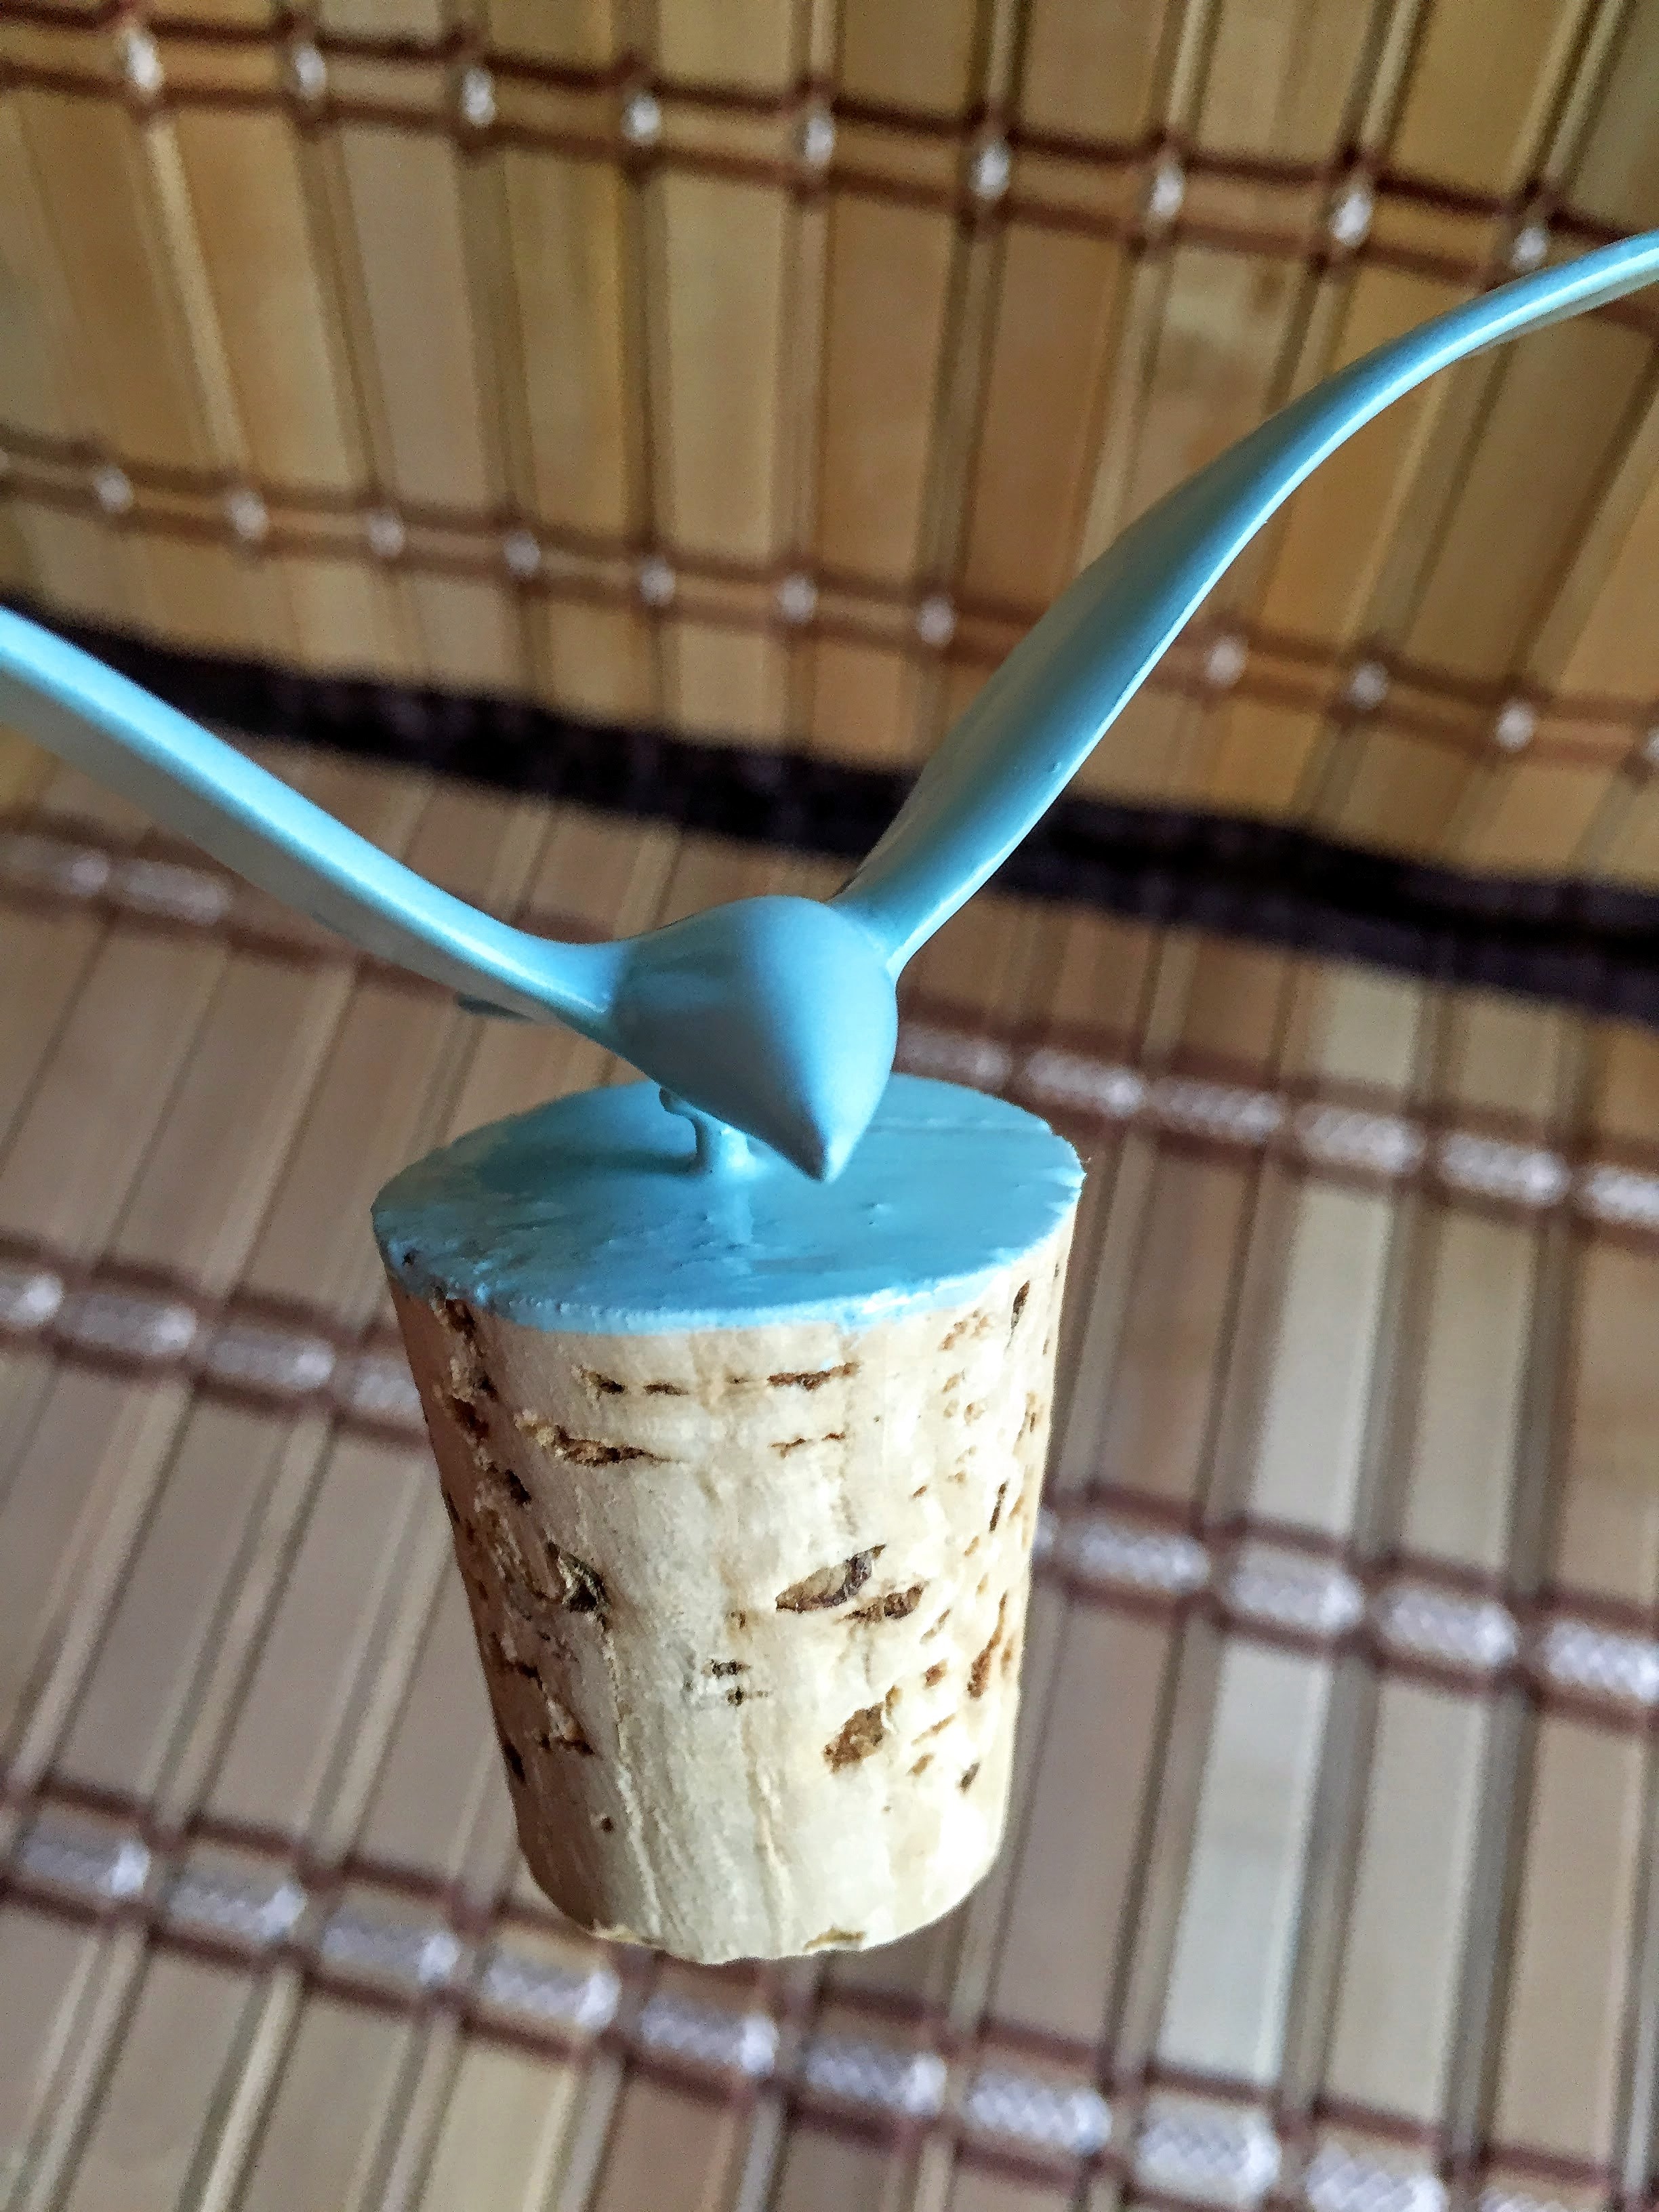
After that, if you feel that your seagull is dry enough, you can put it into the hole in your corkscrew. At this point, you can dip the wire into a little bit of E6000, and then put it into the hole, and push straight down with some strength. Here is what it should look like when it’s in:
Sometimes, The hole at the top of the corkscrew gets kind of big and loose looking. That’s when you would use a little spackle to fill it in. Unfortunately, I don’t have an example to show, here. You can take a q-tip or use your finger, to kind of push the spackle into the hole, and if you can reach in, to wipe away the excess, do that, or use a paper towel to wipe it away. You can go in when it’s dry, with a piece of sandpaper, and sand it down a bit, to smooth it out. If it doesn’t bug you, and you’re not an obsessive compulsive crazy person, like myself, don’t worry about it. It must be nice…
Home stretch, people!
Now, grab your small paint brush and your tupperware container. You’ll want to go outside and spray whatever paint you’re using, into your tupperware, so that there’s a puddle of paint in your container (spray paint dries very quickly, so give yourself an adequate amount):
Next, paint the top of your corkscrew. The paint will seem thin and watery, so do light coats, allow to dry, or at least, to get tacky, and then add another coat, and so on. Here is the first light coat:
Second coat:
And then go around and paint the edge (or not, if you like the look of it painted on the top, only). I like to paint the edge, because it looks more polished to me:
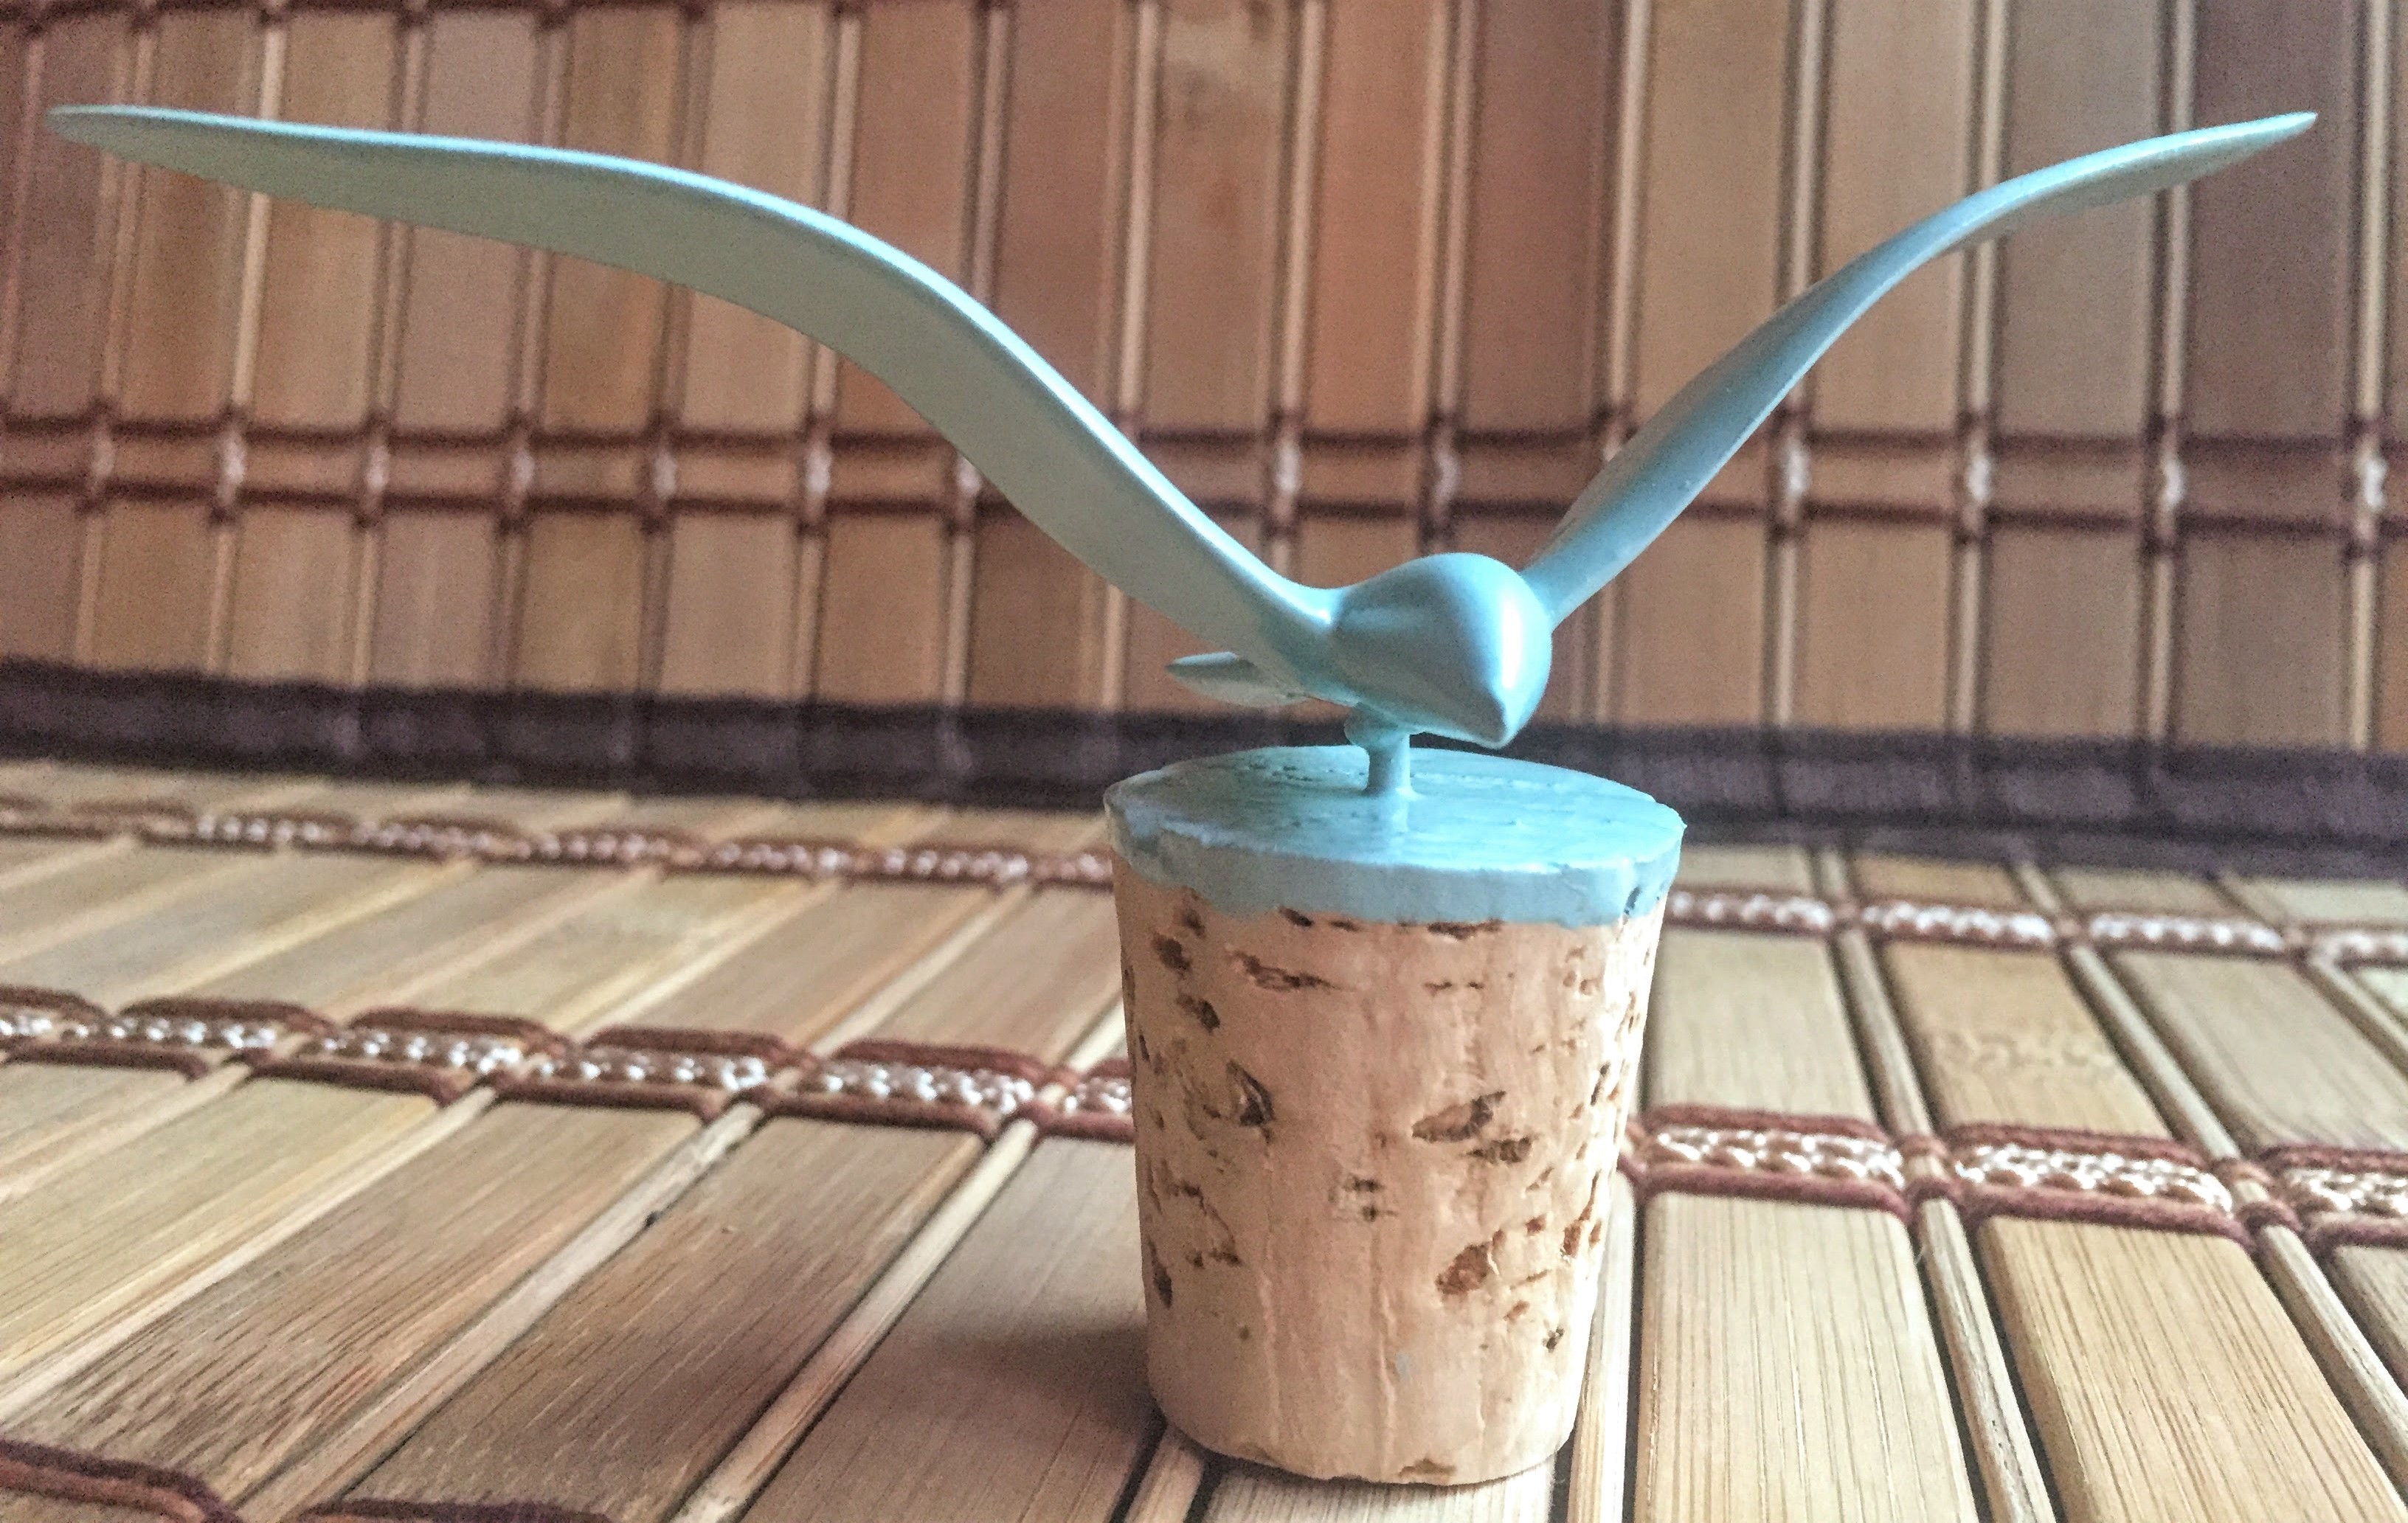
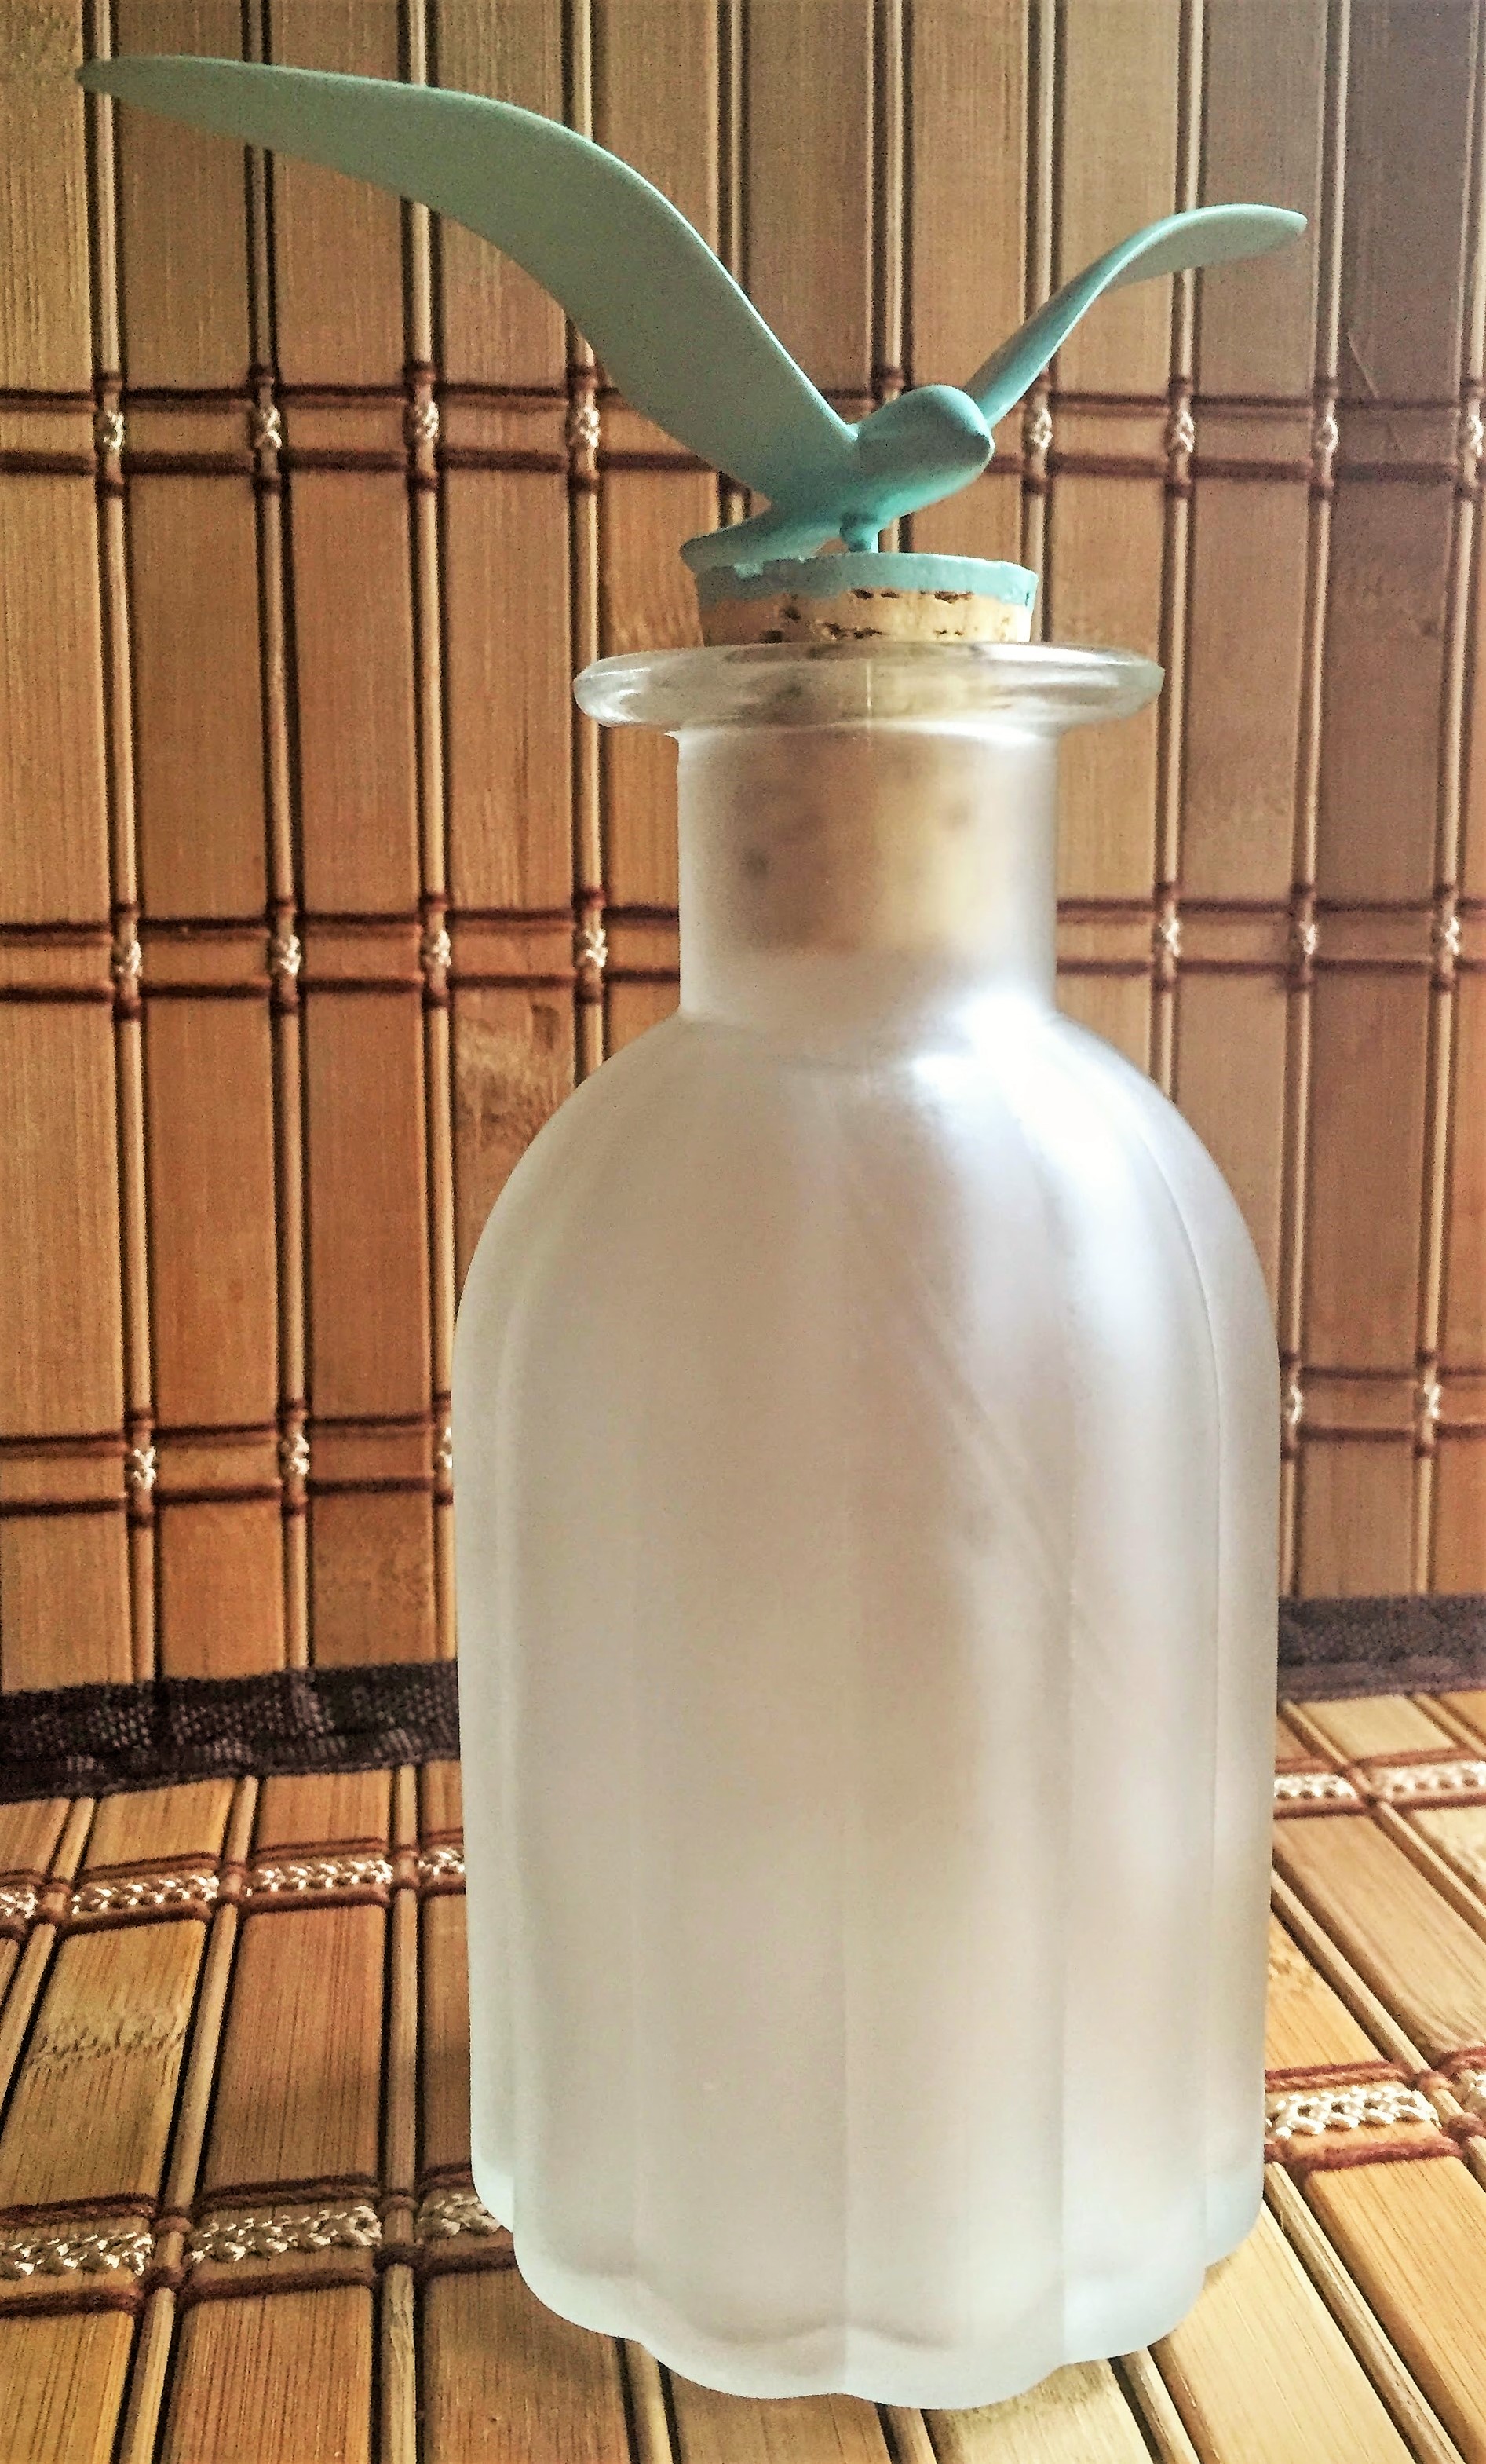
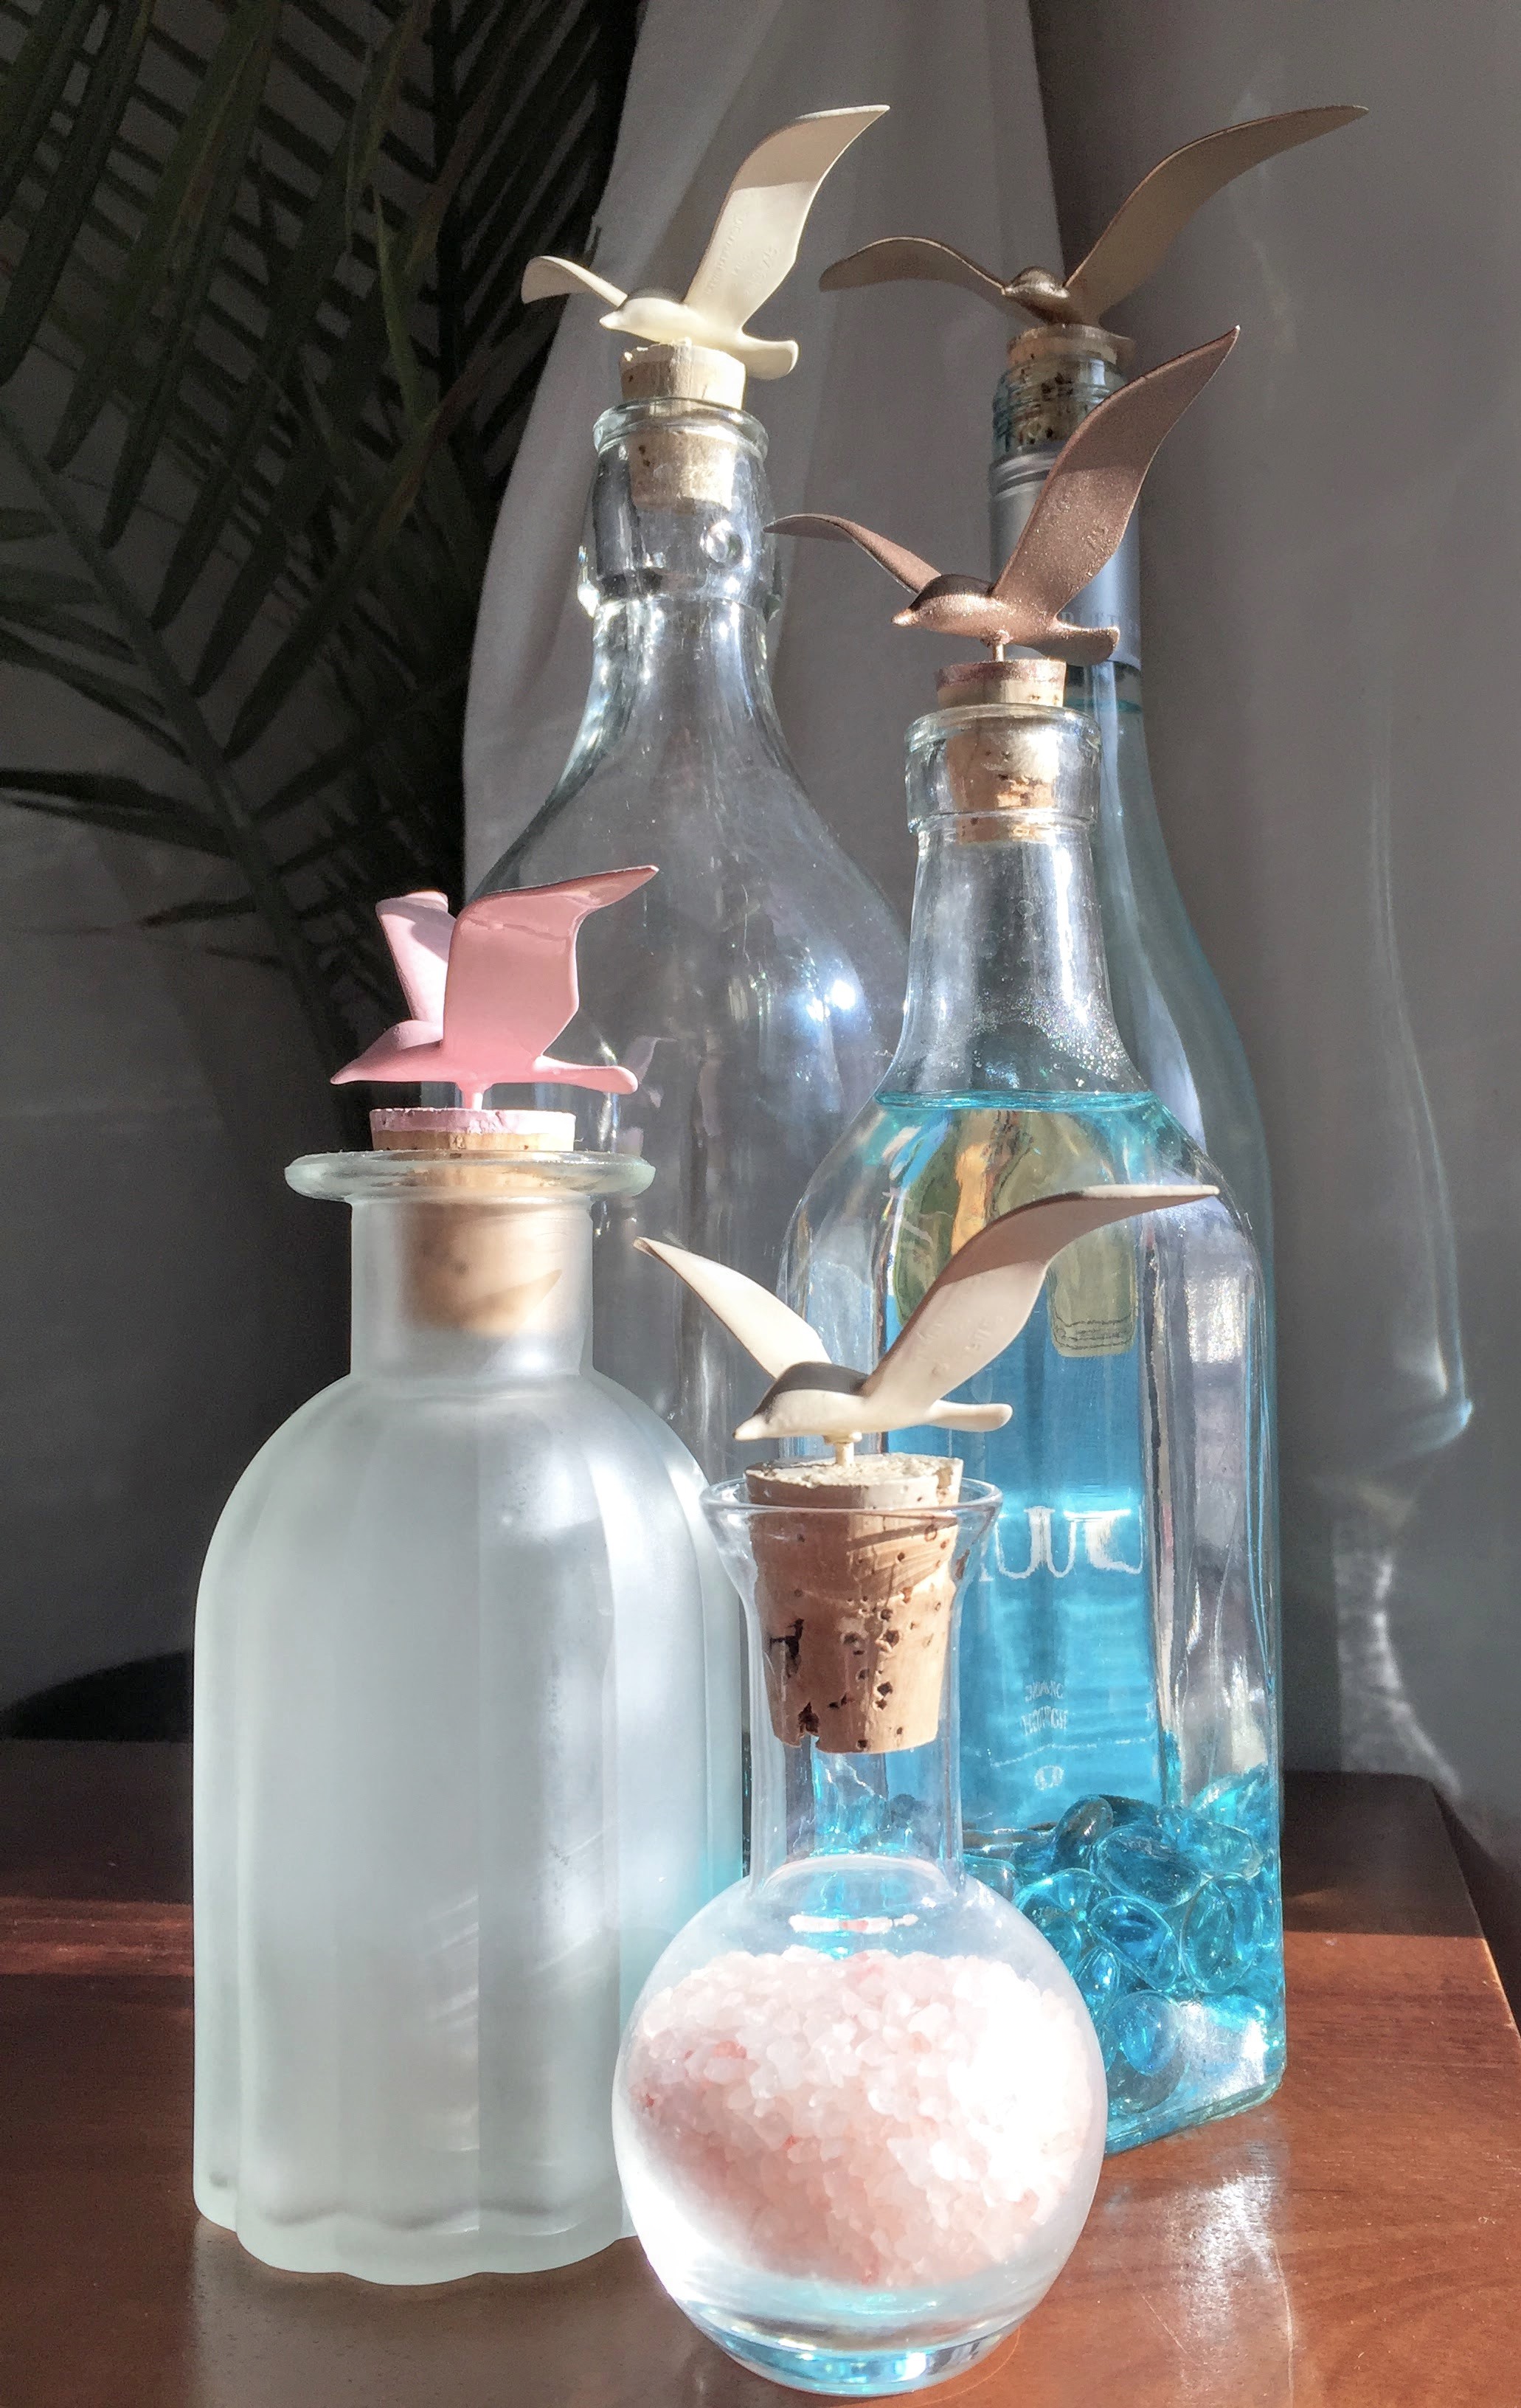
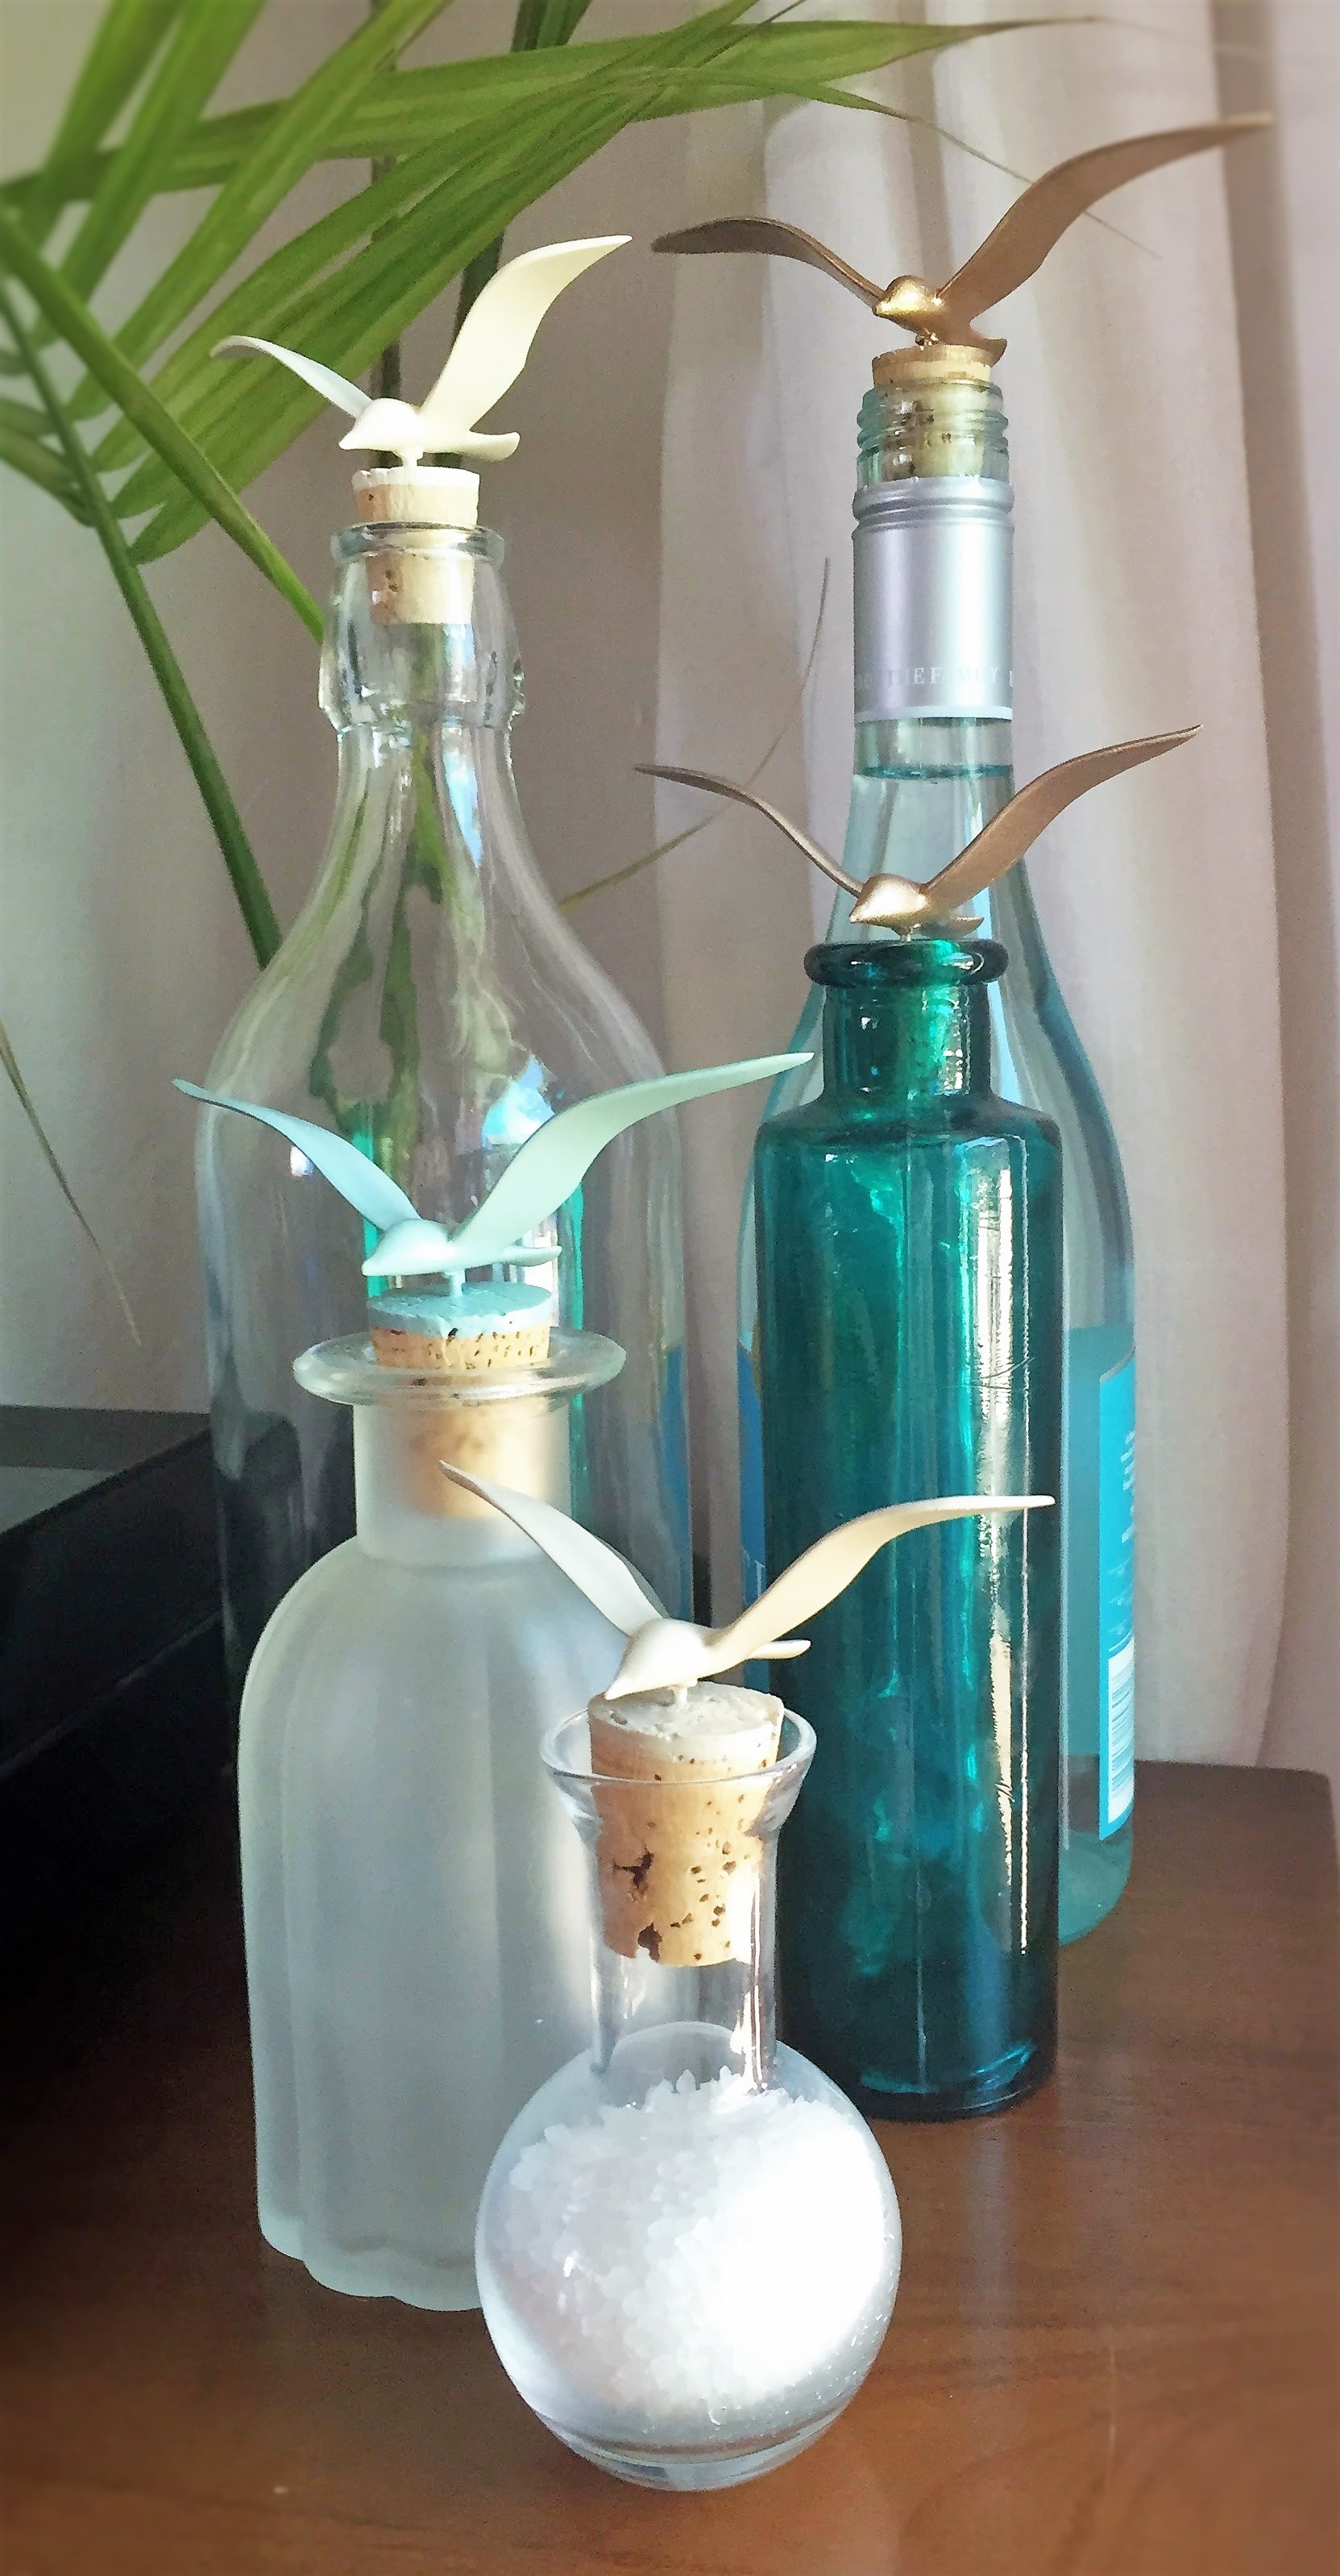
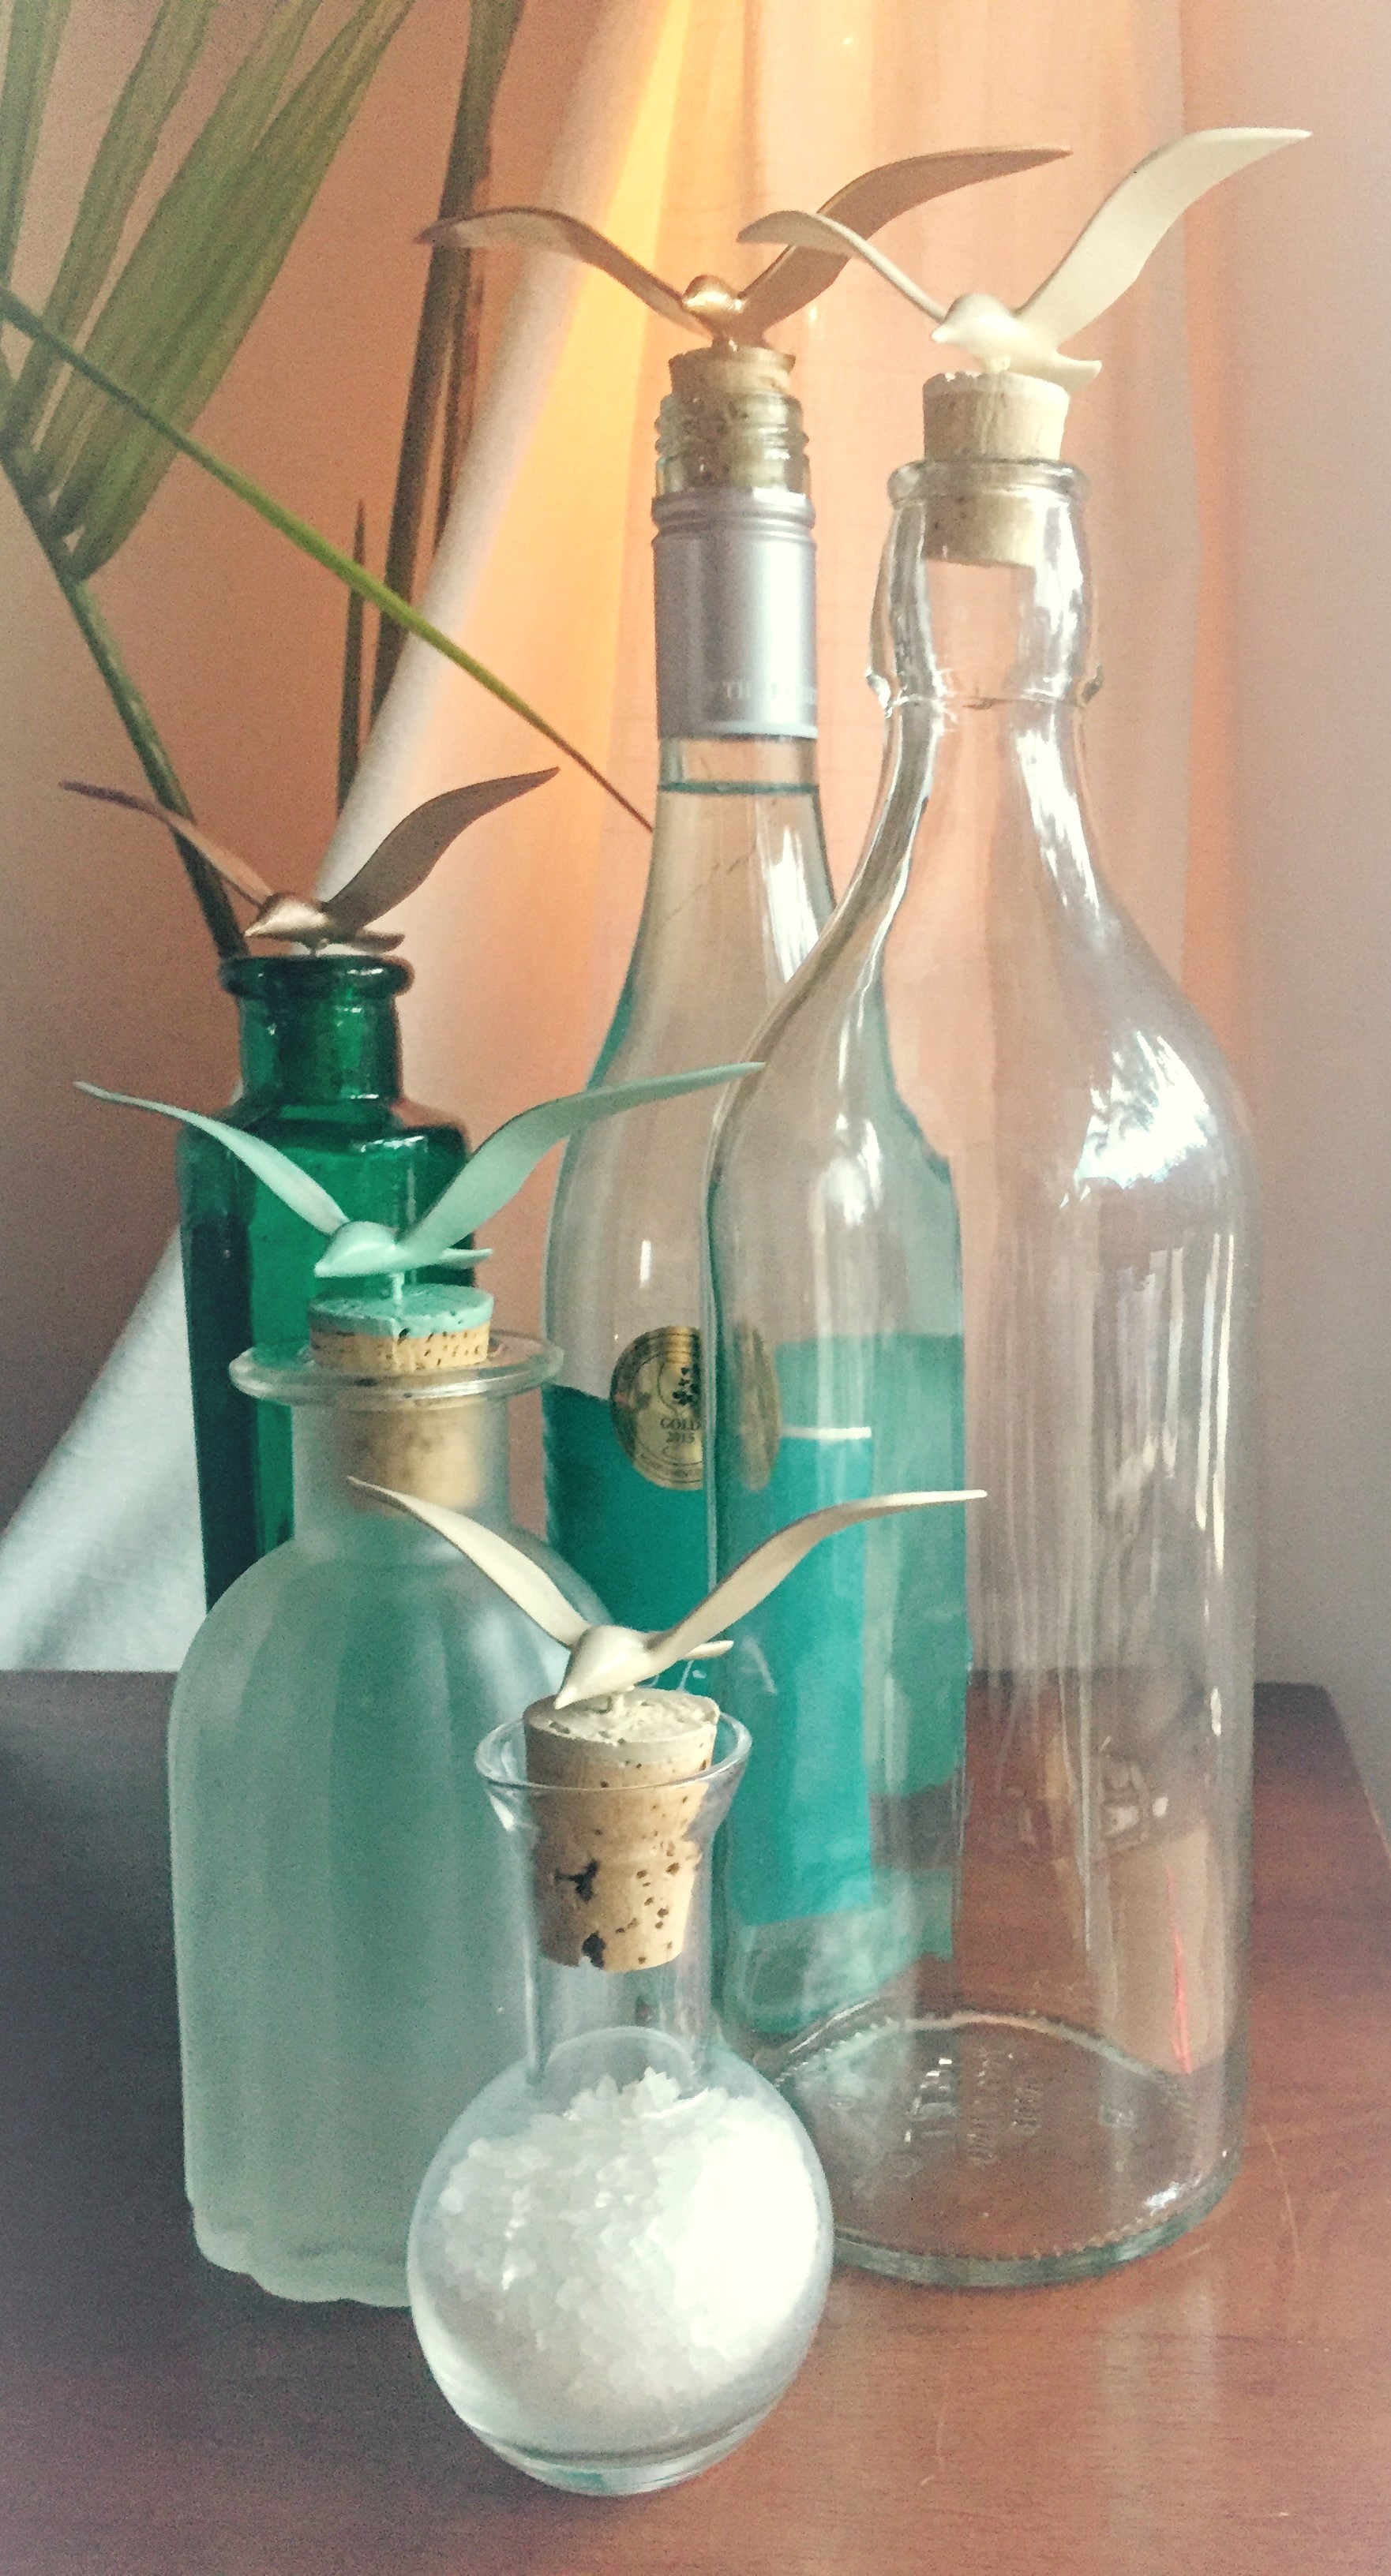
That’s it! We are DONE and now I have beautiful Seagull Bottle Stoppers for my wine or sangria at summer soirees! I, for one, feel much better after chattering away to you all! Thanks for listening (or skimming past that part and learning how to make these guys :)) I feel lighter!
Please send pictures if you make these little guys. I would love to see them!
Let’s have a heart-to-heart again, soon!
Happy Nesting.
Kirstie xo
I love these!! It seems the Etsy shop no longer has them! Do you have any other ideas for locating 3″ plastic seagulls at a reasonable cost? I need about 50 and all I can find are 3/4″ or 15+”. Have a super day!
Or….if I could borrow one you haven’t painted I could make a moulding using silicone and send you a few resin casts with your original. ?
Hi Lynn!
Thanks for checking out my blog!
Unfortunately, the Etsy shop I bought them from is all out 🙁 I’ve contacted the owner several times to see if he’s gotten anymore and the answer has always been no… what will you be making with the seagulls?
It was a long hard search for me to find the perfect ones- it literally took about a year. I had the mobiles and the sunburst seagull mirror in my head for ages, before actually being able to create them, so when I found these seagulls, I was thrilled. Do you think you could reproduce them? I’ve tried, and it was impossible for me to make a really good replicate. Let me know your thoughts, and meanwhile I will look through my inventory to see which ones I have left.
Thanks so much.
I have a tall, narrow clear glass vase 24″x3″. I have the idea to use colored acrylic wTer (at an angle), then adding sand to replicate the beach. The reeds I have are 2.5-3.5′ tall, very thin and stick straight. I thought if I varied the reeds, added a few seagulls above, and micro shells below, it’d make an interesting piece of beach art. Then obviously the mobile idea as well in the other corner. I grew up in Huntington Beach CA, and ‘Jonathon Livingston Seagull’ was my favorite book! Funny how 40 years later trying to find cheap plastic seagulls is next to impossible! If I find any Ill let you know. I did find a broach of just a seagull, I may buy it and try my hand at a silicone mold. It’s not as exquisite as the bottle stoppers. Perhaps you could try to silicone mold one of yours?