
Hello and welcome to The Craine’s Nest! Thanks for dropping by!
Today, I hope to inspire with a quick and easy DIY for your record collection… the one that’s been hanging around your house, looking for somewhere to go, and collecting dust… you know that one!
We love records. My husband who’s a musician, especially loves records. We love the sound of records, the feel of records, and the look of records. When I met Ryan, we both had record players and while I thought I had a large record collection at the time, it didn’t even come close to Ryan’s cache.
Being a child of the 70’s, I grew up listening to records because that’s all we had… until 8 tracks came along- I have to say, 8 tracks were pretty convenient. You would just push different buttons, to get to different tracks. It was quick and easy. None of this fast forwarding and rewinding nonsense of the 80’s cassette tape… and then finally came CD’s. No more tapes getting eaten by your cassette player, having to pull it out, untangle, and then carefully reassemble. When I think of all the different forms of music-playing technology I’ve experienced in my lifetime, I get to feeling a bit old! But not as old as the night my nephew, Connor, was visiting and asked me if he could listen to the giant CD thing on the round CD-playing thingie on the table… good lord… that was a while ago, before records made their big comeback.
Yep…records have seen an explosion in popularity in the last few years, with Barnes and Noble selling Crosley portable turntables and records. My nephew, Gage, now has a little turntable of his own and listens to it all the time. I’m glad they’re back. It’s a better sound. It’s closer to the real thing than anything else. It will make kids have a greater appreciation of music and that makes me happy. Not to mention, records are just cool. They’re mini pieces of beautiful artwork. They’re meant to be displayed and listened to.
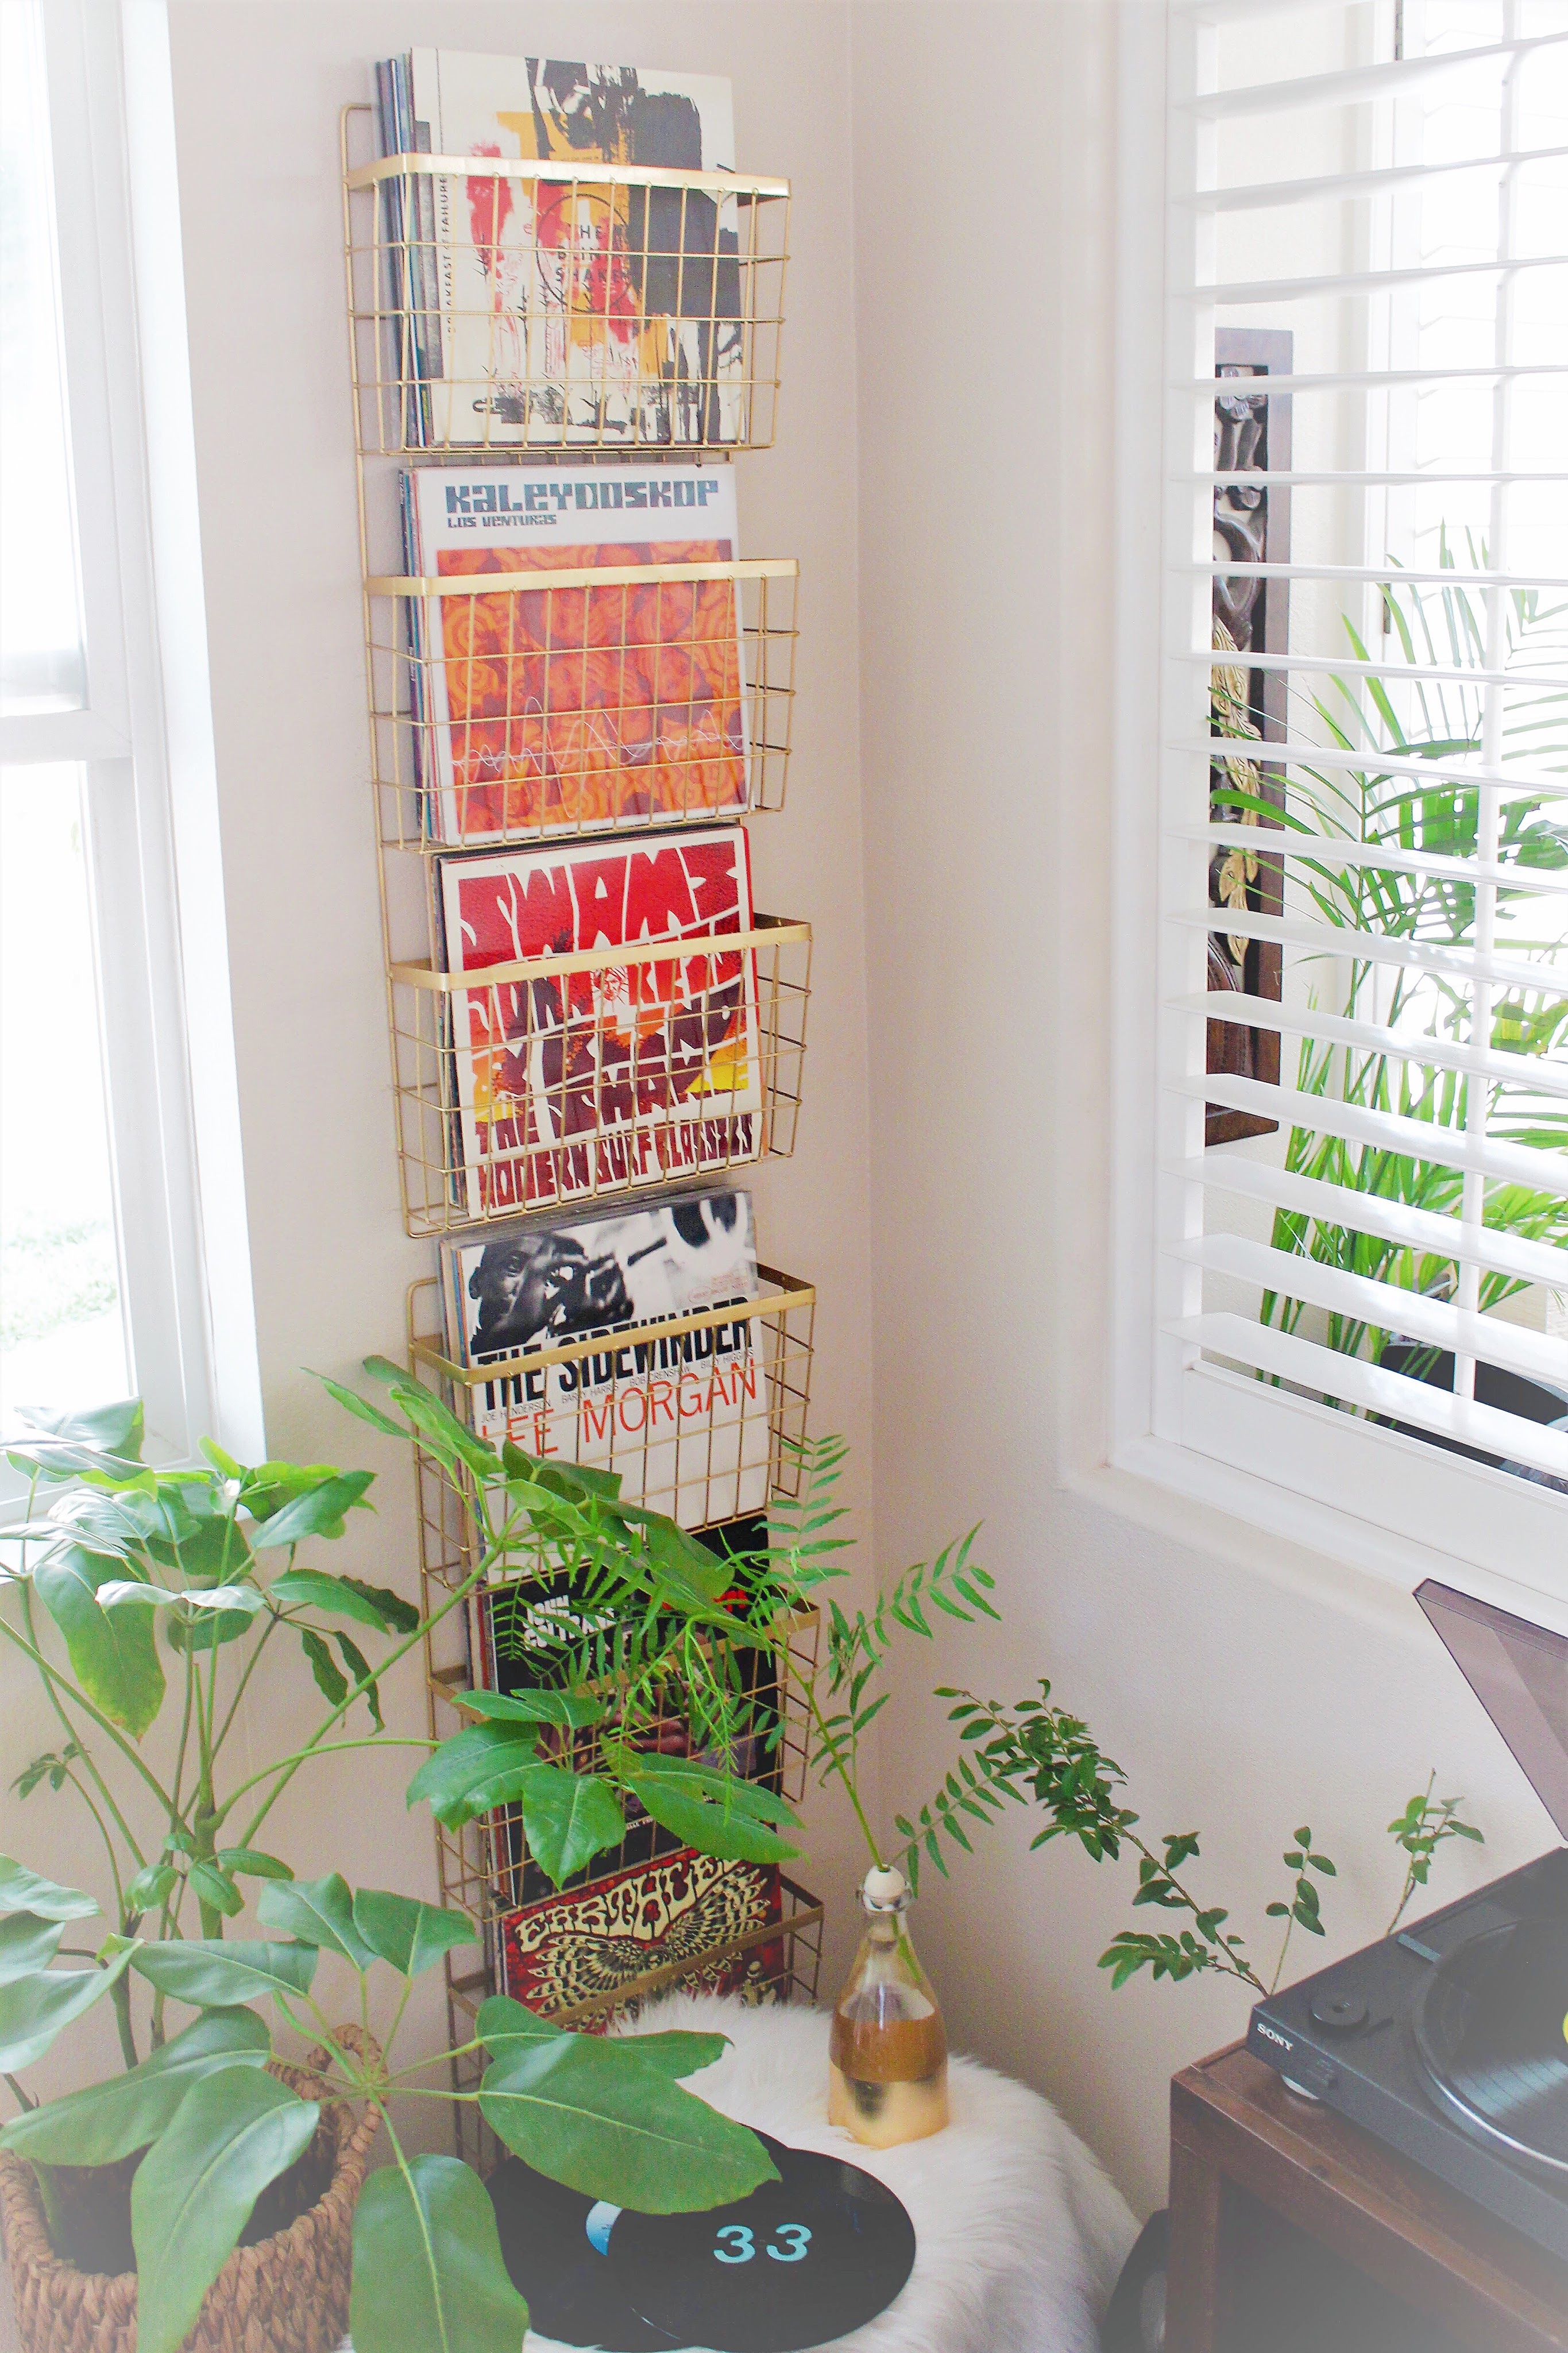
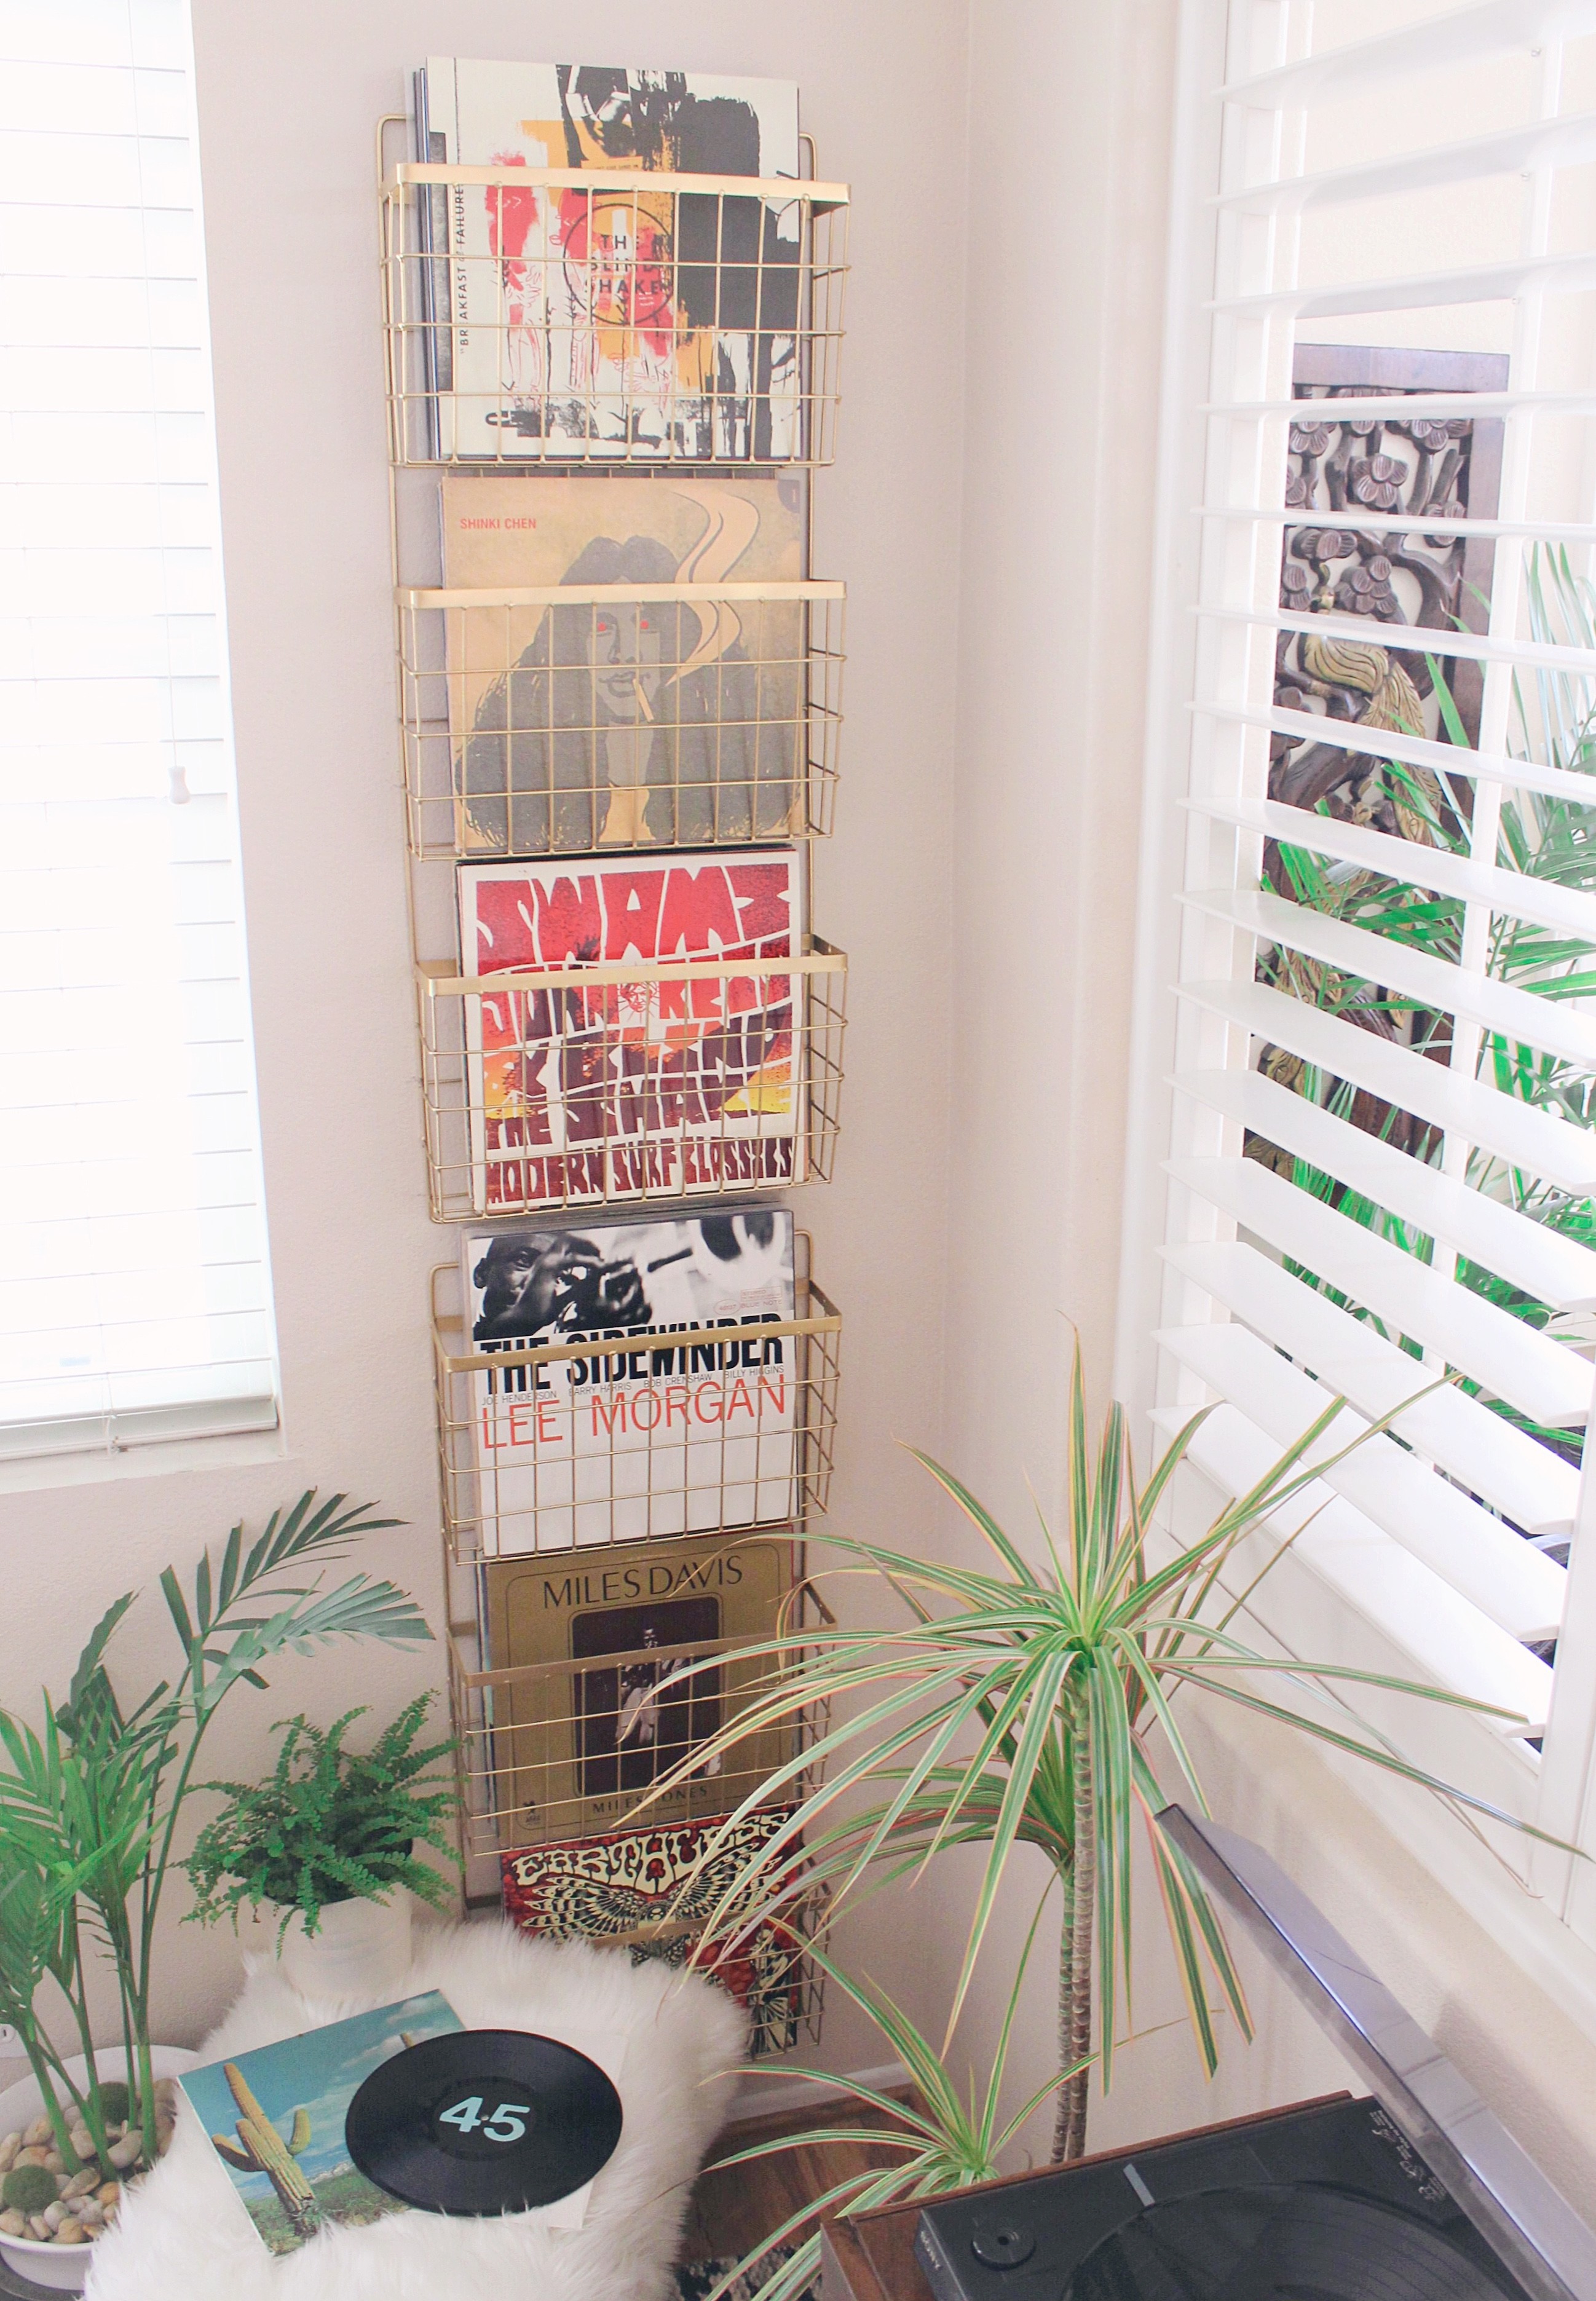
I’ve had big plans for our collection for a long time now, but haven’t had luck finding anything. I was always looking for something stylish and unique, inexpensive, with units just-the-right-size for records. It’s easy to find something if you’re willing to spend a small fortune, but I’m not. So… I searched and searched for pieces on a dime, and until now, have always come up empty-handed. I scoured every Salvation Army, Goodwill, St. Vincent de Paul, and Target, in hopes of finding the gem I was looking for. I bought a buffet (you can see the corner of it in the right-hand-side of the photo above), specifically to house and display our records. Once I got it home, the sections of the buffet were not tall enough to stand the records upright. I was able to lay them down, but it just wasn’t the same as being able to file through them :(. One would think that after doing this over and over throughout my life, I’d measure things before buying, but I get excited and purchase. I did just that, with these office organizers and got really lucky… finally! Truth be told, I was planning on putting them on either side of the buffet, very sure upon purchase, that they were exactly the right height to fit just below the interior shutters. Per usual, when I got home I found that they were WAY too tall for that… so instead, I stacked them one-on-top-of-the-other in this corner. It worked out (yay!), but measuring before and bringing along a tape is, in fact, a good idea :).
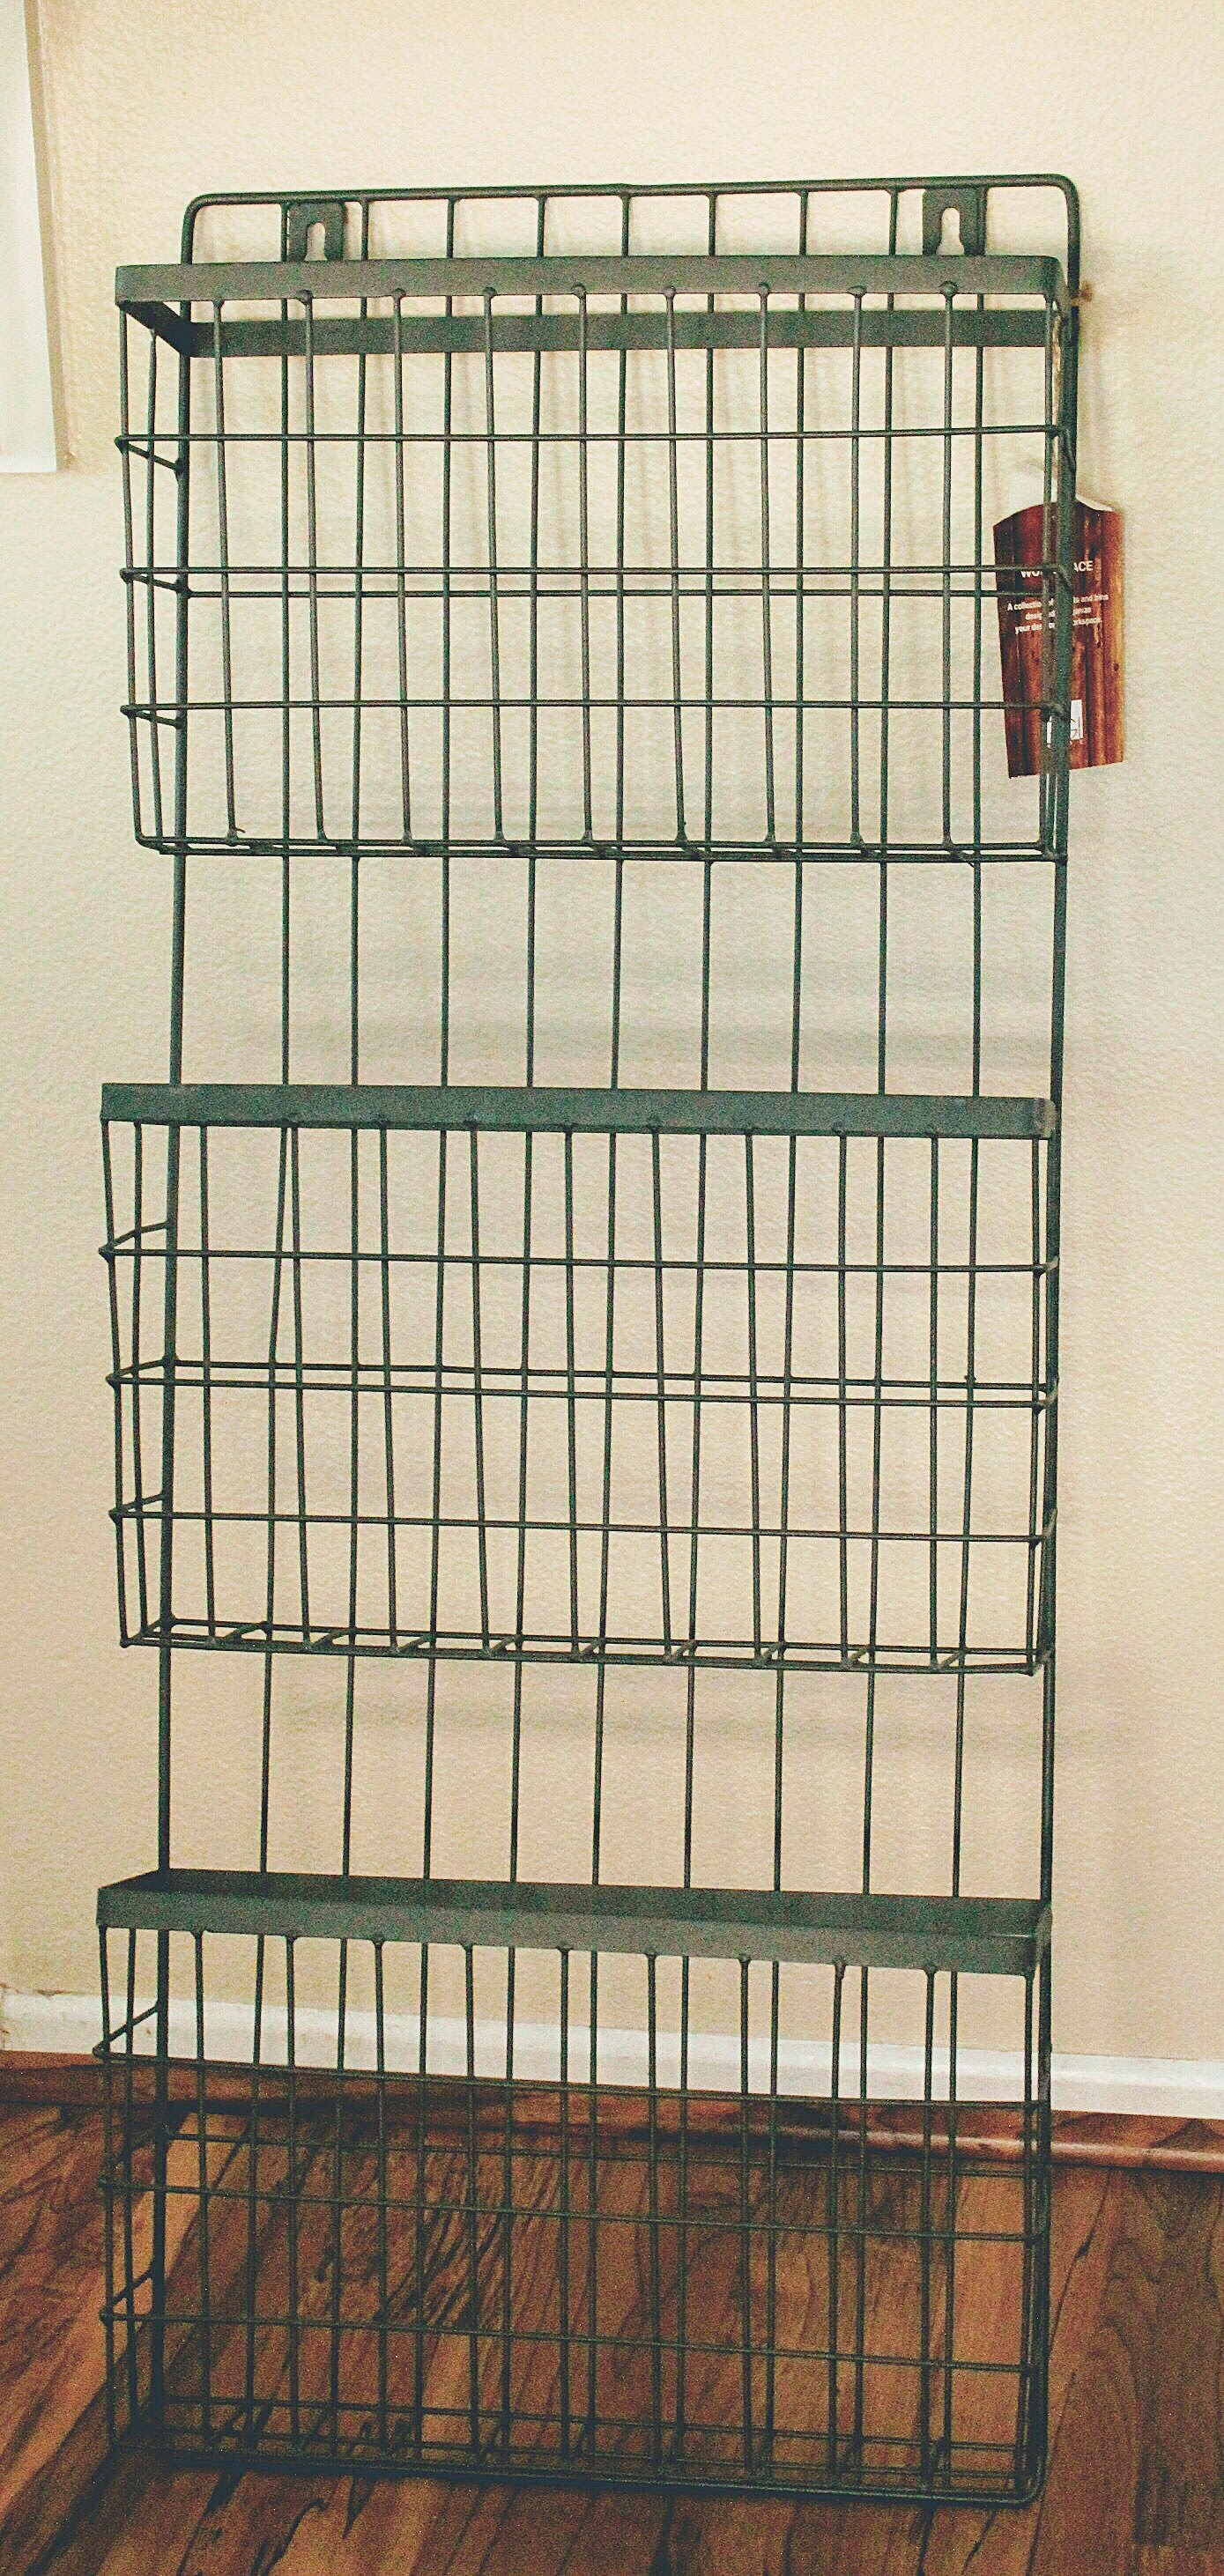
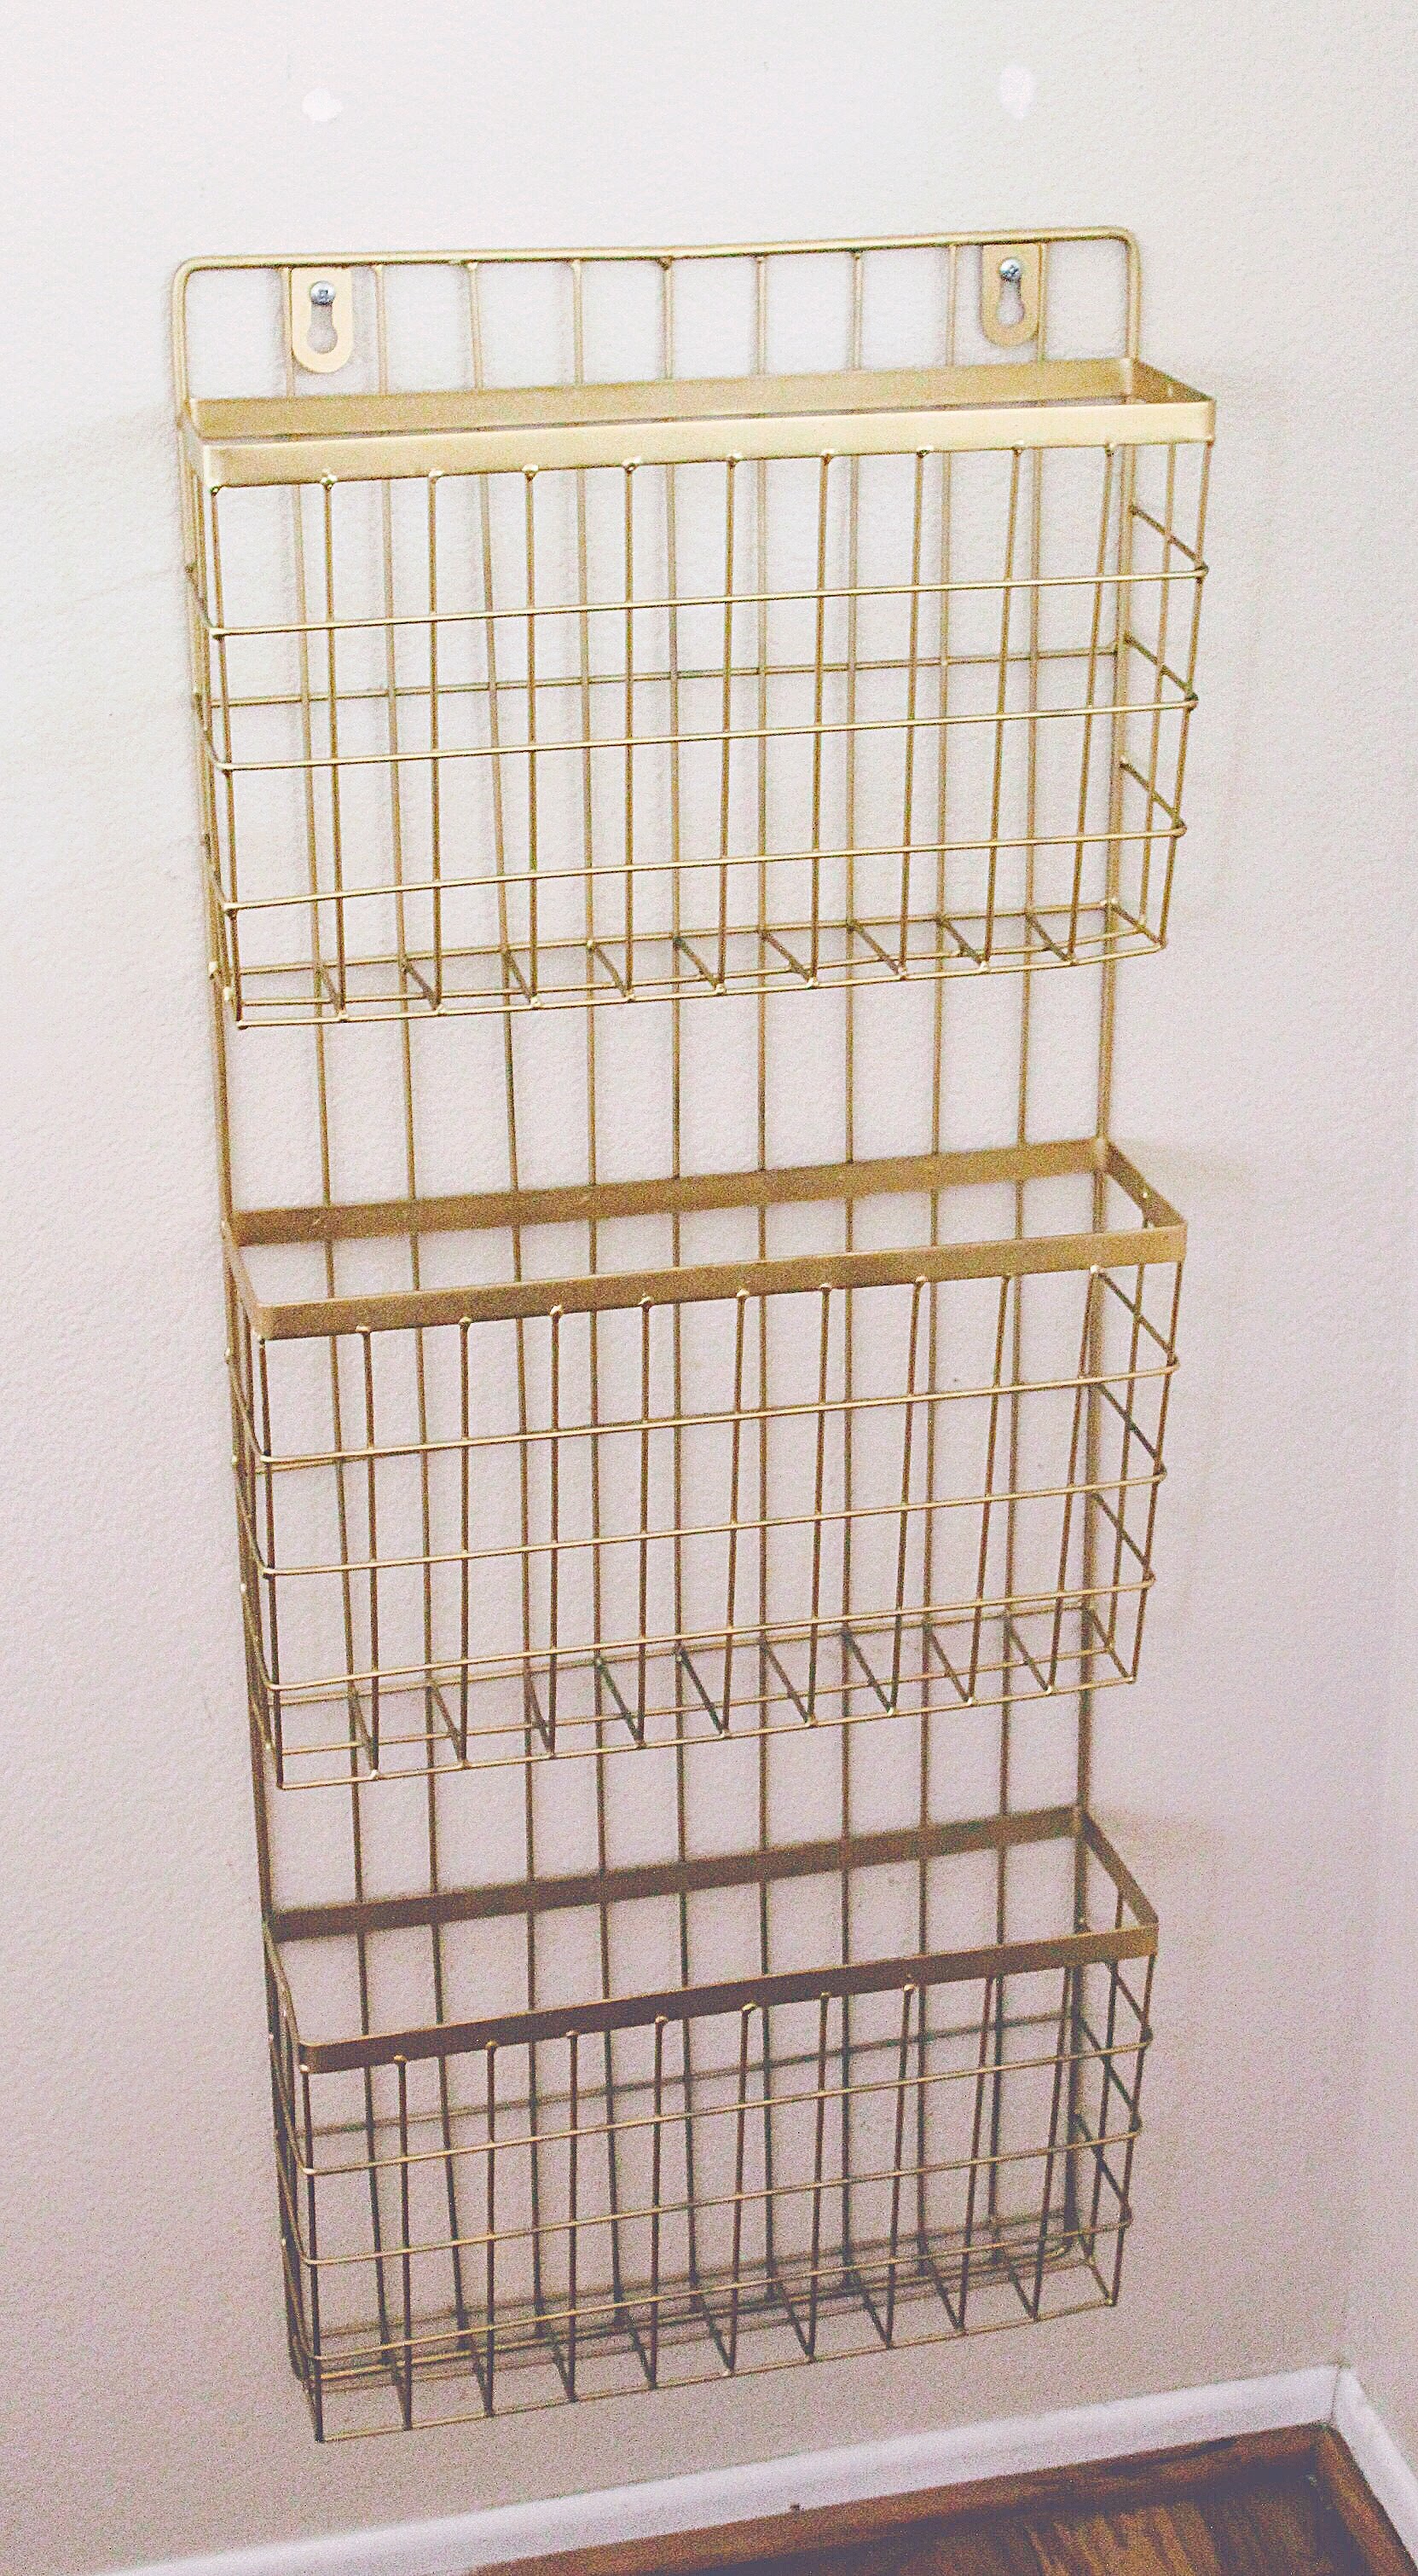
There’s not much to this DIY. It’s mostly meant to inspire you to look beyond the normal storage solutions and realize that if something doesn’t look exactly as you want it, there’s always spray paint… specifically this 24K Gold Spray (Michael’s) or this Metallic Gold Spray (Home Depot)! Of course, I think most things should be coated in gold. You may not be a fan of gold (not sure how that’s possible!), but I understand that everyone has different taste ;). Any color you prefer, will do. I bought these fairly unattractive office organizers at Home Goods for $24.99 each. Sort of reminiscent of a prison cell, don’tcha think?
Things go pretty quickly there, never to be restocked again, so if you like this idea, you should run in and pick them up.
For this simple DIY, you will need:
- 2 organizers (Home Goods- $24.99 each)
- Gold Metallic Paint- a couple of options are in links above, or whatever paint color you prefer
- Screws- wait until you get your organizers home and figure out the size you need
- Plastic screw anchors for whatever size screws you decide upon
Once you’ve purchased your organizers, take your spray paint and coat everything. You will need 1 can per organizer. I laid the organizer on a large cardboard box lying flat on the ground while I sprayed it. Start with the back side and when that’s very dry, turn it over and finish the front side. Make sure you pay attention to the sides and paint the thicker bars on the front of the unit, evenly and with a couple of coats. Also, make sure you really coat all of the thin mesh, because if you don’t, it will end up looking very shadowy. Here it is, after it’s painted:
Here are the organizers side-by-side, before and after:
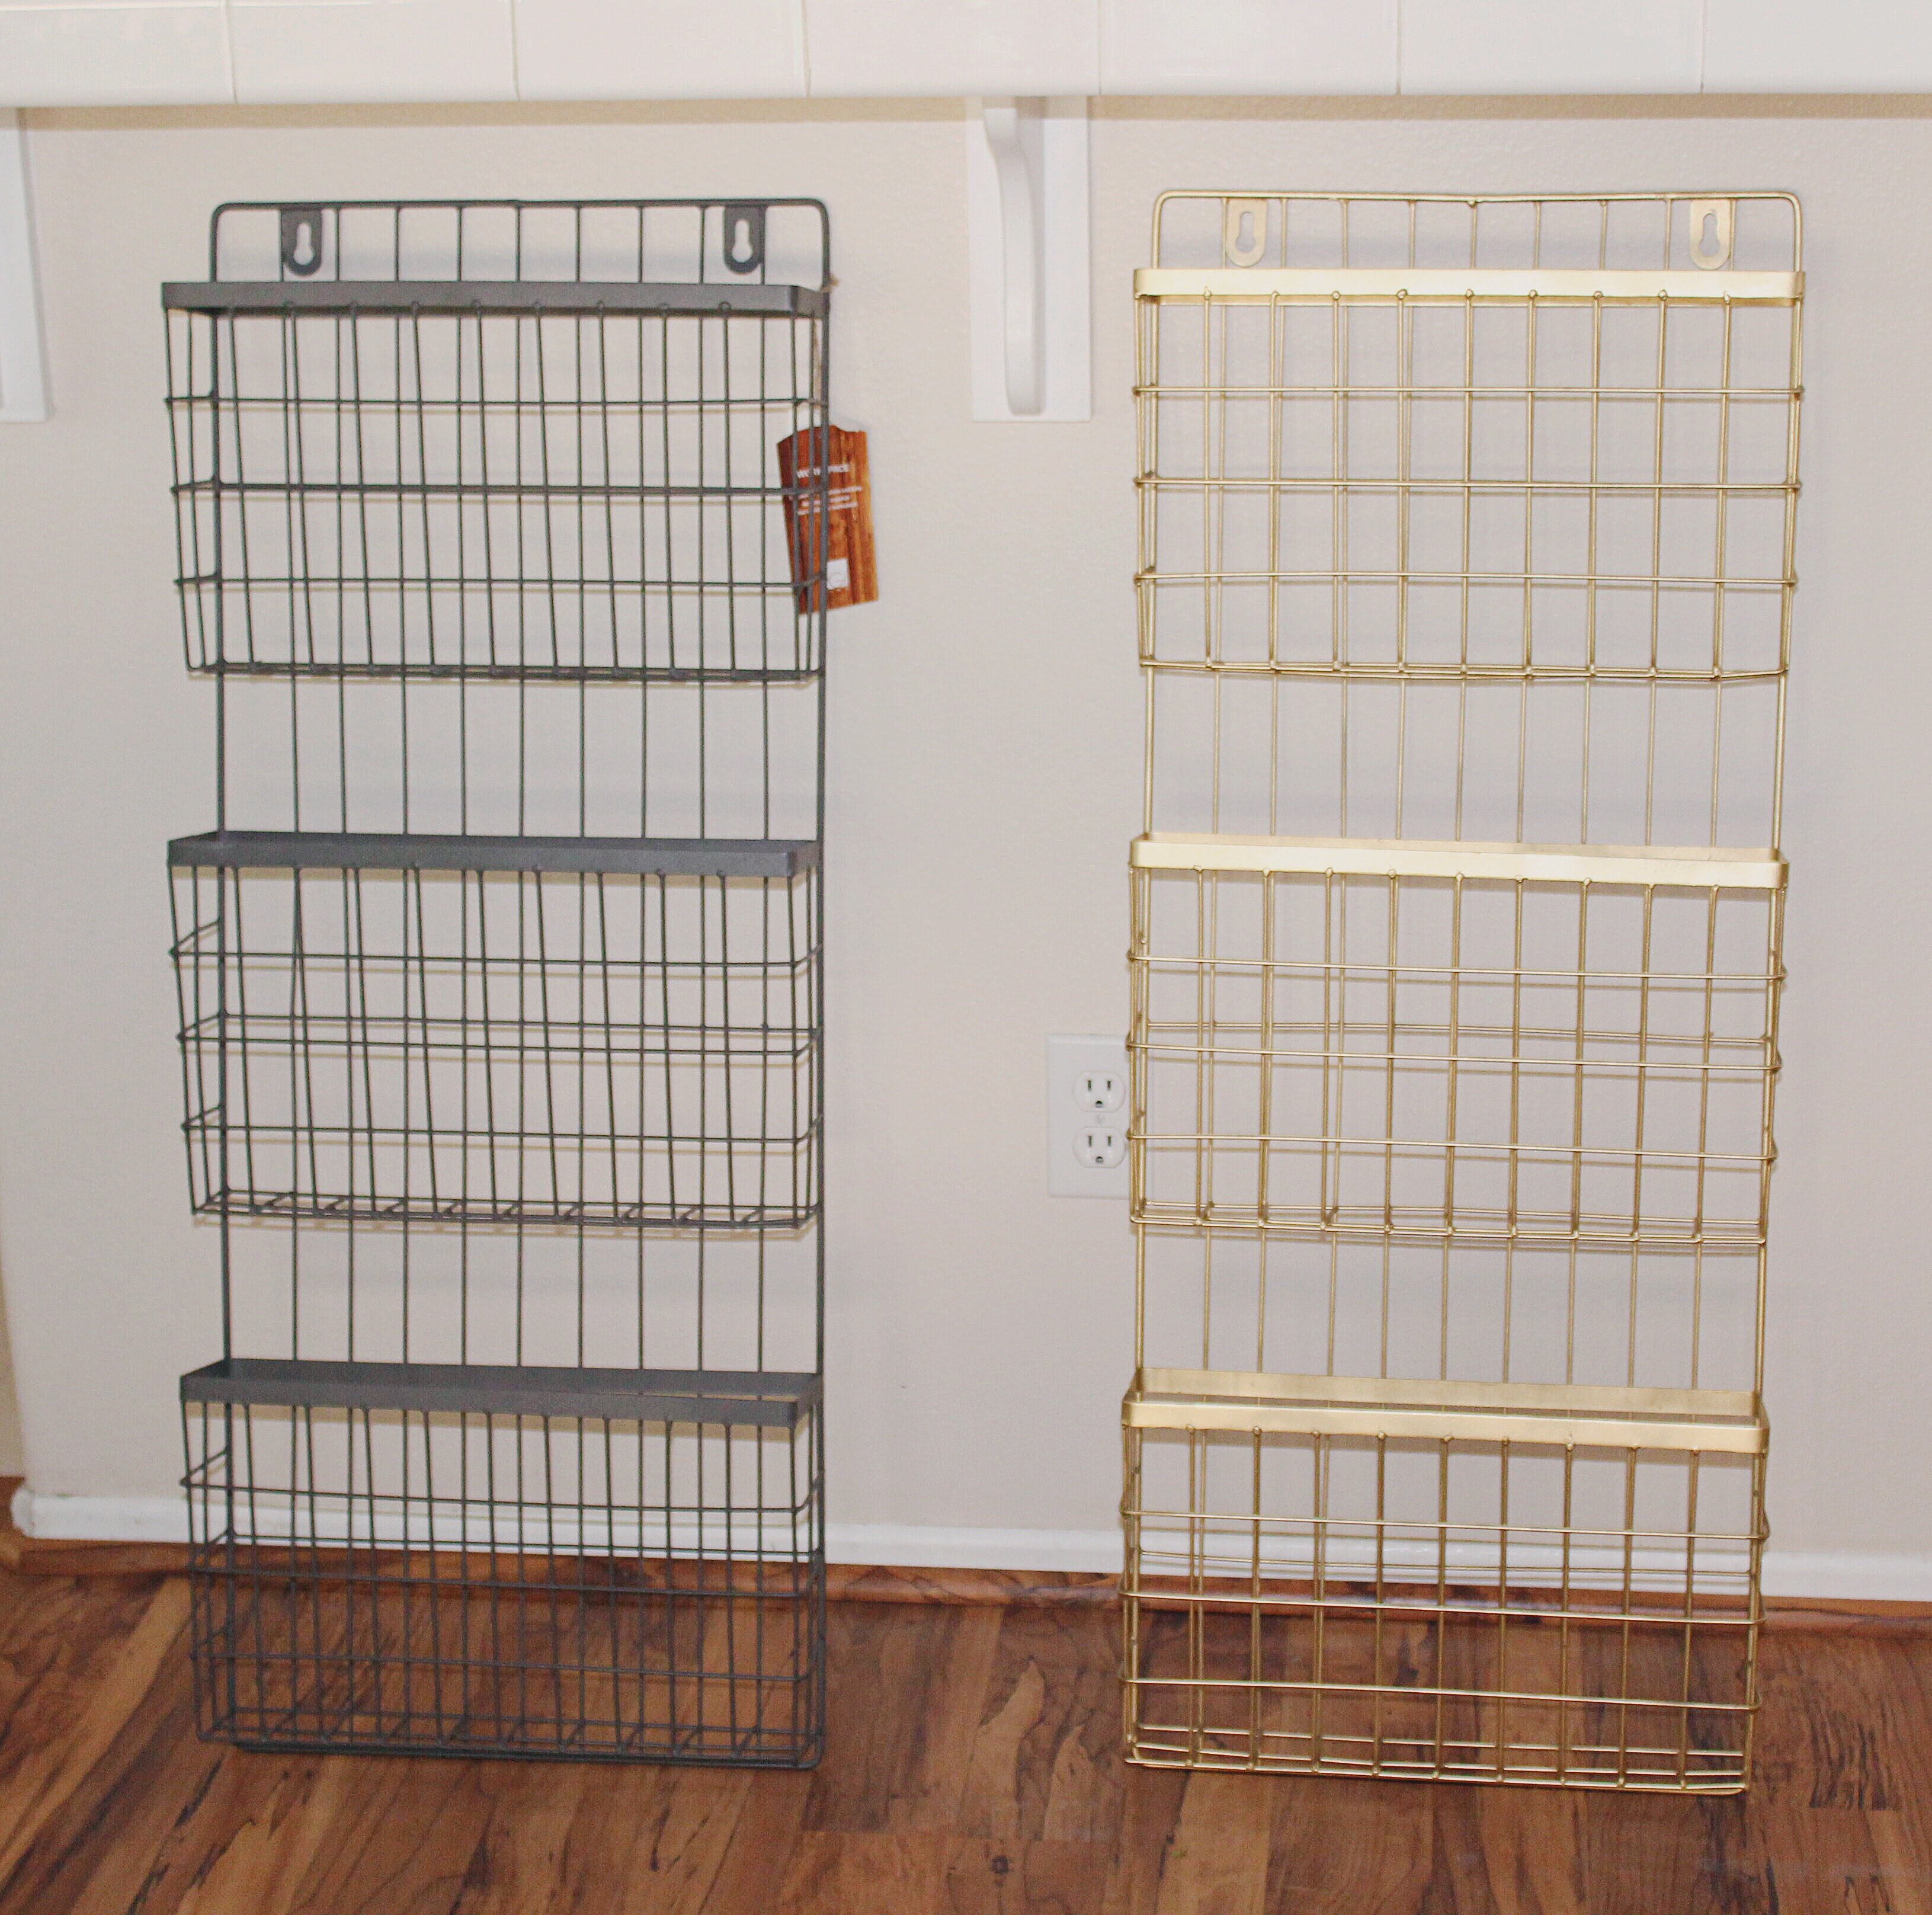
The ‘after’ is so much more light and airy, not to mention stylish, right?!!! I’m so happy with the result. For about 70 bucks (that’s organizers, spray paint, and screws), you’ve got an artistic storage alternative for those records that have been hanging in the nether-regions of your home, collecting dust.
A few things:
- Make sure you allow for at least a few hours of dry time (preferably, 1 day), before attempting to hang your organizers. I’m really impatient and my organizer ended up with finger prints all over its front bars. I had to take them down and repaint- what a pain.
- Make sure you use plastic anchors before putting in your screws. These units get weighty, especially if you’re doing one above the other like I did. You want to make sure that those records don’t come toppling down on anybody- especially a little one. There are 2 places for screws at the top of the organizer (as seen in photos above) and that’s where I used anchors. I also placed screws in a couple of random spots in the lower areas of the unit to hold them tight, so they wouldn’t clang around when pulling out records:

I didn’t use anchors in the lower spots, as it would’ve been almost impossible to fit them. Just a little added assurance, and it also helps to keep the units stable when you’re pulling out your records. Mine feel very secure after all of that.
Also, you can take a small paint brush, spray some of your gold paint into a Tupperware container or paper bowl, and paint those screws gold if you’re OCD, like me :)! If not, don’t worry about it! The records cover them completely.
Now, it’s time to sit back, have a drink, and listen to those old records that you haven’t heard in a while… and bravo to a DIY, well done!
Until next time…
Happy Nesting.
Kirstie xo